Step-by-Step Beaded Leather Necklace Tutorial

I have to admit, I am a sucker for anything with a heart on it. It’s always been one of my love languages for making jewelry--stick a heart on it, and you’ve won me over. Today, I’m going to show you how to make a beautiful beaded leather necklace with a heart focal that I’m sure you will love as much as I do.
Tools and materials:
- Heart pendant
- Large-hole spacers
- Large-hole bead
- Crimp ends
- Leaf/feather pendants
- Jump rings
- Seed beads
- 70 inches of 1.5mm leather cord
- Barrel knot tube
- Wire cutters
- Chain nose pliers
- Bent chain nose pliers
Place the heart pendant on the cord
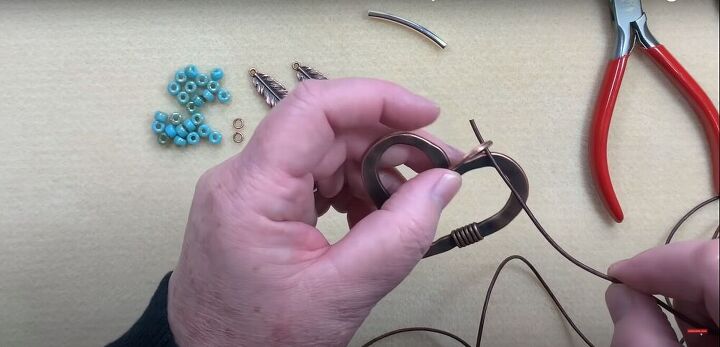
I threaded the leather cord through the ring on the heart pendant and moved the pendant to the middle of the cord.
Make a barrel knot
I placed my barrel knot tube between the cords holding the pendant.
I pulled the cord that was farther away from me down and around the tube and the cord next to the tube.
Then I wrapped the cord all the way around and back over the tube.
I wrapped the cord twice more around the tube and second cord, getting closer to the pendant each time.
Then, holding the wrapped cord in place, I inserted the end of the second cord into the end of the tube closest to the pendant.
Once the end of the cord poked out from the end of the tube, I removed the tube, while ensuring the wrapped part of the cord was still in place.
Finally, I pulled the second cord to tighten the knot.
Adjust the knot
Before securing the knot completely in place, I adjusted it so it was not too tight against the ring of the heart pendant. I left about a quarter of an inch of space between them.
Place the large-hole bead
Once the knot is secured, pull both cords through the large-hole bead, and pull it down so it rests right above the barrel knot.
Measure the cords
I inspected my cords to see which one was longer. The longer cord will be used as the wrapping cord for the next barrel knot.
Make another barrel knot
Placing my barrel knot tube between the cords above the large-hole bead, I repeated the previous steps to create another barrel knot.
Adjust the barrel knot
I pulled and twisted to tighten and adjust the barrel knot above the bead.
Cut the end of one of the cords
The look I wanted for this necklace was to have uneven tassels hanging in the front, so I cut a bit off one of the cord ends to make them a bit more uneven.
Place the seed beads and spacers
Next, I placed three seed beads at the end of one of the cords.
Then I placed a spacer.
I repeated this until there were twelve beads and a spacer after every three beads.
Repeat on the second side
I made the same pattern of beads and spacers at the end of the second cord.
Place the crimp ends
To apply the crimp end, I slid the end of the cord into the crimp end stopping when the end of the cord was just visible at the end of the tube. Then I squeezed the middle section of the crimp end from a few different angles with my chain nose pliers until it was secure.
Open the jump ring
To place the jump ring, I held it with the chain nose pliers, open end up.
Then, using my bent chain nose pliers, I twisted it open.
Place the crimp end on the jump ring
I placed the small ring of the crimp end on the jump ring as I held it still in my chain pliers.
Place the feather pendant
I placed the feather pendant on the jump ring, as well, and closed up the ring with my bend chain pliers.
Repeat on the second cord
I repeated the steps to add a jump ring and feather pendant to the crimp end on the second cord, as well.
I loved creating this piece of jewelry. It was super simple, but it has a really striking effect. If you enjoyed this tutorial, please let me know in the comments.
Enjoyed the project?
Suggested materials:
- Heart pendant
- Large-hole spacers
- Large-hole beads
- Crimp ends
- Leaf/feather pendants
- Jump rings
- Seed beads
- Leather cord
- Barrel knot tube
- Wire cuters
- Chain nose pliers
- Bent chain nose pliers
The author may collect a small share of sales from the links on this page.


Comments
Join the conversation
Vey cute!!!! and great tutorial!!!! Is this your store or workshop in the background of the last two photos???
Thanks so much! Yes, that is my bead store in the background.