Memory Wire Necklace Tutorial: Make a Statement

I’m playing with some memory wire today to make a beautiful focal necklace. I was thinking that I hadn’t used memory wire in a long while so I would bracelet but then I decided that I should make a necklace instead.
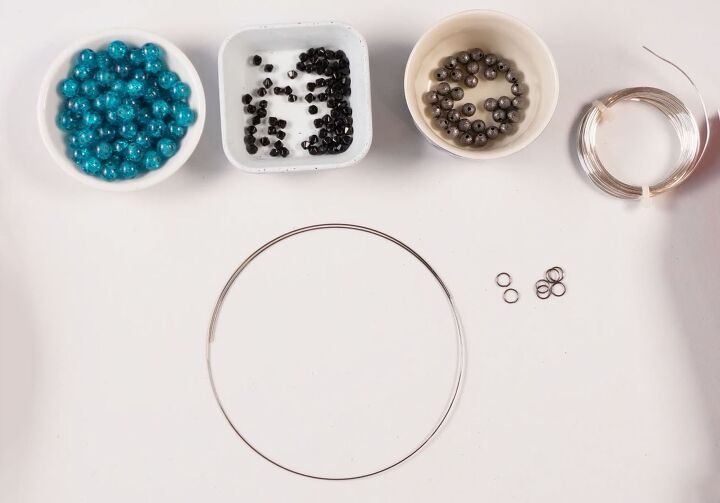
Materials
To make this necklace you will need:
- 8mm Medium Sea Green Crackle Beads x 61-65
- 6mm Black Stardust Beads x 11
- 3mm Jet Crystal Glass Bicones x 11
- 11.5cm Gun Metal Memory Wire – approximately 1 1/3rd rounds
- 6mm Black Jump Rings x 7
- 20 Gauge Silver German Style Wire
Tools
The tools I used to make this necklace are:
If you don’t have the pliers set you will need:
Instructions
Watch the video or read the instructions below:
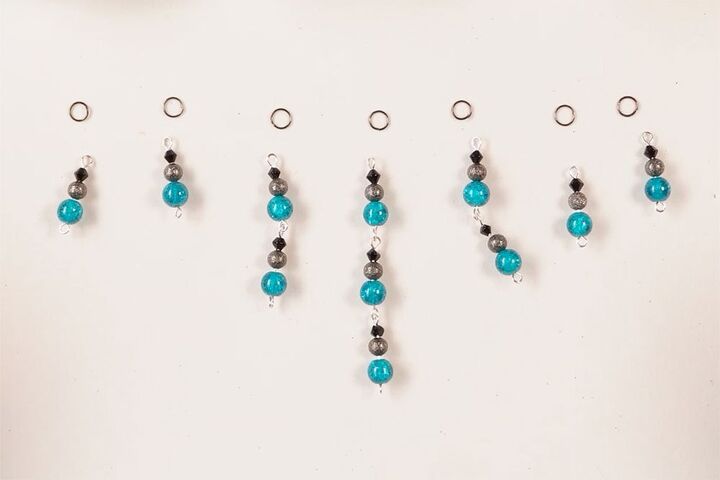
Make the Dangles
Cut a piece of the 20 gauge wire. Using the 1-step looper make a loop in one end. Thread on the crackle bead, the stardust bead and the bicone, then make a loop in the other end.

If you don’t have a 1-step looper, use this technique to make your loops.
Repeat until you have 11 dangles.
Join the dangles together in the following configuration.
- Join three dangles x1
- Join two dangles x 2
- You will have four individual dangles left.
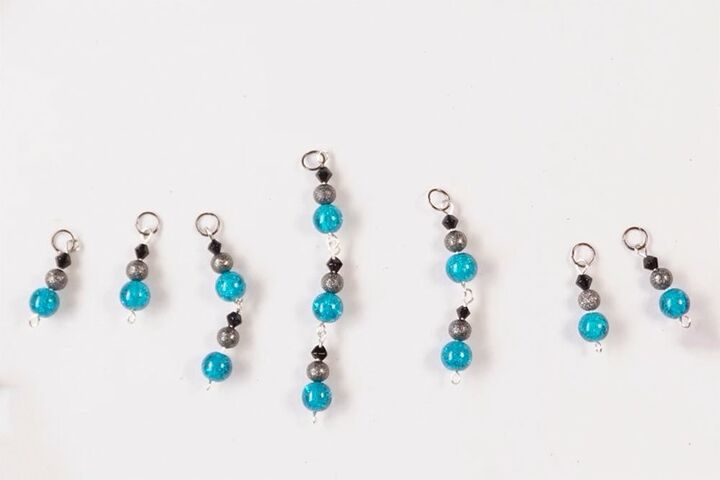
Adding the Jump Rings
Make sure that your jump rings are really well closed and sitting nice and flush. It’s important for this project.
Open the top loop (closest to the bicone) of an individual dangle and thread on the jump ring. Close the loop. Repeat for the other dangles until you have one jump ring attached to the top of each dangle.
Threading the Necklace
Put the bead stopper on one end of the memory wire. Thread 22 beads on to the memory wire. Thread on the jump ring of one of the individual dangles. Repeat.
Next thread on the jump ring of a double dangle, then a triple, a double and two more individuals. Your focal should look like this:
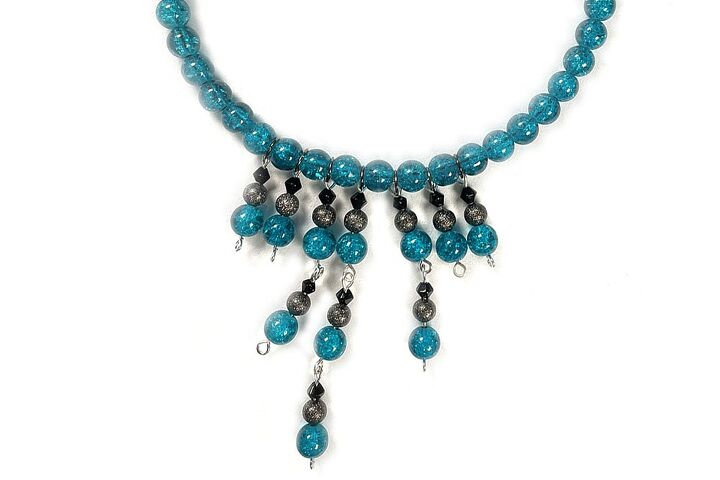
Thread on another 22 beads.
Check the Length and Finish
Holding the end without the bead stopper very carefully, so the beads don’t fall off, put the necklace around your neck to check the length. The part without the beads should cross over a little. If you need to add more beads, do so now. I was happy with mine crossing over with no beads.

Put one end of the memory wire into the round nose pliers about half way up and make a reasonably large P loop facing in towards the curve of the necklace. Repeat on the other end.
That’s all there is to it.
Now you have this stunning statement necklace.
I just love the colours I’ve used here. The sea green of the crackle beads is stunning. This necklace would look amazing with a cocktail dress but you could also wear it with your shorts and a t-shirt to ramp up the look.
Jewellery I'm Wearing
The necklace I was wearing in the video was a vintage one of my mother’s so no tutorial for that one. I have been looking for the longest time for beads like these but I have not been able to find any.
I made the earrings as part of my 5-Minute Earrings Series last year. The tutorial can be found here.

I have also done a tutorial on the bracelet which can be found here.
I really hope that you enjoyed this foray into the world of memory wire and that you decide to make this necklace. Please let me know in the comments section below.
Remember to subscribe to my YouTube channel and ring the notification bell so you will never miss a thing.
⇓ REMEMBER TO PIN THIS PROJECT FOR INSPIRATION AND SHARE WITH YOUR FRIENDS!!⇓

If you like my blog be sure to click on the RECOMMENDED button and SHARE it with your friends! It’s the best way for my blog to grow so I can continue to give you great content. I would love for you to be part of my family so sign up to receive my emails. Every time I post a blog, I will send you an update email. Also, follow me on Facebook HERE, Instagram HERE, and Pinterest HERE.
Come by and say Hey!
The author may collect a small share of sales from the links on this page.


Comments
Join the conversation
Awesome necklace! You are so talented!