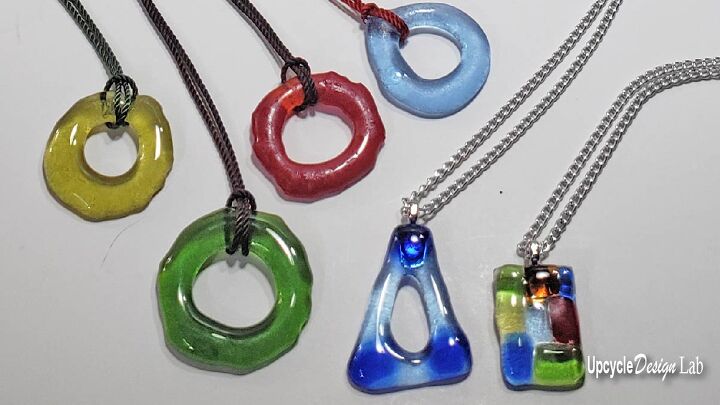
Microwave Kiln Fused Glass Necklace Eyeglass Holder – Upcycle Glass

Hello,
In this post, I am sharing a simple fused glass design that you can make using bottle glass and a microwave kiln. If you have never heard of a microwave kiln, it is precisely what it sounds like. It is a small container that turns your microwave into a kiln that can fuse glass to make simple fused glass pendants and other jewelry!
So if you have ever wondered about glass fusing but thought that it was too expensive to get started this might be your answer. These small kilns are pretty affordable. The brand I have is around 100 dollars, but I have seen other brands in the 50 and even 30 dollar range. Plus, this is a very inexpensive craft if you use recycled glass.
For more information on using the kiln and some safety precautions, check out my intro video below, and for more pendant designs and a demo of using the kiln, see the videos at the bottom of this post.
Advertising Disclosure: Upcycle Design Lab may be compensated in exchange for featured placement of certain sponsored products and services or your clicking on links posted on this website.
Below are the simple steps to making a simple fused glass ring shape that can be used as a necklace or eyeglass holder.
Advertising Disclosure: Upcycle Design Lab may be compensated in exchange for featured placement of certain sponsored products and services or your clicking on links posted on this website.
Step 1- Clean and Cut Bottles
If you have a bottle cutter, you can use it to make your first cuts. You can also break the bottle to get started.
The curved pieces of bottle glass can be tricky to score, and as a beginner, I find it easier to cut the glass pieces with a pair of wheeled glass cutters. This yields a more non-uniform shape than the more precise scoring and braking method, but it is still possible to make similar pairs and repeat similar shapes.
I cut lots of small, approximately 1/4 inch square pieces to make a ring shape. The pieces do not have to be square, and many of them won’t be, but they do need to be of similar size.
Step 2 – Prepare Kiln and Assemble
Each time the kiln is used, a new piece of kiln paper should be placed on the base of the kiln. This will protect the kiln. The kiln paper should be large enough to accommodate the glass design but not hang over the edge of the kiln base.
Next, you need to carefully arrange the pieces. I placed several pieces in a round shape for this design and then added a second layer on top to cover the gaps. A pair of tweezers is very helpful when arranging the pieces of glass.
Step 3 – Fuse and Cool
The fusing process is straightforward, but do follow all the safety precautions in your instructions. Your times may vary. I usually start with two minutes and then carefully check the progress. After that, I fuse in 1 min or 30-second bursts until I reach the desired fuse.
Once the fusing is complete, you need to remove the kiln from the microwave and allow it to cool for about an hour.
Step 4 – Sand
Once the kiln has cooled, you can remove the glass. If any of the kiln paper is stuck to the glass, it can be easily removed with a little bit of water.
You may find that your fused glass has a few sharp edges. If so, use a sharpening stone or sandpaper to smooth the edges.
Step 5 – Finish
Your glass piece is now ready to be made into jewelry. To complete my piece, I attached some cord to make my fused glass pendant eyeglasses holder.
To see more details on this project and more pendant designs, check out the video below.
If you want to see more about what you can make with this simple little kiln, check out this quick 2-minute tutorial video.
Happy Upcycling,
Cindy
Advertising Disclosure: Upcycle Design Lab may be compensated in exchange for featured placement of certain sponsored products and services or your clicking on links posted on this website.
Enjoyed the project?
Suggested materials:
- Microwave kiln
- Wheeled glass cutters
The author may collect a small share of sales from the links on this page.


Comments
Join the conversation