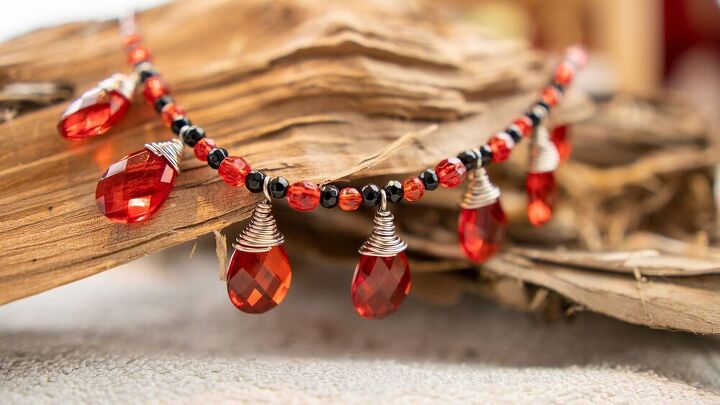
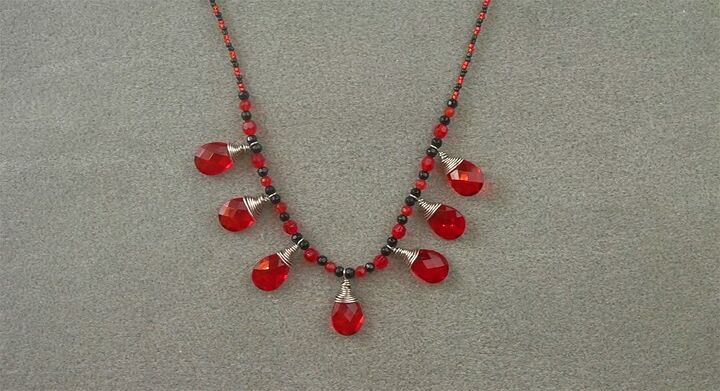
Queen Of Hearts Necklace Tutorial
You had me at teardrop!
After I finished this necklace, I asked my kids what I should call it. They said it reminded them of the Queen of Hearts in Alice in Wonderland and so it was named.
These acrylic transparent teardrops are gorgeous, I really wanted to use them but because the hole runs from front to back, not side to side like a briolette, I had to get creative about what to do with them. Wire wrapping them was the perfect solution to making them sit perfectly and look more attractive.
I’m a beggar for punishment so I made the “chain” portion of the necklace using seed beads.
The necklace sits quite long, under the collar, but you can make this shorter by adding less of the seed beads.
If you like this project please check out my other projects on the Create Section of my blog or my YouTube Channel.
Materials
Here’s what you will need:
- 4mm Hyacinth Faceted Round Glass Beads x8
- 6mm Hyacinth Faceted Round Glass Beads x8
- 4mm Black Faceted Round Glass Beads x24
- 11/0 Red Silver Lined Seed Beads – approximately 120
- 11/0 Black Opaque Seed Beads – approximately 120
- Red Faceted Acrylic Transparent Teardrops x7
- 17mm Black Lobster Clasp
- 6mm Black Jump Ring
- Crimp Beads
- Tiger Tail x65cm
- 20 Gauge Half Hard (or German) Silver Wire
Tools
You will also need:
- Chain nose pliers
- Round nose pliers
- Wire cutters
Instructions
Watch the video or read the instructions below.
Wire Wrap the Teardrops
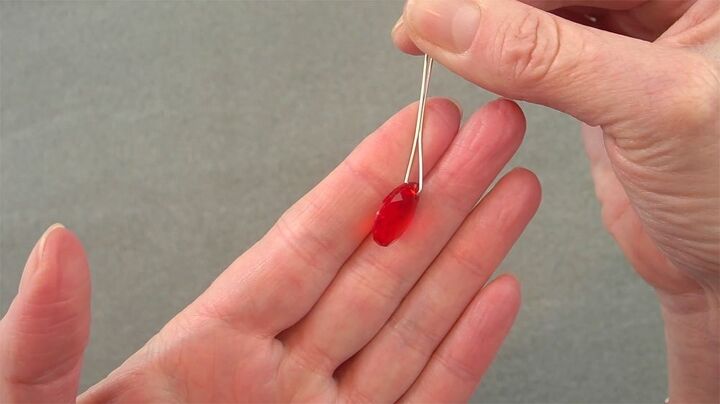
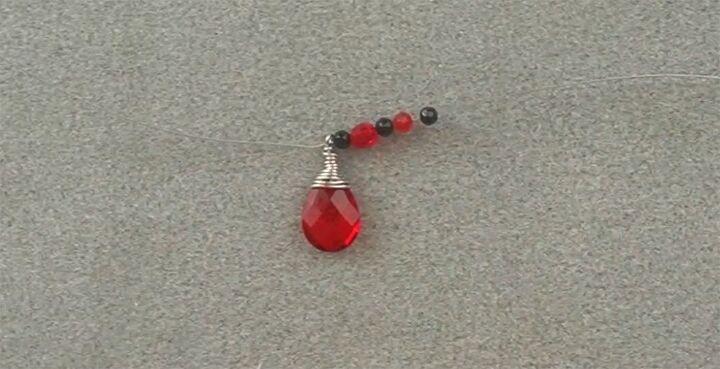
Cut a piece of 20cm piece of wire. Thread it through the teardrop and place the teardrop about 5cm from one end. Bend both ends up.
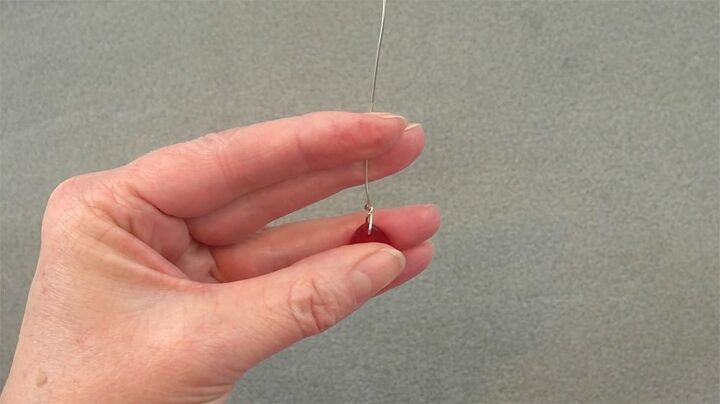
Take the shorter piece and twist it over the long piece. Wrap it around once and trim off the excess. Tuck in the ends using the chain nose pliers. This doesn’t need to be too neat as it will be covered by the wraps.
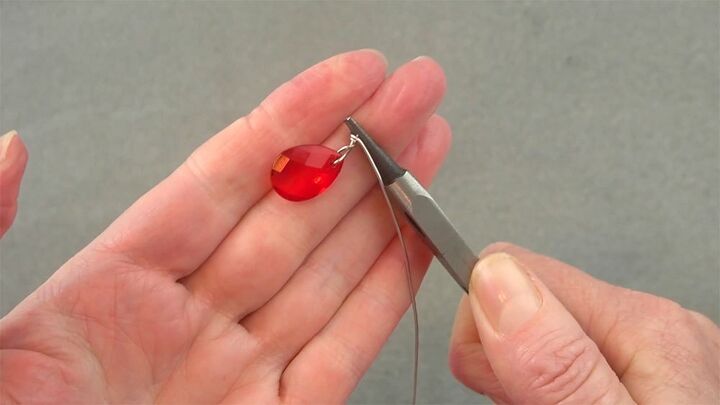
Place your round nose pliers, at the top of the existing wrap. Wrap the wire around the pliers above the existing wrap until the wire sits across in front of the pliers.
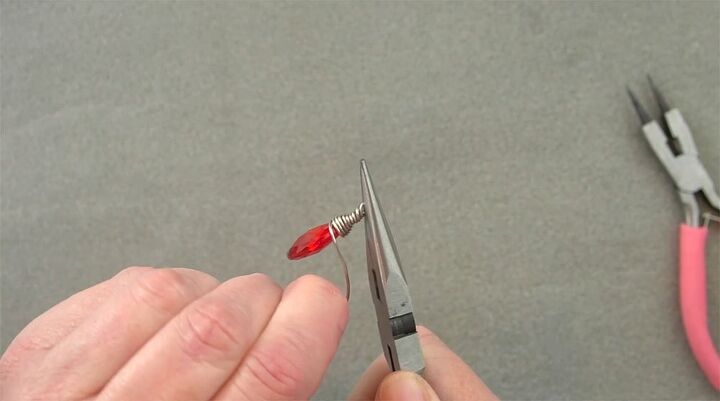
Hold the loop with your chain nose pliers and wrap the wire around and around laying each wrap of wire under the last. Wrap until the hole in the bead is covered. You can hold the end of the wire with another pair of pliers if this is easier.
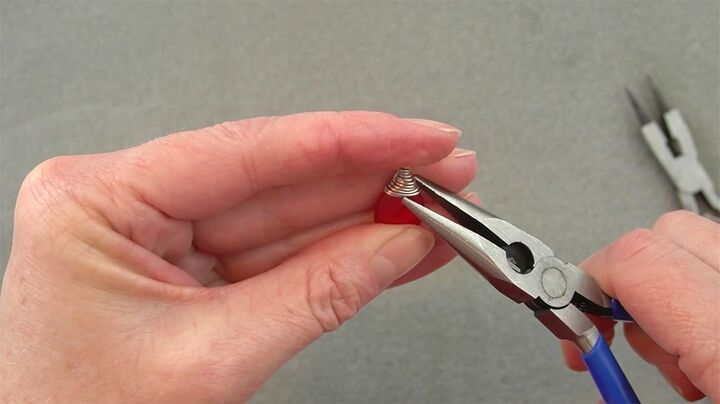
Trim off the excess wire and tuck the ends up and under the last wrap. It’s OK for the wrap to be a bit messy.
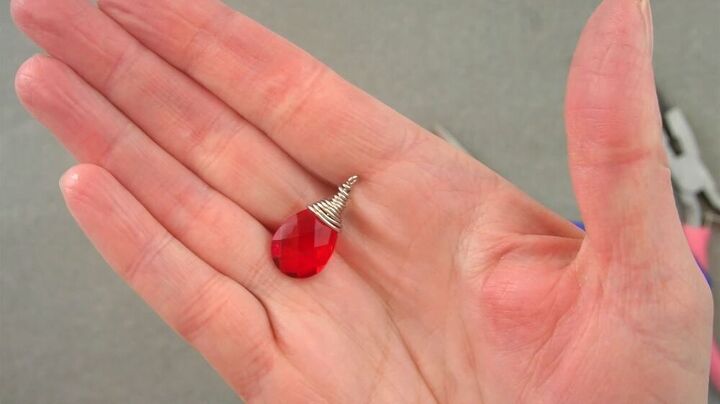
Repeat this process until you have seven wrapped teardrops.
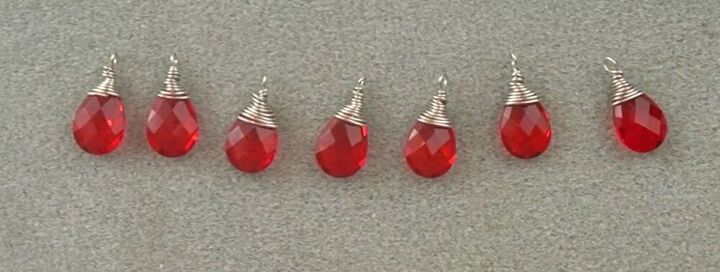
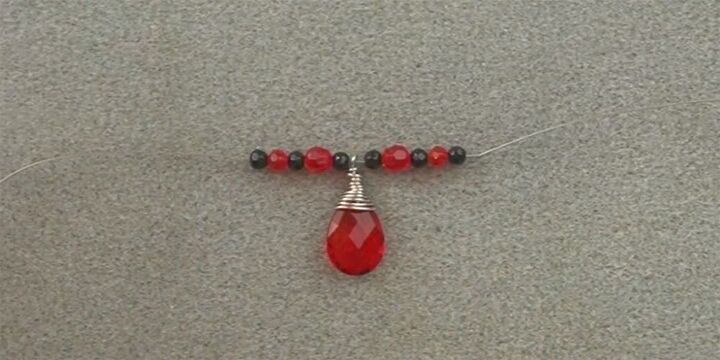
Thread the teardrop onto the Tiger Tail and move it close to the centre.
Follow this with:
- Black 4mm bead
- Hyacinth 6mm bead
- Black 4mm bead
- Hyacinth 4mm bead
- Black 4mm bead
Reverse the pattern on the other side of the teardrop so that it is a mirror image of the first side.
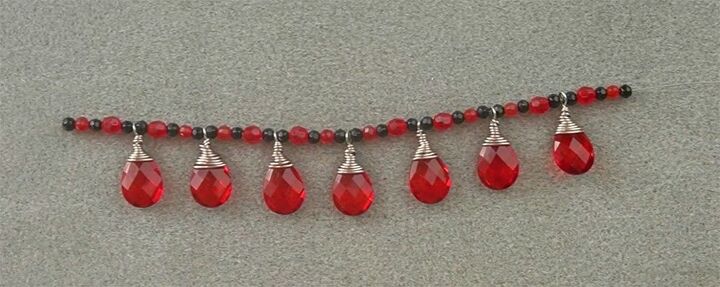
Add another drop then reverse the pattern. Ensure your teardrops are all facing the same way so that the back isn’t showing. Thread all the beads until you have all seven teardrops with one run of the beads at each end. Lay the necklace down periodically so that you can check the pattern and that the teardrops are all on the right way.
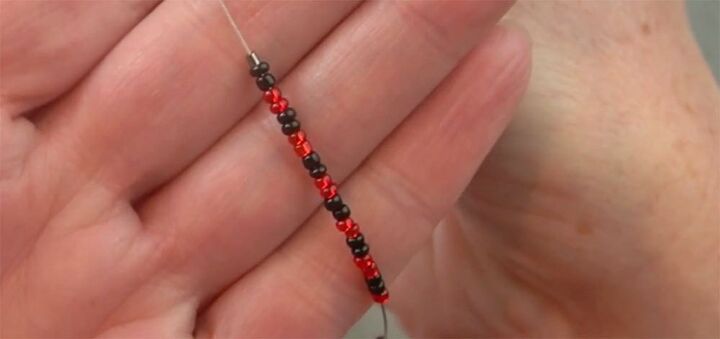
Make the Seed Bead Chain
Thread on two red seed beads followed by two black seed beads.
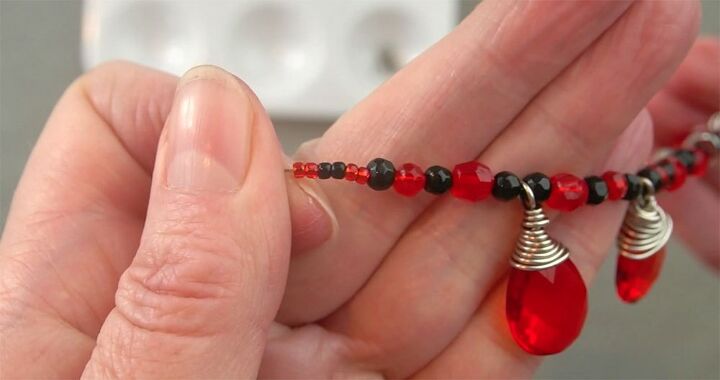
Continue in this manner until the entire necklace measures 52cm. If you want a shorter necklace, add less seed beads.
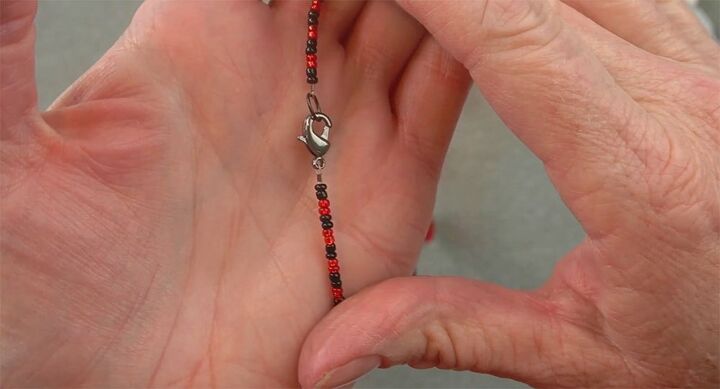
Add the Clasp
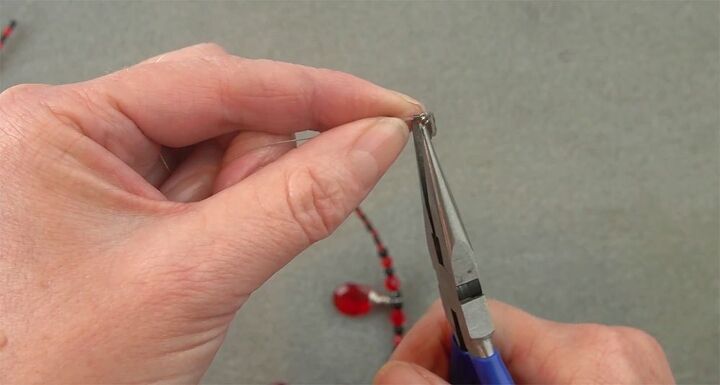
When your necklace is long enough, thread on a crimp bead, then your clasp.
If you are right-handed, put the clasp on the right hand side, if you’re left-handed put the clasp on the left hand side.
Thread the Tiger Tail back through the crimp bead.
Squeeze the crimp hard with the chain nose pliers to squash it.
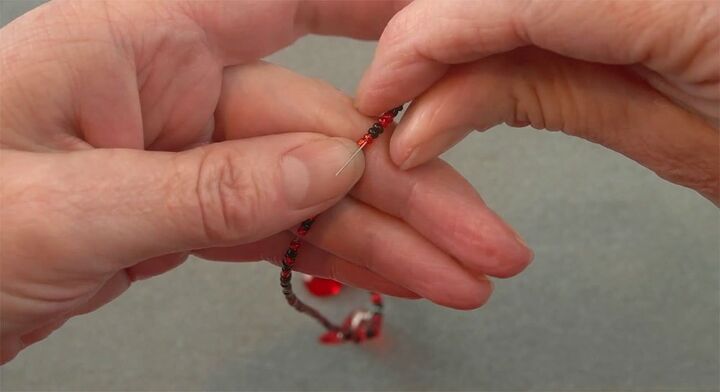
Thread the Tiger Tail back through a few of the beads. Pull it nice and tight.
Trim off the excess Tiger Tail.
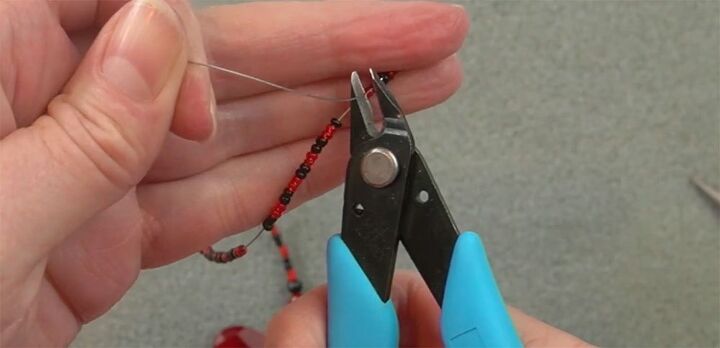
Repeat the process for the other side, ensuring that you had no gaps in the beads.
Here’s the completed necklace. Because there are an uneven number of drops, it should sit with one drop in the centre of the necklace.
You could also use these wrapped teardrops to make a pair of matching earrings.
To do this, just make the wrapped drop, then attach an earwire.
I hope you enjoyed this necklace project. With Christmas on the way, it would make a great gift for someone. The teardrops come in lots of colours so if this one is too bold for you, you could try something more subtle.
Check out my other beading tutorials, either in the Create section or on my YouTube channel. Please leave me a comment below and let me know if you like this project.
The author may collect a small share of sales from the links on this page.


Comments
Join the conversation
I made this necklace years ago using different color teardrop beads . I love it !
Cute necklace! And the name is perfection!