Turn Your Old Maxi Dress Cute Again

Hey DIY'ers before you throw away or donate your old maxi dress consider transforming it to a stylish jumpsuit instead. The result is super cute and you will be so proud of yourself once your project is completed.
DIY: How to make Jumpsuit from a dress | Sewing projects for beginners
Hello Youtube friends, today I am going to show you how to easily thrift flip a Maxi dress to a jumpsuit. I had so much fun making this jumpsuit I was able to test my DIY short pants patterns for this sewing project and I am very pleased. I really love thrifted transformation not only it is good for your pocket it is also good for the Earth, so whenever I get a chance to recycle old clothes to a stylish new one it makes me so happy and proud.
For the fist time ever, I will be naming a sewing makes after a subscriber or a viewer. I named this jumpsuit Patti, it's so fitting since she suggested that I should make a jumpsuit using this thrifted maxi dress! The next time I create a new garment it could be your name. So be sure sure to leave me some suggestions on what to make next!
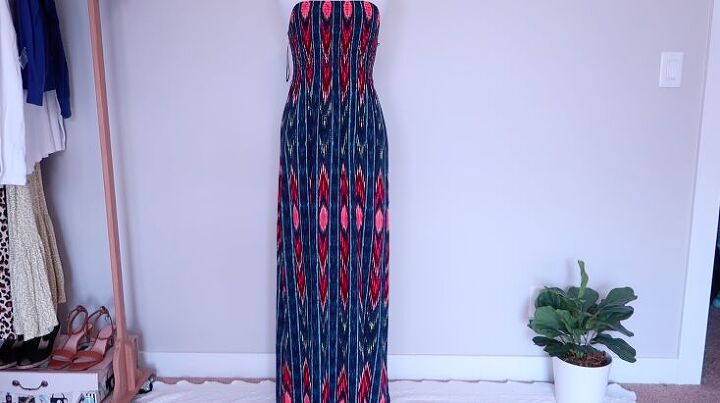
I bought this maxi dress at the thrift store but if you already have one on hand it's even better so you don't have to spend money. So this dress features a shirred bodice which is very trendy at the moment.
Measured how long you want the bodice to be. Mine was 11 inches long plus 1/2 inch seam allowance. You can add more seam allowance so you have plenty of fabric to work with in case you made a mistake.
Cut the bodice away from the skirt.
If you would like to shorten the hem this is the time to it. It's so much easier than hemming two leg panels.
I used a self- drafted short pants pattern which you can easily find on my Youtube channel Sew Aldo for more detailed instructions. It is very easy to make and it will be a perfect fit for you.
Anyway, I just extended the length to make it longer.
I cut along the fold to make two panels. This piece I am working on is the back panel.
I repeated the same on the front piece, I cut along the fold to make two pieces of front panels.
I matched the back and front panels for each leg. Then I pinned them to secure. Be sure that the right sides of the fabrics are facing each other.
I matched the front crotch seam together and the same for the back crotch seam. If you noticed the side seams is at the center for now. Then I will sew the front seam and the back seam.
I matched the inner seam together then pinned it to secure. Then I will sew it to turn them to a pair of pants.
I take in the side seams of the bodice by about 2 inches. The idea is you want the waistline of the bodice and the pants to be at the same width.
Now it's time to attach the bodice to that pants. I place the bodice inside the pants, right side of the fabrics should be facing each other. I matched the side seams first then pin along the waistline to secure, then I will sew it all the way around.
Now it's time to fix this mess, it's so ugly it looks like a clown top the way it was flaring out like this. Since the bodice has some shirring already. I thought it a perfect treatment to cinched in the waistline. Yes you guessed it I have a tutorial how to shirr fabric too.
I did five rows of shirring stitch. To make sure that the waistline won't be super tight. I shirred one row first, then I pulled out the elastic thread by about five inches then trimmed it off. I then adjusted the elastic thread manually the tied a knot to secure. The reason for it was to make sure that the waistline won't be so tight that you can't get in the jumpsuit and that is based on my own experience.
Lastly, I finished the hemline by double folding it and your DIY Jumpsuit is ready!
Enjoyed the project?
Suggested materials:
- Thrift find dress (Goodwill)
The author may collect a small share of sales from the links on this page.


Comments
Join the conversation
I'd like to see the finished project.