DIY Shorts and Wrap Jumpsuit

Versatile pieces of clothing - I love them. I’m going to show you how to make a fabulous pair of shorts that you also have the option to wear as a jumpsuit. Sounds too good to be true, but it isn't. With two ways to wear it, you’re never going to get bored, and the styling options are endless. Let's get started.
Tools and materials:
- 100% polyester fabric
- Fabric marker
- Ruler
- Scissors
- Sewing machine
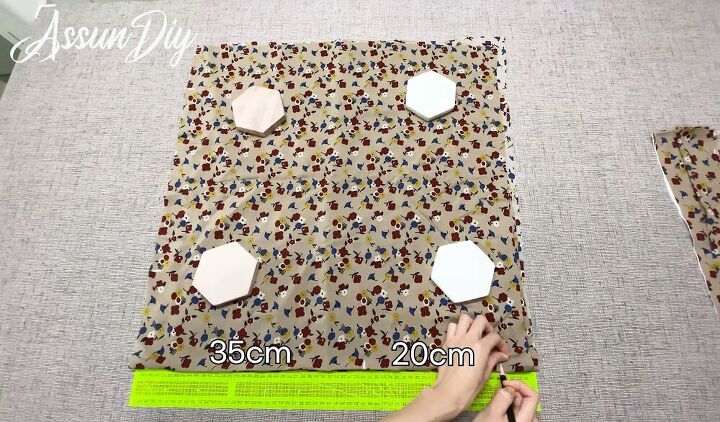
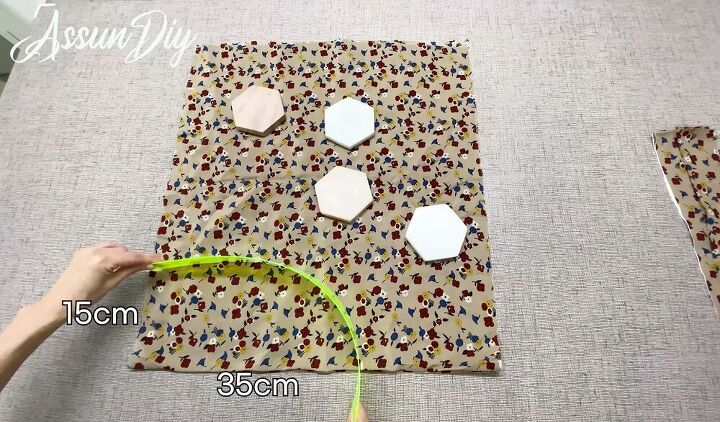
Mark and cut the material
Start with two folded pieces of material, one on top of the other. You need to make two marks on one side of the fabric: one 15cm up from the edge and another 35cm (13.77 inches) away from that. On the other side of the fabric, you need to make another two marks: one 35cm (13.77 inches) away from the edge and another one 20cm (7.87 inches) away from that. Proceed to cut off the remaining material between the 20cm (7.87 inches) mark and the edge of the fabric.
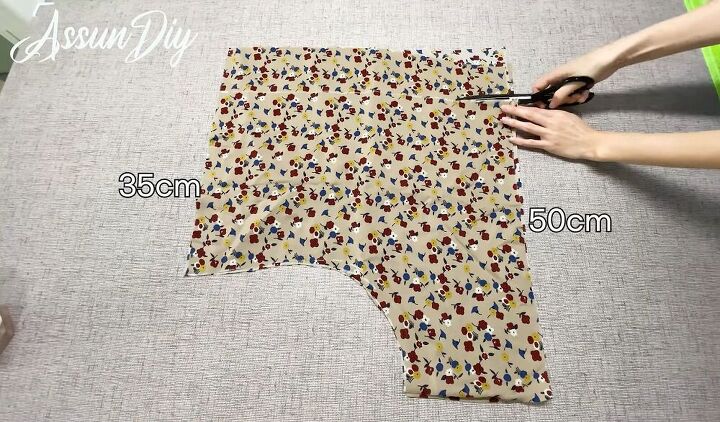
Draw and cut a curve
Draw a curve between the two points shown in the picture. The curve needs to measure 45cm (17.71 inches). Proceed to cut it out.
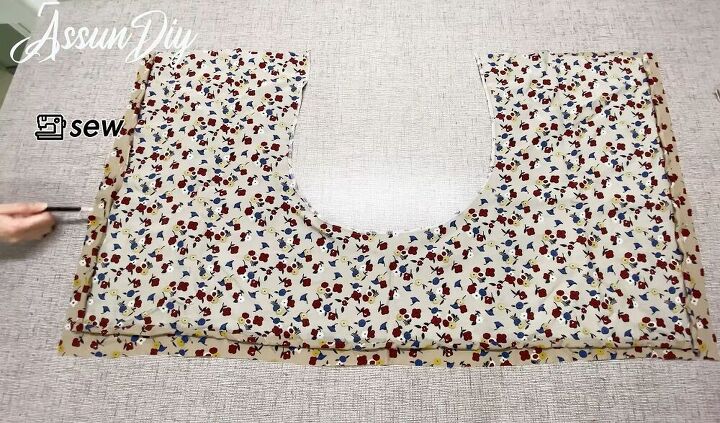
Cut fabric
Cut the fabric at the top of the material, as shown in the picture.
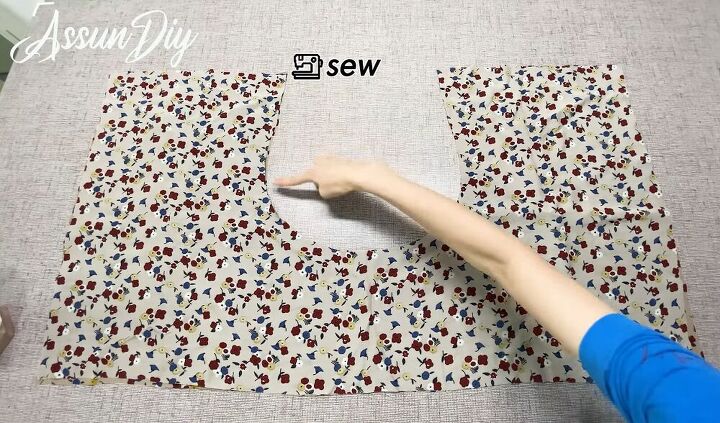
Sew opening
Open up your fabric so that the good sides of the two pieces are touching. Sew around the curved opening with a zigzag stitch.
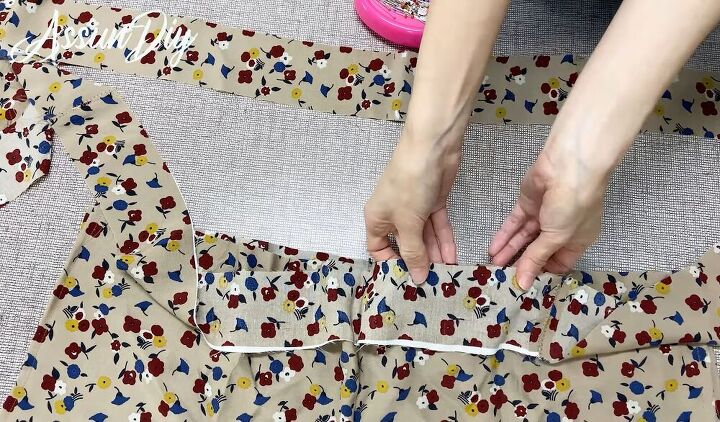
Sew around the fabric
Continue by folding up the sides of the piece of fabric on top by about an inch, and then sew the sides down. When done, turn the fabric round to the other side and do the same on the back. Then you need to fold your fabric in half; take a look at the video from 3:10-3:17 to see how to do this.
Attach long pieces
You then need two long strips of fabric that measure 160cm (62.99 inches) long by 6cm (2.36 inches) wide. Find the center point of each piece and pin it to the center point on your shorts with the good sides of the material touching. Pin all the way along and then sew. Do this on both sides.
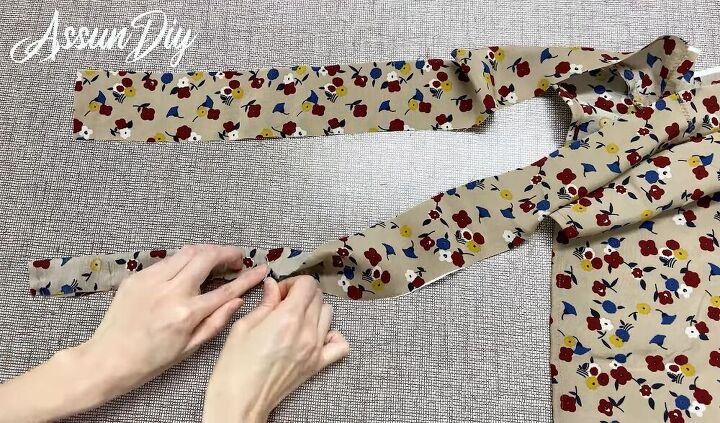
Fold and sew long pieces
Continue by folding your long pieces in half so that the good sides are touching, pin them down and sew. Only do this for the material that is not attached to the shorts. Do this on both sides. Once you’ve sewn them, snip the corners and then turn them right side out.
Tip:
You can use a knitting needle to help you with this last part.
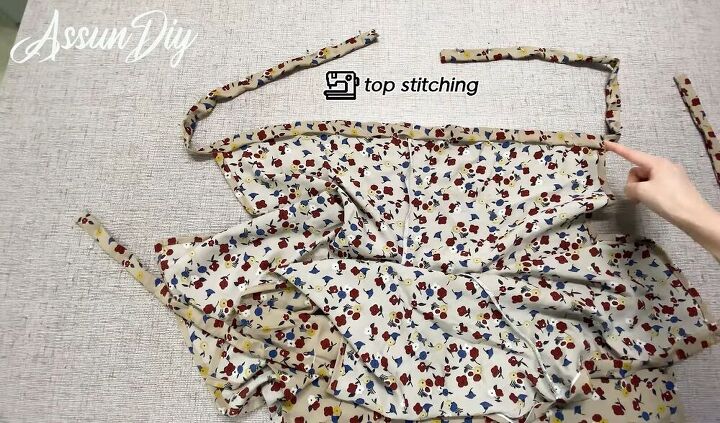
Topstitch
Proceed to fold the long pieces in half all the way along the shorts, pin them into place, and topstitch them down.
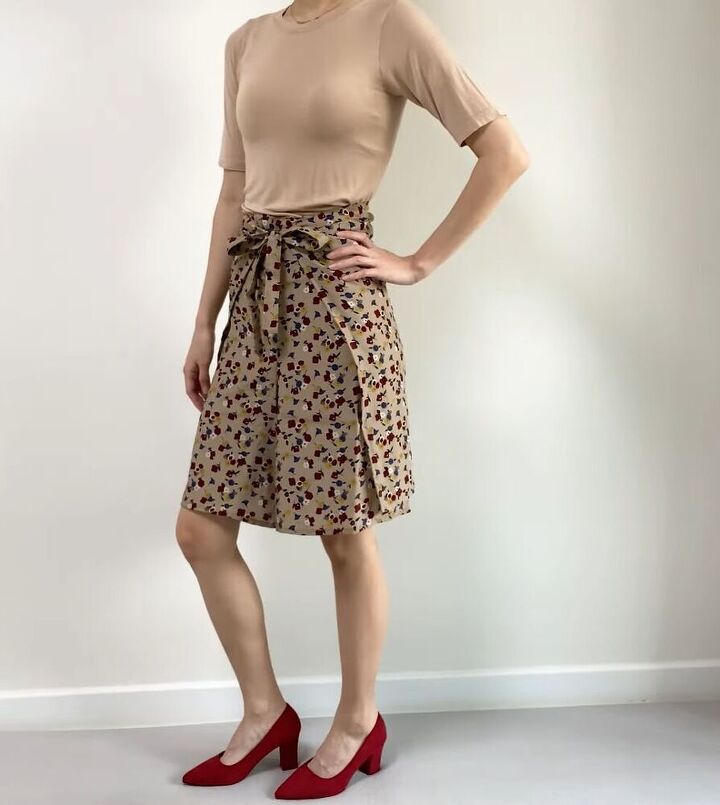
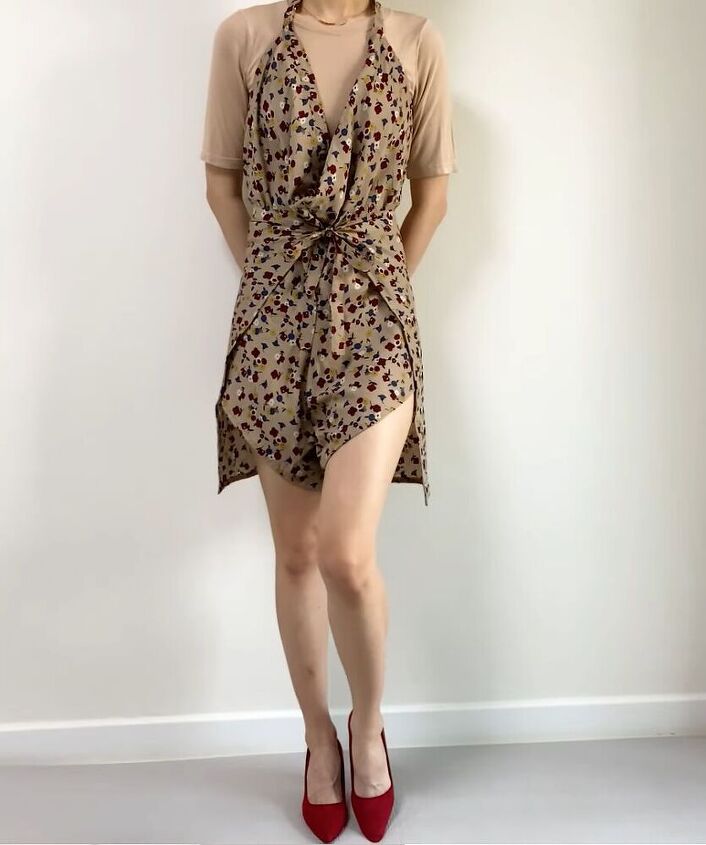
And here is the finished look! I love how versatile this DIY is and how you can wear the finished garment both as a pair of shorts and as a jumpsuit. I really like the tie detail when worn as shorts; it’s like having a built-in belt. As a jumpsuit, I like the cross-over feature at the top and the flow of the bottom part. Which way of wearing it is your favorite?
The author may collect a small share of sales from the links on this page.


Comments
Join the conversation
Many years ago I had denim pants made in this style! Just loved them. I hope I'm not too old to try them again. They were very comfy!
Very cute!