This DIY Romper is a Really Flattering Look for the Summer

Hello! Today, I’m going to be showing you how to make a DIY romper. This off-the-shoulder romper was inspired by a recent off-the-shoulder top I made, and I couldn’t resist making a similar design.
It’s quick and easy to make, plus I’ll show you how to create a simple DIY romper pattern using clothes you already have.
Tools and materials:
- Fabric
- A shirt and shorts that fit you well
- Decorative elastic
- Regular elastic
- Pattern paper
- Marker
- Sewing machine
- Scissors
- Measuring tape
- Pins
- Safety pin

1. Draw the DIY romper pattern
Mark a shirt where you want the neckline to hit, on the front and the arms.
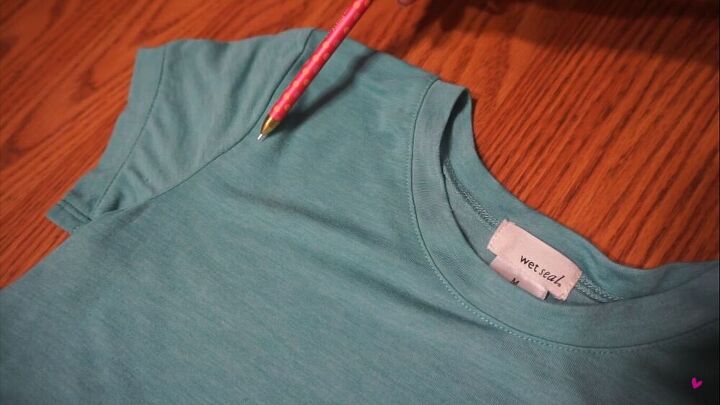
Draw a straight line across the bodice to connect the marks on the front and sleeves.

Trace the sleeves to the desired length using your own shirt. Next, trace half the bodice of your shirt to the smallest part of your waist, then add 2 inches.
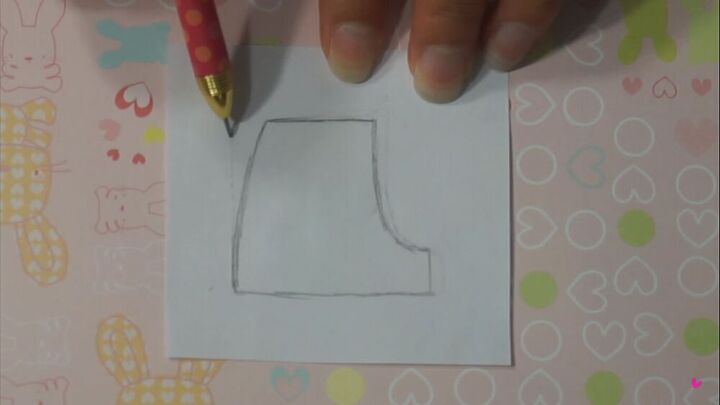
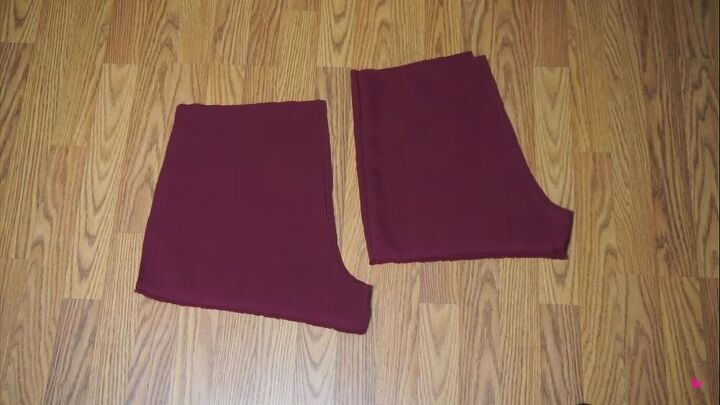
Trace the front and back of your own shorts and straighten out the side seam. Be sure to keep the side length the same.

Measure the widest part of your hips and divide it by 4. If your shorts pattern is less than this, cut it vertically and spread it out until it is at least the same as the measurement you just took. This will ensure that the romper is wide enough to slip into.
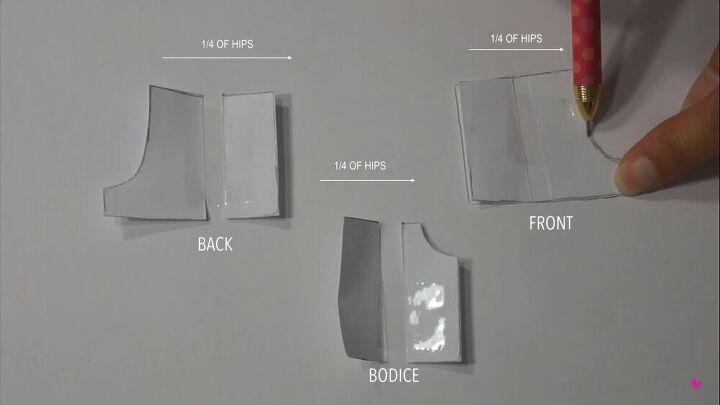
The seam allowance may vary a little bit. Here are the measurements I used:
- Bodice top: twice the width of the decorative elastic (½ inch)
- Bodice waist: width of the elastic, plus ½ inch (1 inch)
- Sleeve top and hem: twice the width of the decorative elastic (½ inch)
- Shorts waist: width of your elastic, plus ½ inch
- Shorts hem: 1 inch (I used none since I retained the edge of my fabric)
Basically, you want enough seam allowance at the neck and waist to accommodate your elastic.
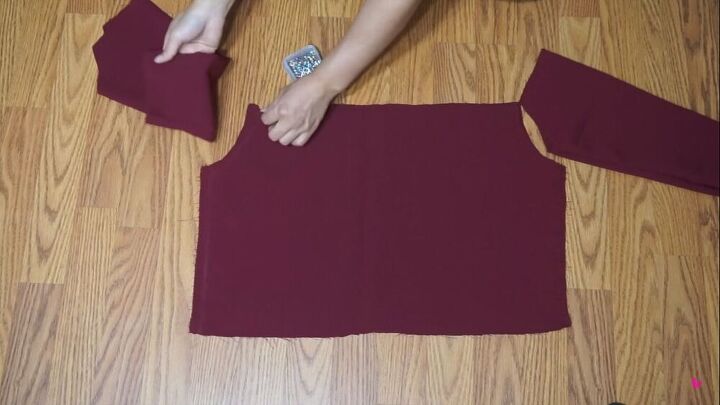
2. Sew the top pieces of the romper together
With the right sides together, pin and sew the bodice. Then, pin and sew the sleeves. Finally, attach the sleeves to the bodice with pins, then sew. I placed my sleeves inside the bodice to sew them together.
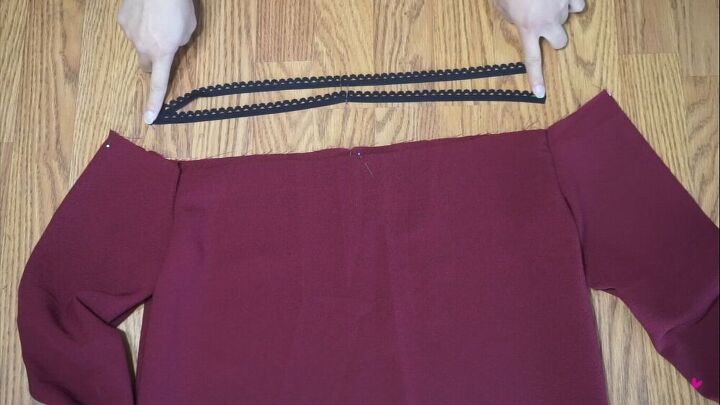
3. Pin the decorative elastic
Measure a decorative piece of elastic that fits snugly around your shoulders and cut it. Mark equal reference points on both the neckline and the elastic to ensure even distribution.
To do this, I divided my elastic into four equal parts, then aligned them with the front, back, and sides of the neckline.
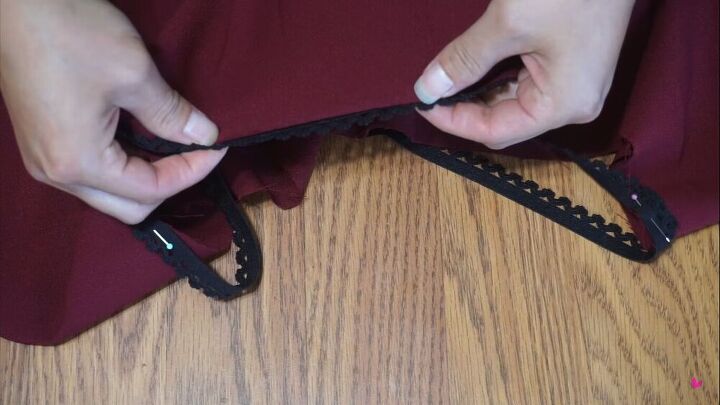
4. Attach the decorative elastic
If needed, sew the neckline with a serger or zig-zag stitch to prevent the fabric from fraying. Do this before you attach the elastic, as elasticity decreases with additional stitching.
To streamline this two-step process, I simply folded over the fabric and secured the elastic with a single zig-zag stitch. Remember to stretch as you sew.
Use the same decorative elastic on the sleeves and attach it using the same process as above.
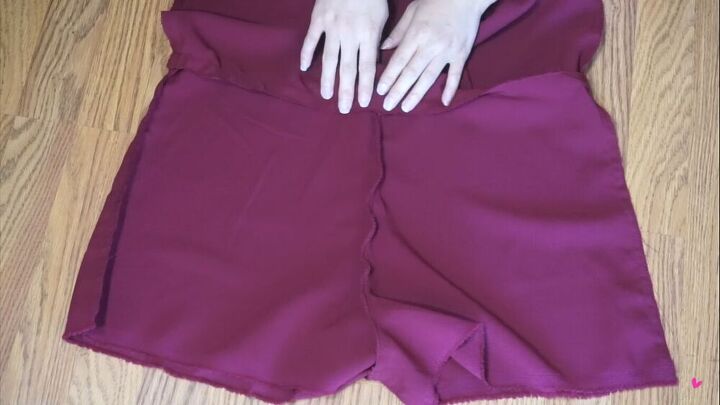
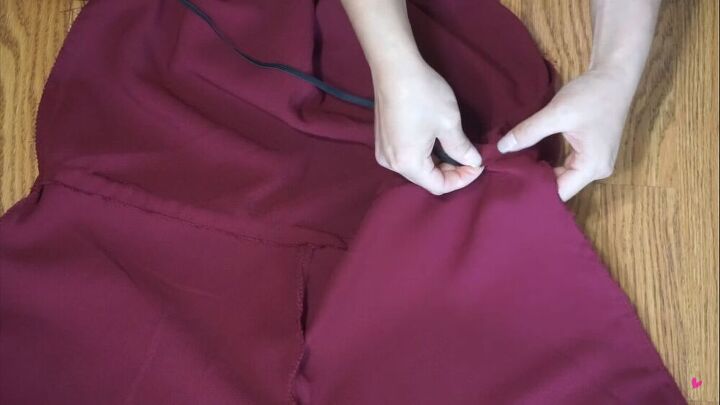
5. Sew the bottom pieces of the romper together
Pin and sew the front and back shorts pieces together. Turn one leg inside out, then insert it into the other leg. Sew along the crotch.

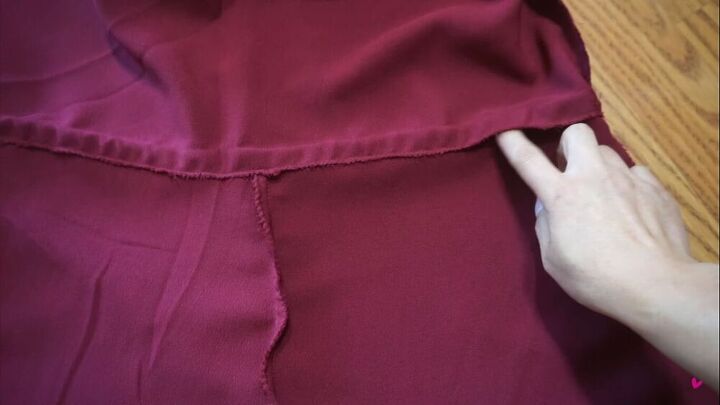
6. Attach the top of the romper to the bottom
Sew the bodice and shorts of the romper together and finish the edge of the seam allowance.
7. Add the waist elastic
Create the casing for the waist elastic by folding the seam allowance down, then secure it with a straight stitch.
Make sure to leave a gap, so you can thread the elastic through.
Attach a safety pin to one end of the elastic, then feed it through the casing. Finally, sew the elastic ends together and close the gap.
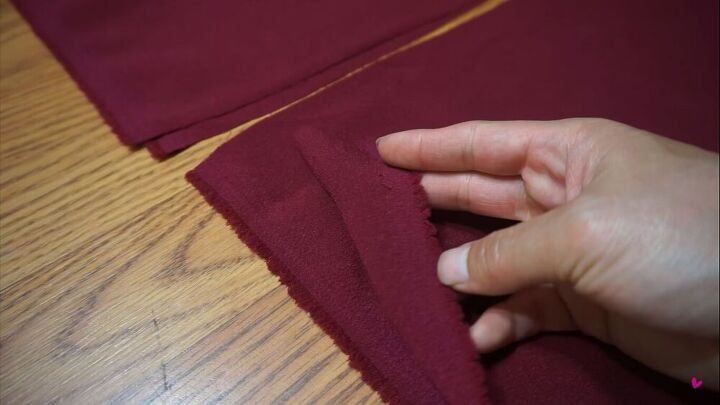
8. Hem the shorts
I decided to use the ends of my fabric. However, if you need to hem the shorts, fold the raw edges twice and sew in place.

DIY romper tutorial
Your project is complete. Here’s my long-sleeve, off-the-shoulder romper in action. I hope you enjoyed this tutorial on how to make a romper out of fabric and a DIY romper pattern from scratch.
In the comments below, please let me know what you think of the final garment and whether you’d try this out at home.
The author may collect a small share of sales from the links on this page.


Comments
Join the conversation