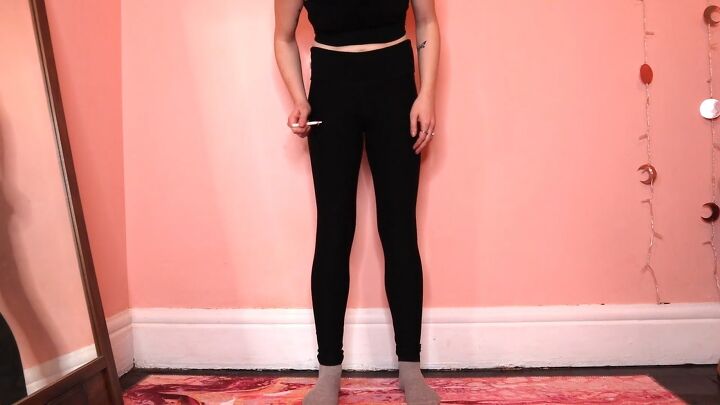
Sexy Woven Leggings in 3 Ways: DIY Tutorial

Today, we’re thrift-flipping regular, solid leggings into woven leggings.
In this tutorial, you’ll get hands-on practice and learn how to weave fabric to create cut-out leggings. Let’s get started!
Tools and materials:
- Leggings
- Fabric chalk
- Scissors
- Lace (ribbon, shoelaces, old t-shirt)
- Ruler
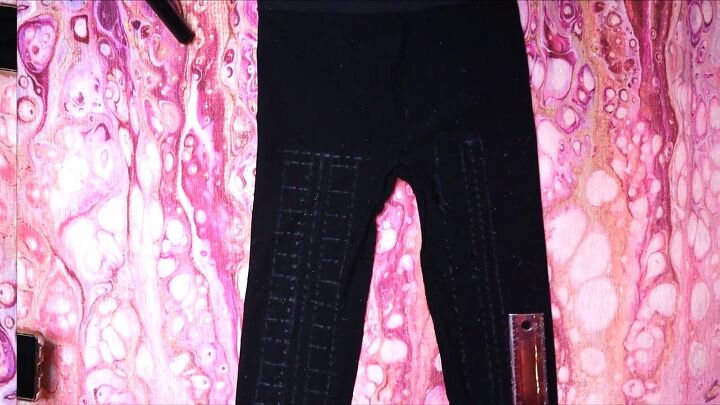
Design 1: Twisted weave leggings
1. Mark two ovals on one leg
With your leggings inside out, mark out two ovals on one leg where you want to design to go.
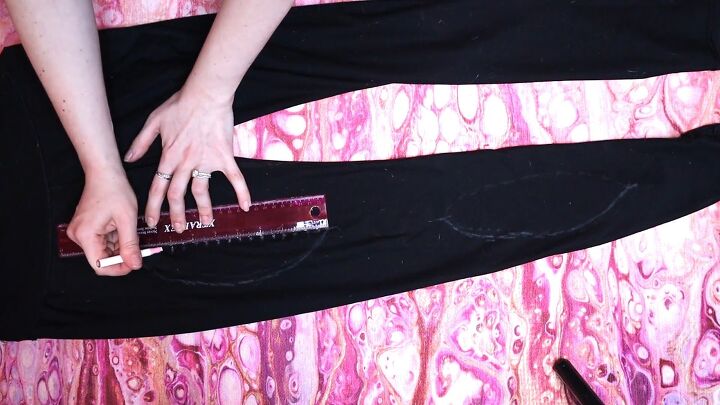
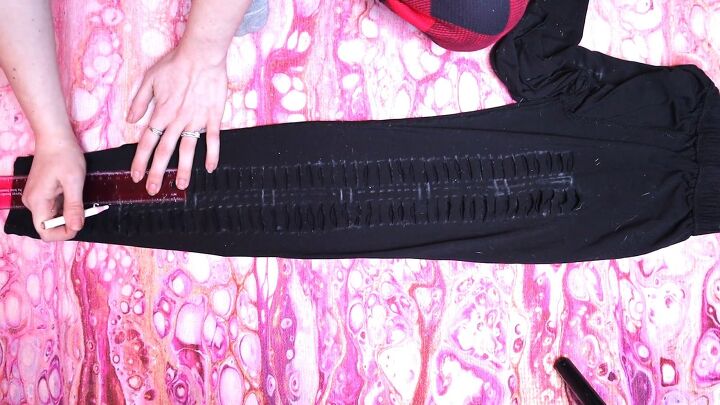
2. Mark ½-inch sections within half of the ovals
Lay your leggings down. Mark out ½-inch sections on the outer half of each oval on one leg.
Use these marks to draw lines across the ovals.
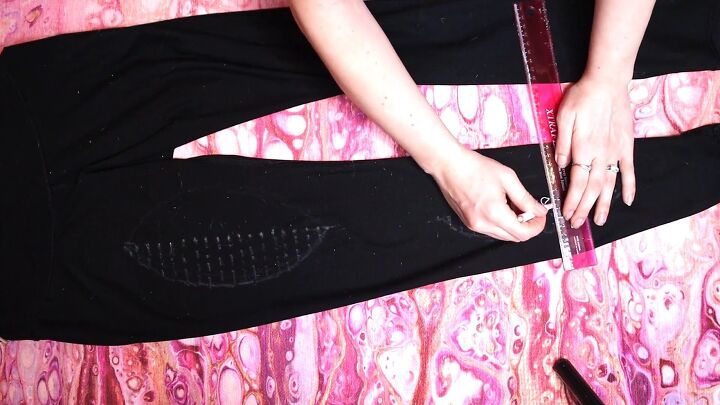
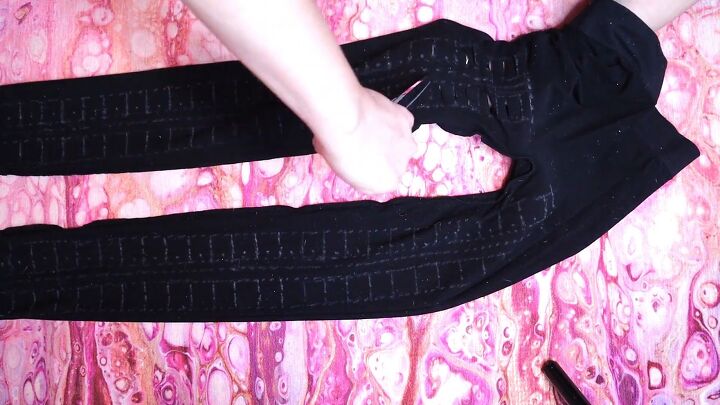
3. Line up both legs of the leggings so the marks are facing up
Lay your leggings so the legs are on top of each other and the half-marked ovals are visible.
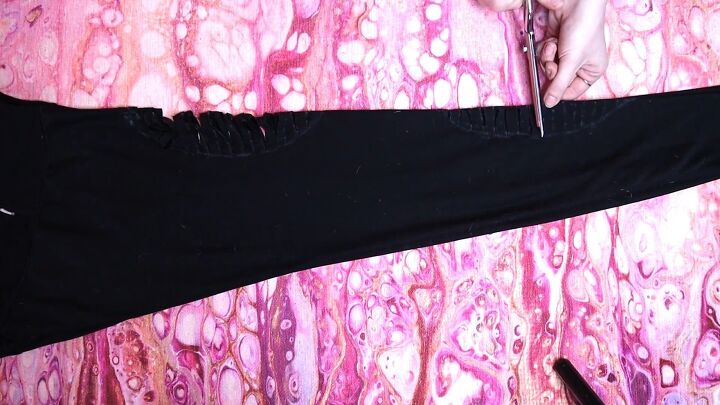
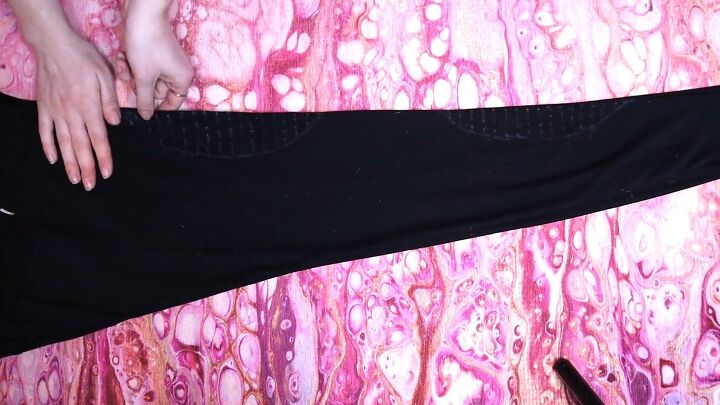
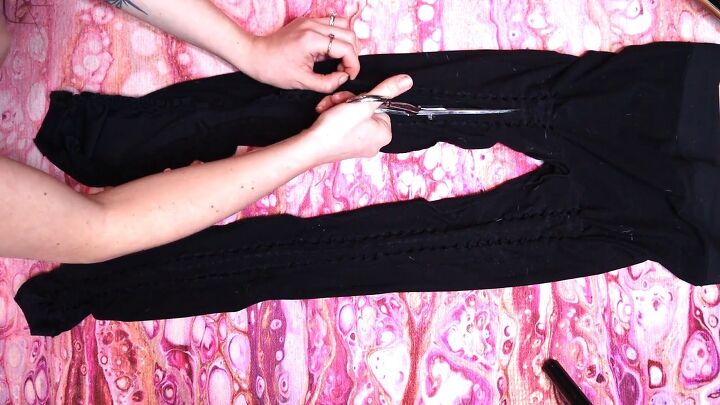
4. Cut through both legs along the marks
Cut along the lines through both legs, starting and ending with a small hole.

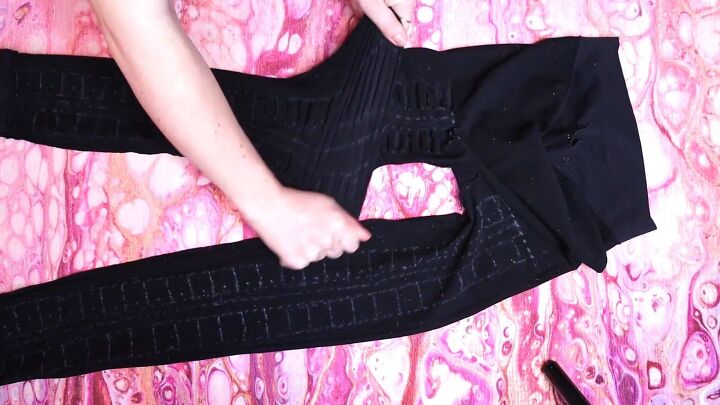
5. Stretch the leggings
Stretch the ovals sideways.
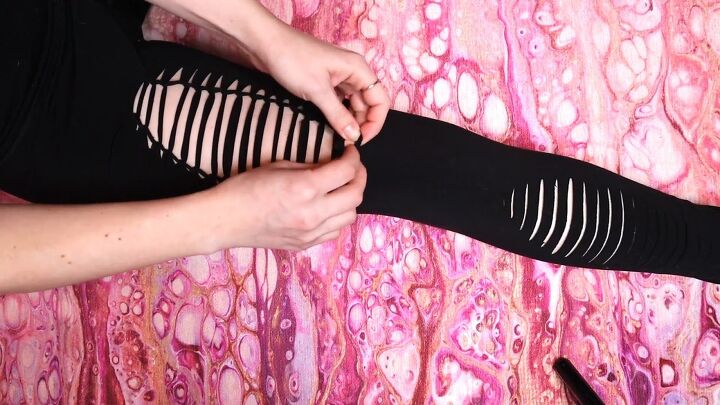
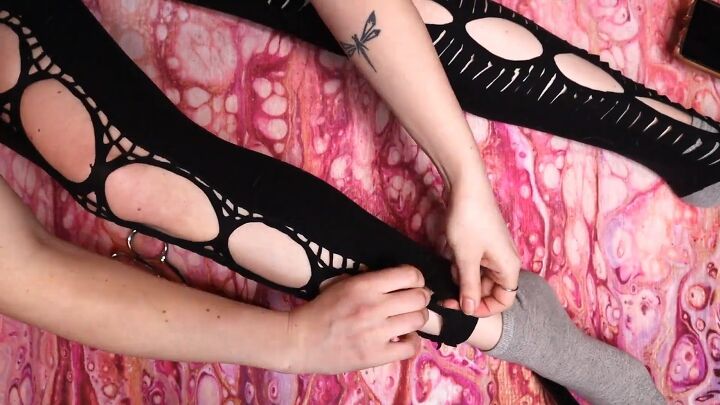
6. Use the ladder weave technique to weave all the way down the first oval
Put your leggings on inside-in. Grab the first strip of fabric and pull it behind and up through the top hole, creating a loop.
Grab the second strip of fabric and pull it behind and up through the loop. Repeat until you reach the bottom.
7. Cut the bottom loop and tie it through the final hole
Cut the bottom loop in half and tie it back together through the bottom hole.
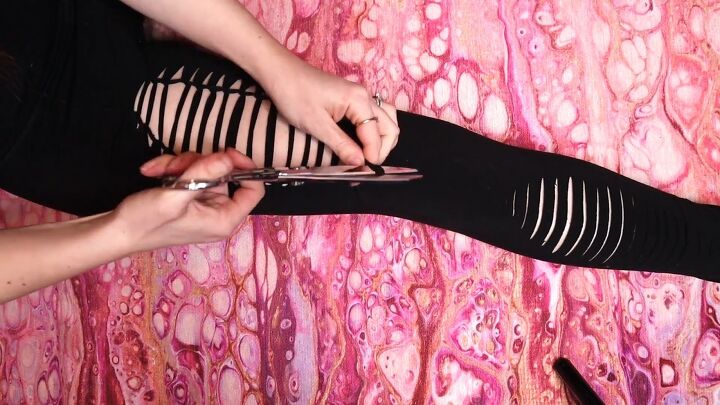
8. Do a twisted weave
Grab the top strip and twist it, making a loop. Skip a strip and grab the third one, pulling it up through the loop.
Twist it, then go back and grab the second strip and pull it up through the loop.
Repeat the pattern until you get to the bottom. Cut and tie the bottom loop.
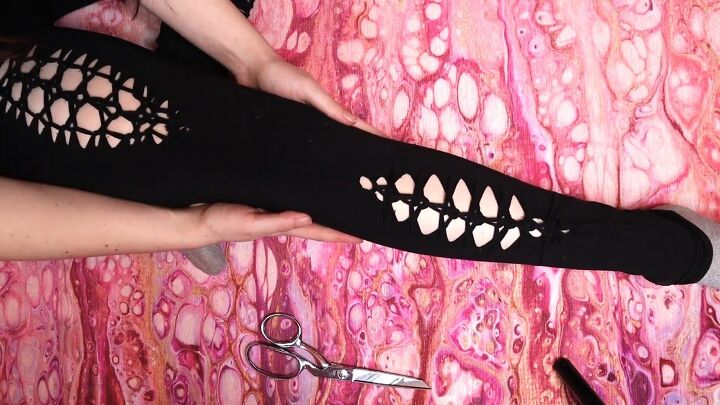
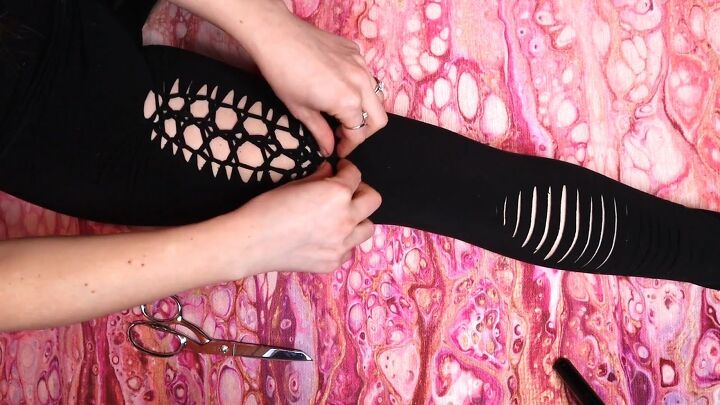
9. Repeat step 8 for the bottom oval
For the second oval, do only the twisted weave to the bottom. Cut and tie the bottom loop.
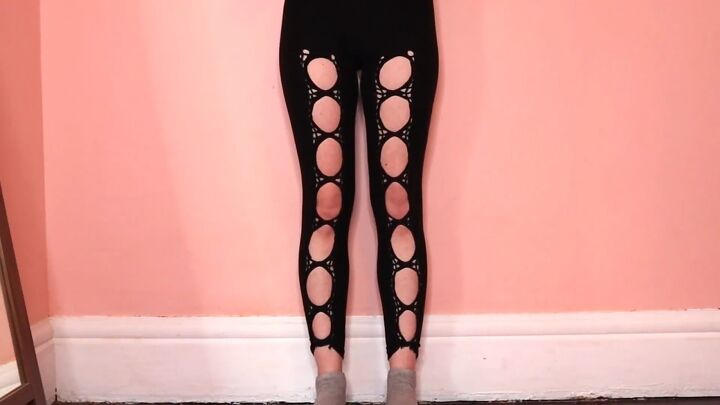
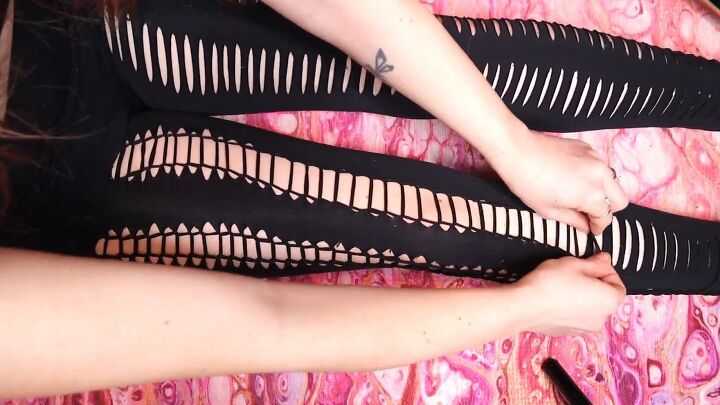
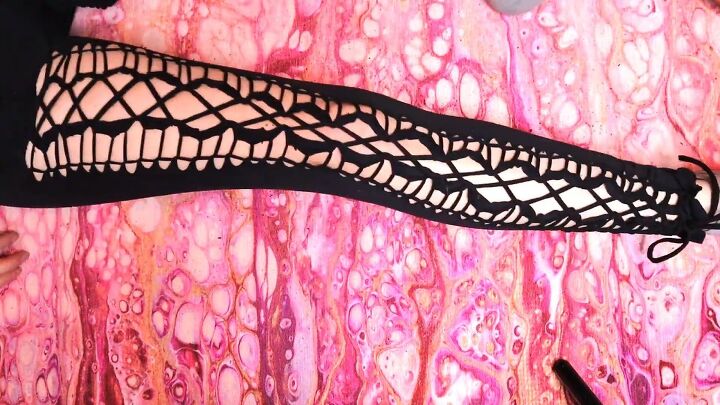
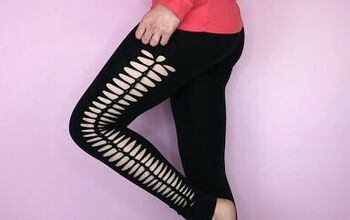
Here are the finished woven leggings!
Design 2: Circle weave leggings

1. Mark how high you want the design to go
Put your leggings on inside out and mark how high you want the design to go in the center.
Lay them down flat and draw lines down the center.

2. Draw four additional parallel lines
Draw another line parallel ½-inch away on either side, so you have three lines running down the center of the leggings.

Draw one more line on both sides 1-inch away.
3. Draw horizontal lines to connect the outer lines
Draw horizontal lines ½-inch apart across the 1-inch wide sections.
4. Cut along the horizontal lines
Cut along the horizontal lines only inside the inch-wide sections.
5. Measure the vertical cuts
Mark 3-inches down the center line from the top, and then a ½-inch down. Repeat this to the bottom.
6. Cut
Cut the 3-inch sections along the center line.

7. Repeat
Repeat the previous steps on the other leg.
8. Cut a small hole and ladder weave down the leggings
Put your leggings on inside-in and cut a tiny hole just above each column of strips, then ladder weave down.
Cut and tie the bottom loop, then repeat on the other column and leg.
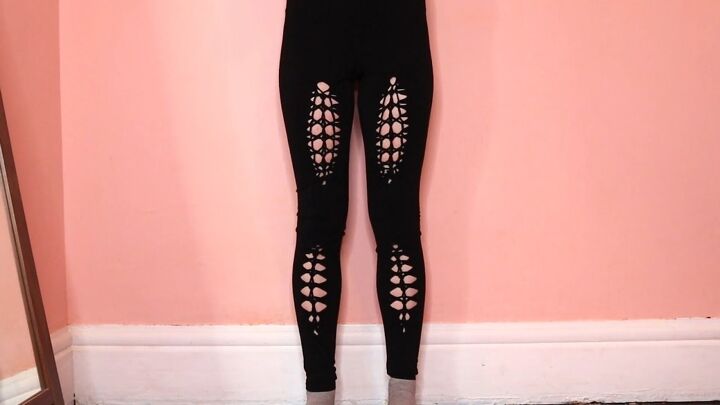
Here are the finished woven leggings!
Design 3: Lace up weave leggings
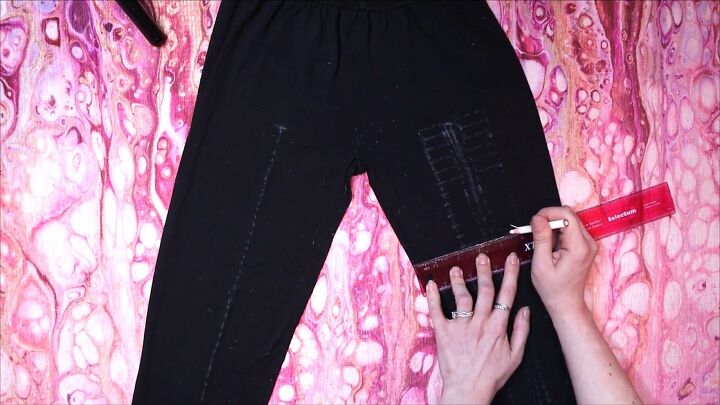
1. Mark the cutting lines
Put your leggings on inside out and mark the center of the legs and how high you want the design.
Lay them down, and make the same lines in the previous design.
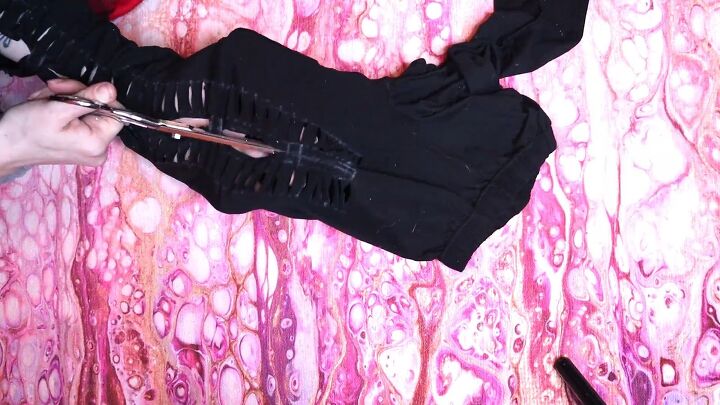
2. Cut the horizontal marks
Cut inside the 1-inch wide sections, dividing them into ½ inch strips.
Also cut a small hole at the top of each inch-wide section.
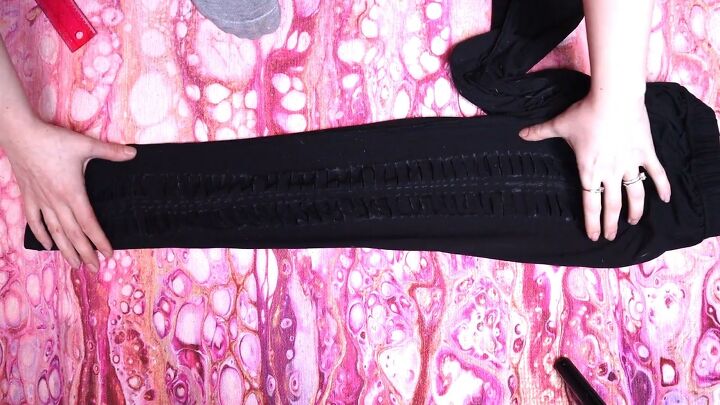
3. Stretch
Stretch the legs sideways.
4. Ladder weave each column
Put the leggings on right-side out and ladder weave down each row. Cut and tie the bottom loop.
5. Cut along the centerline
Take your leggings off and turn them inside out. Cut up along the center line to the top mark.
6. Lace up your leggings
Put your leggings on the right-side out and measure out laces four times the length of your leg.
You can use ribbon or shoelaces, or you can reference the video to see how I made mine out of a t-shirt.
To lace, start at the top and put one end through each top hole.

Cross the laces and put them through the third or fourth hole down.
Continue lacing through every third or fourth hole like a pair of shoes down. Tie the laces in a bow at the bottom.

Here are the finished woven leggings!
DIY woven leggings
I hope you enjoyed this woven leggings tutorial. Let me know which is your favorite down below.
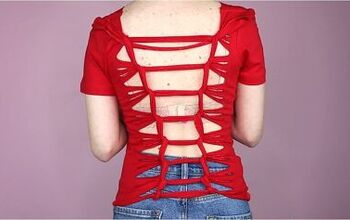
Check out my T-shirt Weaving Tutorial: Create a Cute Dragonfly and Butterfly Top.
The author may collect a small share of sales from the links on this page.


Comments
Join the conversation
Your very skilled and have a good eye for detail..I can only imagine what monstrous outcome in my attempt to do this ..