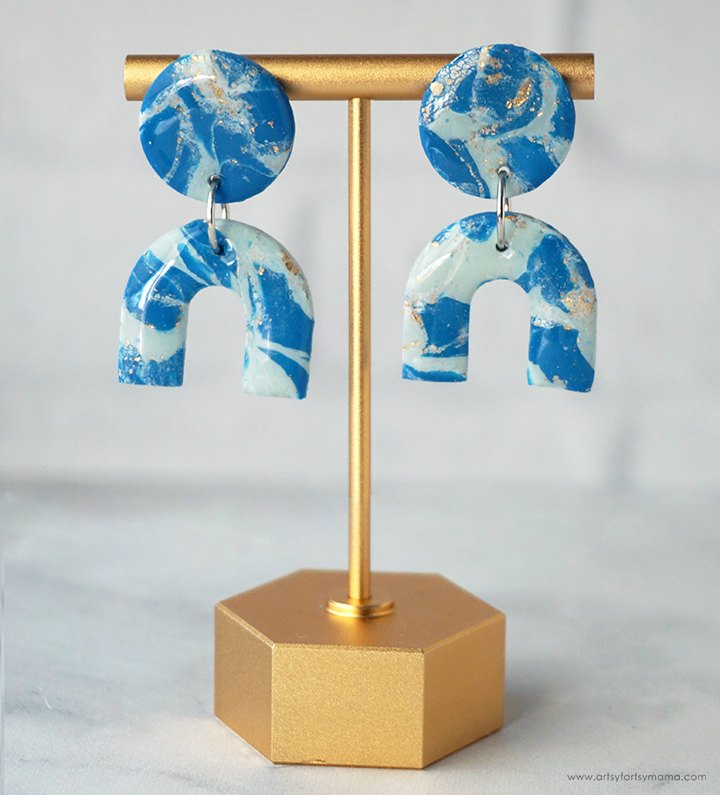
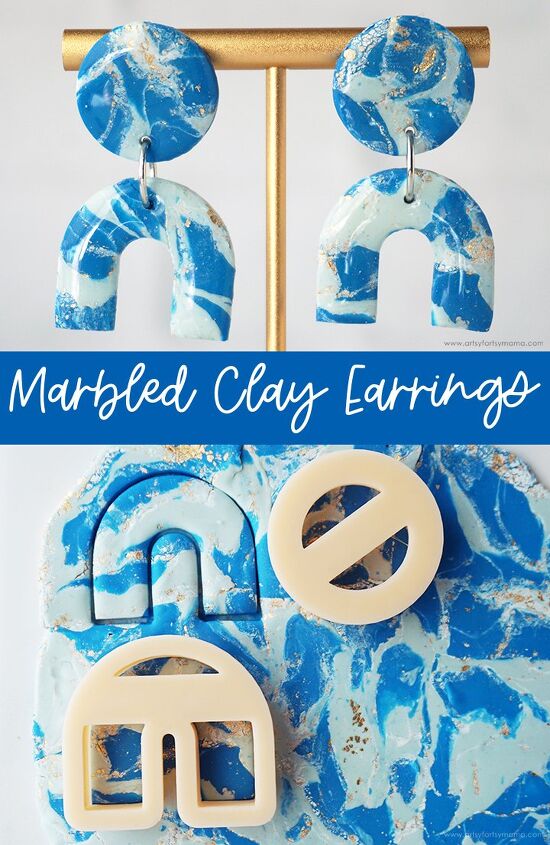
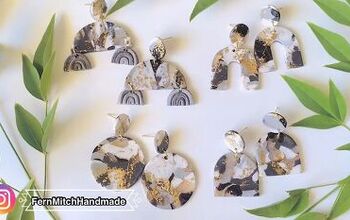
Marbled Polymer Clay Earrings
Create a stunning set of earrings with swirls of blue polymer clay and specks of gold foil!
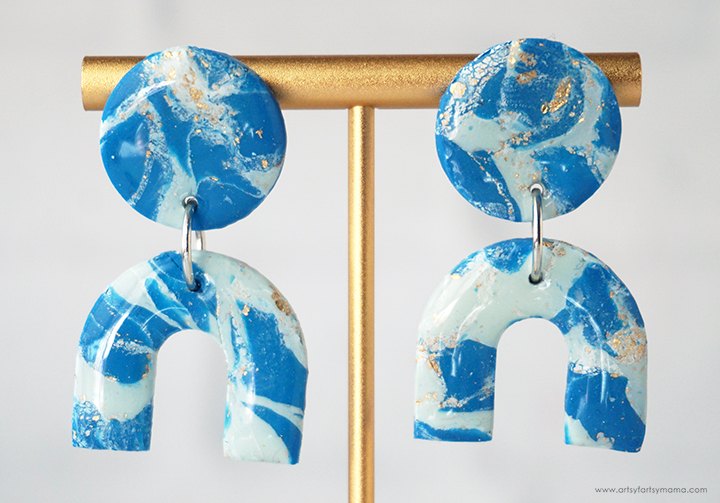
There are so many things you can make using polymer clay, and jewelry is one of my favorites. The marbling technique to make these Marbled Polymer Clay Earrings is one I've been wanting to try for a long time, and I finally did it! It's so much easier than I thought it would be, and crafters of any skill level can create a pair of custom earrings in no time. I love how chic the earrings turned out, and think they would make a great gift or product to sell in your small business.
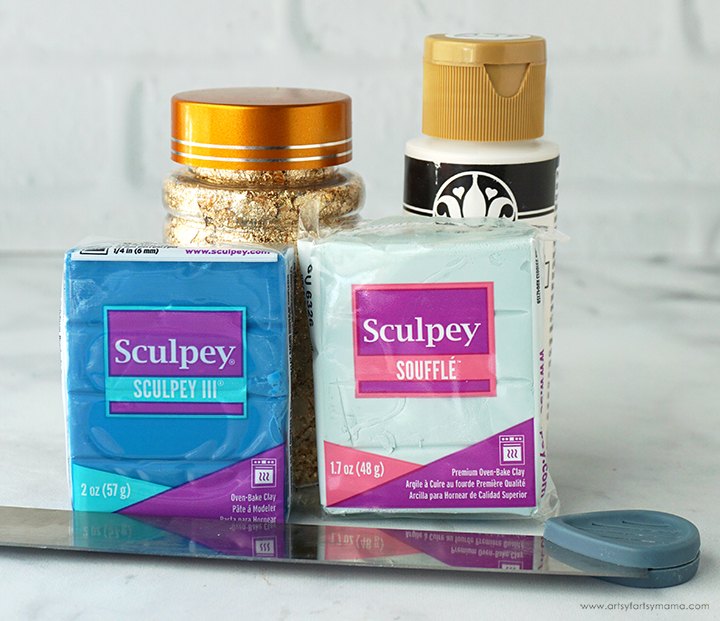
To make your own set of Marbled Polymer Clay Earrings, you will need these supplies:
- Sculpey Polymer Clay - light blue, dark blue
- Ceramic Tile or Oven-Safe Work Mat
- Clay Slicer Tool
- Acrylic Paint
- Disposable Gloves or Zipper Storage Bag (optional)
- Gold Foil Flakes
- Clay Roller
- 2 Craft Sticks
- Clay Cutters
- Hand Drill Tool
- Gloss Glaze or UV Resin
- Toothpick
- Jewelry Pliers
- 2 Jump Rings
- 2 Earring Posts
- Strong Adhesive
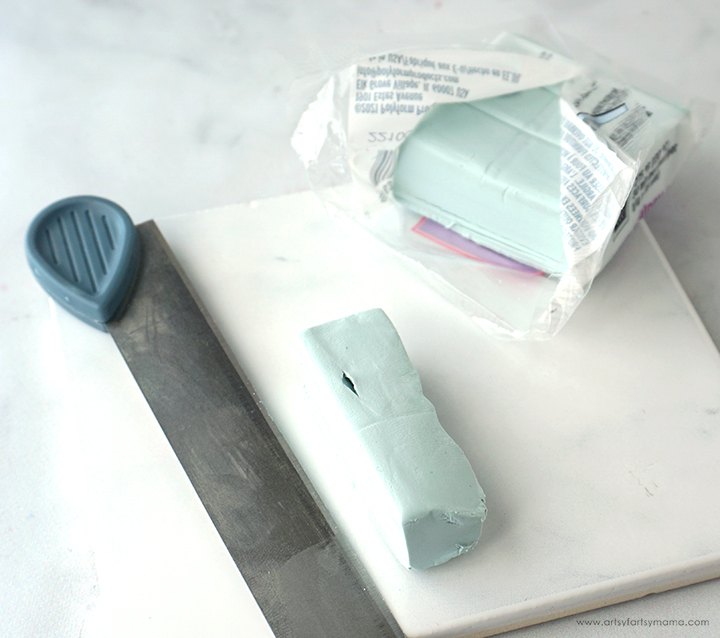
Cut off the top section of light blue polymer clay (this is Sculpey Soufflé in Glacier) and knead it well until it is a smooth, pliable texture. Shape it back into a rectangle brick.

Use the slicer tool to carefully cut the clay into small pieces. Be careful - that blade is very sharp!! The pieces don't have to be perfectly even in size. For odd-shaped pieces, roll them into little balls with your fingers.

Cut another section of a darker blue polymer clay (this is Sculpey III in Blue). Knead it and and slice into small pieces with the slicer tool, just like with the lighter blue clay.
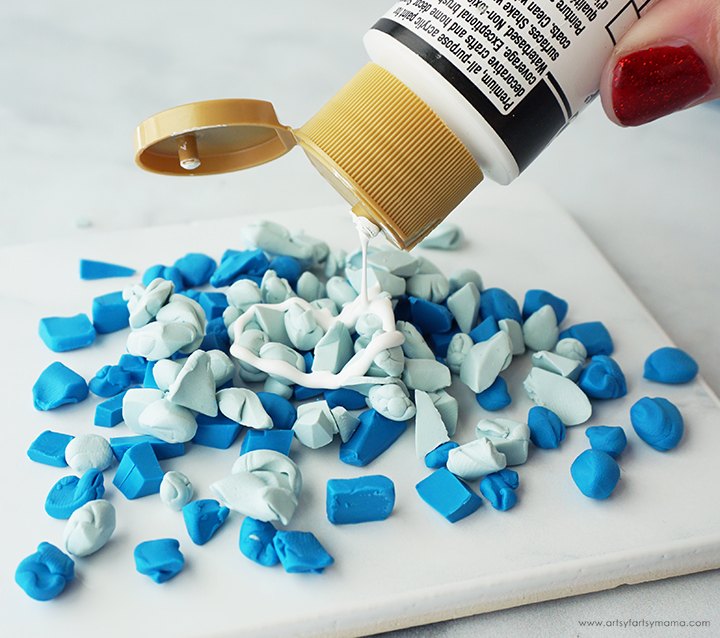
Pour all of the clay pieces together on your workspace, but don't press them together. At this point, you have two options: keep the clay on the tile or baking mat, or put the clay pieces into a sandwich-sized zipper storage bag. Pour some white acrylic paint over the clay.
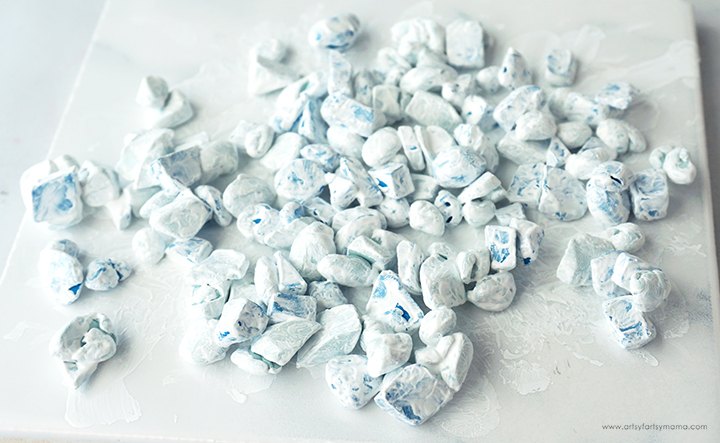
If using your workspace, I'd recommend putting on disposable gloves. Get your hands in there and get all of the clay coated in paint. Add more, if necessary. If the clay is in a bag, gently move the clay pieces around until completely coated.
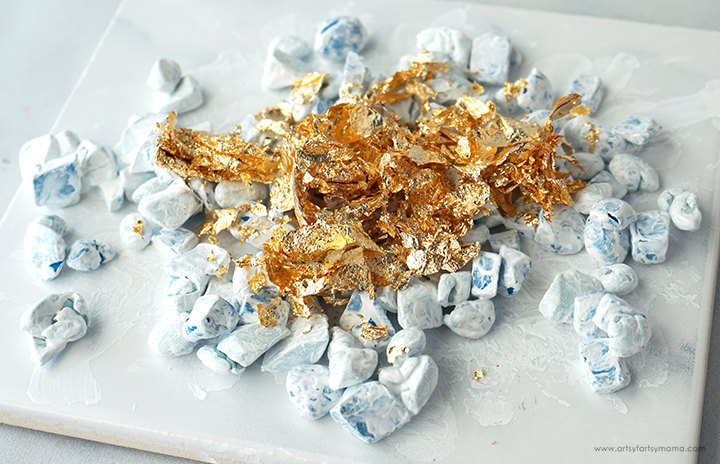
While the paint is still wet, sprinkle a generous amount of gold foil flakes over the clay. Mix the pieces around again (by hand, or in the bag) to disperse the flakes through the clay.
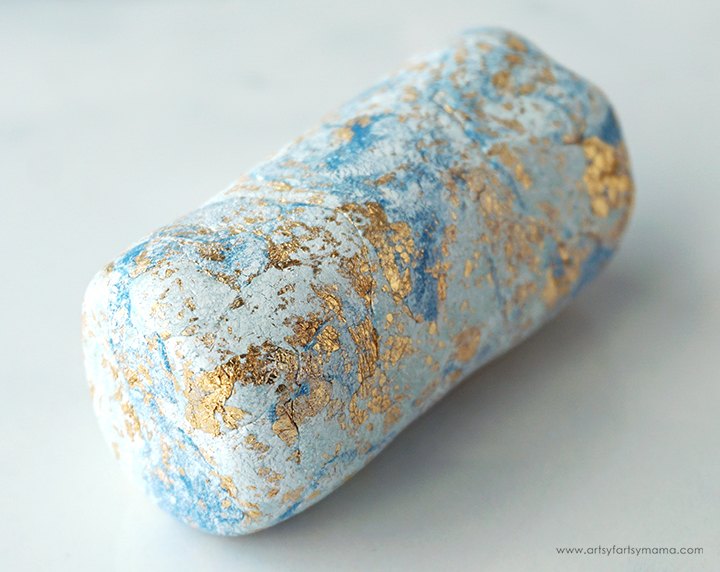
Grab all of the clay pieces in one hand, and form them into a log, or "cane". Make sure to push the pieces together tightly so that it all becomes one solid piece.
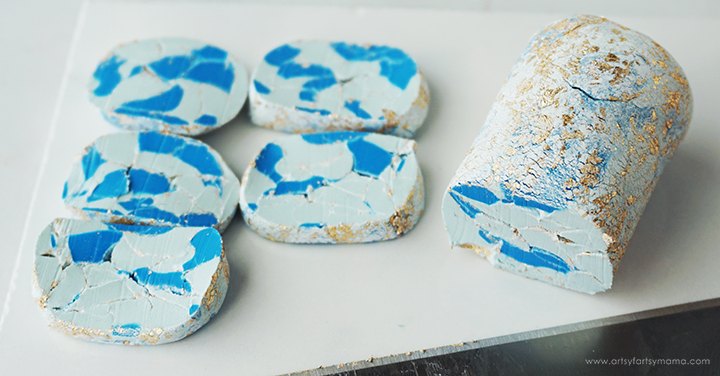
Slice the entire cane into pieces, trying to keep them as even as possible. Arrange the slices on your tile or baking mat so that they are as close together as you can - you can even overlap the edges a little.
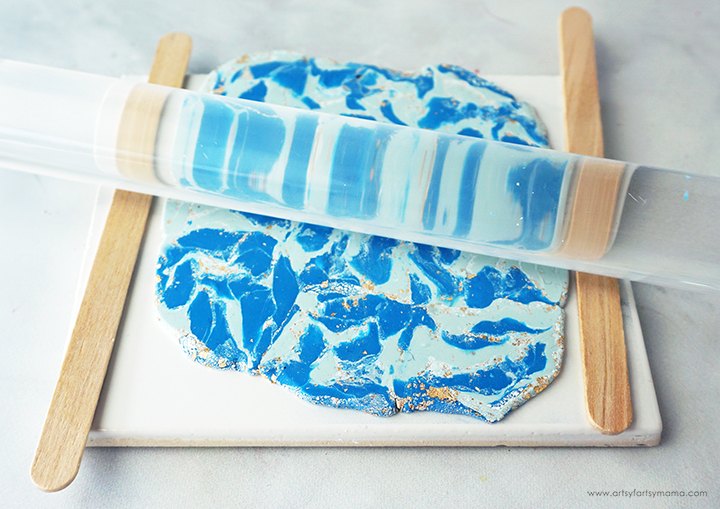
Lay two craft sticks down, parallel on either side of the clay slices. Use the roller to flatten the clay. Having the sticks placed on the sides of the clay will help to flatten the "slab" to an even thickness.

To cut out the earring shapes, I recommend using cutters. You could also freehand with a craft knife. Place the cutter over the clay and gently press it straight down. Pull the cutter straight up. If the clay stays down, leave it there. If it comes up with the cutter, be careful how you remove it. Poking through the top to push the clay out will leave dents or holes in your work. If necessary, you can re-roll the clay and start over.
Here's a few tricks & tips for cutting clay that have worked for me:
- Place a piece of plastic wrap over the clay first, and then cut the clay.
- Your clay or workspace might be too warm. Put the clay in the fridge or freezer to cool it down before cutting.
- This one is a bit strange, but you can put your mouth over the cutter and blow to set the clay free.
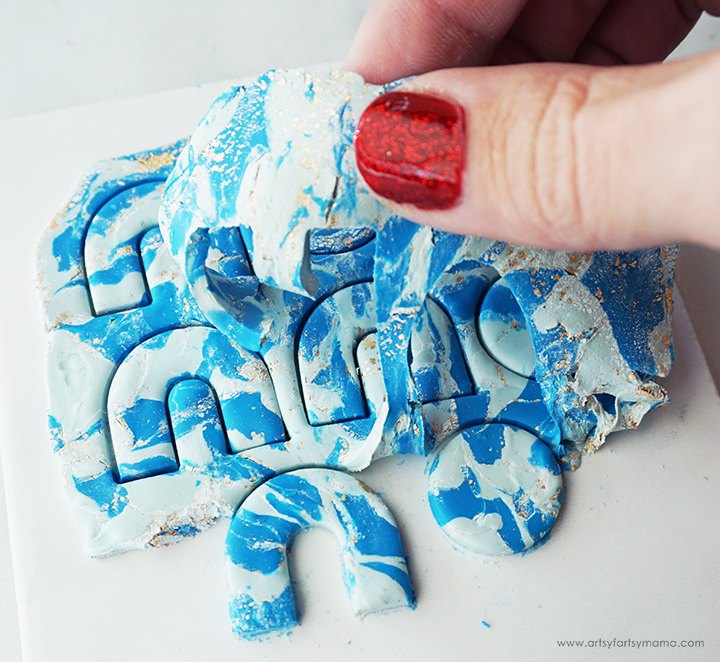
Carefully peel away the excess clay and leave the earring pieces in place. It's ok if the edges of the earrings look a little rough. Just make sure to remove all of the excess.
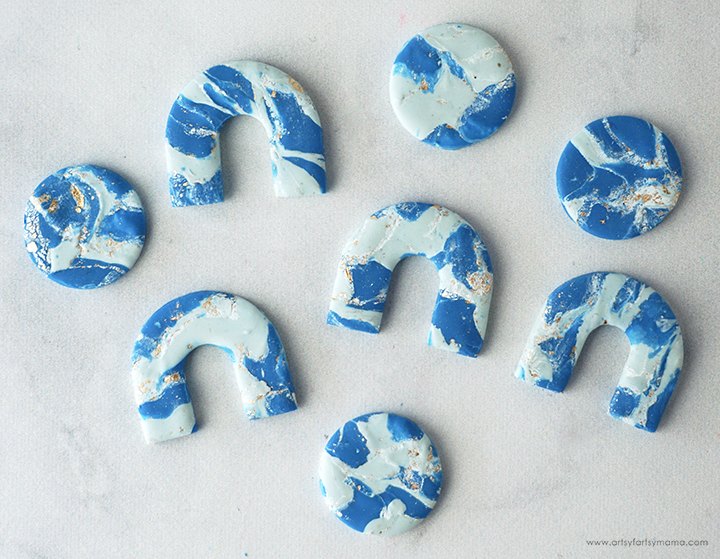
Preheat your oven and bake the earring pieces. Most polymer clays are usually baked at 275º for 15 minutes per quarter inch thickness, but refer to your specific clay packaging directions to make sure. Once baked, let the pieces cool completely before handling.
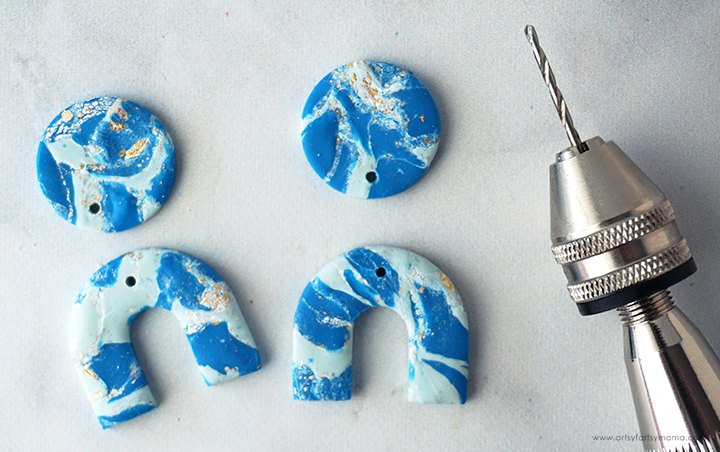
Use a fine sandpaper to clean up the edges of the earring pieces. To make holes in the earrings to connect them, I used a hand drill tool. Another option would be to put the holes in the pieces before baking. Be careful not to drill too close to the edges, and if your earring breaks apart (I had one that did), you can put it back together with strong adhesive.
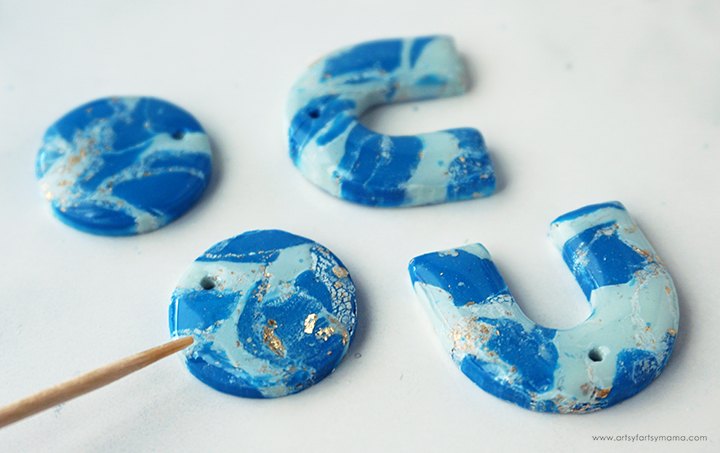
To give the earrings a shiny and professional finish, apply a coat of gloss glaze or UV Resin to the surface with a toothpick.
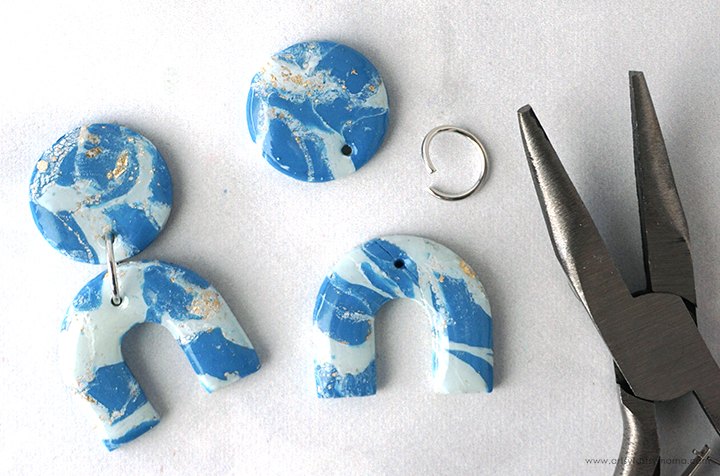
Use pliers to open a 10-12mm jump rings and hook it through the holes in the earring sets. Close the jump rings with the pliers.
Making jewelry out of polymer clay is a lot of fun, and so easy! There are so many ways to customize these earrings to fit your style with shapes, colors, and sizes. If you ever make some Marbled Polymer Clay Earrings or any other clay crafts, I would love to see them! Leave me a comment, or tag a photo on Facebook, Twitter, or Instagram!
The author may collect a small share of sales from the links on this page.


Comments
Join the conversation