Metal Stamping – Make Recycled Jewelry – Stamp Engraving for Begin
I’m a total beginner at metal stamping, but it was fun to give it a try, and I was super excited that I could use my tin can earring blanks for practice. So today, I will share with you how I stamp engraved some of those earring blanks. If you missed the first video, you can learn how to make jewelry from tin cans in this video tutorial. So don’t worry if you’re just learning. Let’s do some metal stamping for beginners.
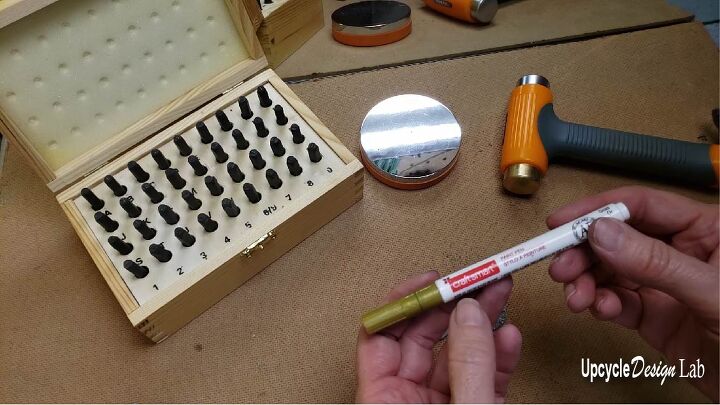
Here are the materials you will need for this project.
Advertising Disclosure: Upcycle Design Lab may be compensated in exchange for featured placement of certain sponsored products and services or your clicking on links posted on this website.
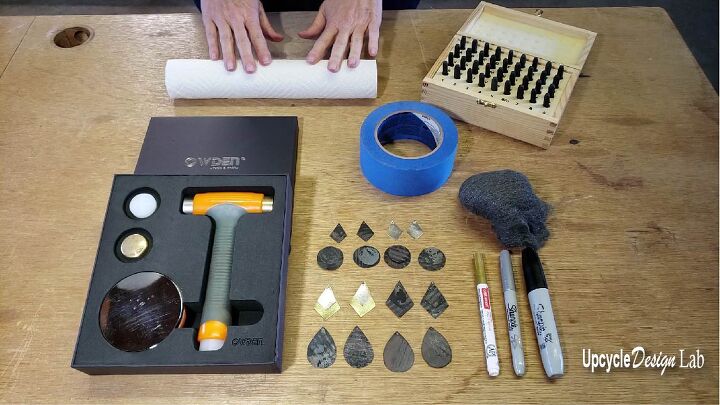
- Letter engraving stamps
- Metal stamp hammer
- Steel bench block
- Painter’s tape
- Gold metallic paint pen
- Steel wool
- Tin can jewelry blanks ( see tutorial for how to make your own from emtpy tin can)
- Black sharpie
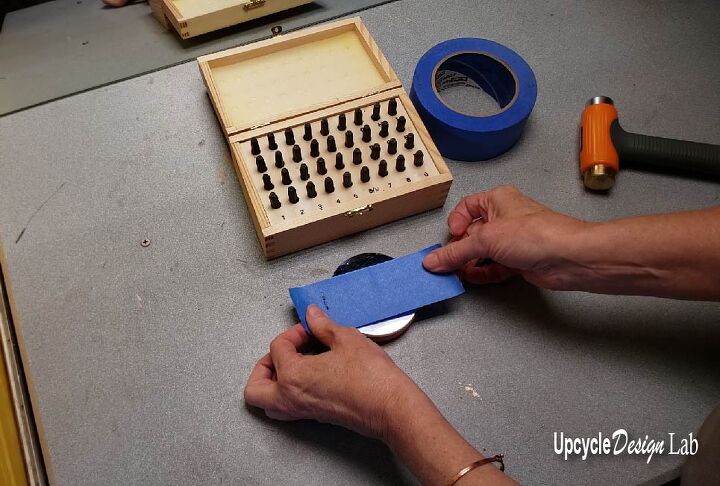
I already admitted to being a total beginner here, so I don’t know if you are supposed to do this or not, but the first couple of times that I used the bench block, it got scuffed up. I saw someone else do this, so I decided to protect my block with a couple of layers of painter’s tape. The painter’s tape is also helpful for lining up your lettering on horizontal lettering. You could use it for vertical type as well, but I just did the eyeball method. Yes, it did show in some cases. 🙃
Another reason to protect the bench block for this project is that the “tin can jewelry blanks” are very thin, so I assume they are more likely to damage it than craft jewelry blanks.
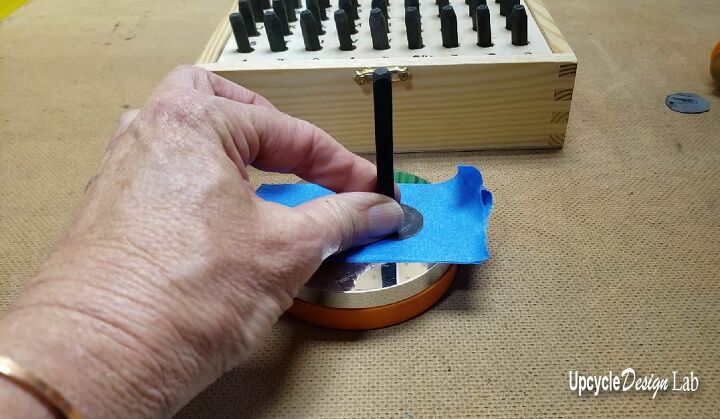
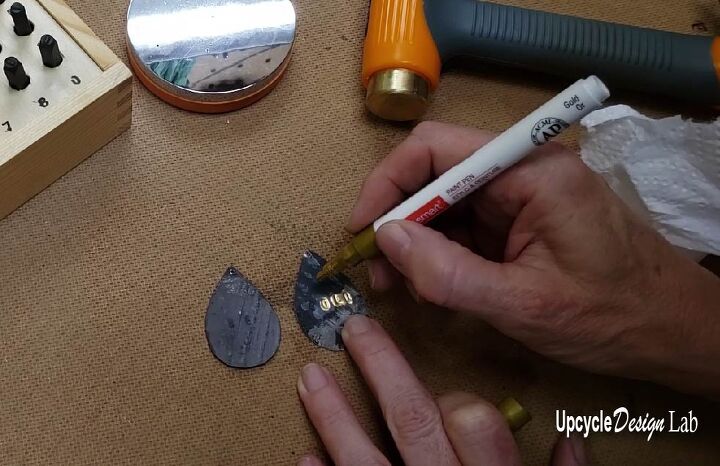
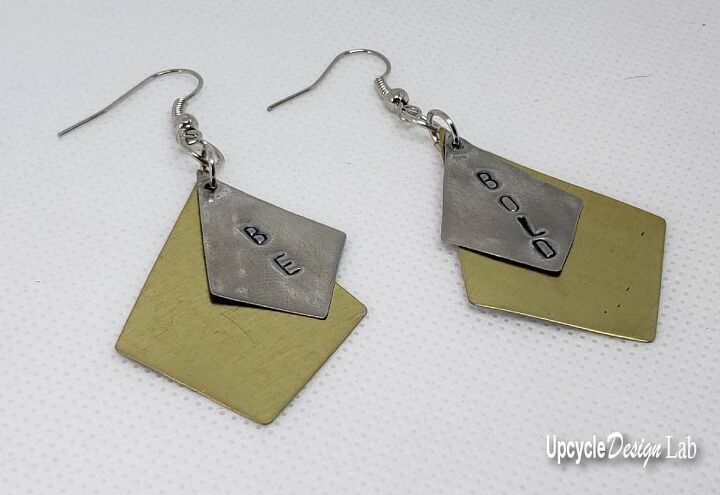
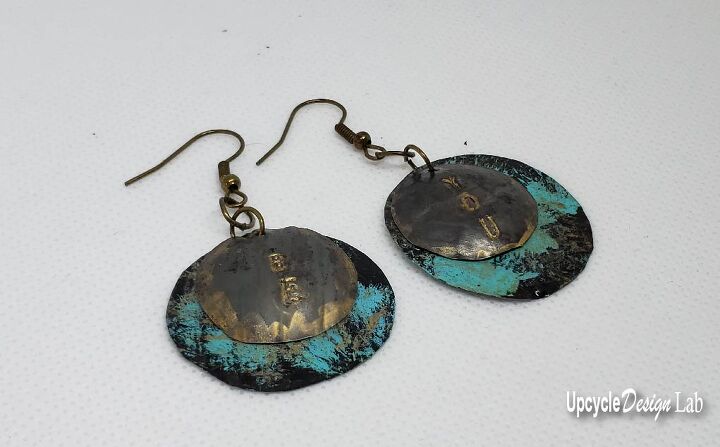
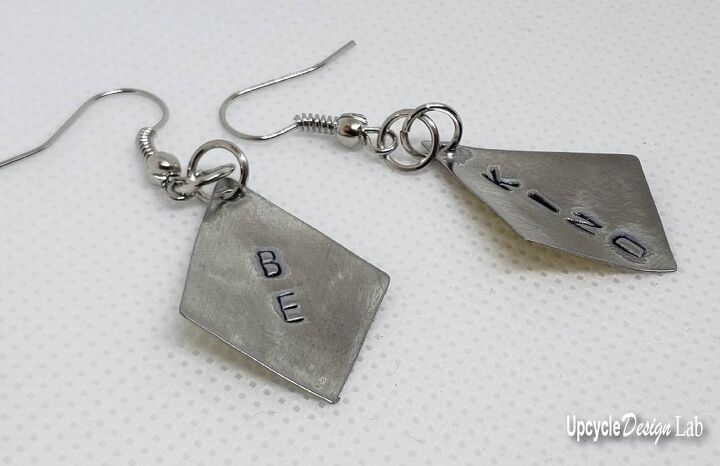
After stamping a few times, I got pretty comfortable lining up each letter stamp. And then, while holding the stamp at the bottom, I used the stamp hammer to make the engraving. In most cases, I just needed to strike the stamp one time with the hammer. However, I did find that I was a little inconsistent with the amount of force that I used each time, so there were occasions when I needed to do a second strike.
They make special stamp markers for engraving, but I was trying to use what I already had, so I found this gold paint pen and used it to highlight my engraving on the darker rusted earring blanks. I also had some jewelry blanks made from unrusted tin cans, and for those, I used a sharpie to highlight the engraving. The sharpie ink was a little challenging to get down in the engraved areas, but it did work with a bit of extra pressure.
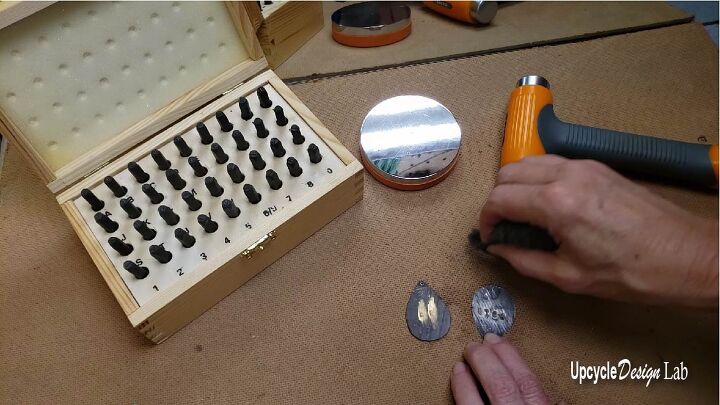
Both the sharpie and the paint pen leave excess paint and ink on the piece, and neither of these things wipes off the tin can material. But with some steel wool and a little bit of elbow grease, the excess paint/ink can be removed.
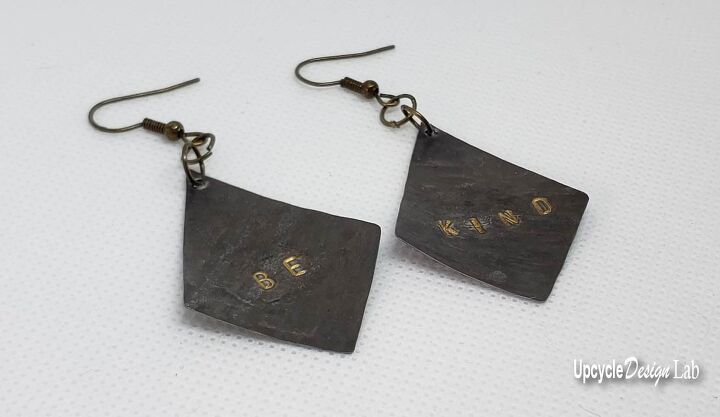
The final step is to add your jewelry findings. I used antique-colored earring hooks and jump rings for my rusty pairs and silver for the non-rusted earrings.
Thanks for spending a little of your time checking out my project. I hope you enjoyed this quick tutorial, metal stamping for beginners.
Be sure to subscribe so you don’t miss the next upcycling experiment.
Happy Upcycling,
Cindy
Advertising Disclosure: Upcycle Design Lab may be compensated in exchange for featured placement of certain sponsored products and services or your clicking on links posted on this website.
The author may collect a small share of sales from the links on this page.


Comments
Join the conversation