My Amazing Waterfall Braid Tutorial

This half-up waterfall braid will make you look polished and pull your look together. All you need is 1 bobby pin!
Follow along with this simple, step-by-step tutorial to learn how to achieve this look yourself.
Tools and materials:
- 1 bobby pin
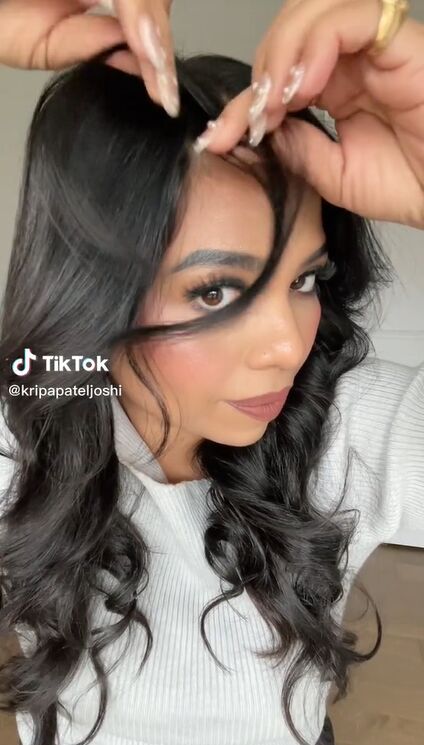
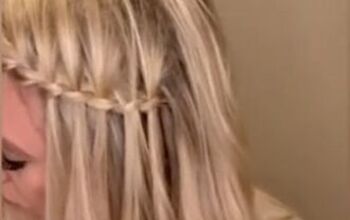
1. Twist 2 sections
Take 2 thin, equal sections of hair, right where your part begins. Hold them at the roots and twist the 2nd, farther piece under the 1st piece.
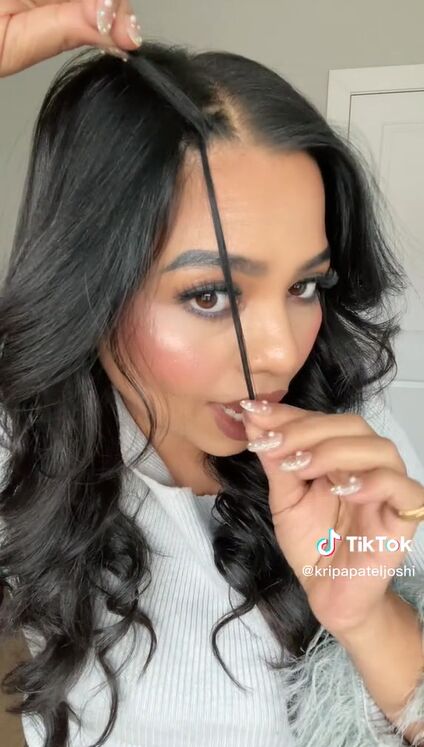
2. Hold
Then pull the 1st piece toward your face and hold the end in your mouth. Continue holding the other piece in your hand.
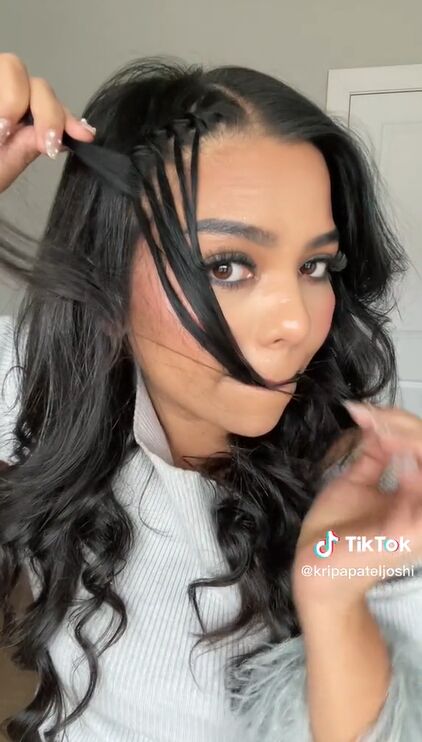
3. Make another twist
Now, grab another equal section of hair, further down the side of your hairline.
Twist the new piece with the piece that you are holding from the previous step.
Twist them just like you did before, holding the bottom piece in place with your mouth.

4. Repeat
Continue separating small, equal sections of hair at your hairline, twisting and holding them as in the previous steps.
Do this until you reach the top of your ear.
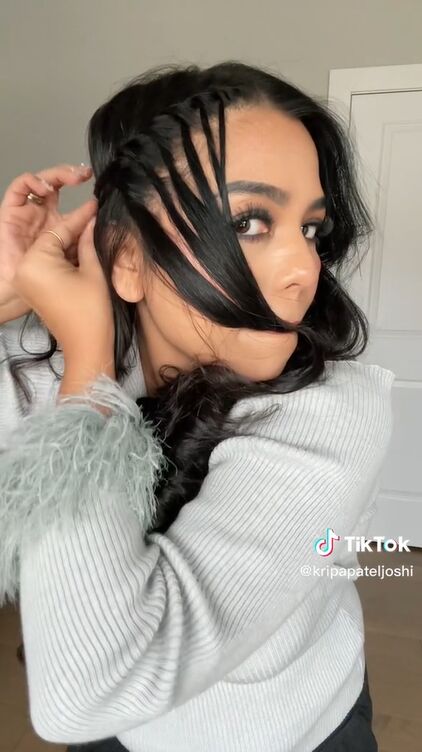
Then pin the last bunch of hair (that you are holding up with your hand) behind your ear with a bobby pin or a flat clip.
Let the strands of hair that you’ve been holding in your mouth spill, like a waterfall!
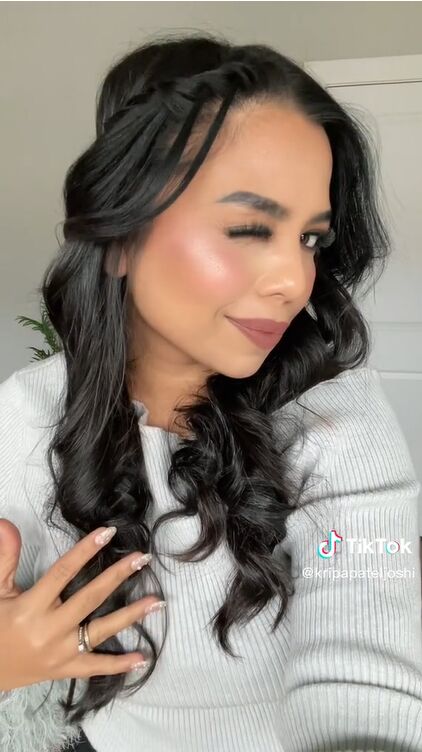
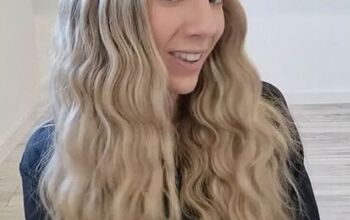
Half-up waterfall braid
That’s all there is to this half-up waterfall braid! Try it out when you have 2 minutes to spare and you’ll see how easy it is to achieve this hairstyle.
For one more easy hairstyle that looks elegant and only requires 1 item, check out this fishtail braid hack.
Follow me on Instagram: @kripapateljoshi_official
Follow me on TikTok: @kripapateljoshi
The author may collect a small share of sales from the links on this page.


Comments
Join the conversation
Very pretty!