Toothpick Nail Art for Beginners

If you are the type of person that would save some hard-earned paper by making coffee at home instead of running to Starbucks every morning, then this tutorial is just for you! Save your time and money by learning how to use a basic item found in the home to create gorgeous nail art. You will learn how to make five easy nail art designs using a toothpick as a dotting tool to create pretty much any design. It hardly takes up any time, and even beginners can do these designs easily.
For all of the designs, I’ve started off with an aqua blue base color. You don’t have to go with the exact same color, but you’ll want something in a light shade. I recommend that you apply the base color to your nails and let it dry for 10 to 15 minutes before you dig in with the nail art tools. Also, all of these designs are made using a toothpick. If a toothpick is hard to find though, you can opt for any other pointed object like a bobby pin, paper clip, etc.
Tools and materials:
- Toothpicks
- Nail polish
Uneven Lines
Take a toothpick and create a big dot on the side of the nail, along with smaller dots right next to it. As you move on, vary the position of the big dot in order to create a variety of lines.
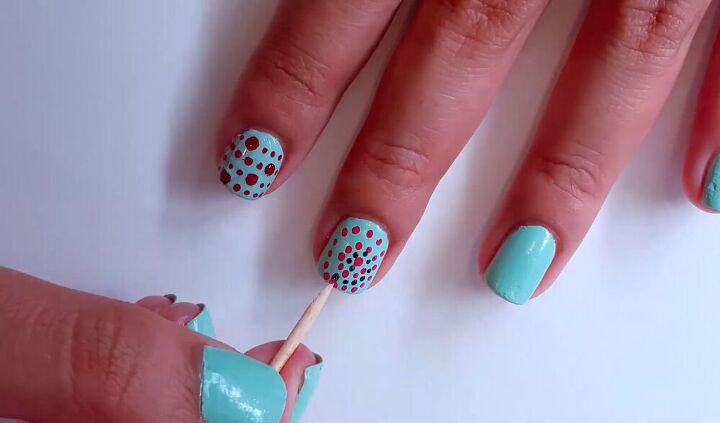
Dual Spiral
For the second design, we will start off with a dot at the center of the nail and move outwards in a spiral pattern. Leave enough space to fill in the gaps with a different color. You can customize this look by using multiple colors and different sizes of dots.
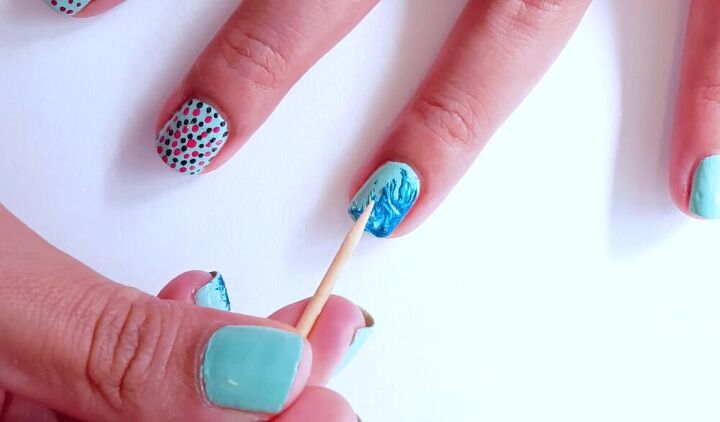
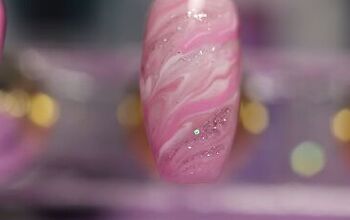
Marble Texture
For the third design, we will create a gradient marble effect. Start off with a blob of base color paint and a blob of accent color on the tip of your nail. Now drag the accent color towards the center of your nail and then start dragging the base color towards the tip of your nail to blend it all in. Create a gradient effect and stop when you feel that the design looks right.
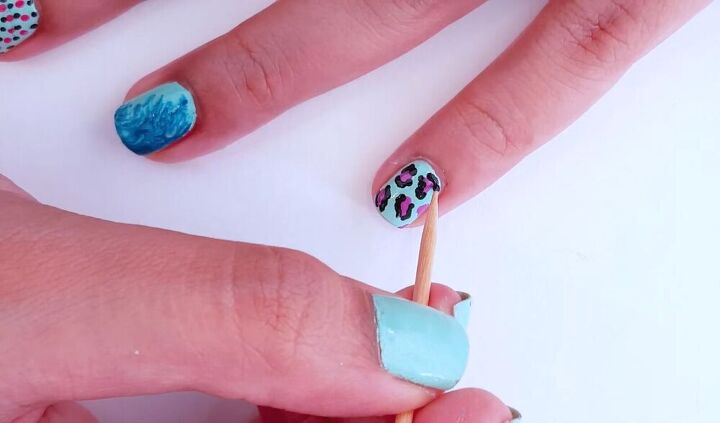
Leopard Print
For the next look, we will create a leopard print design. This personally is my favorite design from the tutorial. Create abstract dots all over the nail with pink nail polish and then, using black nail polish, create a bracket around them. Make additional black dots in order to fill in all the empty space and bring the look together.
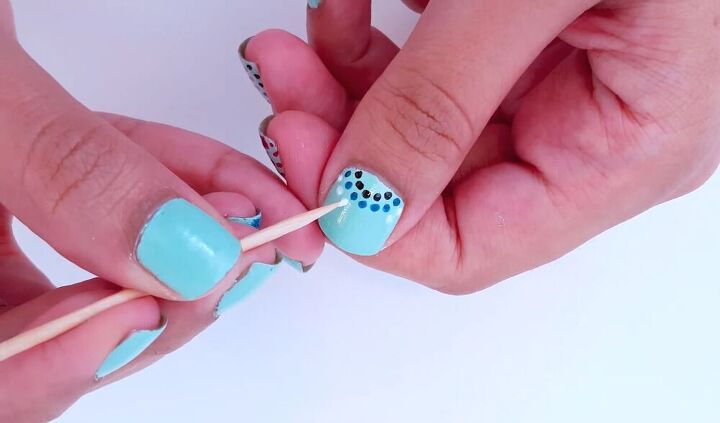
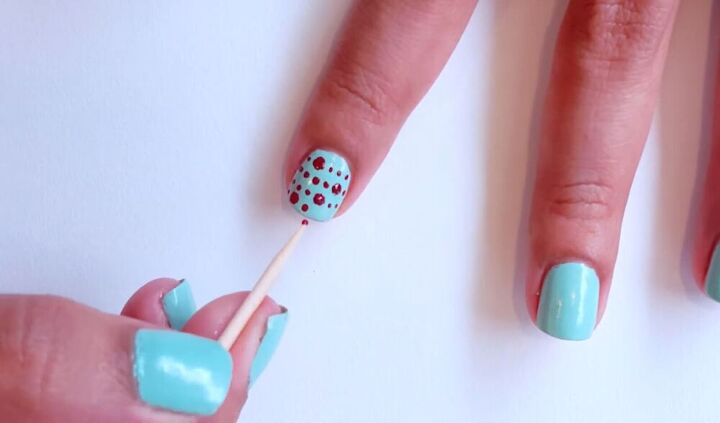
Dotted Necklace
For our last design, we will create a dotted nail art necklace. Start off with two dots on the side of the nails to mark the beginning and the end of the necklace. Now make a dot in the center and fill the gaps in with two more dots. For the second line, create the endpoints and fill the other dots. For the last line, follow the same procedure. You can add as many lines as you want to, but I stopped at three for my design.
The last step is to seal all of your designs with a good consistency of clear nail polish in order to give them a nice shiny gloss.
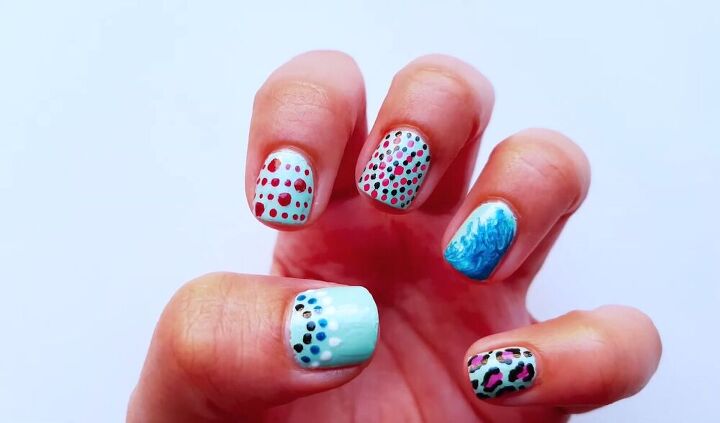
Here are the five different designs! They’re so fun and are guaranteed to put a smile on your face. I love each and every one of them. Go with whatever colors you like and enjoy making the designs!
The author may collect a small share of sales from the links on this page.


Comments
Join the conversation
I absolutely love this I actually do my own nails usually but I absolutely will definitely try your designs I love them
Very cute!