Octocurl No-Heat Curlers Look Ridiculous, But They Give Great Results

Everyone’s talking about the Octocurl no-heat curlers! So, I decided to see what the fuss is all about! Any method that doesn’t require heat is really awesome, so giving this DIY Octocurl a try is totally worth the time and effort to see if it really achieves heatless curls.
I’m so excited to show you this process, and of course, the results! Let’s jump right into this Octocurl tutorial.
Tools and materials:
1. Place the Octocurl on your head
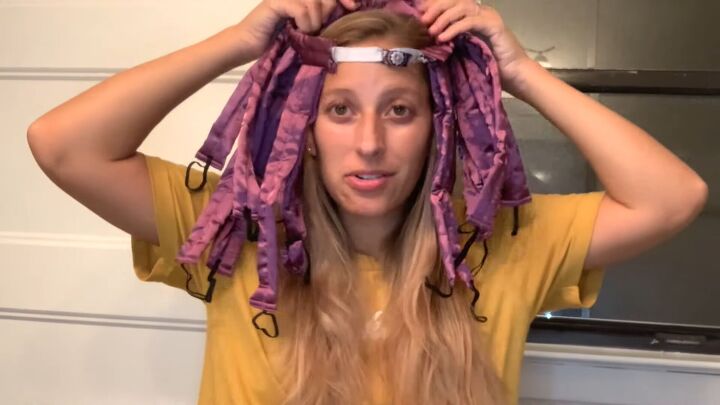
First thing’s first, place the gadget around your head, as shown. Yes, it looks weird.
You can make it tighter or looser by playing around with the strap at the back. It needs to sit comfortably on your head, not too tight either, as this is a heatless curls overnight process.
2. Start curling your hair
My hair has been washed, and it’s somewhat dry but still damp. Now, we're ready to start curling, but there are three different methods you can use. I'm going to demonstrate all three, so you can see the results and figure out which will work best for your hair.
Wrapping technique
Take a section and wrap your hair around each silk tube.
When you get to the end of your hair, tie the elastic that’s placed at the end of the silk tube around your ends, as shown.
Criss-cross technique
You could also try a different wrapping technique with a criss-cross around the silk strap. Divide a section of your hair into two smaller sections, and criss-cross it over and under the tube.
Coil technique
This is another awesome method of wrapping your hair, especially if you want tighter curls. Wrap a section of your hair tightly around one strap, and then wrap it into a bun after.
Secure the bun with the elastic from the end.
So, for me, it took around 12 minutes to wrap each section of hair around the silk tubes. If you have thicker or longer hair, it may take you longer. But this is what it should look like in the end! Now, it’s time to go to bed and let the DIY Octocurl work its magic.
(Check out the little lizard making a cameo in the background!)
5. Unravel your hair
Ok, it’s morning and time to take out the gadget, unravel my hair, and see the Octocurl before and after effect!
Here’s the first piece, which I creating with the simple wrapping technique.
This is how the coil turned out, and I like it!
This is what it looks like before it’s fluffed out; I like the result. It definitely curled my hair!
Here are the Octocurl results from the back.
DIY Octocurl no-heat curlers tutorial
Ok, here’s the final look! Be sure to run your fingers through your hair to loosen the curls.
I love how these heatless curls came out, though I prefer having more curls closer to my roots; that’s why I feel the right side of my head looks better since the curls start higher than the left side.
All in all, the Octocurl no-heat curlers worked great, maybe a little uncomfortable to sleep in, but it did a great job!
Enjoyed the project?
Suggested materials:
- Octocurl no-heat curlers
The author may collect a small share of sales from the links on this page.







Comments
Join the conversation
Everything old is new again, they were called rag curls when my mom did them, then again in the 60’s I used this method….would use your new gadget as it looks more efficient, if I were younger…:)
rip up an old towel into strips and you can wrap to the scalp and get the full length curls... for just a loose waves look divide hair into 4 sections... tighter curls more sections.