Thrift Flip Tutorial: Easy Method to Lower the Waistband on Pants

Today, I want to show you a quick and easy hack to lower the waistband on pants.
You might be thrift flipping a pair you’ve bought that are too high waisted, or making a pair you already own more on trend.
I’m modifying a pair of knitted pants with a very long crotch into a pair of low-rise pants.
You don’t even need a sewing machine for this, you can do the whole thing by hand.
Tools and materials:
- High-waisted pants
- Pins
- Scissors
- Sewing machine or hand sewing needle and thread
- Serger (optional)
- Regular or steam iron

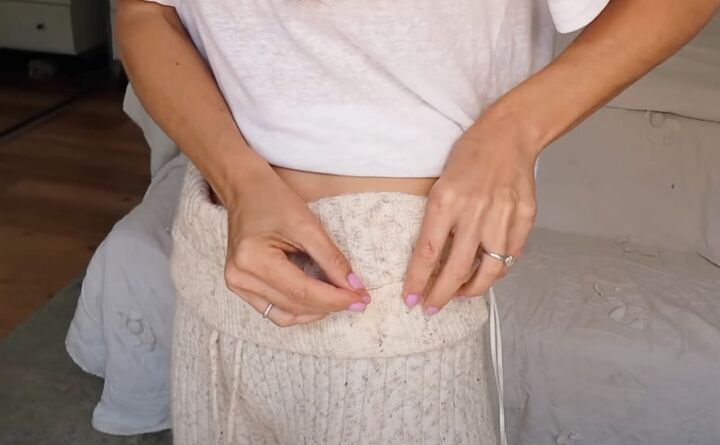
1. Try on the pants
Wear the pants with the crotch where it looks best and feels most comfortable.

Fold the waistband over to the outside until the horizontal waistband seam is in the position you want.
I placed mine just below my hip bone.
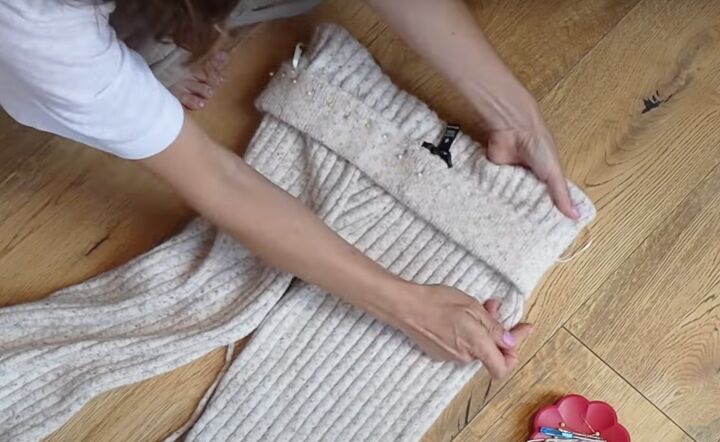
2. Pin the waistband
Pin the waistband in place around your body. Place the pins horizontally to mimic the new stitching line.

Take the pants off and lay them flat.
Check that the waistband is level at the front and back of the pants.
Try the pants on again and make sure that the fit is right.
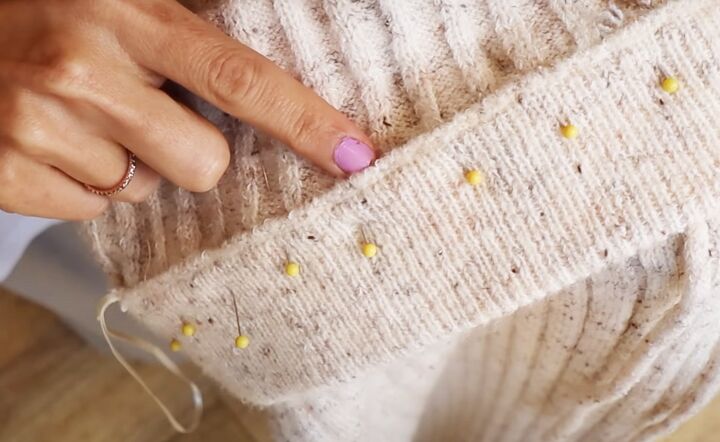
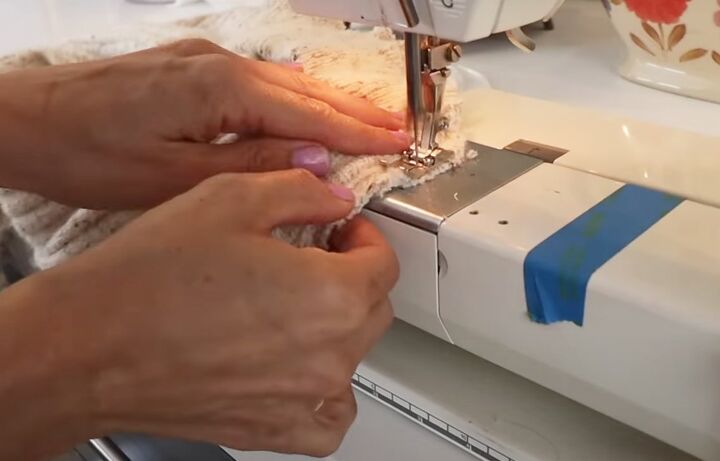
3. Sew the waistband
Re-pin the waistband so the pins are vertical. This will make it easier to sew over them in the correct stitching line.
Use more pins that you think you need, to help distribute the excess bulk evenly around the waist.
Sew the waistband in the ditch of the original seam or as close as you can get to it.
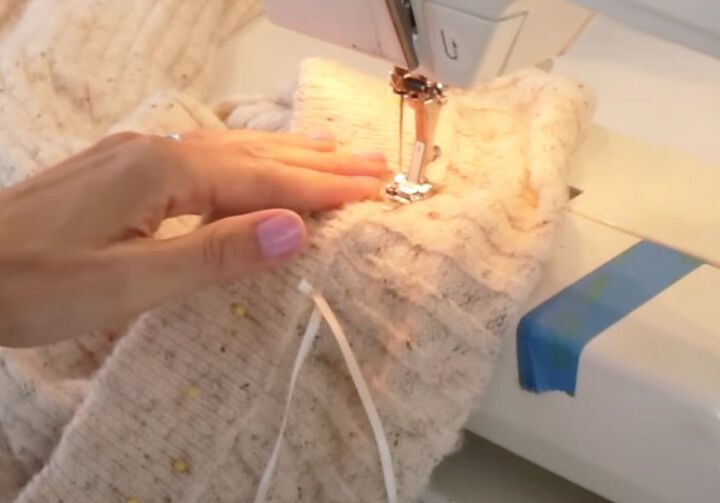
Use a straight stitch with a longer than usual length, especially if you’re working with a stretch fabric.
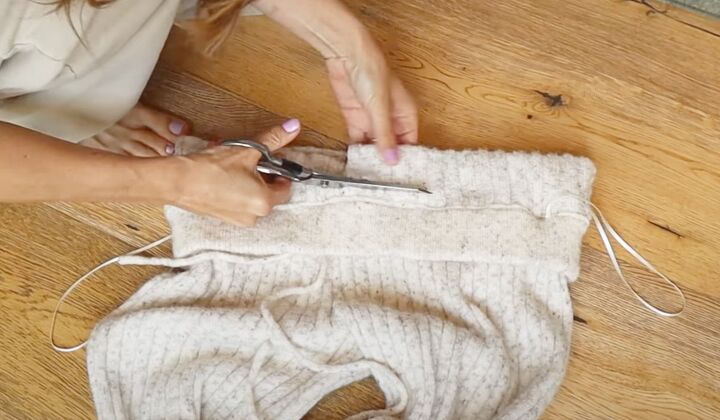
4. Cut off the excess
If you have a serger, use this to cut and finish the seam in one operation.
Otherwise, cut off the excess leaving a half inch seam allowance.
Finish the raw edges by sewing them together with a zigzag stitch, as close to your first stitch line as possible.
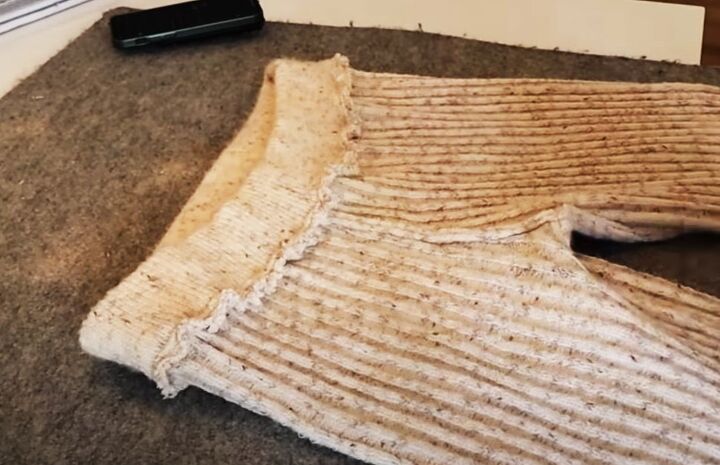
5. Steam the edges
On a knit fabric especially, the cut edge will be wavy and bulky after this operation.
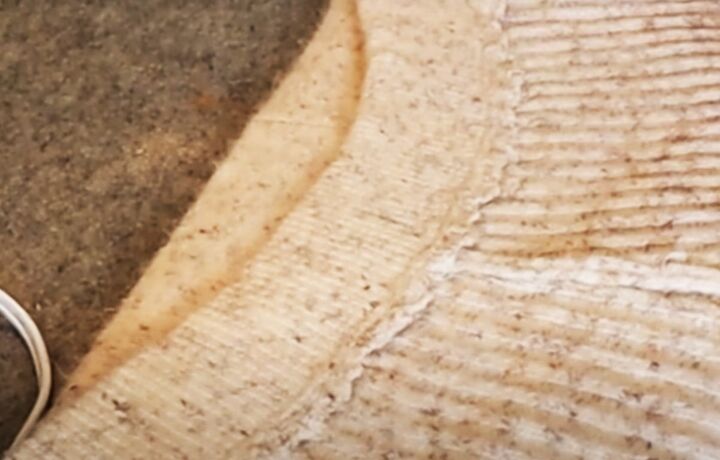
Using a damp cloth and an iron, or a steam iron, press the edge of the seam flat.
If necessary, trim the edges more closely to the zigzag stitches so they lie as flat as possible.


With this method, you can customize the waistband to exactly the height that suits your body.
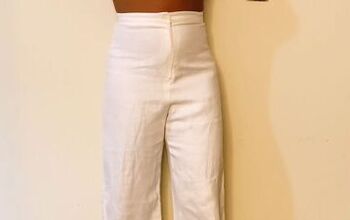
Thrift flipped pants
You can use the same technique to change the placement of other elements on a garment, such as the cuff of a jacket to shorten the sleeves, or the hem on a pair of jeans to retain the original bubble hem.
It’s a perfect way to thrift flip something that’s too long, without needing to disassemble it.
Where I definitely wouldn’t recommend using it is on the waistband of jeans because there’s way too much going on there structurally for this to work successfully.
Let me know what you think of this quick and easy hack in the comments, please.
Next, learn How to Upcycle a Pillowcase Into a Cute DIY Bucket Bag.
The author may collect a small share of sales from the links on this page.


Comments
Join the conversation
I love this idea. So useful in many, many different applications
In fact I love just about everything that Orly does even if it isn't something that fits my personal style.
Thank you for this info! I'm short waisted and have a hard time finding pants that fit right. You are frustration saver!