How to Sew a Pair of Chic DIY Trousers

Today I’m going to be showing you how I made the Tatjana Trousers from Just Patterns. This is my first time making trousers, so I invite you all to follow along as I learn how to make DIY trousers and gain some new sewing skills. Let’s get started!
Tools and materials:
- Pattern
- Fabric
- Interfacing
- Iron
- Scissors
- Pins
- Seam ripper
- Buttons
- Zipper
- Measuring tape
- Sewing machine
- Serger
Prepare pattern pieces
To see how I prepared all the pattern pieces before construction, see the video from 0:36-2:24.
Iron
To begin construction on these basic DIY trousers, I folded the fly facing and pressed it to the wrong side of the pants.
Sew and press
Then I sewed the narrow end of the fly shield down and pressed it flat.
Attach the zipper
I pinned the zipper to the fly shield and then sewed it to the front of the pants.
Sew
Once the zipper was attached, I sewed the two front leg pieces together and sewed down the darts on the front of the pants.
Sew pockets and darts
Then I pinned and sewed the pocket pieces to the front leg pieces, sewed down the darts, and pressed the seams flat.
Sew in back pockets
The back pockets are well pockets, which I had never made before. They are supposed to have a little flap on the outside, but I screwed it up and ended up with just a hole. It didn’t end up looking too bad, but I definitely should have read the directions before doing this. At this point, I also made buttonholes and attached buttons in the center of the opening to each back pocket.
Serge
Next, I serged the side edges of the back leg pieces of the pants.
Sew
Then I sewed the legs together at the side seams for the front and back.
Pin and sew
I pinned the crotch curve from the back center all the way up to where the zipper ends and sewed it down.
Make belt loops
Next, I made belt loops by sewing a narrow strip of fabric and cutting it into smaller strips of equal length.
Pin and sew
Then I pinned and basted the belt loops into place around the waistline.
Attach waistband
I attached the waistband to the top edge of the pants. Here, I made a little mistake, as well. I somehow miscalculated the length and had to leave off an extra little flap that was supposed to be in the front of the pants. So I just put in a regular button closure, and it turned out fine.
Finish belt loops and hem
Once the waistband was in place, I was able to connect the top edges of the belt loops. I also hemmed the bottom of the pants with an invisible stitch that I hand-stitched in.
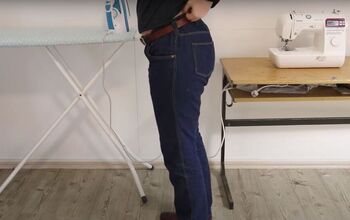
Here are the completed trousers. There’s a lot of advice on the Just Patterns website on how to avoid all the mistakes I made, so if you plan to make DIY trousers like these, I highly recommend checking that out first.
What do you think of this pattern? How would you style these trousers?
Enjoyed the project?
Suggested materials:
- Pattern (https://just-patterns.com/shop/tatjana-trousers)
- Fabric
- Interfacing
- Iron
- Scissors
- Pins
- Seam ripper
- Buttons
- Zipper
- Measuring tape
- Sewing machine
- Serger
The author may collect a small share of sales from the links on this page.


Comments
Join the conversation
Such a great job of matching up the fabric's pattern across the seams!
(You might want to use a heavier interfacing on waist band next time.)
Amazing! Good job!