Thai Fisherman Pants Sewing Tutorial
Thai Fisherman Pants are super comfortable to wear, and quite easy to make with this step-by-step sewing tutorial. This wrap pants sewing pattern is simple to draft and can be adjusted to suit most body types.

How to Tie Thai Fisherman Pants?
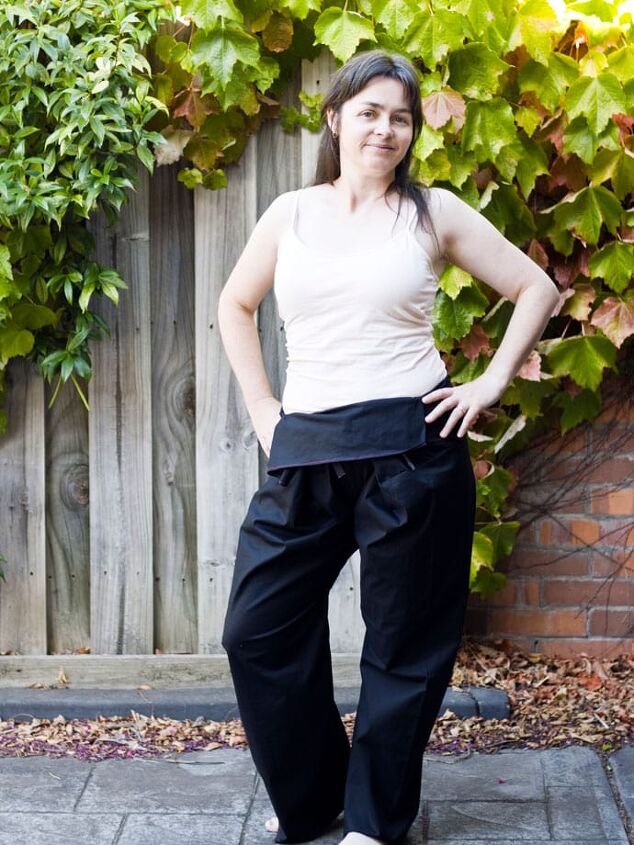
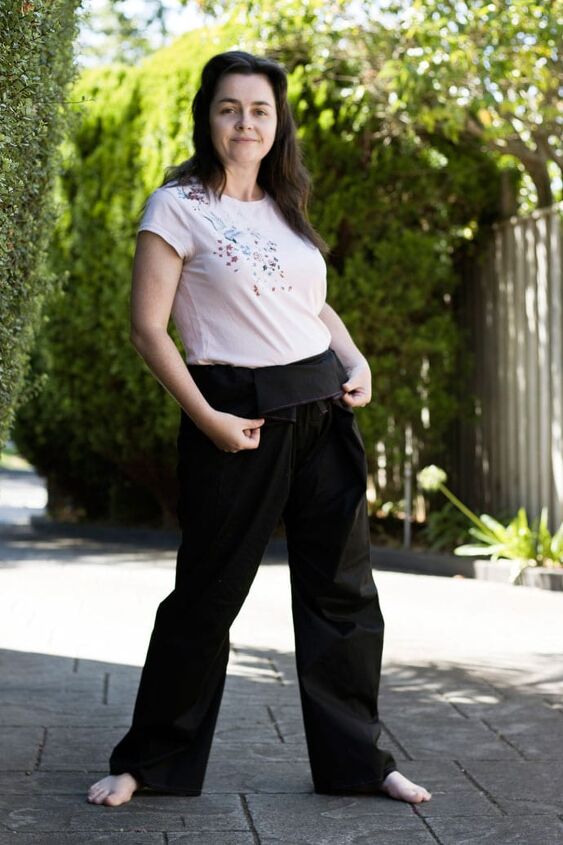
Thai Fisherman pants are very adjustable and easy to wrap and tie once you get the hang of it.
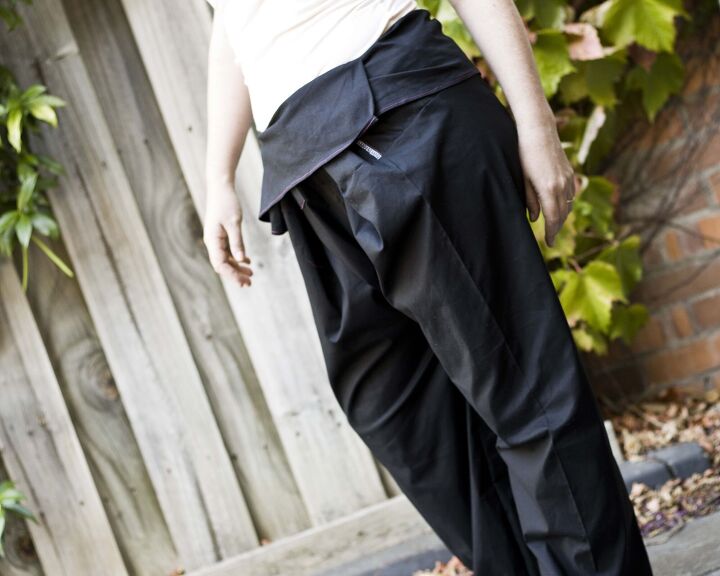
The width of the waist band is folded around the waist and secured by the fabric ties to form a belt. Then the excess waistband fabric is folded down over the waist knot.
There are two main ways to fold and wear Thai fisherman pant as shown in the video above:
1. Center fold – both sides into the center
2. Side fold – Pull all the excess fabric to one side then overlap over the front
Like to sew? You may also enjoy:
How to sew your own Thai Fisherman Pants
Even beginner sewist can make these easy wrap trousers. You’ll need to do a little bit of self drafting, but the effort is worth it.
Do I use woven or knit fabric for this design?
In my opinion you can use either. Woven fabrics like cotton or linen are perfect for these wrap pants, but knit fabrics can also be used. For bodies with more curve, I find that stretchy fabrics are going to be more accommodating.
In fact I chose a woven fabric with a spandex blend that has a bit of stretch in it.
Choose a light weight fabric if you are planning to wear these in summer. A recycled vintage bed sheet would make an awesome pair of Thai fisherman pants to wear in Spring or Summer.
What size is this pattern?
The Thai fisherman pants pattern included for this tutorial will suit a ladies Australian size 12-14, (US 8-10, UK 10-12) which is generally a medium.
If your clothing size is below this, you can keep the pattern as it is but maybe just shorten the leg length. If your clothing size is higher than 12-14 you can enlarge the pattern by increasing the side width and the pant leg length (if required).
The pattern is drafted in cm, convert to inches using google if required.
You will need:
- 2 m fabric – woven or knit
- pattern template pages – download here
- Thread
- Sewing machine
- Overlocker ( Serger) – optional
- Fabric marker – chalk or pen
- Scissors – Paper; Dressmakers
- Long Ruler or Measuring tape
- Drafting paper
- Dressmakers pins
- Iron
- Ironing board
- Pencil
- Haemostat or Tube turning tool
This pattern includes a 1 cm seam allowance unless otherwise stated.
The sewing machine stitch size is 2 mm unless otherwise stated.
Overlocking (Serging): If you don’t have an overlocker (serger) you can use the zig-zag stitch on the sewing machine to reinforce the seam allowance.
Backstitch: I recommend doing a backstitch at the start and the end of each row of sewing. By doing this you prevent your stitching from coming loose.
Acronyms you need to know:
- CF – Centre Front
- CB – Centre Back
Mirrored pattern pieces – fabric will need to be folded, then lined up with pattern fold lines before tracing and cutting.
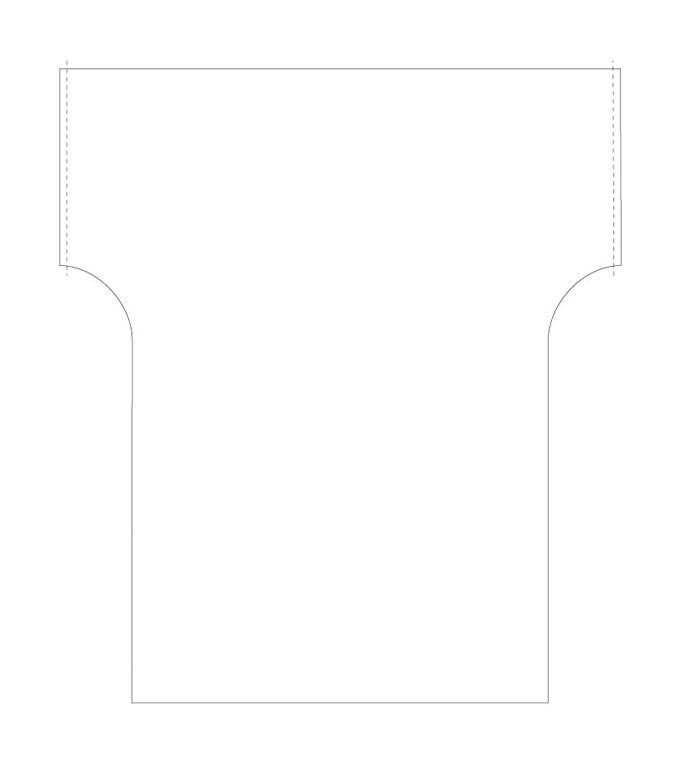
How to make:Pattern Making
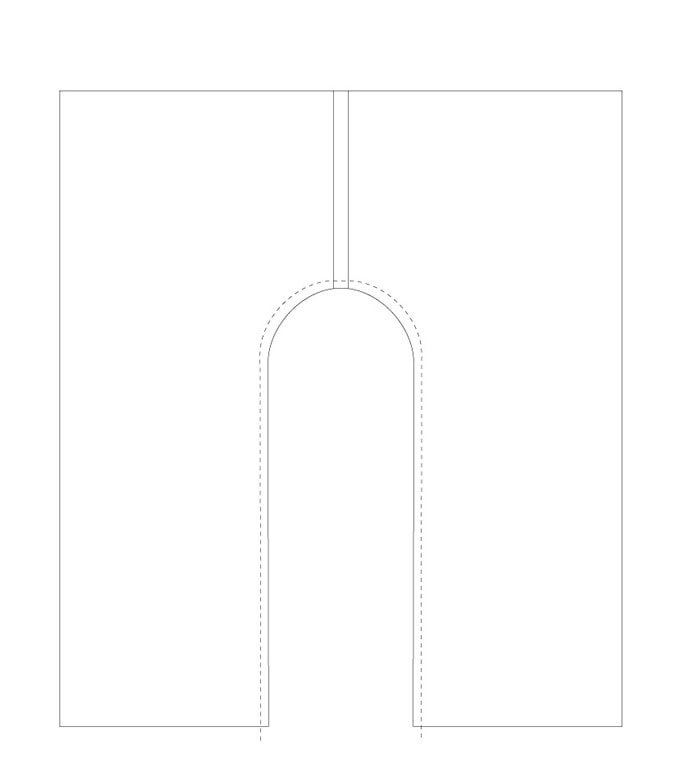
1. Print the three template pages at 100% – the first page is a reference for drafting your own pattern. The second page is to help you create a side curve in that pattern. The third page is an illustrated reference to clarify some of the steps.
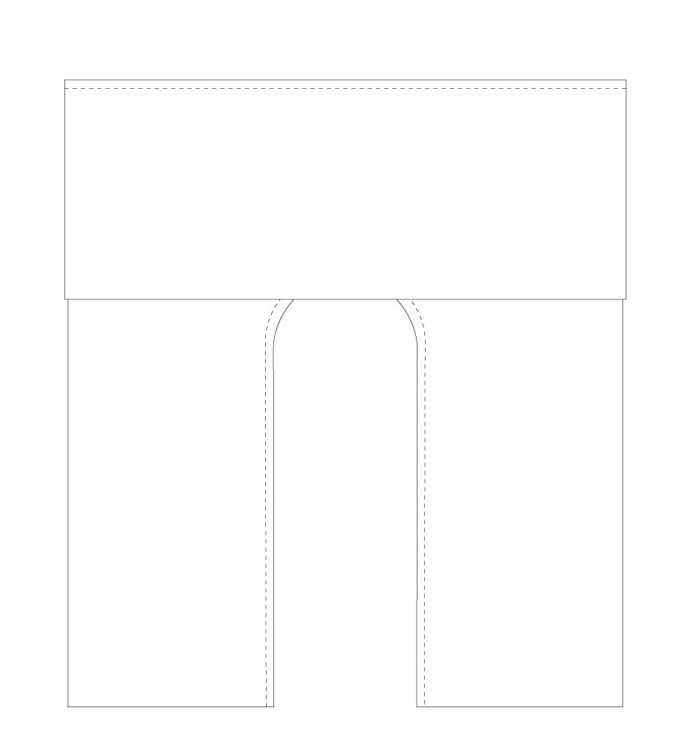
2. On a large sheet of drafting paper rule lines to create three pattern pieces (top panel, pant and tie) as per the template reference. When drawing the curve on the left and right side of the pant pattern you can trace onto the side pattern curve template.
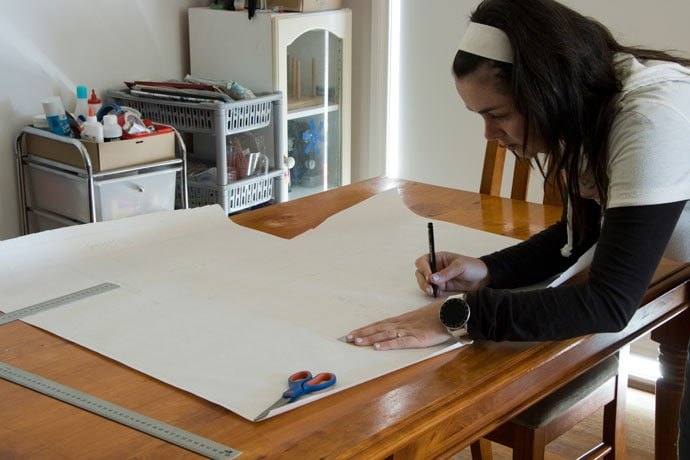
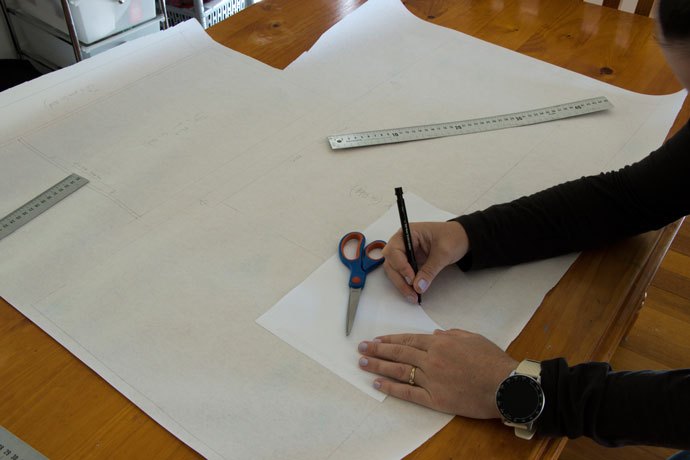
3. Cut out the pattern pieces.
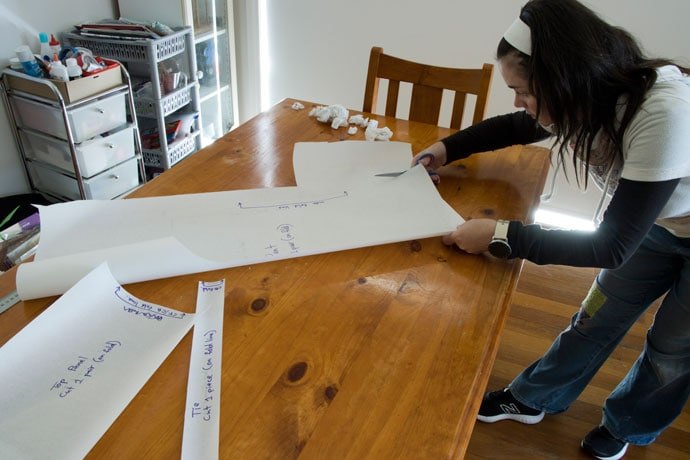
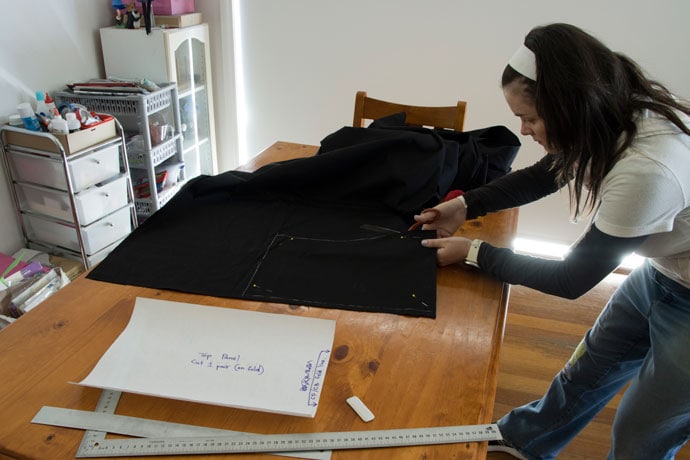
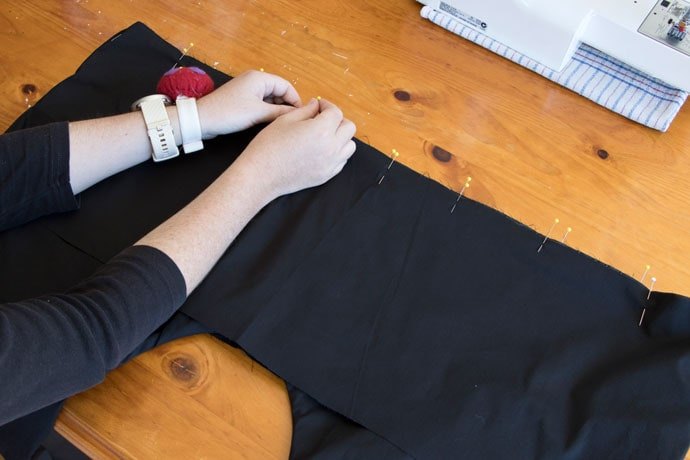
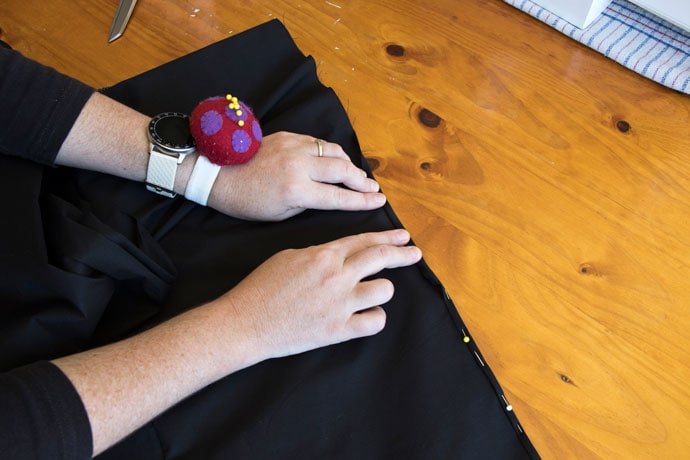
4. Pin the pattern pieces to folded fabric – lining up the fold lines of the fabric to the referenced pattern fold line. Mark the fabric with a fabric marker, then cut out the fabric pattern pieces.
Assembly and sewing
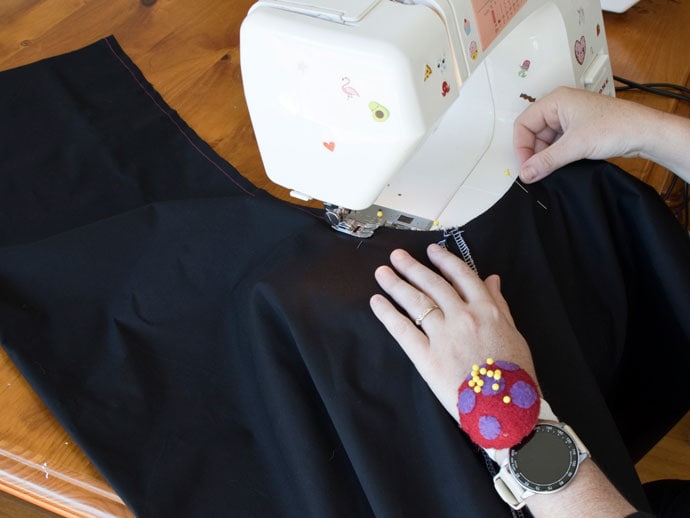
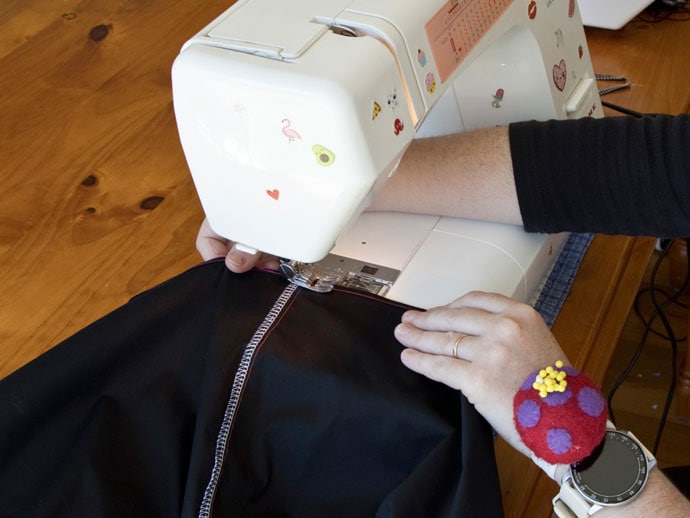
5. Overlay the top panel pieces with right sides together. Sew together along the short sides. Reinforce the seam allowance with an overlocker (or zig zag stitch).
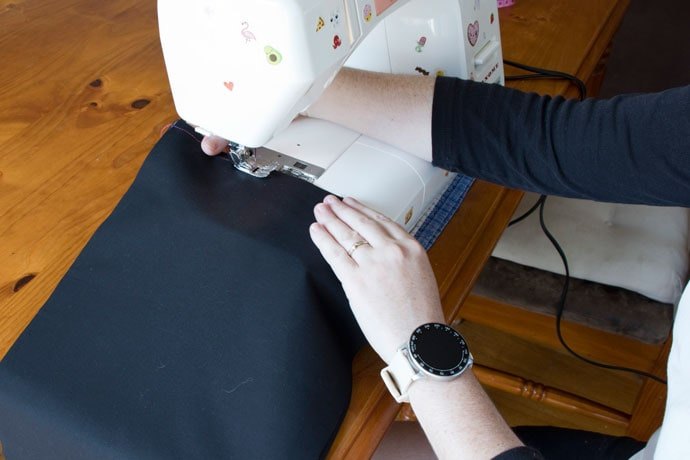
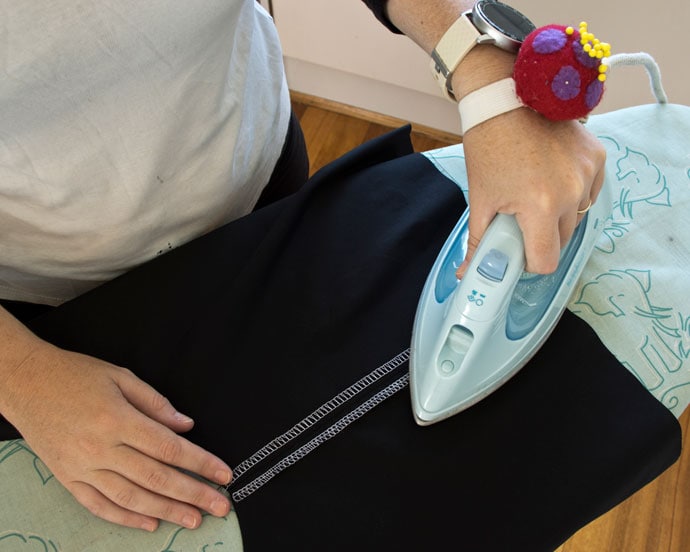
6. Reinforce the seam allowance of the pants CF and CB lines with an overlocker. Overlay the CF sections and the CB sections of the two pant pieces. Sew along the CF and CB seam allowance. Iron press the CF and CB seam allowance open.
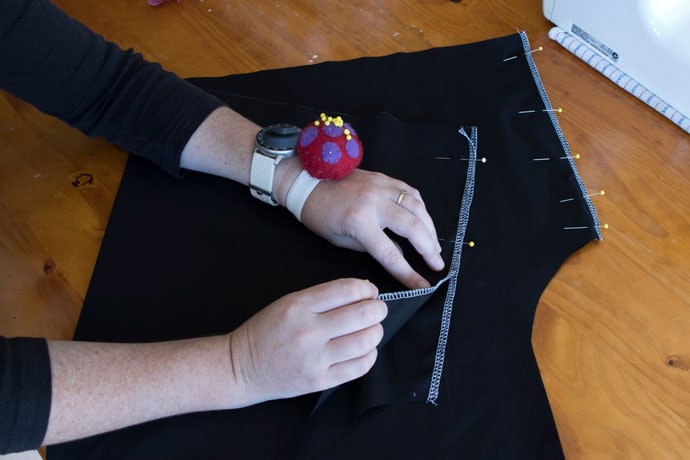
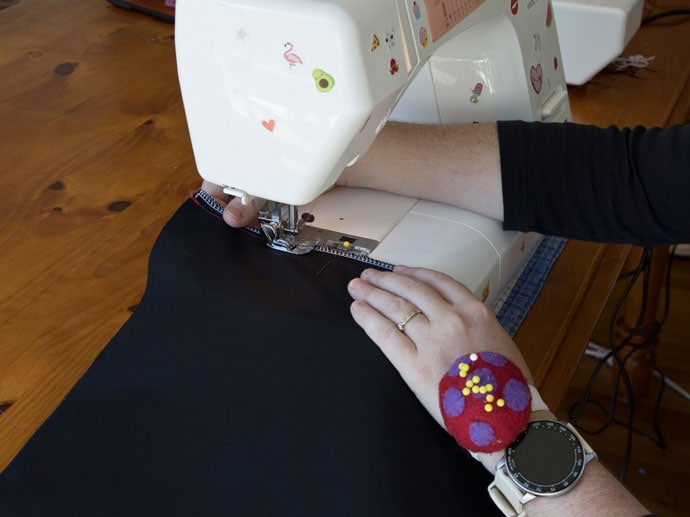
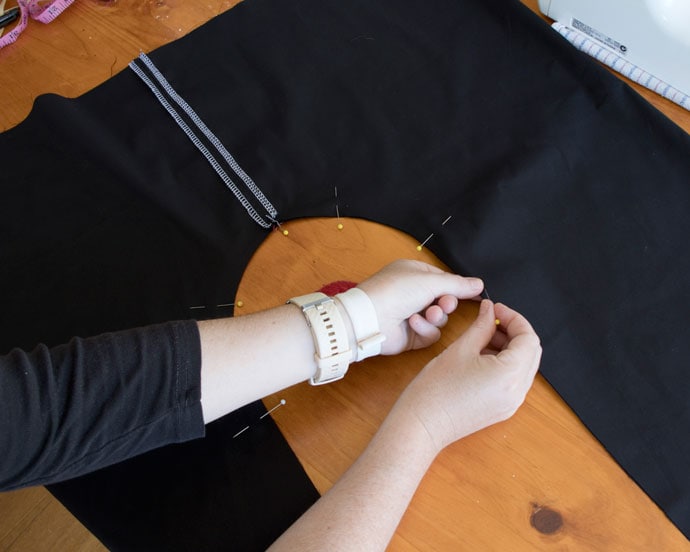
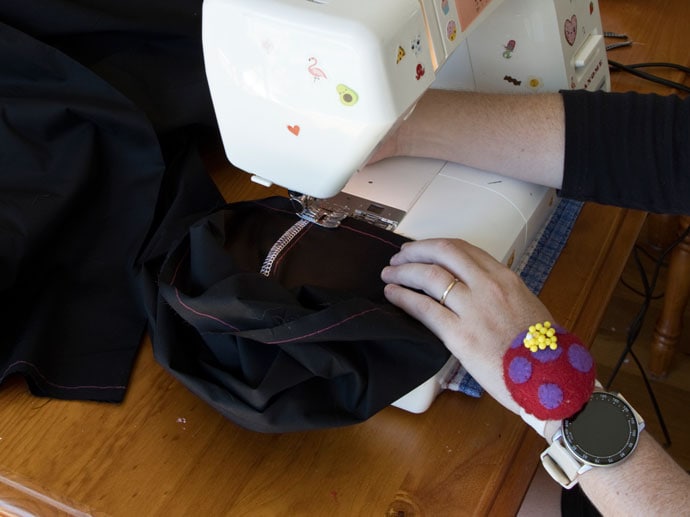
7. Sew together the inner leg arch, which is the ankle to crotch curve, and back to ankle, along the seam allowance. Reinforce the seam allowance with an overlocker.
8. Fold the top panel loop in half and mark the fold lines – these are the CF and CB points. Turn the top panel and pants right side out (the seam allowance is inside). Pin the top panel to the pants right sides facing outward, lining up the CF panel marks to the CF pants seam line. Also, lining up the CB panel marks to the CB pants seam line.
9. Sew the top panel and pants together. Reinforce the seam allowance with an overlocker.
Hemming
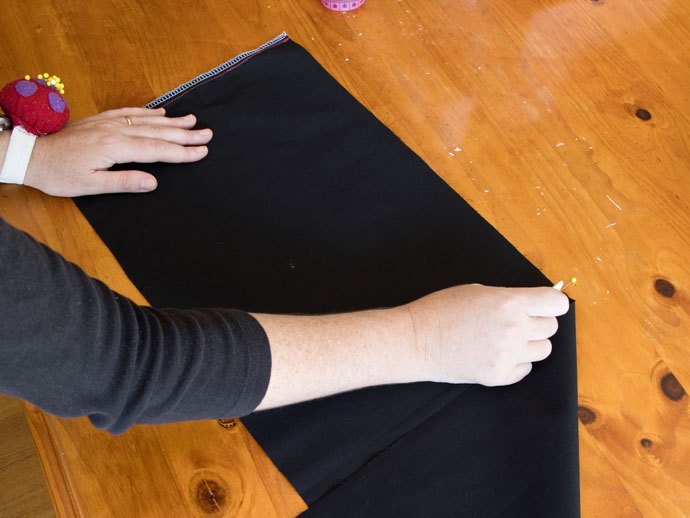
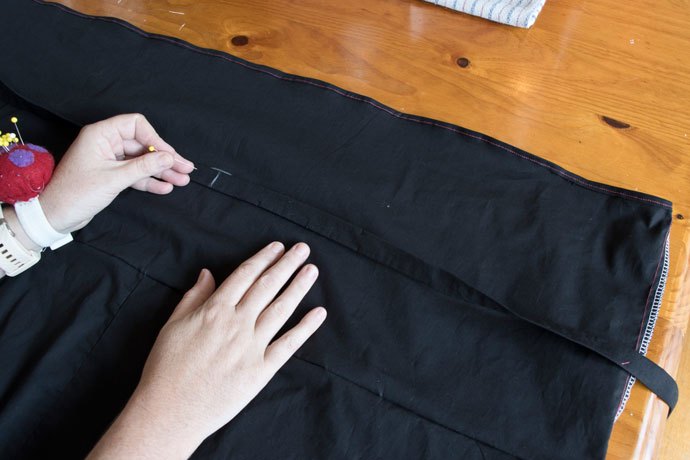
10. Turn and iron press the waist line edge 5 mm, then turn again another 5 mm. Sew this folded hem down with a topstich.
11. Sew along the pant leg hems 1 cm from the edge, with a 1 mm stitch. Let the pant leg hem fray naturally over time. The 1 cm edge stitch will prevent the fraying from going to far.
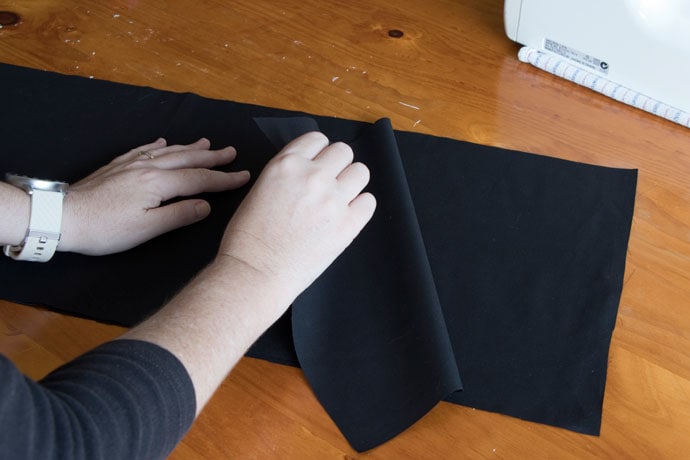
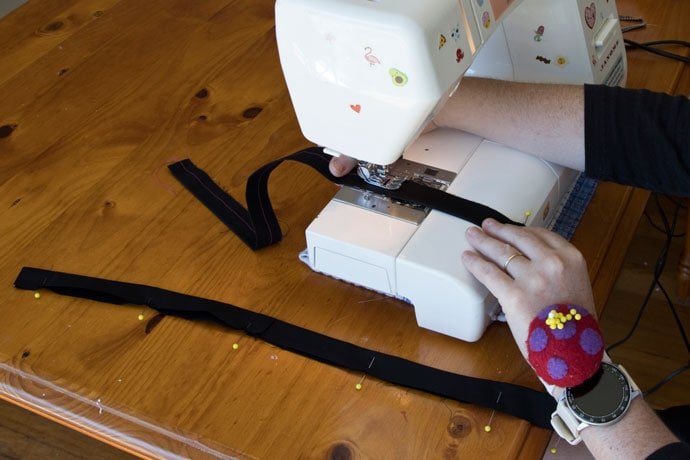
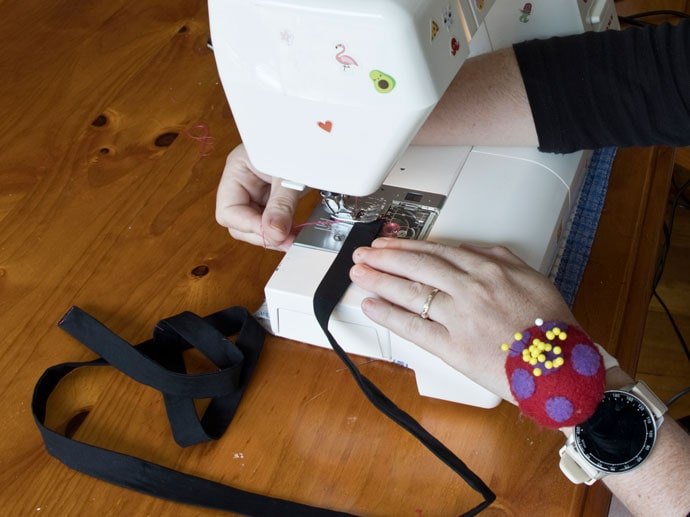
Making the tie
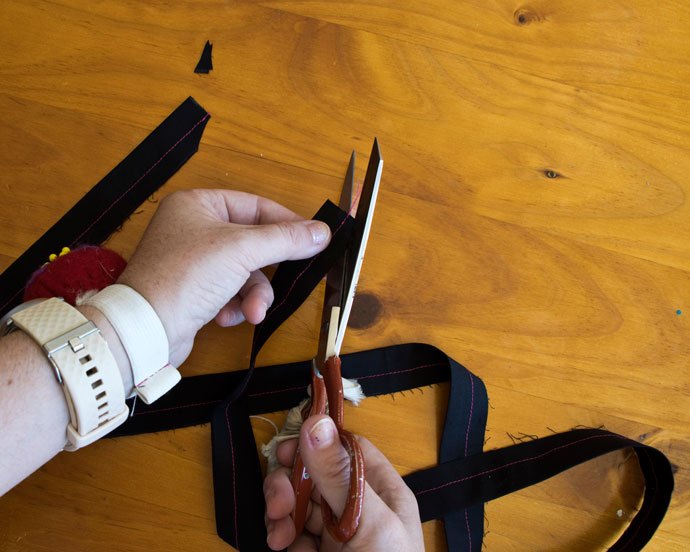
12. Fold the tie lengthwise. Sew closed the tie with a 5 mm seam allowance while keeping the short ends open. Trim little triangles in the ends of the seam allowance.

13. With the use of a haemostat or turning tool, turn the tie through right side out, then press flat with an iron.
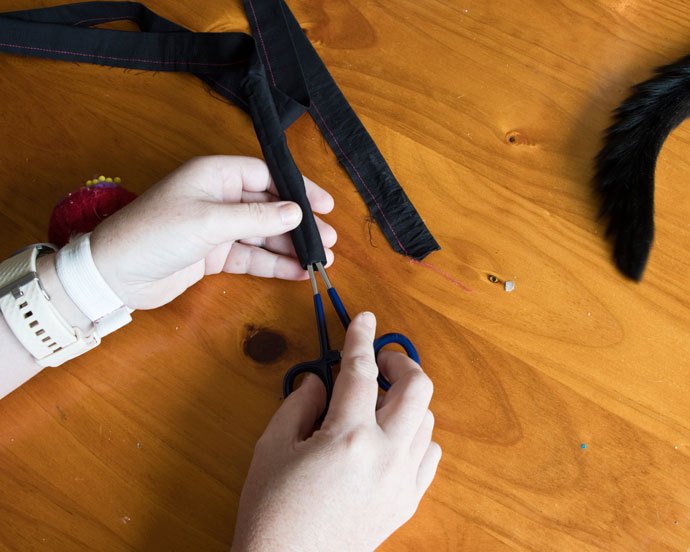
14. Turn in the short ends of the tie, press then sew closed.
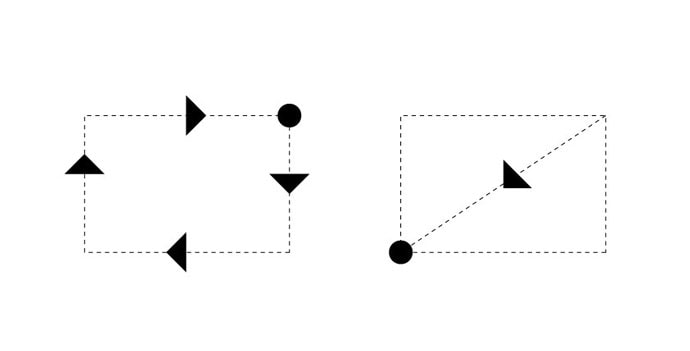
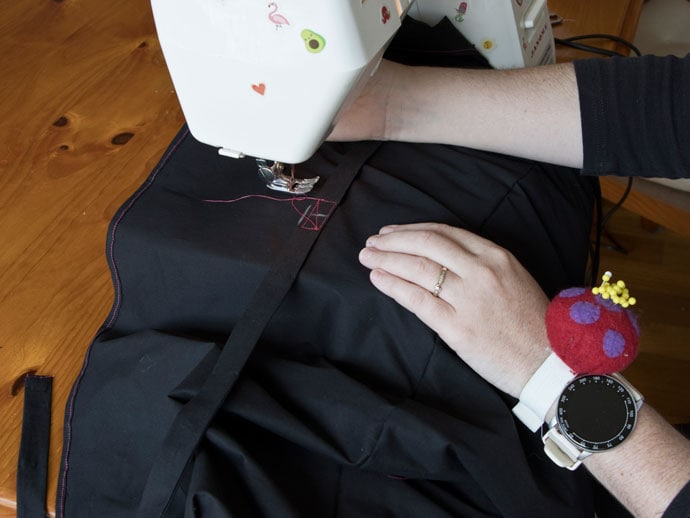
15. Pin the middle of the tie to the middle CB point of the top panel. Stitch the tie to the panel in a 2 x 3 cm rectangle formation. Then sew a diagonal inside the rectangle.
All done! Enjoy wearing your new adjustable sized Thai Fisherman Pants!
The author may collect a small share of sales from the links on this page.


Comments
Join the conversation