Perfect Tutorial for Trick-or-treating Hairdo

I love experimenting with Halloween hairstyles. This is the perfect trick-or-treat hairdo. It looks complex but is simple to create.
Tools and materials:
- Two large hair ties
- 10 small hair ties
- Comb
1. Create sections
Separate the front half of your hair starting by the ears. Tie it off with a hair elastic.
Create a second section with the middle of your hair and tie that with a hair elastic as well.
2. Create a web of ties
Let down the front section. Use that to create 4 smaller sections framing your face.
Use small hair elastic to turn these into 4 tied-off sections.
Take the two small ponytails at the top and split each into two. Take half of one section from one section and half from the section next to it and tie them together with a small hair elastic.
Take the other half of each tiny ponytail and tie them to the ponytails closer to the ears.
This will create a web-like effect with 3 new tiny ponytails.
Use the ends of the new ponytails to repeat the process, splitting the top ponytail in half and creating two tiny ponytails by tying them to the ponytails next to them.
Then tie those two ponytails together.
3. Tease
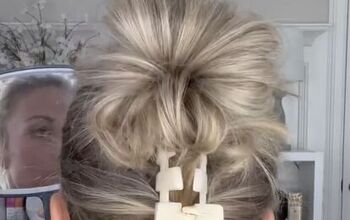
Combine that ponytail to the middle section of hair, tie it off, and tease it.
This will create some volume and contrasting texture. It also frames the web-like style you’ve created at the top of your head.
Halloween hairstyle
I love this hairstyle for Halloween. It mimics the festive spider web decorations of the holiday season. Give it a try!
Next, Grab Some Ribbon for This Halloween Hairstyle.
Follow me on Instagram: @poppy_hairstyles
Follow me on TikTok: @poppy_hairstyle
Enjoyed the project?
Suggested materials:
- Two large hair ties
- 10 small hair ties
- Comb
The author may collect a small share of sales from the links on this page.









Comments
Join the conversation
LOVE it! Also love your contacts and makeup! Thanx for sharing!