How to DIY Easy and Romantic Pink Floral Nails

In this tutorial, I’m going to show you how to do pink floral nails with a foil nail art technique.
Pink foil nail designs are so cute and trendy and, by the end of this tutorial, you’ll be able to create them on your own! Let’s get started.
Tools and materials:
- Sheer pink nail polish
- Shimmery pink nail polish
- Nail buff
- Striping brush
- Foil gel
- Transfer foil
- Glossy top coat
- Wipes
- Striping tape
- UV lamp
1. Apply sheer pink
Apply sheer pink as a base coat and cure.
2. Buff the nail
Wipe the nail and buff it so the next layer has something to stick to.
This will also help you see what you’re doing with the foil gel as well as allow the foil to only stick to the foil gel and not the sheer pink.
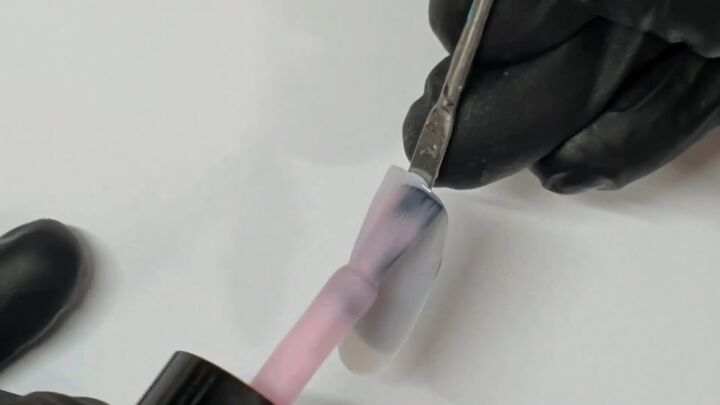
3. Apply the foil gel
Use a thin striping brush to apply the foil gel where you want the foil to stick. I drew a column down the center.
It doesn’t have to be perfect, just make sure it’s filled in the center. Cure for two minutes.
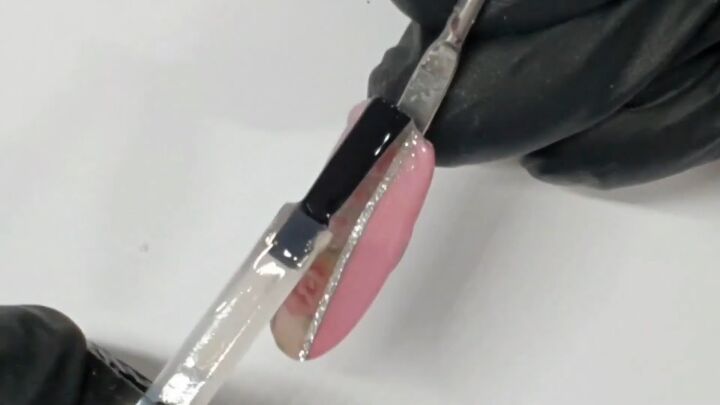
4. Press the foil to the nail
Place the foil on the nail and press down on it.

Use a dry, lint-free wipe to rub the foil onto the nail until you’re 100% percent sure it’s transferred to the nail.
You can use your nail to iron out the creases.
5. Pull off the foil
Once it’s transferred, pull the foil off the nail.
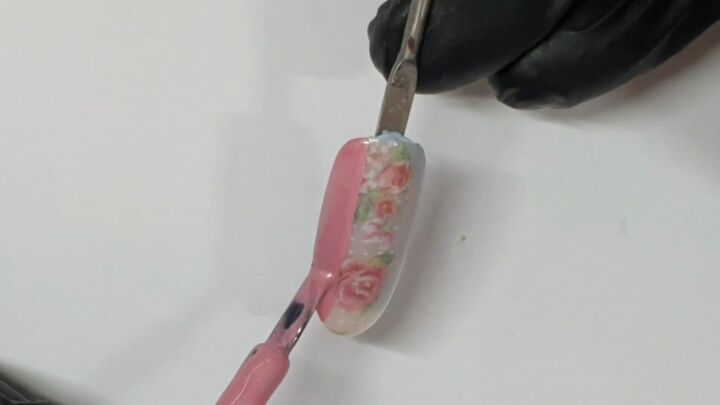
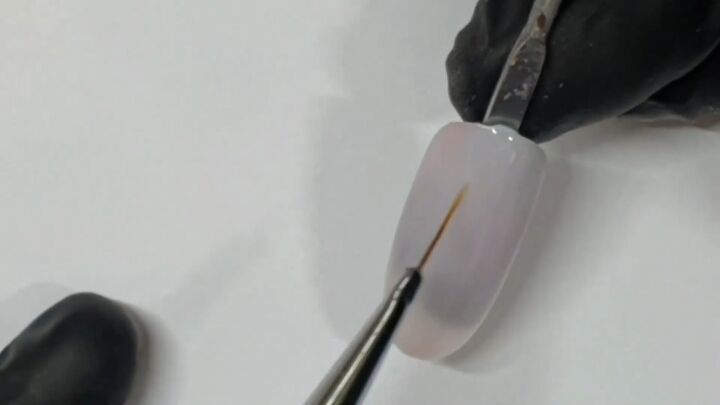
6. Paint the sides of the foil
Paint down the sides of the foil with a pink, shimmery color. This will create a straight line, so don’t worry if your foil isn’t neat.
You can also use a striping brush here and fill it in so you don’t get polish all over the skin. Cure.
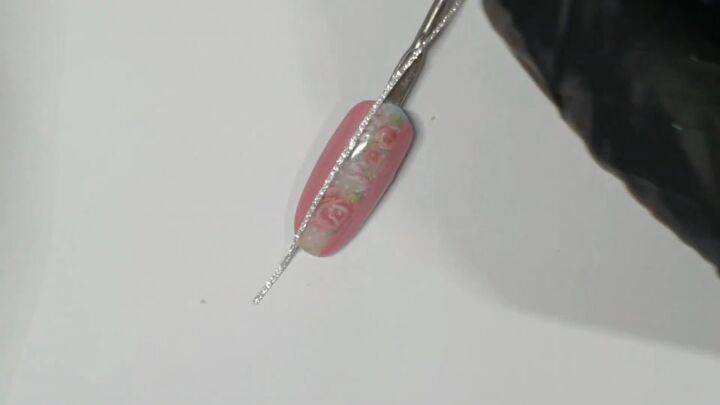
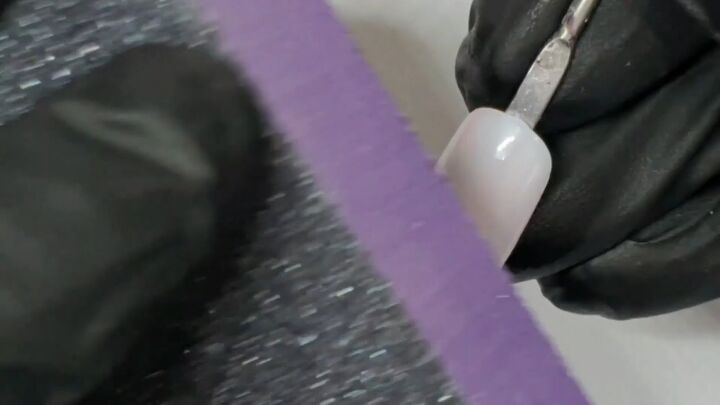
7. Apply striping tape
Cut your striping tape longer than you need so you only have to hold onto the parts that aren’t going on the nails and place them down.
I haven’t wiped the tacky layer of the pink and I’m going straight on it with the tape then gently pressing them down.
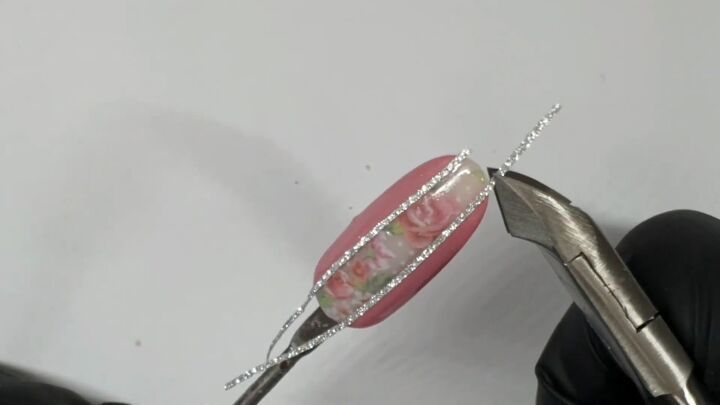
8. Trim the excess tape
Trim the ends a bit shy of the tip so you can tap them and seal them in. This way they don’t start peeling after only a few days.
9. Apply a top coat
Apply a medium-thick layer of a glossy top coat to seal everything in, and cure for a minute.
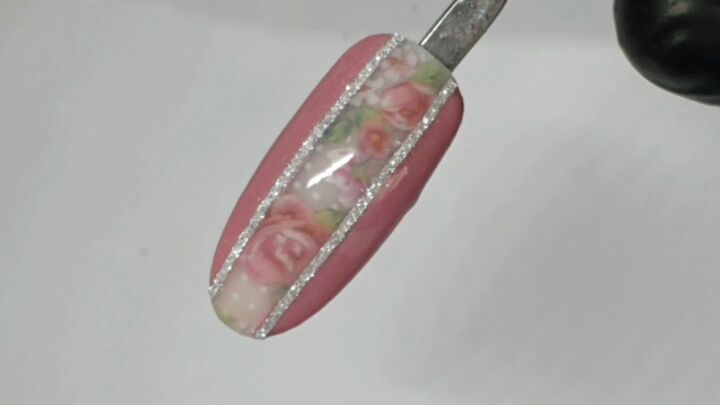
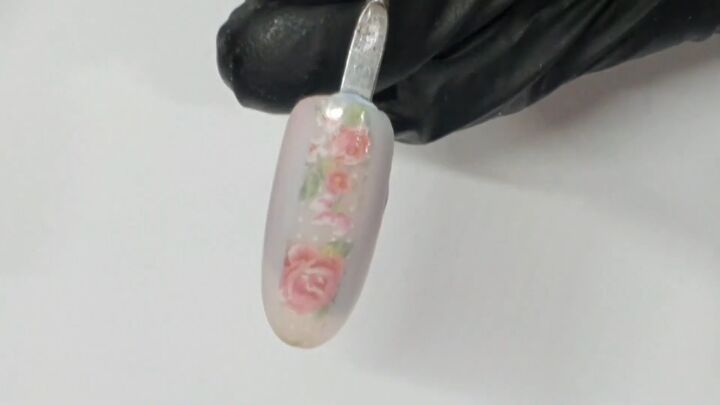
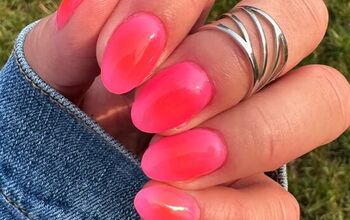
DIY pink floral nails
That’s it! Here’s the finished pink floral nail. Now you know how to use nail foil, and you can create your own pink foil nail designs.
Let me know what you think about foil nail art down below!
For more nail content, check out my post on How to DIY Super Cute Love Letter Nails.
The author may collect a small share of sales from the links on this page.


Comments
Join the conversation