How to Do a Beautiful Pull-through Ponytail

Hey guys! Today, I wanted to show you a fun hairstyle that I call a reverse pull-through ponytail.
I'm obsessed with how it looks. Follow along for a quick and easy, step-by-step tutorial.
Tools and materials:
- Bobby pins
- Clear elastics
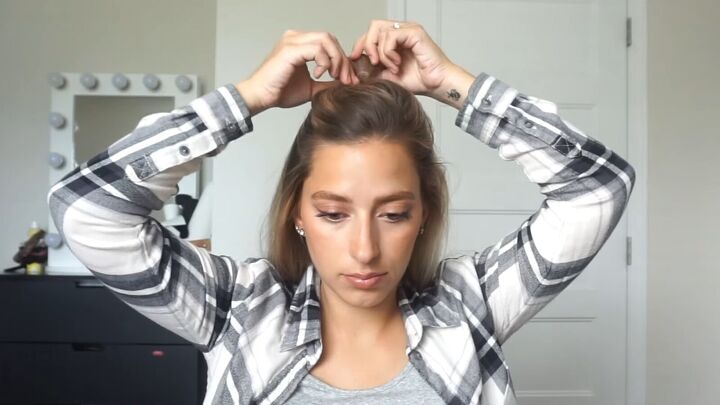
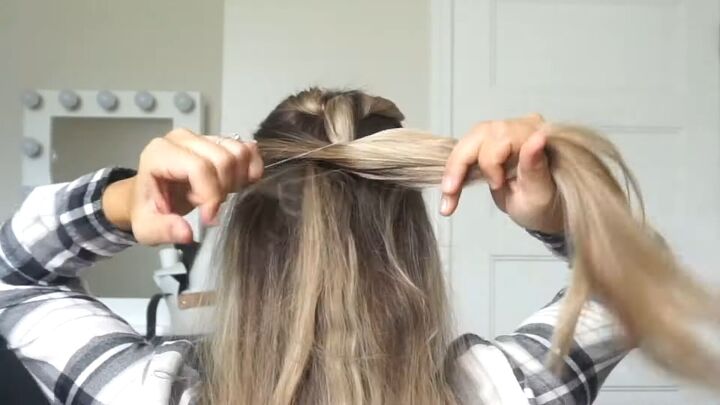
1. Tie a half ponytail and flip the ends through
Starting at the top of your head, gather a small section of hair and tie it off with a clear elastic.
Next, create a hole directly above the elastic and pull the end of the ponytail under and up through the hole.
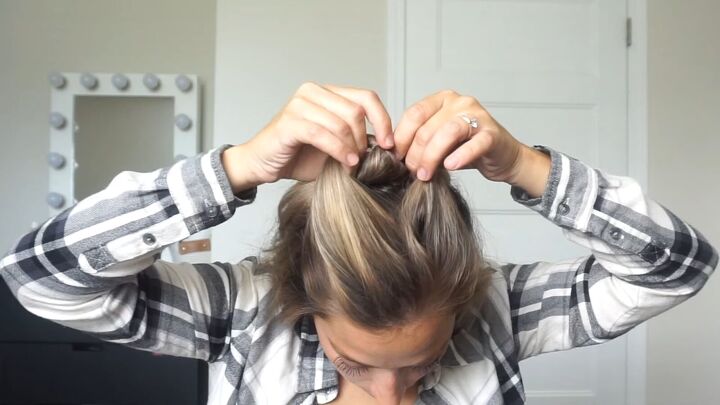
Now tighten it to make sure it’s secure.
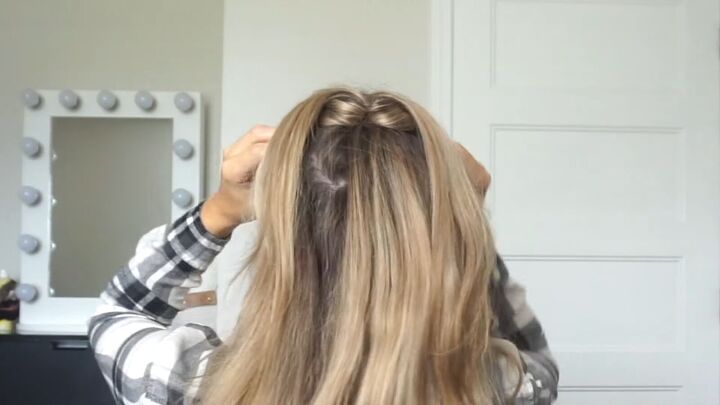
Here’s what it should look like right now from the back:
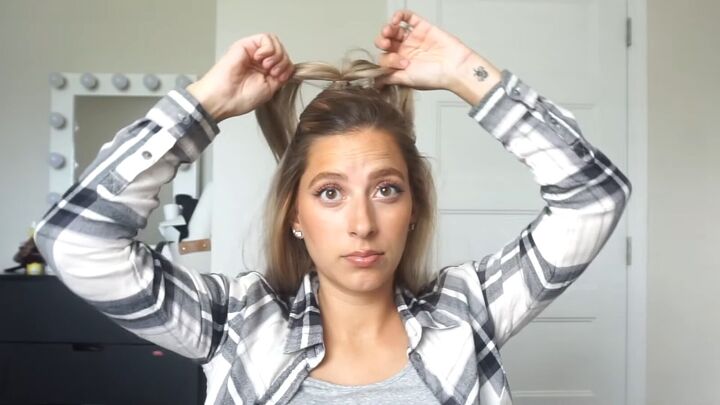
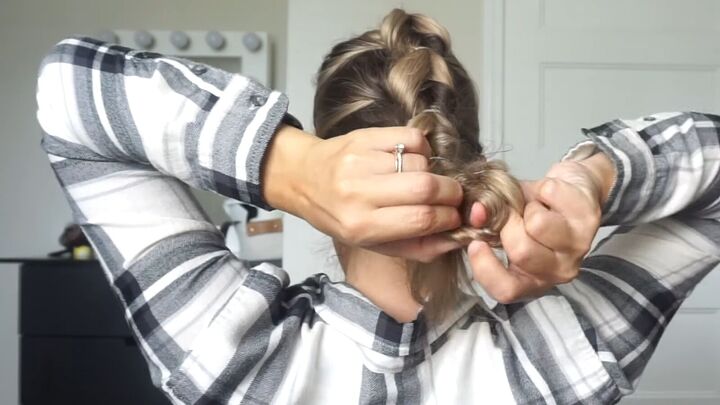
2. Repeat step 1
Grab the inverted half ponytail that you just made and add a section to it from the right side of your head then from the left side. Combine them all to make a lower ponytail.
Secure this with another clear elastic.
Create another little hole above this elastic, and pull the ends of the ponytail underneath the hole and up through it, like you did before.
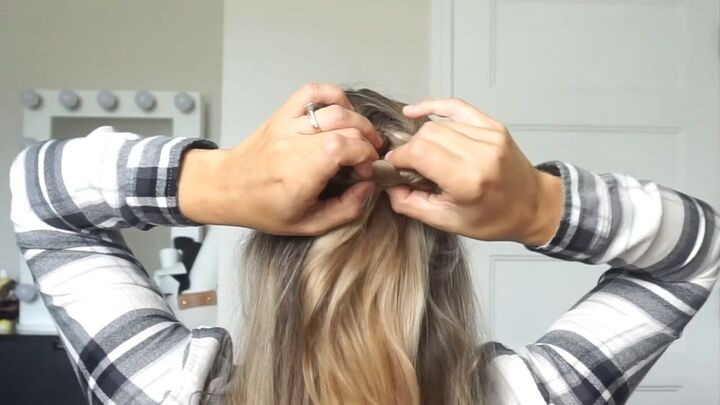
Then again, tighten it to secure it.
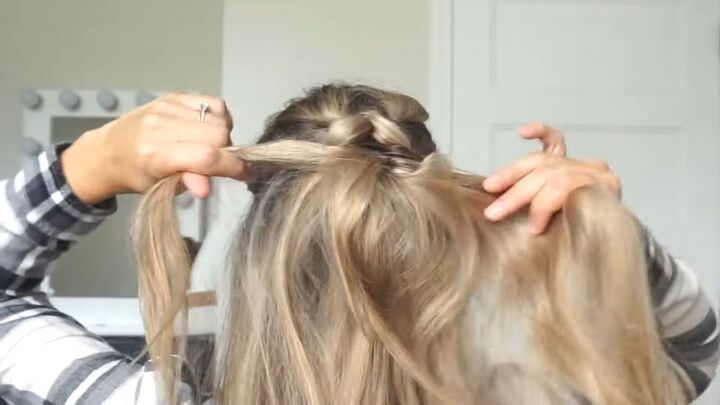
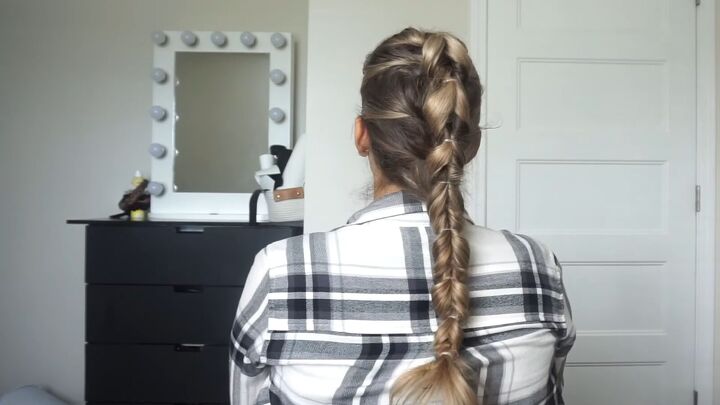
Continue to make these pull-through ponytails all the way down until you run out of hair. At this point, your hair should look like this:
3. Finish the braid
Add a clear elastic to the end, without adding any hair from the sides.
Then, create a little opening above that final elastic and pull the ends of the hair up and through the hole.
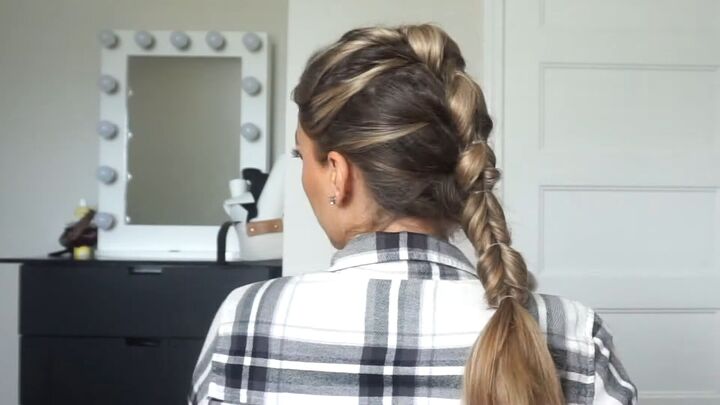
Here’s your braid so far:
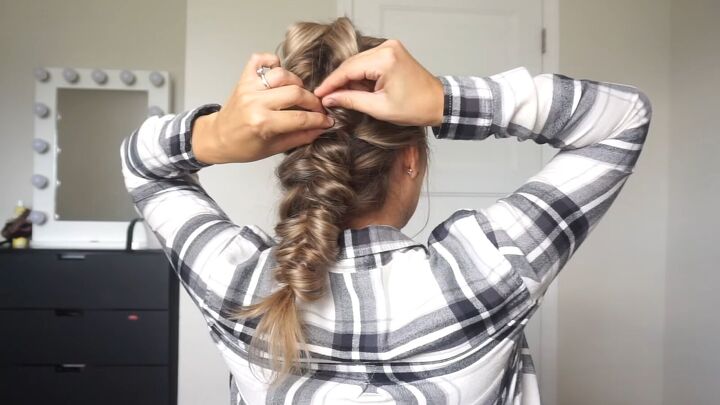
4. “Pancake it”
Now it’s time to “pancake” each section, so you basically just pull at each side to fluff out the braid.
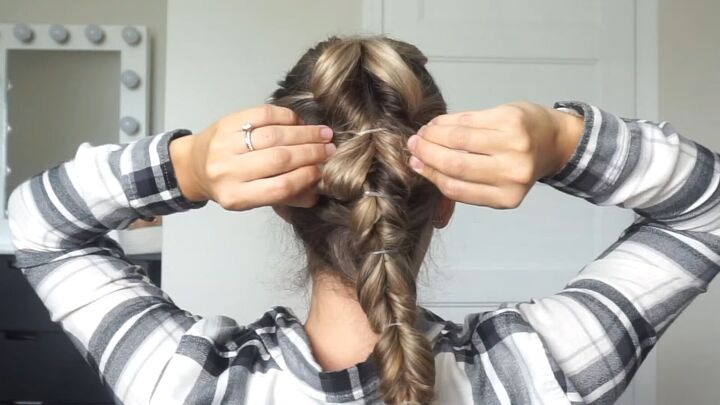
Keep doing this until you achieve the amount of volume that you like.
I went up and down my head several times until I got it to look like this:

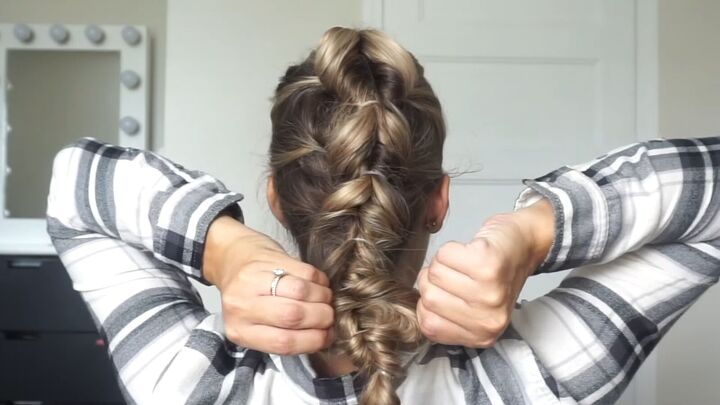
5. Secure with bobby pins
This step is optional, but I opted to secure the braid in a few places just to make sure no hairs would escape this unique, ponytail hairstyle.
It also made it lay more flat against my head. It lasted me all day without budging.
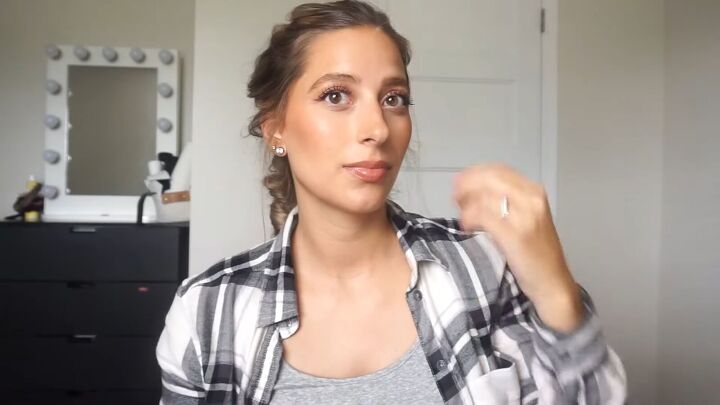
Here’s how it looks from the front:
And from the back:
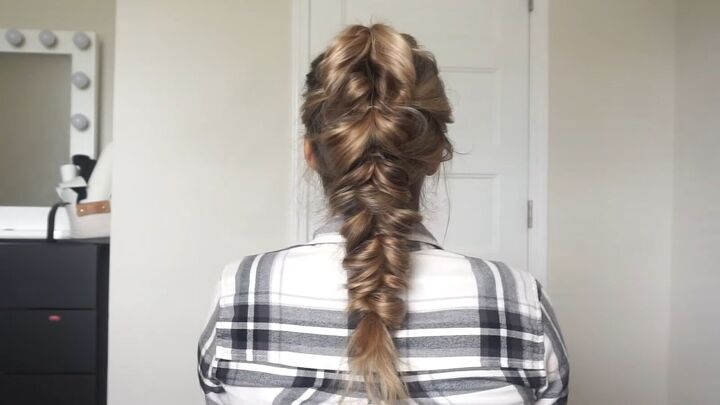
Pull-through ponytail
I hope you enjoyed this pull-through ponytail hairstyle!
It’s great for beginners since you don’t need to be an expert at braiding to achieve this look.
For more hair content, check out my post on 4 Cute and Easy 60-second Hairstyles.
The author may collect a small share of sales from the links on this page.


Comments
Join the conversation