How to Do Creepy Pumpkin Makeup for Halloween Using Cheap Face Paint

In this tutorial, I'll show you how to do pumpkin makeup for Halloween using cheap face paint you can buy at any store. I want to demonstrate how you can do easy pumpkin makeup that also looks really impressive and spooky, using only affordable face paint products.
If you can spend some time doing this look, you don’t need to add much to the rest of your costume, as the face will be the jaw-dropping factor. So, grab your Halloween makeup, and let’s get into this DIY pumpkin makeup tutorial!
Tools and materials:
- Various sized makeup brushes
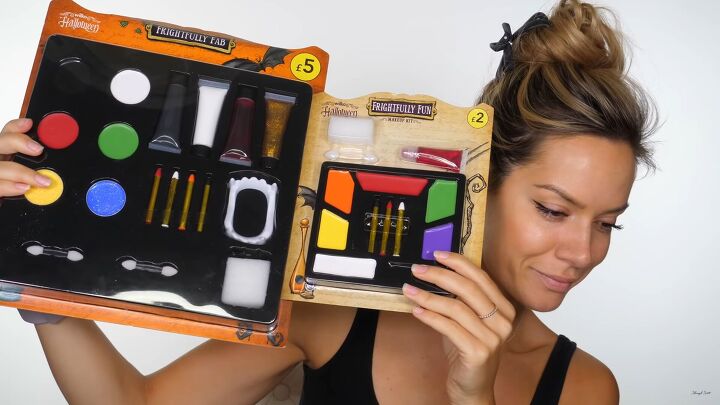
- Halloween face paint kit (red, yellow, black, orange, and white)
- Black grease paint
- Black pencil
- Black wig
1. Grab your materials
I collaborated with Wilko (an affordable British retail brand) for this look. However, you can pull off this DIY pumpkin makeup with just about any Halloween makeup face painting kit.
2. Prep time
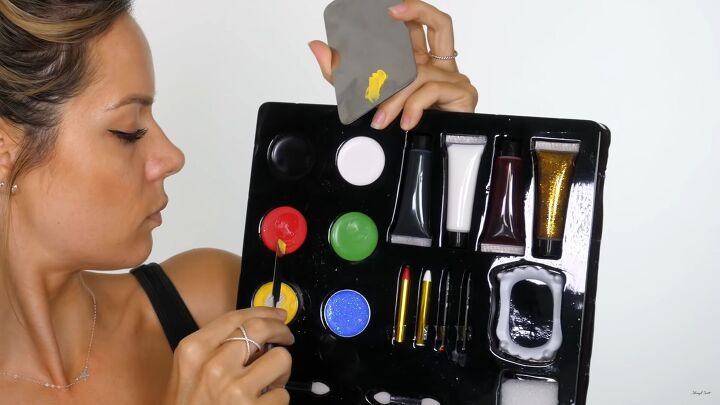
I needed a little more orange to pull off this look, so I mixed the yellow and red face paint colors to make a lovely, rich orange color. This is a good trick for those who run out of orange, and you can mix it yourself if need be.
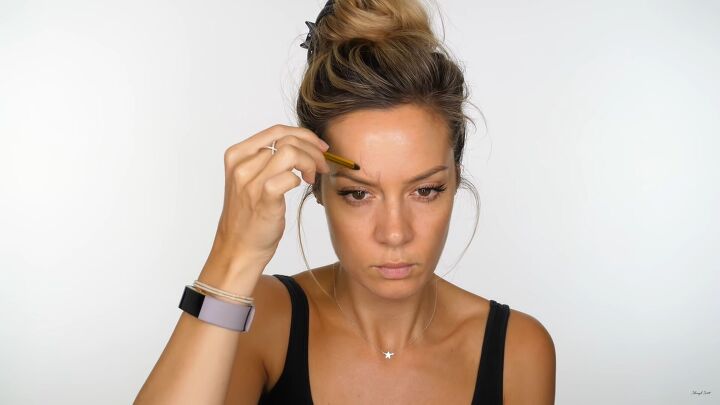
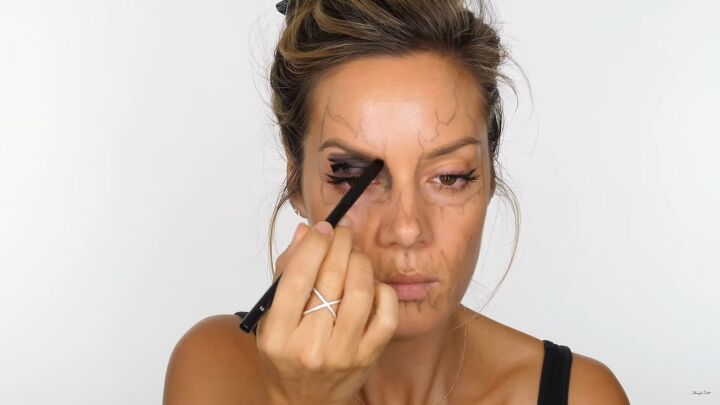
3. Start drawing
My Halloween makeup kit included a black pencil. This came in super handy for sketching on the pumpkin face. If you do not have one, you can use an eyeliner pencil.
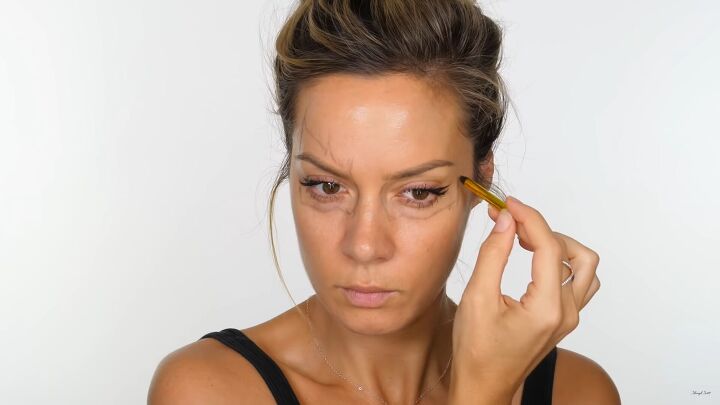
The trick to doing impressive Halloween makeup is to be as detailed as possible. As you can see, I’m drawing the lines carefully. Aim for some jaggedy lines, too.
Start by drawing a line right above your eyebrows, continue all the way around your eye socket, and repeat on the other eye.
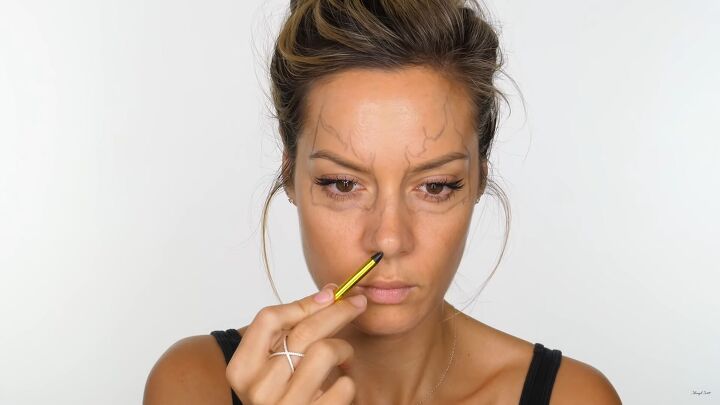
For the nose, create an upside-down, triangular sketch.
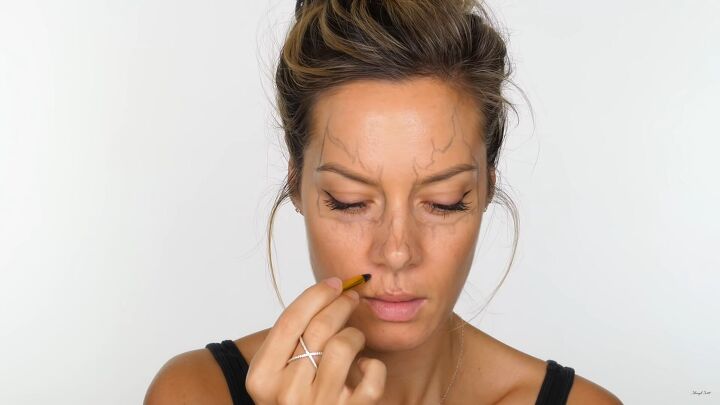
Along the top lip and onto the cheeks, create sharp triangular lines, as shown. This is going to give an illusion of the mouth and teeth.
Here’s how it should look.

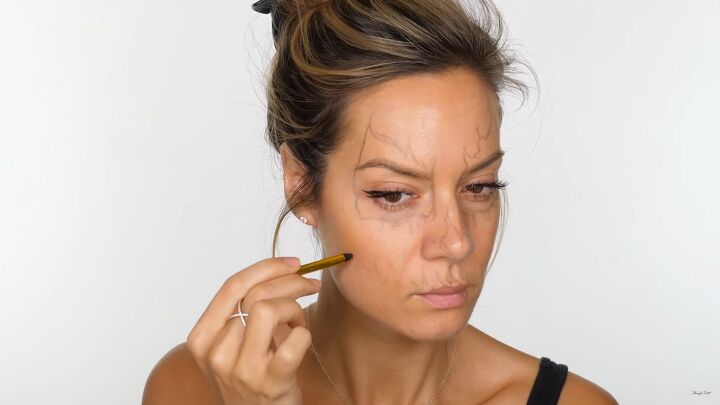
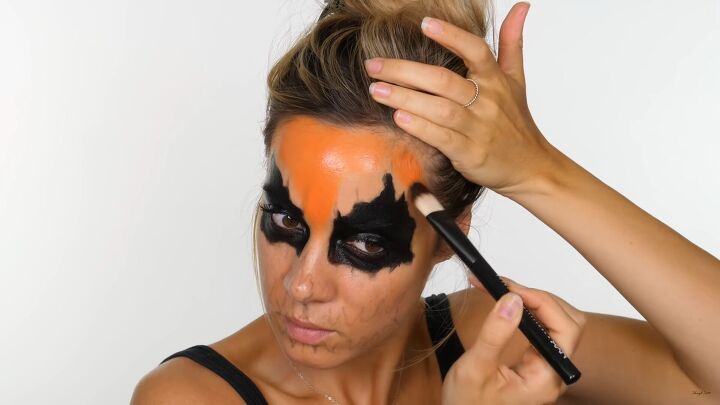
4. Add the black face paint
With black face paint, start filling in the areas, as shown. I used a makeup brush for this for the best application.
To get the best pigment, it’s good to mix the face paint and the grease paint. First, apply one layer of face paint.
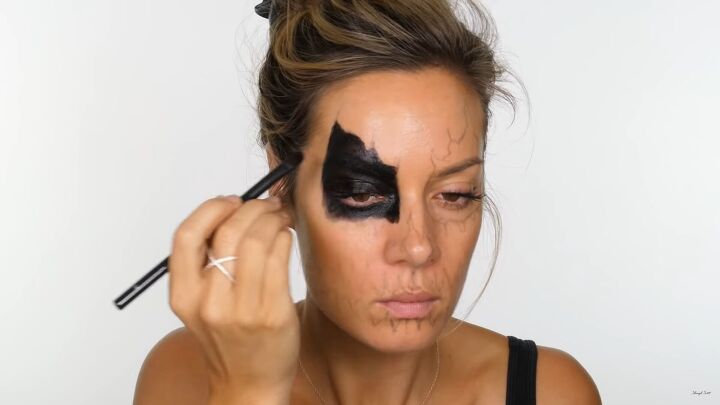
Now, add the grease paint. Can you already see how opaque it looks?
Next, for the third time, go in and apply more face paint. This will set the grease paint, so it doesn’t rub off.
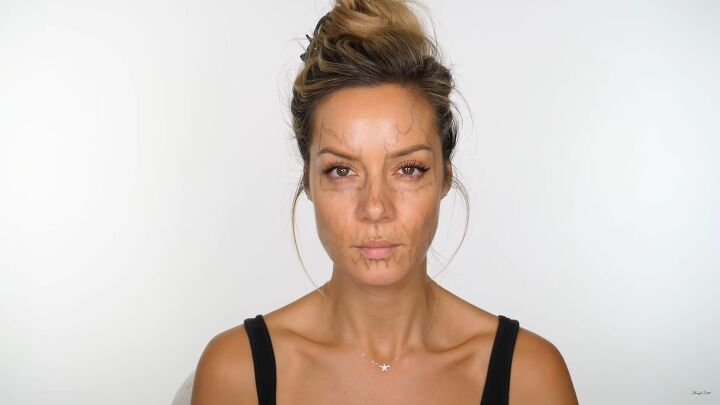
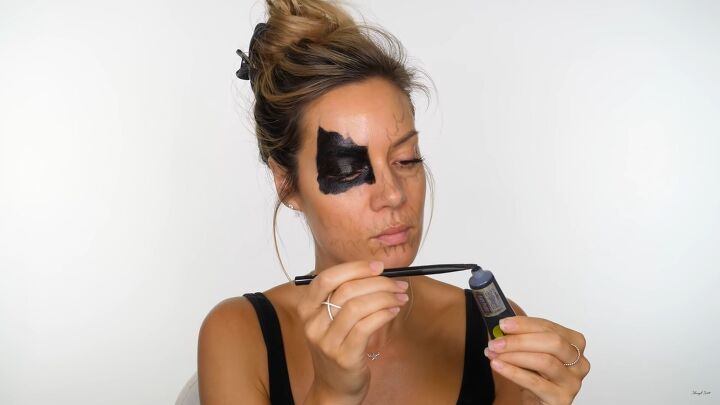
5. Add orange
Now, move on and apply the orange color. Here, I’m using a wide makeup brush to get the job done quickly.
I applied two coats of orange face paint to really get that color to stand out.
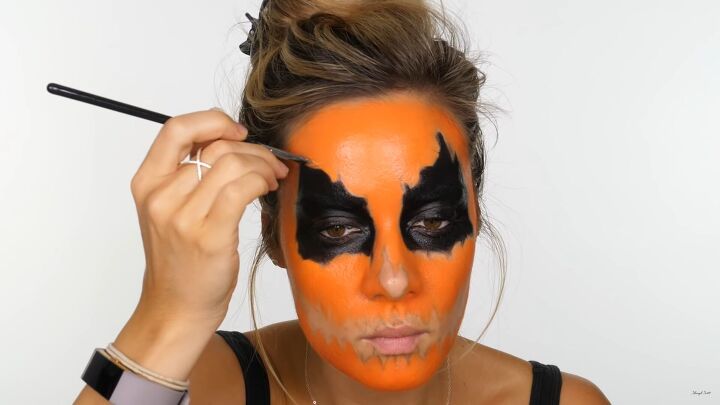
Use a smaller brush to get the orange closer to the black lines on the face.
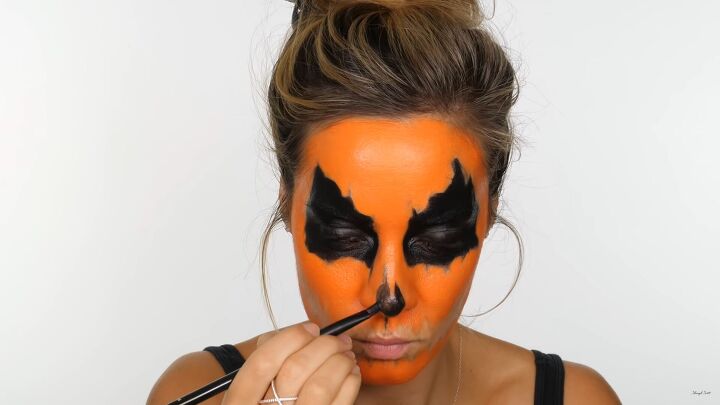
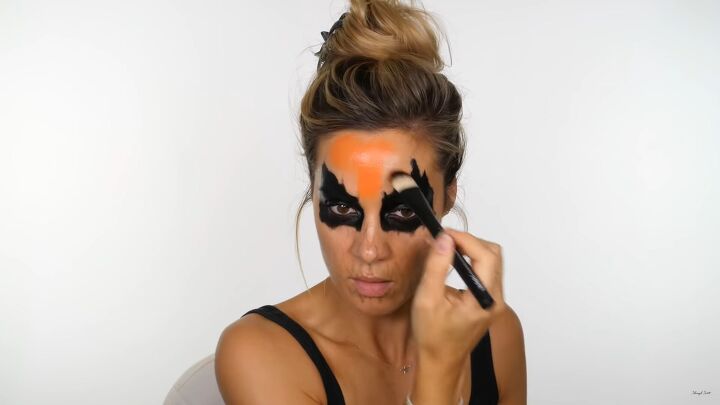
6. Complete the makeup
Now, go ahead and complete the rest of your face. Remember to add layers to the black sections, including a grease paint layer between the face paint and two layers of face paint in the orange section.
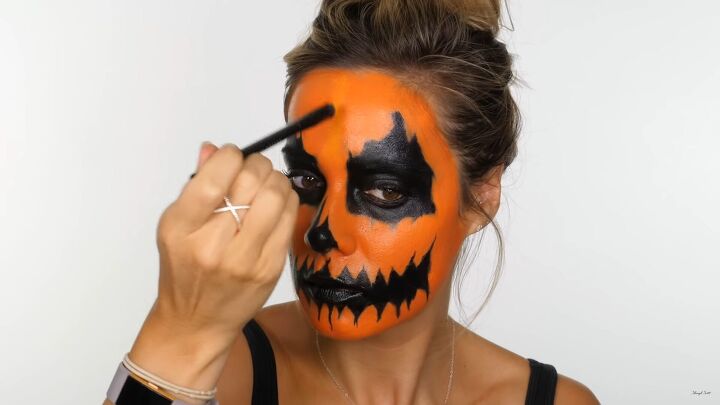
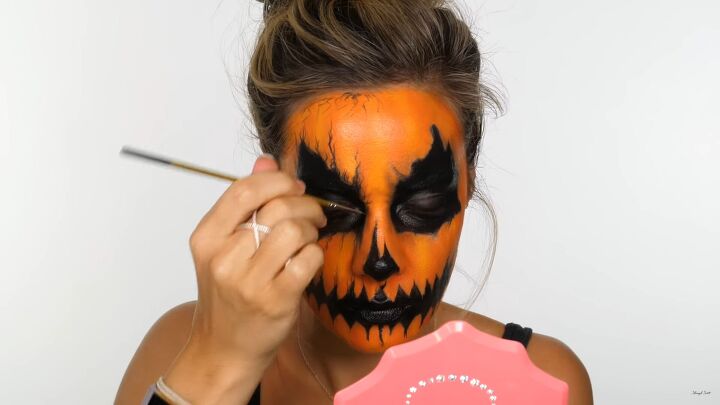
7. Add in some 3D effects
To make your pumpkin makeup look a little more 3D, go in with a yellow color and lightly add it to the center of your forehead. Don’t rub it on, but instead dab it on in swift motions. This will create a lovely highlighted area on the face.
Working in segments, add more highlighter lines to the rest of your forehead to create that classic, rippled pumpkin shape.
Soften the lines with a brush.

Repeat around your whole face, making sure the lines align.
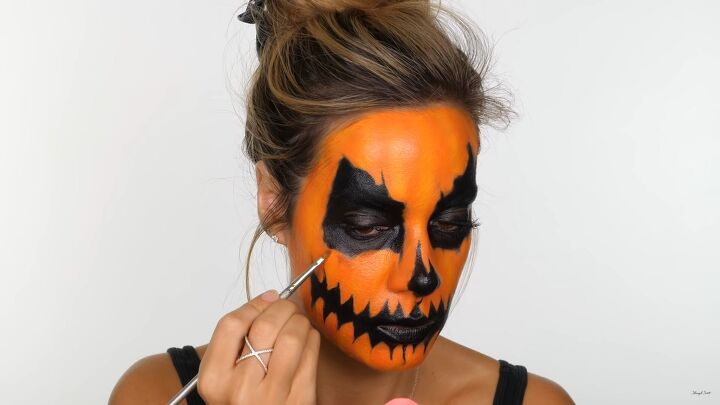
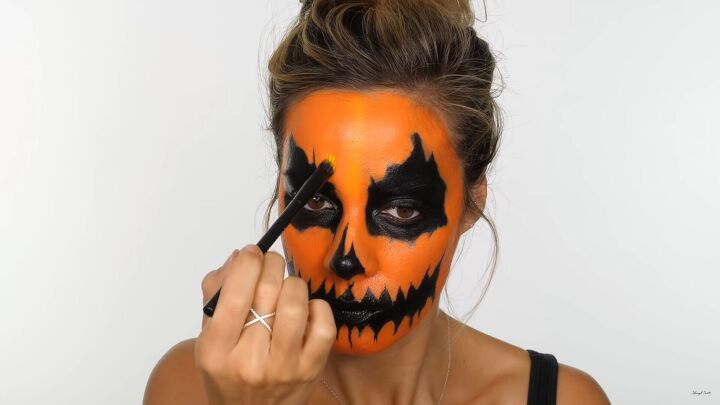
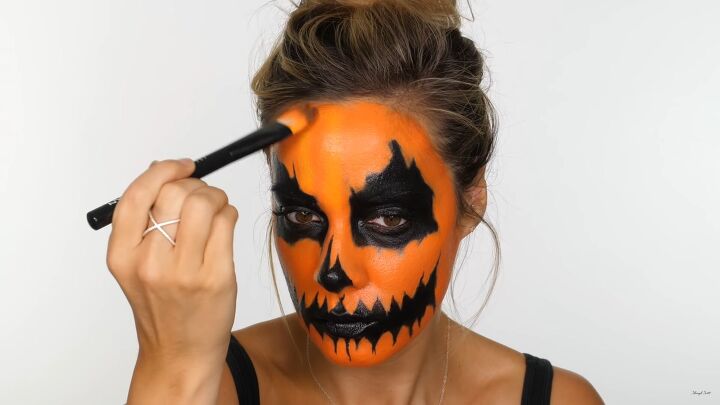
8. Add depth and details
To add a little depth, mix your yellow and red face paint, and add a touch of black. Then, apply this color between the orange and yellow on your face to create a shadowy look.
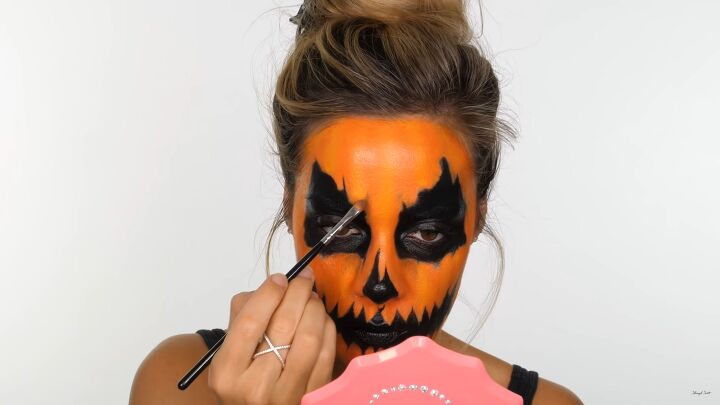
Repeat the same around the brow bone area to make it look more sinister.
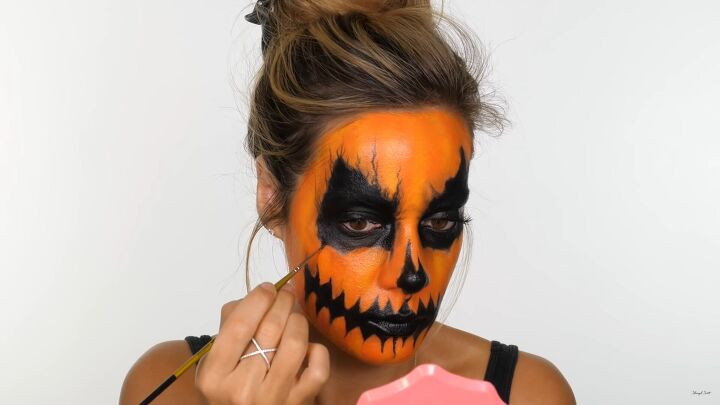
Using a small, pointed brush, add some wiggly lines around your brow area. You want it to look like a smoke effect. You can drag the grease paint from your eyes for this, there’s no need to apply more paint.
Repeat around the forehead, teeth, and nose area.
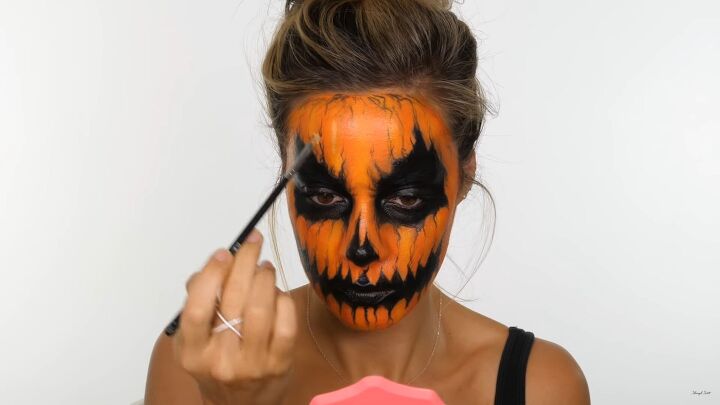
Add some more highlights with white paint, subtly along the yellow lines.
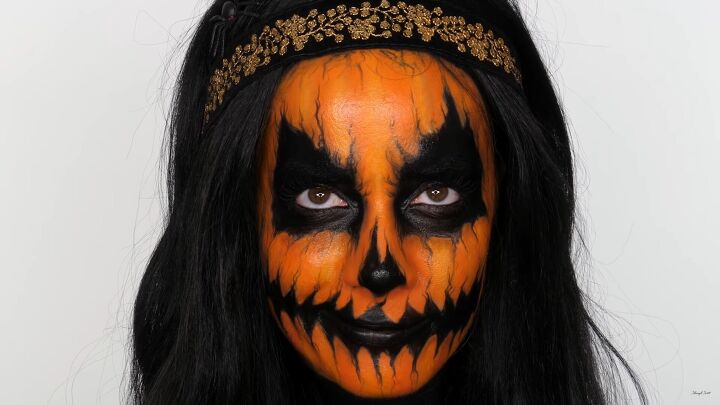
Pumpkin makeup tutorial
There you have it, a gourd-geous pumpkin makeup look! What do you think of this? It’s scary but fab! Thanks for joining me on this pumpkin makeup tutorial. I hope this gives you some excellent pumpkin makeup ideas for your Halloween costume.
The author may collect a small share of sales from the links on this page.


Comments
Join the conversation
Hi Shonagh, This is a beautiful interpretation of a spooky pumpkin face. VERY well done. Thank you for sharing your process.
Thank you for the tutorial! Love it! My grandson is gonna freak out when he sees his nana like this!@ lol🎃 trick or treat thanks again