Try This Easy Cherry Blossom Nail Art to Create Blissful Sakura Nails

Today, I’m going to show you a black cherry blossom nail art design that I created using sakura gel nail polish colors. These dark Japanese cherry blossom nails are perfect for spring (sakura season!) or summer, especially for the 2021 Tokyo Olympics!
Nail Addict, a company that makes cruelty-free, vegan nail polishes, sent me some sakura nail polish colors to try out, and even though I’m a real newbie to using gel polishes, I came up with this very pretty cherry blossom nail design, which is really easy to do.
If you’d like to learn how to do create these sakura gel nails, keep reading!
Tools and materials:
- Nail file
- Rubbing alcohol
- Gel base coat
- Gel top coat
- Black gel polish
- White gel polish
- Hot pink gel polish
- Nail polish curing lamp
- Thin paintbrush
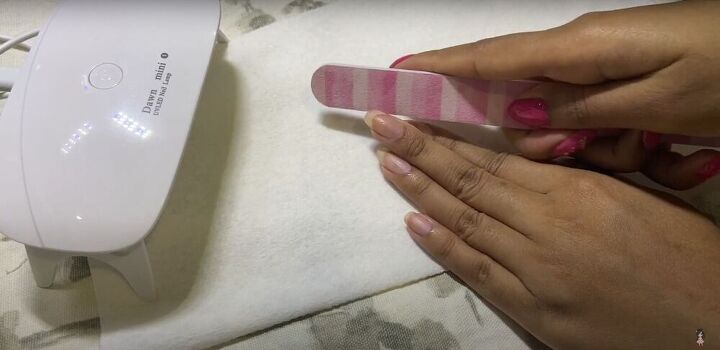
1. Prepare nails
I started by filing my nails to the shape I like, buffing the surface of my nails lightly with the file, and wiping each nail with a little bit of alcohol on a soft cloth.

2. Apply base coat and cure
Then, I applied a thin layer of base coat gel polish and cured it under my UV lamp for 60 seconds.
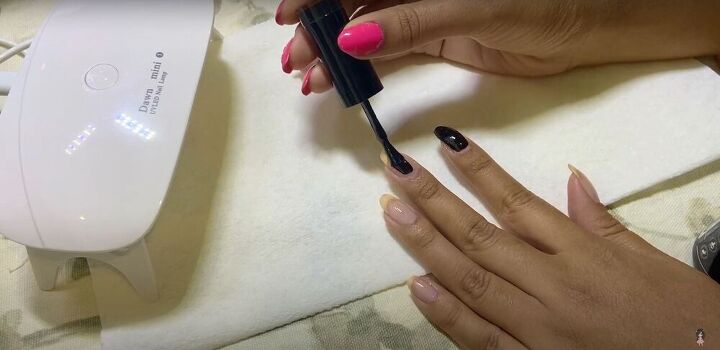
3. Apply black gel polish and cure
After the base coat, I applied a coat of black gel nail polish and cured it under my UV lamp. It was very opaque, so I only needed one coat.
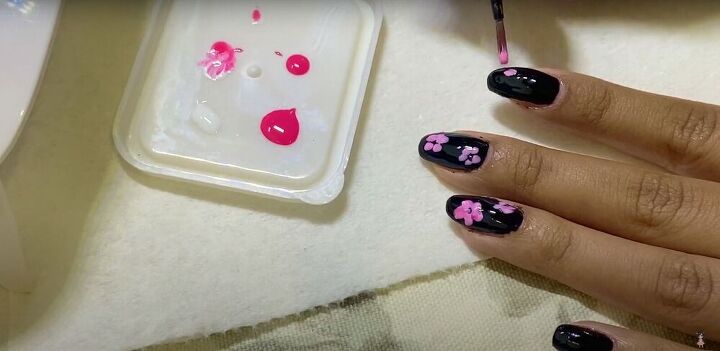
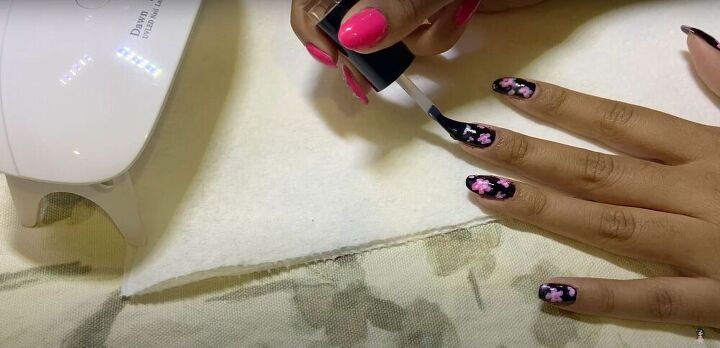
4. Make the cherry blossom nail designs and cure
I laid out the sakura nail polish colors I wanted to use in my cherry blossom nail art on a flat surface. I mixed some white and hot pink to make a light pink and used a thin brush to dot the light pink onto my nails to create cherry blossom nails.
After completing the petal layer, I cured the sakura nail polish under the UV lamp.
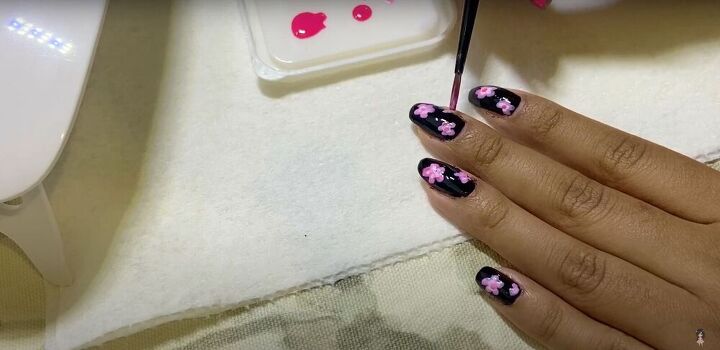
5. Add details
After the first layer, I went back in and added more details, and then cured the second layer when it was completed.
6. Apply top coat and cure
When I was happy with my design, I applied a no-wipe topcoat to my nails and cured it for 60 seconds.
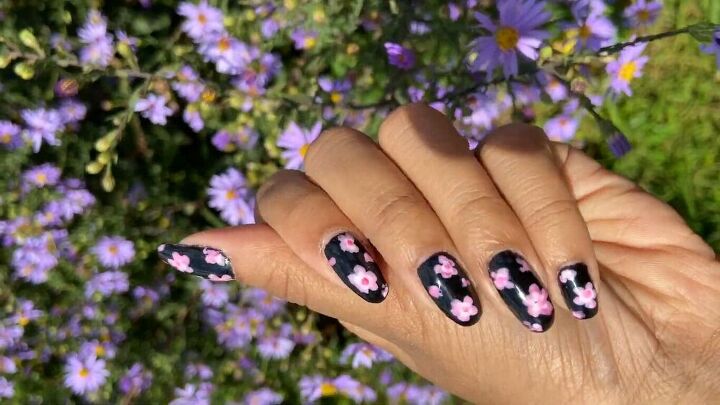
Cherry blossom nail art tutorial
Once they were dry, my black cherry blossom nail art was complete!
I really love these sakura nail polish colors from Nail Addict, and I’m definitely going to be buying more. I’ve had this cherry blossom nail design for two weeks already, and it still looks brand new!
What do you think of these Japanese cherry blossom nails? If you give it a try, I’d love to see your results.
The author may collect a small share of sales from the links on this page.


Comments
Join the conversation