How to DIY These Awesome Gel Sea Blue Nails

In this tutorial, I'm DIYing these beautiful sea blue nails.
This blue eye nail art is pretty simple to do and looks great, making it perfect for those of you looking for ocean blue nail designs. Let’s get started.
Tools and materials:
- Base coat
- Blue magnetic gel polish
- Black gel polish
- Off-white gel polish
- Magnetic stick
- Top coat
- Metallic drawing gel
1. Apply the first coat of gel polish
Apply base gel first and cure, before applying your first coat of the magnetic gel polish.
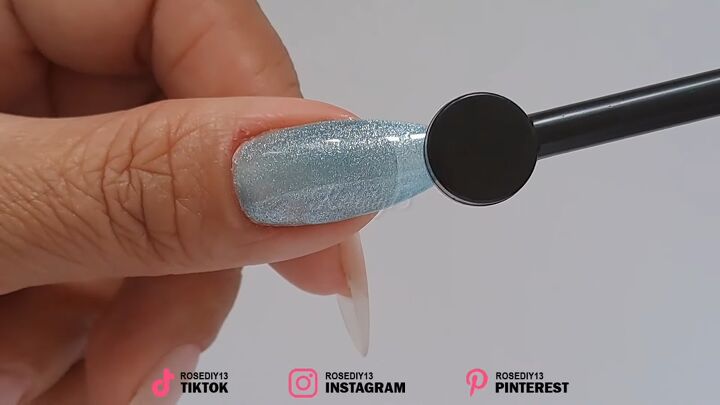
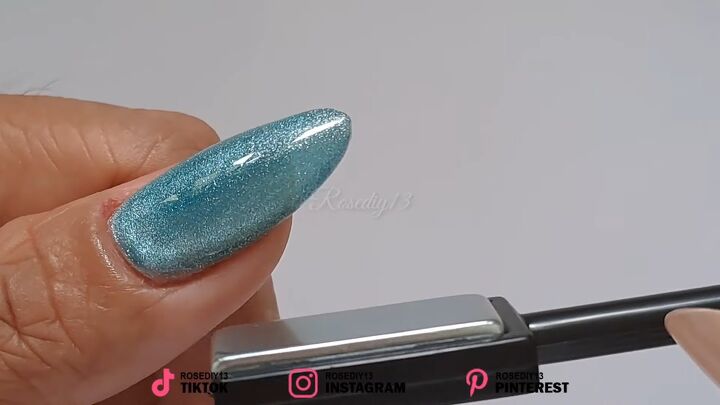
2. Use the magnetic stick to make any shape and pattern you want
Use the magnetic stick to manipulate and move the particles to make the shape you want.
Here’s what mine looked like. After you’re satisfied with the shape, cure it for sixty seconds.
3. Repeat with the other nails
Repeat the same process with the other nails. I did this pattern with all of my nails except my middle nail, which I’ll show you how to do next.
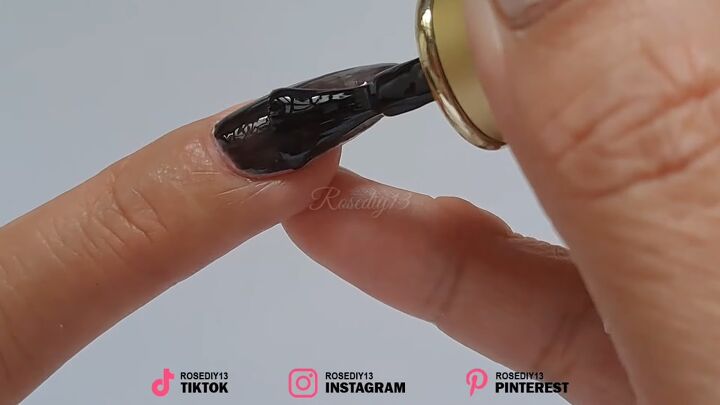
4. Apply black polish to the middle nail
For the middle nail, apply simple black nail polish to the nail and cure.
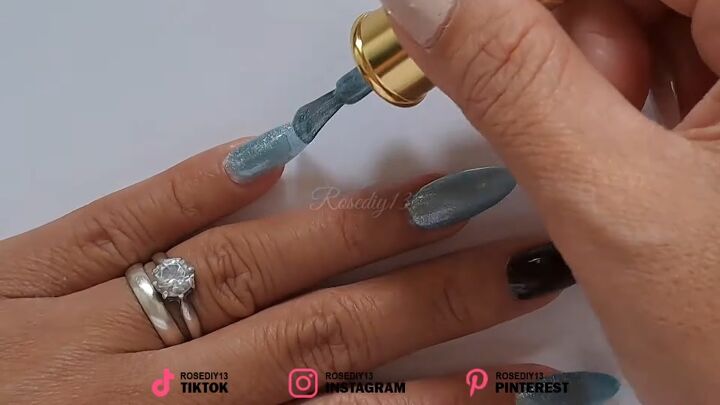
5. Apply the second coat
After the first coat is cured for sixty seconds, apply the second coat of the sea blue magnetic gel polish.
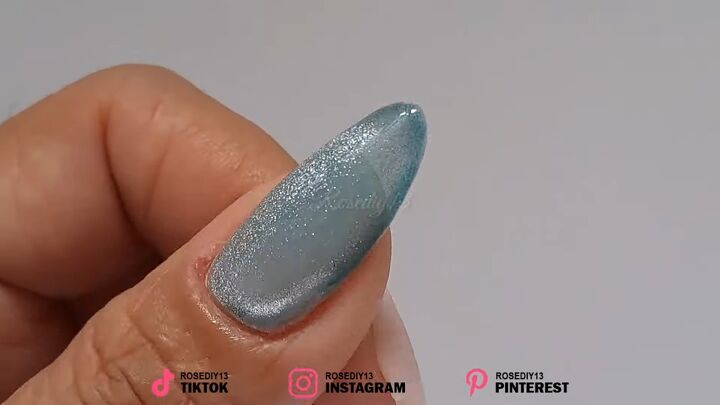
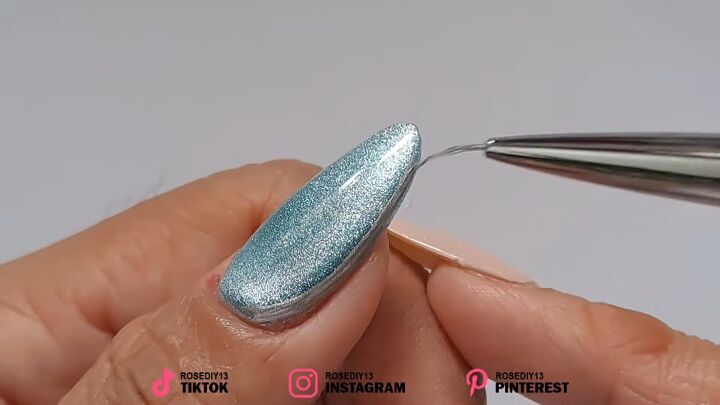
6. Use the magnetic stick to continue making the shape you want
Do this for all of the nails, and cure for sixty seconds.
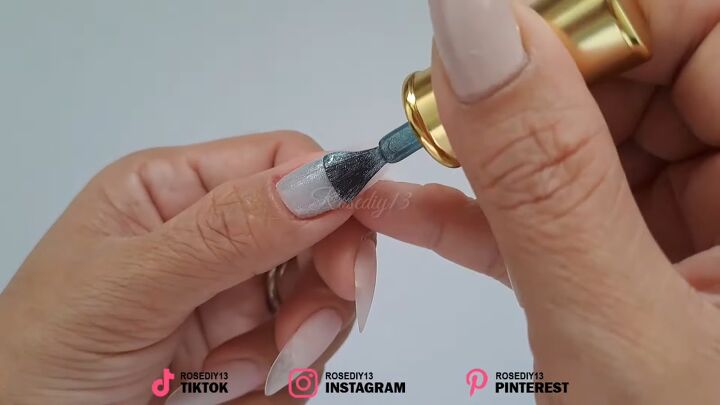
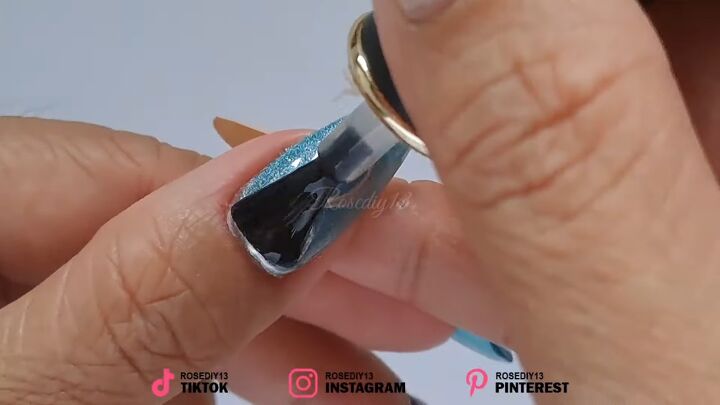
7. Draw a line on the side of the nail with metallic drawing gel
Using the metallic drawing gel, design your nails by drawing a line from the bottom of the nail’s edge to the top.
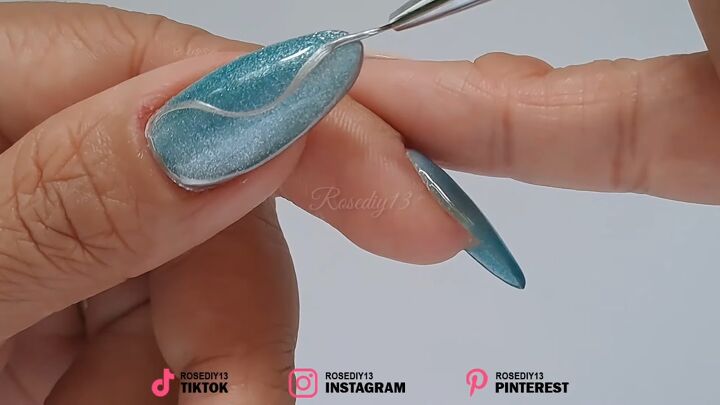
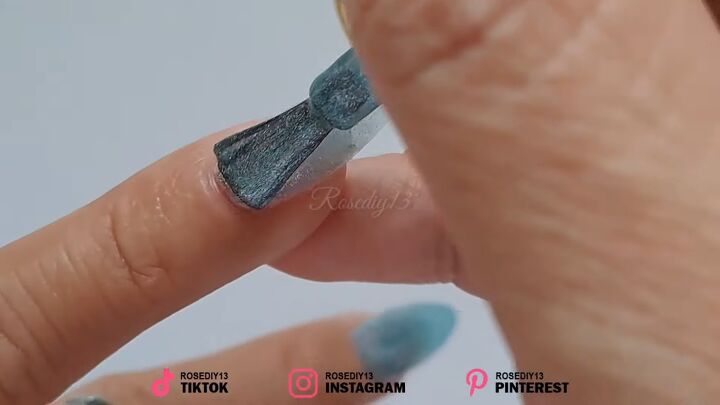
8. Draw a wavy line to meet the line on the side
Continue the design by starting from the other bottom edge and drawing a wave to the top to meet the tip of the line you drew previously.
Repeat this with the other nails.
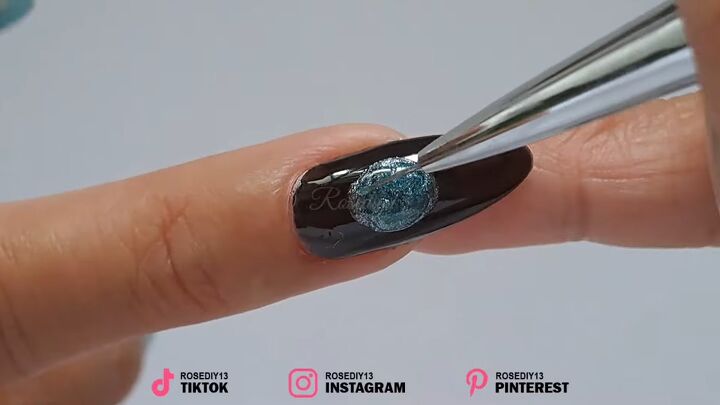
9. Add sea blue gel polish to the black nail
On the black nail, pour a large drop of the sea blue metallic gel on top and swirl it around with the same brush.
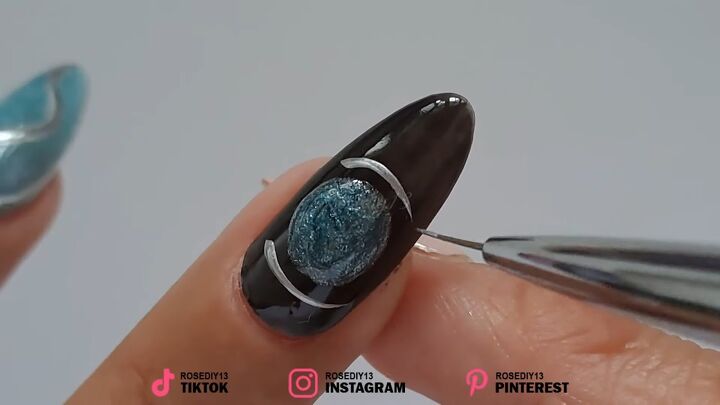
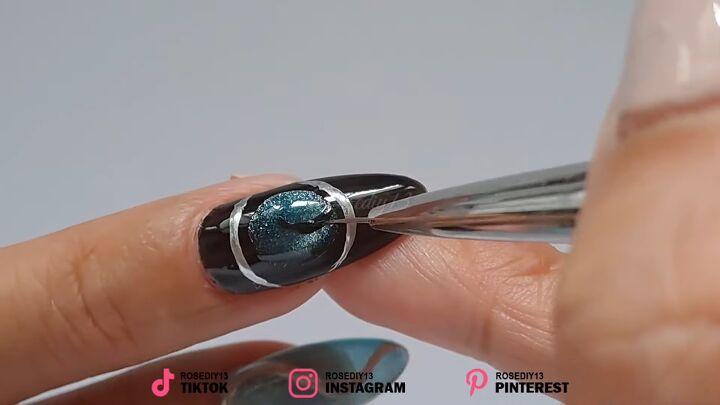
10. Draw two curved lines on the black nail
Use the drawing gel to draw two lines that follow the curve of the circle.
11. Use the magnetic stick to move the particles
Use the magnetic stick to manipulate the particles until you’re happy with the design.
12. Draw a line through the blue polish
Use black polish and a thin brush to add a small curved line inside of the blue polish to mimic an eye.
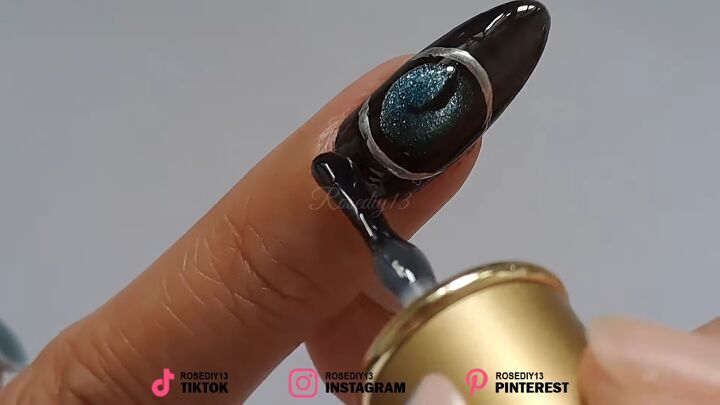
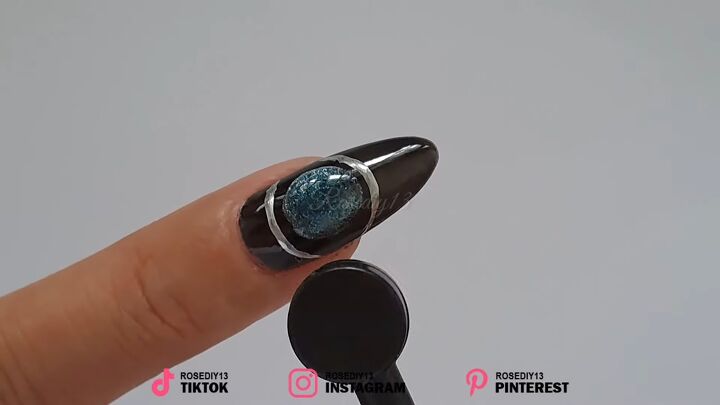
13. Apply another coat of black polish
Add an additional coat of black polish around the circle.

14. Apply off-white polish around the circle
Finish the design by adding three dots of off-white polish around the circle.
It should spread like this.
15. Cure for 60 seconds
16. Apply top coat and cure
Apply a top coat on all of the nails and cure again.
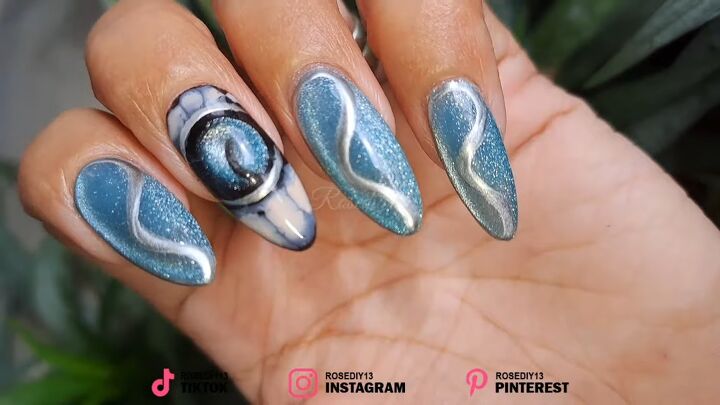
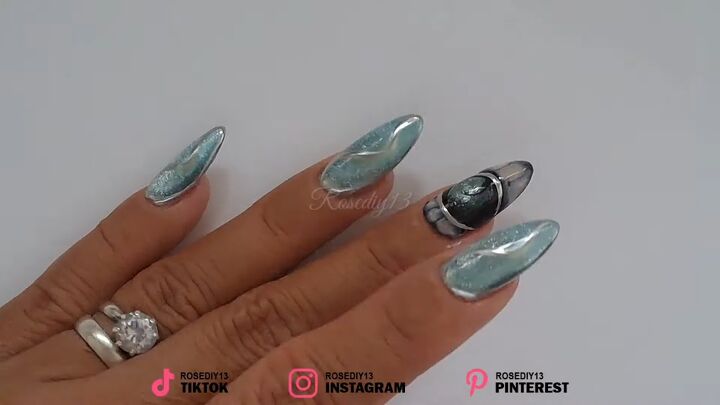
Sea blue nails
That’s it! Here are the finished sea blue nails. I love this magnetic gel effect and the nail art eye that I did with it.
The application is very easy and smooth and it dries quickly with any UV light. It lasts up to 45 days with no irritating smell and it’s so bright and shiny.
Let me know what you think about this nail art down below!
Products used:
- SEA BLUE CAT MAGNETIC GEL: https://bornpretty.com/products/born-...
- CAT EYE MAGNETIC STICK: https://bornpretty.com/products/born-...
The author may collect a small share of sales from the links on this page.


Comments
Join the conversation