How to Hem a Circle Skirt 2 Ways
If you’ve ever tried to hem a circle skirt the way you hem a straight skirt you’ve no doubt had trouble. You work so hard on the whole garment then the curved hem just doesn’t want to cooperate. And if you want a nice wide hem–forget it. You end up with bunching and it’s hard to get it to look good.
Hemming a circle skirt or other curved edge is inherently different because you have more fabric at the edge than where you need to stitch. Your circle circumference is bigger the further you get from the center. So how do you account for that extra fabric?
That’s where these secrets for hemming a circle skirt come in. They’ll help you get a nice smooth hem (even a nice wide one) without all the frustration!

Secret 1: Hem a Circle Skirt with Bias Tape
Using bias tape (also called bias binding) is a simple way to hem a circle skirt or other curved edge. Bias tape is fabric that is cut at 45 degrees from the straight grain (or on the bias) into folded strips. When fabric is cut on the bias, it has more flexibility and can more easily wrap around curves without becoming bulky.
When hemming a circle skirt, you use that flexibility to curve smoothly around the circle at its widest while still fitting perfectly at the stitch line. Both layers of the skirt in the main photo above were finished with bias tape.
You can buy pre-made bias tape or make it yourself using one of these tools. I like how this video helps you see how to use bias tape–if you haven’t used it before go check it out.
Secret 2: Create a Facing
Creating a facing to hem a circle skirt is a little more laborious but you can get a deeper hem that’s more desirable for a higher-end look. This is how I finish my own clothing because I love the look and weight of deep hems. Here’s how you do it.
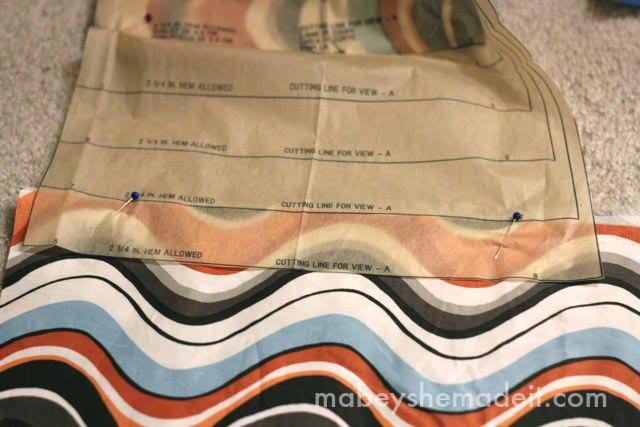
- Look in your pattern to see how much of a seam allowance is allowed. Let’s say it allows for a 1″ hem. So you’d cut your pattern 1″ shorter than the pattern calls for. Then sew up your dress until you get to the hemming part.
- Now take your pattern and cut a facing using the hemline of the pattern to the height you want it. Finish one edge with either a zigzag stitch or a serger. In this example I’m cutting my facing a good 2″ (I like wide hems) and since the facing will follow the bottom of your skirt exactly you won’t have any trouble folding the hem up.
Sew your facing pieces together at the side seams. Then pin the facing to the garment (right sides and raw edges together). Now stitch around the whole hemline.
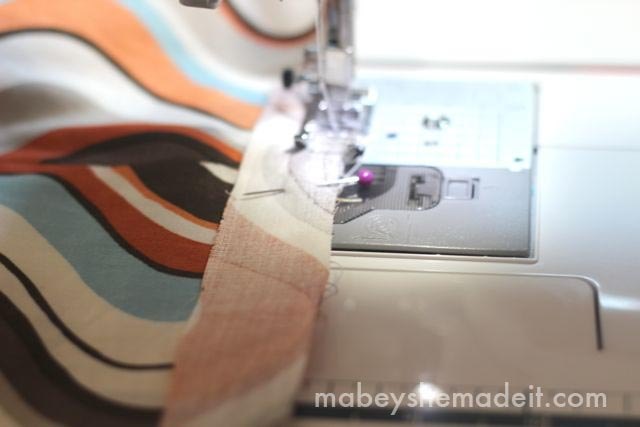
Flip the facing to the inside of the garment and press so you have a nice clean hemline. Then either machine or hand stitch the facing in place and you’re done!
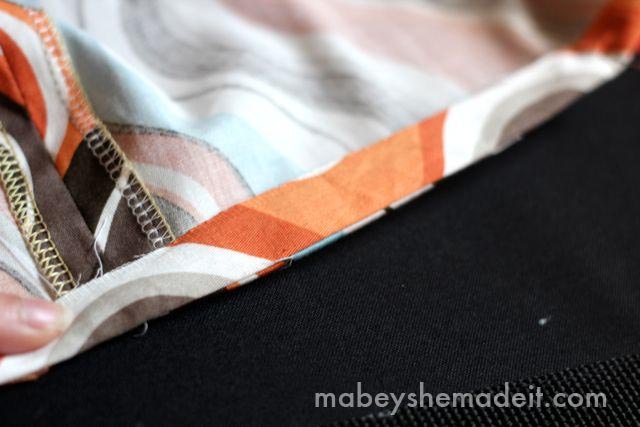
Because the facing is the exact same shape as the garment, you won’t have any bunching. Everything should lay perfectly flat, eliminating the headache and frustration of hemming a curved edge. It’s totally worth the added step–especially when you have a really big curved edge like on this maxi skirt. I started to hem it without the facing, and was so mad I almost gave up until I remembered to use this secret.
If you liked this tutorial, you might also like:
The author may collect a small share of sales from the links on this page.


Comments
Join the conversation