Make Your Own DIY Gathered Skirt With Elastic Waistband

Have you ever seen a really cool pattern and just wished you could have a skirt in it? All you have to do is follow this simple tutorial to learn how to turn that fabric into your very own gathered skirt with an elastic waistband. This gorgeous flared look will have you looking great and stylish and dressed to impress. The cool thing is that you can make it out of any pattern, so you can really make it yours. The skirt I made was size medium, so feel free to adjust as needed.
Tools and Materials:
- Cotton fabric, 43”. I used 2 ½ meters because it’s what I had, but 2 ¾ meters is better.
- Chalk
- Ruler
- Fabric ruler
- Elastic
- Safety pin
- Scissors
- Sewing pins
- Sewing machine
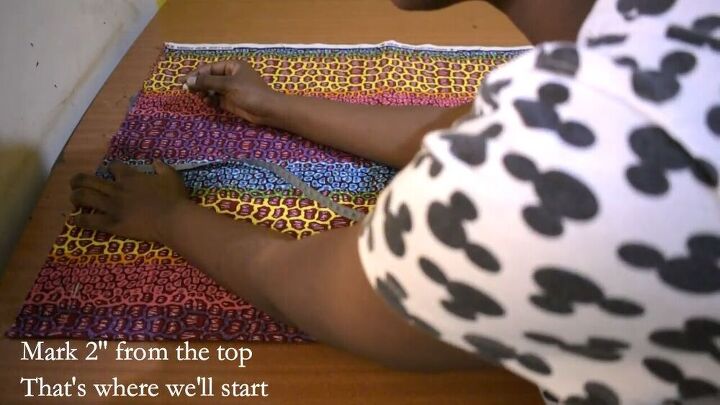
Fold your fabric, then using chalk, mark a horizontal line 2” from the top of your fabric. Then mark the endpoint of the waist, which in my case was 14 ½” (37 cm).
Once you’ve marked the waist, go up 1 ¼” and mark there. You’re then going to connect the line with a curve.
Now you’re going to mark another horizontal line at 20 ½” (52 cm). Then connect that higher point you made to the end of the new line. Use a ruler to keep it straight. Now measure 21.5” from the high point and mark it, then draw a slight curve from the bottom line to the new point.
Go around your outline and mark and pin your seam allowances under your lines. At the hem, it’s ¾”, everywhere else it’s ½”.
Fold your fabric, and then fold it again so that you have 4 layers of fabric. Then go around and cut out your pattern on your seam allowance markings.
Cut a 3 ¾” x 39 ⅝” strip out of the scraps of fabric you cut off of your pattern. If you don’t have enough material to cut it that long, just join two scraps together. Take your elastic, about 1 ¼” width, and measure around your waist to see the length you need. Stitch the ends of your strip, leaving a ½” seam allowance.
Line up the pieces of your fabric and sew the seams together all around.
Now you’re going to gather the waist. I used the yarn method in which you sew the yarn around the waist then pull it. For detailed instructions on how to do that, you can check out this explanation.
Sew the waistband to the skirt with the right sides facing each other. Once you’ve done that, go ahead and remove the yarn.
Take the edge of the waistband and fold it in ¼”. Then fold it again to just below the seamline, and stitch just below the waistband at the seamline, leaving an opening to insert the elastic. Now fasten a safety pin to the end of your elastic and feed it through the opening until it reaches the other side. Remove the safety pin and sew together the ends of the elastic, then stitch closed the opening.
Take your hem and fold it over ¼”, then fold it again ½”, and stitch it.
And there you have it! Your very own DIY from scratch gathered flare skirt. This project was so fun. Not only is it super cool to make my very own skirt completely from scratch, but because of that, I got to choose a pattern that spoke to me. This skirt is so “me”! I’d love to see what patterns you choose for yours — drop a picture in the comments!
Enjoyed the project?
Suggested materials:
- Cotton fabric
- Chalk
- Ruler
- Fabric ruler
- Elastic
- Safety pin
- Scissors
- Sewing pins
- Sewing machine
The author may collect a small share of sales from the links on this page.


Comments
Join the conversation
Just beautiful, an original for sure.