Quick and Easy: DIY Pencil Skirt

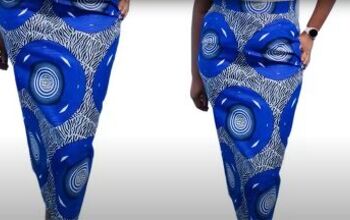
I love this tutorial because it is so easy and makes such a versatile garment! The pencil skirt only takes one hour (!) and can be made from only about a yard of fabric. It is so easy to find the time, the fabric, and the money to make such a simple, yet stylish, piece of clothing.
Tools and materials:
- One yard of knit fabric
- Measuring tape
- Marker
- Sewing machine
- Pins
- Drafting paper
- Scissors
Make your pattern
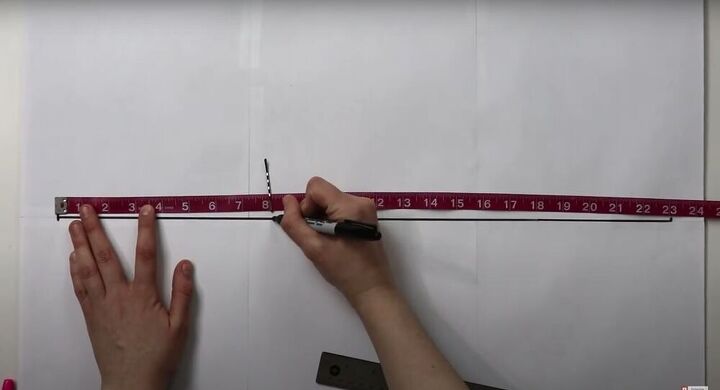
To begin, you first have to take your body measurements. For this skirt, we only need three measurements: length, waist, and hips. For the length, you’re going to take your measuring tape and start it at your waist, then you are going to let it drop down until the length you desire. Additionally, you want to mark off our hip point. So, once you’ve found your length, take a bobby pin and mark it on your measuring tape where it hits your hips. Copy all of this onto paper for your pattern.
Next, wrap your measuring tape around your waist (at the point where you began your pencil skirt), and without pinching check your measurement. Once you have it, fold it in half and that number is what will be copied into your pattern paper (meaning ten become fives, eight becomes four, etc.). Finally, repeat the same process with your hip measurement and copy your half measurement onto your pattern paper for your hips and for your hem. Then, take off one inch on each side of the hem so that your hem measurement is two inches smaller than your hip measurement.
Cut out your fabric
Fold your pattern in half and add dash lines to create the curve of your pencil skirt. Next, cut the pattern out. Remember that I didn’t include a seam allowance in this pattern, so if you would like to add that before cutting out the pattern, now is the time. Keep in mind that most knit fabrics have a negative ease (this refers to the stretch of the fabric) and therefore should be cut a little smaller so that the skirt fits just right. Finally, cut out your fabric (with seam allowance) so that you have two matching front and back pieces.
Sew the sides
Once your skirt is cut out, take a pin needle and use it to mark the top of the skirt. Next, place your fabric right sides together and sew the sides seams. Use a zigzag stitch, lightning stitch, or any stretch stitch. (To find what works best for you and your fabric, test everything on a test piece of fabric).
Draft your waistband
Start with your master pattern and some extra sheets of paper to draft your waistband. The goal here is to make your waistband the exact same size as your elastic so that the top looks like a seamless continuation. We want the waistband to be an inch tall, so the pattern should be two inches to account for the fold. Make sure your waistband is curved so that it sits on your waist well and then cut out your pattern (remember to include seam allowance).
Make the waistband
Take both pieces of your waistband and place them right sides together. Sew the side seams together. If you stretch the fabric so that it’s not as curved, the fabric will be easier for you to manage. Once the side seams are done, fold your waistband in half (make sure to match all the side seams so that it’s nice and neat) and insert the top of your skirt into your waistband. Match the side seams and pin them in place. Next, sew the waistband closed, but remember to leave a little opening for the elastic.
Insert the elastic
Insert the elastic into your waistband (you can use a safety pin to weave it through if you need). Once the elastic comes out the other end, match up the edges and use a zigzag stitch to sew them together. Once that’s done, close up the gap and secure the elastic inside.
To finish the skirt, simply fold the bottom over to hem it, and this DIY pencil skirt is done! It’s so easy and quick to make this skirt, I don’t see why you wouldn’t make five! Test out different colors, lengths, and even materials! Summer, spring, winter, fall, this skirt is perfect for every occasion!
Enjoyed the project?
Suggested materials:
- Knit fabric
- Measuring tape
- Marker
- Sewing machine
- Pins
- Drafting paper
- Scissors
The author may collect a small share of sales from the links on this page.




Comments
Join the conversation