Quick and Easy DIY Coin Purse

I’m going to show you how to make a quick and easy DIY coin purse. This is the perfect DIY to do if you have any scraps of fabric lying around that you want to use up.
Tools and materials:
- Fabric
- Zip (mine is 4inches but you can use a different length)
- Pins
- Scissors
- Pinking shears
- Sewing machine
Make your pattern
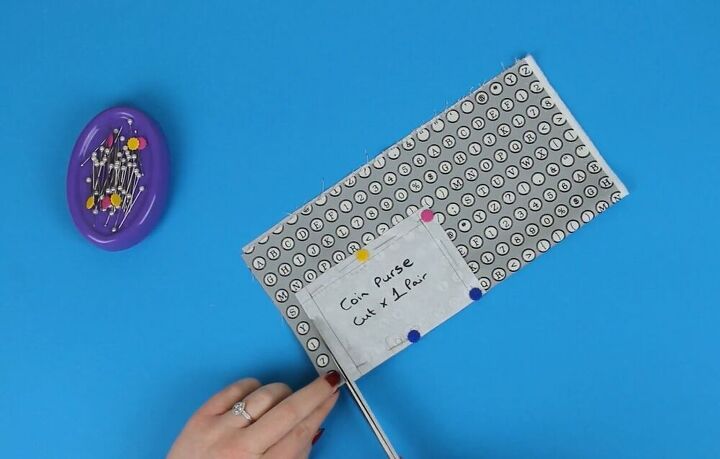
For the pattern, simply choose the length and width that you want your purse to be. I chose 7cm long by 10cm wide (3inch x 4inch). After you’ve made the basic shape of your purse, you’re going to want to add a 1cm seam allowance to the top and the sides. The bottom of the purse will be left on its own because it’s going to be on the fold. Taking your chosen fabric, fold it over, and then you’re going to pin your pattern to the fabric, making sure that the bottom of the pattern is at the fold of your fabric. Once you’re done, go ahead and cut it out.
Sew the zip to the fabric
At the top of the fabric, you’re going to need to mark where your zip will start and finish. I measured in by 1cm on both ends of the fabric. Take your zip and align it with the marks that you just made and pin it in place to secure it. Now using the zipper foot on your machine, sew the zip to the fabric. When you get close to the zipper pull, just remove it from the machine, close the zip and then continue sewing the rest of the zip to the fabric. Once you’ve sewn one side of the zip down, just open and close it a few times to make sure that it’s not catching to any of the fabric. Taking the other end of the fabric and the other half of the zip, pin them together and repeat the previous steps.
Sew the side seams
The next step is to close each of the side seams. Fold the zip over so that it’s face to face, and then you’re going to sew 1cm in the whole way down. Repeat this on the other side. When you’ve got that done, you’re going to want to cut off the excess zip and trim the corners just to reduce the bulk.
This bit is optional, but I took my pinking shears and trimmed the side seams to help reduce any fraying of the fabric. Now turn your purse the right way out and check your zip a few more times to make sure that the fabric isn’t catching. Once you’re done, give it an iron, and you’re good to go.
There you have a super simple DIY coin purse. The size I chose is the perfect size for my change and my cards, and it’s such a cute and handy little thing to have. These make great presents for friends and family, so next time you have some leftover fabric and you’re not sure what to do with it, why not make a few coin purses?
Enjoyed the project?
The author may collect a small share of sales from the links on this page.


Comments
Join the conversation
Thanks for solving a problem! Now I can make a custom sized coin and card purse. The store bought versions are way too small!