Creepy Spider Queen Makeup For Halloween

Halloween is fast approaching which means I get to teach you some terrifying special effect makeup tricks and I thought I would start with this easy spider queen makeup tutorial. You can easily recreate this look using common makeup products you already own.
Let’s get started!
Tools and materials:
- Glue stick
- Pressed/loose powder
- Heavy-duty concealer
- Salmon-toned concealer (optional)
- Foundation
- Black eyeshadow
- Brown eyeshadow
- White/cream eyeshadow
- Light skin-colored eyeshadow
- Angled liner brush
- Fluffy eyeshadow brush
- Black eye pencil
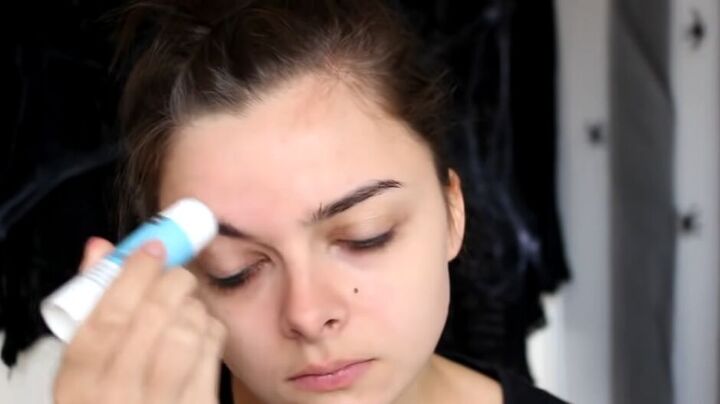
1. Conceal eyebrows
A big part of this spider queen makeup look is to make sure you cannot see your eyebrows, so I suggest you do not skip this step.
Using a non-toxic glue stick, start spreading the glue all over your eyebrows making sure to cover all sides of the hair.
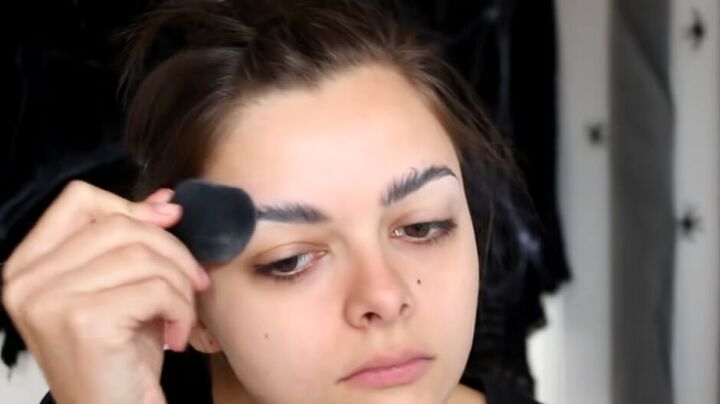
Once your eyebrows are completely covered in the glue, start a process of layering powder and glue over one another, repeating until the texture of your eyebrows is basically gone.
Over this apply a heavy-duty concealer.
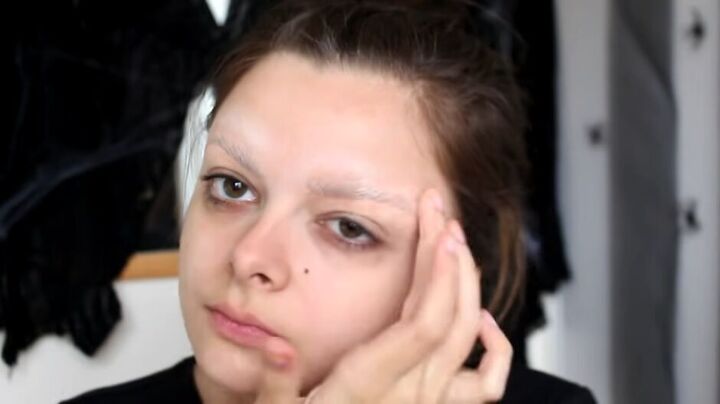
Pro tip: If you have particularly dark eyebrows like me, you can also use a salmon-toned concealer over your skin-toned one to help neutralize the darkness of your eyebrows, make sure to set this with a powder.
Using a brush dab the skin-toned concealer over your eyebrows so they magically disappear creating the perfect canvas for this frightening look.
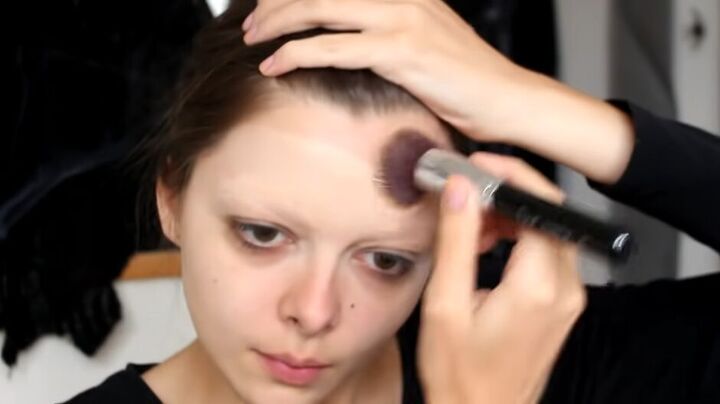
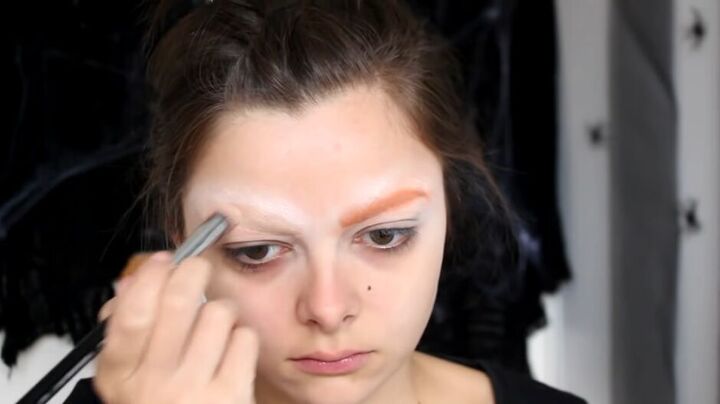
2. Cover your face with foundation
Go over the rest of your face with foundation and powder to make everything blend together and give a more natural look.

3. Frame your eyes with circles
Using a pencil brush and black eyeshadow start drawing circles around your eyes. It’s easiest to follow the socket of your eye to create a natural roundish shape then fill those circles in with a darker eyeshadow.
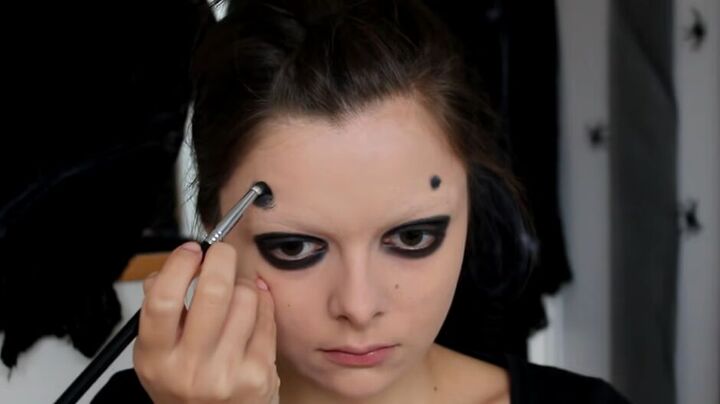
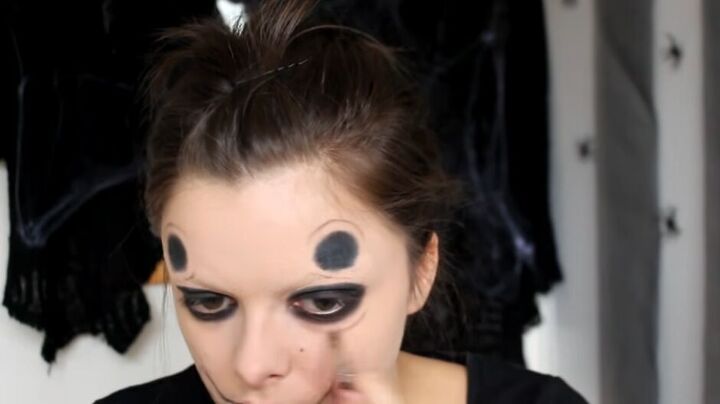
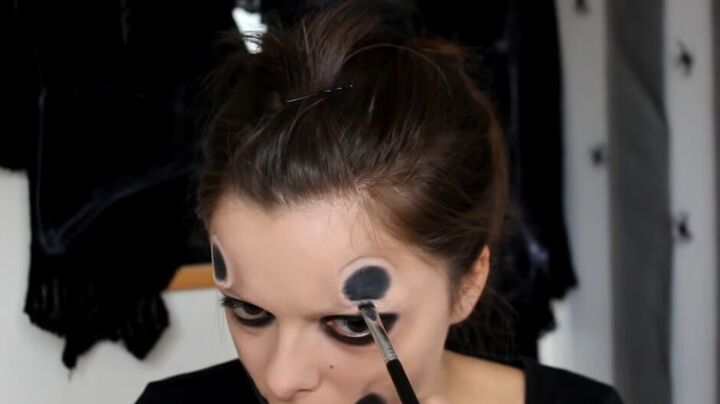
4. Create false eyes
Draw two circles that will represent the second set of eyes almost diagonally above your eyes. Start by drawing two small circles on both sides making sure they are symmetrical and progressively make them larger and larger until you get them to the desired size.
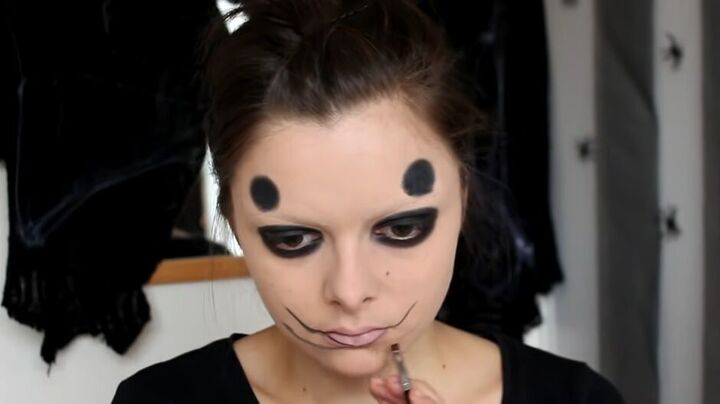
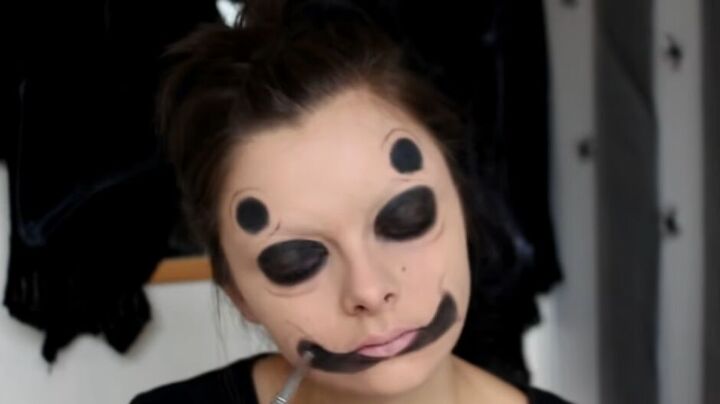
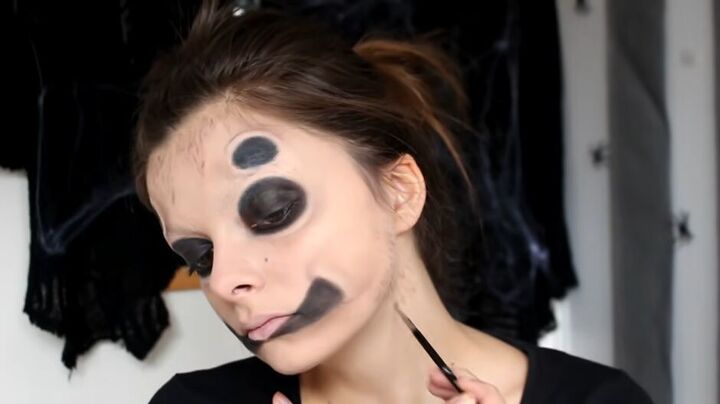
5. Draw fangs
Cover your lips with foundation and start drawing your fangs. To do this, draw a line going from your cheek towards the center of your bottom lip, repeat on the other side.
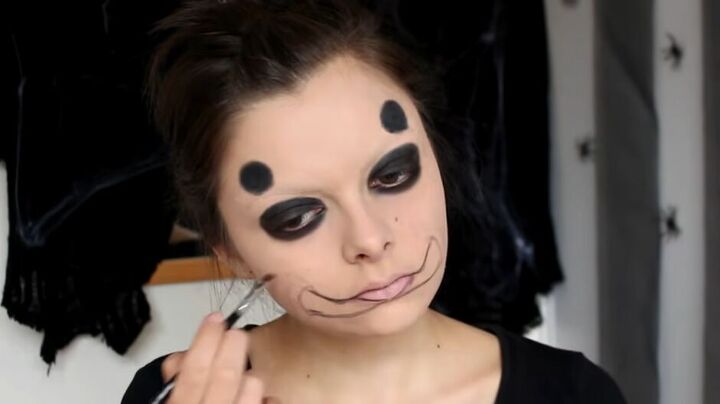
Now draw the part where the fangs look like they are poking up out of your skin. For this, I suggest using brown eyeshadow and an angled liner brush. Try and create that 3-dimensional structure using a little bit of shading here and there.
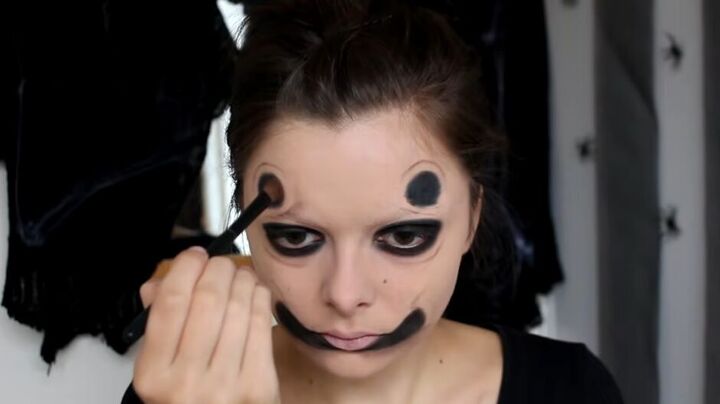
6. Create an illusion of protruding eyes
I want to make my second pair of eyes a bit more realistic, so I draw edges around them to give the illusion that they are protruding from my head. To keep with the whole theme, I do the same around my actual eyes.
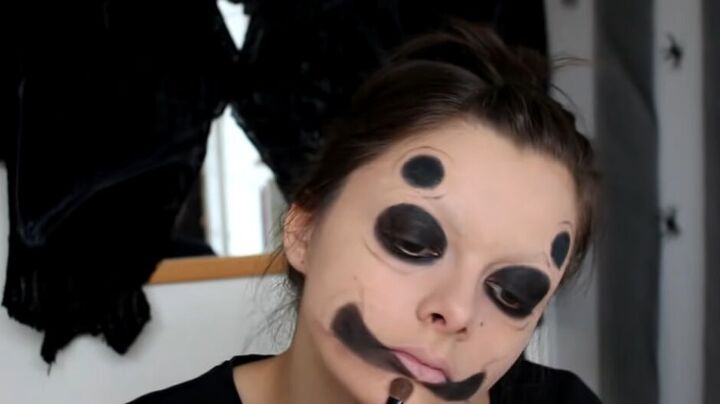
7. Filling in the fangs
Now it’s time to fill in the fangs. Using the same black eyeshadow fill in the fangs you outlined making sure everything is opaque.
8. Add shade to the fangs and eyes
Your next step is to shade the fangs and eyes. For this, use a fluffy eyeshadow brush and brown eyeshadow.
You are just going to shade underneath the fangs themselves as well as under the area they protrude, this is going to make it look more three-dimensional and realistic.
Do the same thing around the eyes.
9. Add a realistic effect to your fake eyes
Take a light skin-colored eyeshadow and go right around the edges of the eyes to make them pop up for a more realistic effect. You can do this around the fangs and eyes as well.
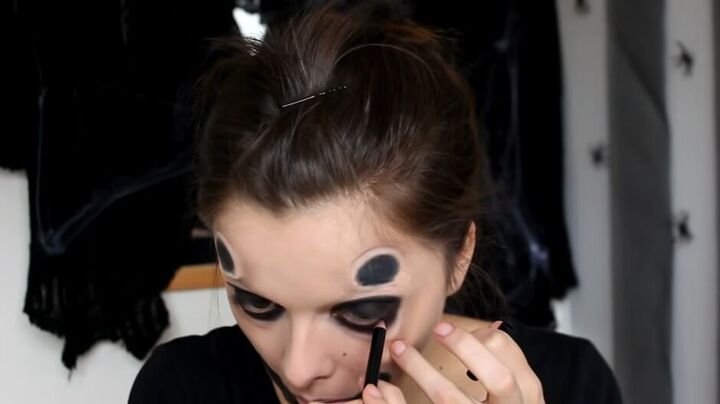
10. Line the inner rim of your eyes.
Line the inner rim of your eyes with a black eyeliner pencil.
11. Draw in the hair
To add a little extra creepiness to your spider queen Halloween makeup, take a mix of different brown eyeshadows and create hairs on your forehead and on the sides of your neck. Make sure to blend this into the hairline as well.
12. Add highlights
Now it's time to start adding the highlights and for this, I'm using a white cream eyeshadow. Draw the highlights on all your black areas in the places where they would catch the light naturally.
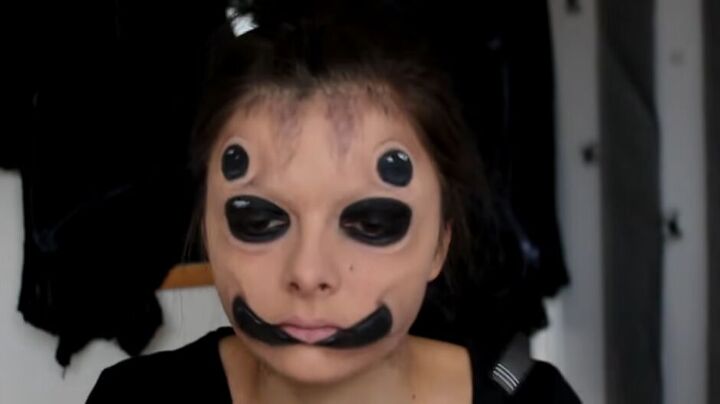
13. Add another set of eyes (optional)

If you would like to amp up the creepiness add an extra set of eyes on either side of the nose as well as in the middle of the forehead. Make sure to add the highlights and shadows to those as well.
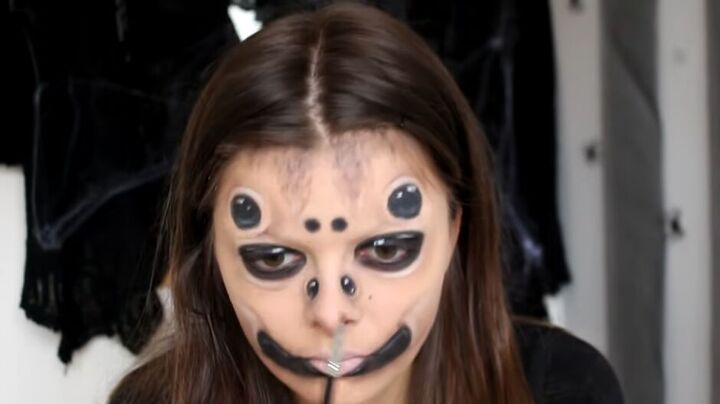
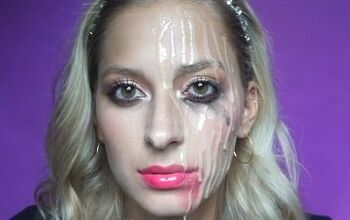
Spider queen makeup
Here she is in all her glory, the result of our spider queen makeup tutorial. I love it, it’s a perfectly creepy idea for Halloween. Let me know if you try it out.
Happy Halloween!
The author may collect a small share of sales from the links on this page.


Comments
Join the conversation
Incredibly creepy! Very professional!!! 🎃💀👻
Will the glue come off your eyebrows easy or pull your eyebrows off?