How To Make A Sweater – A DIY Grommet Refashion
This post may contain affiliate links for products I love and recommend.
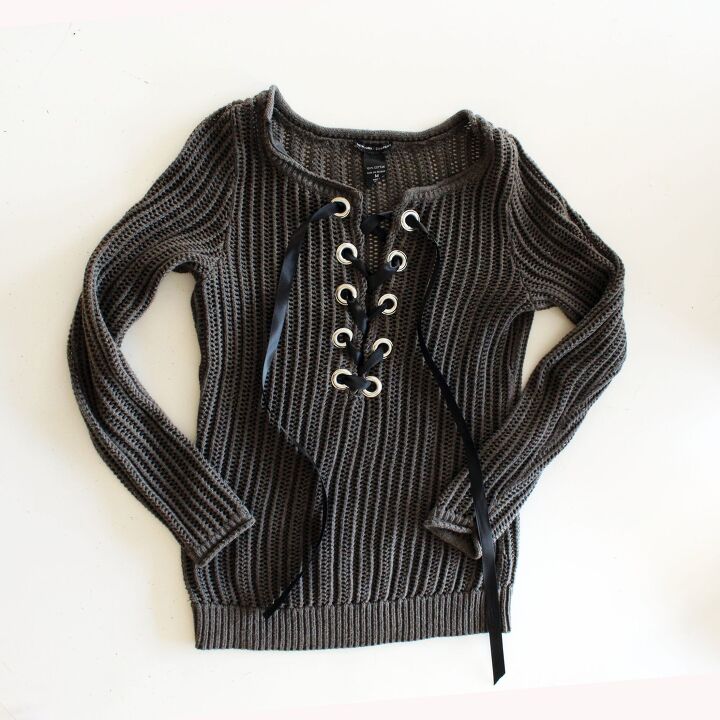
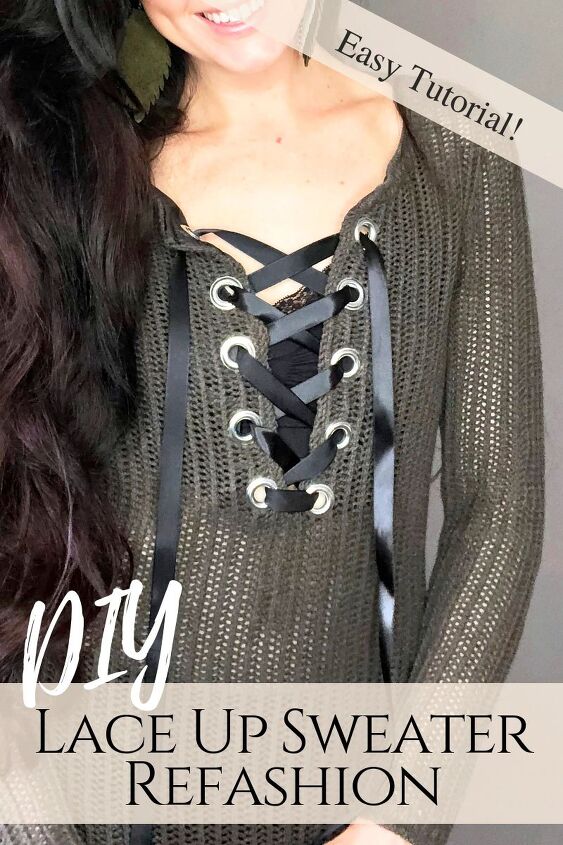
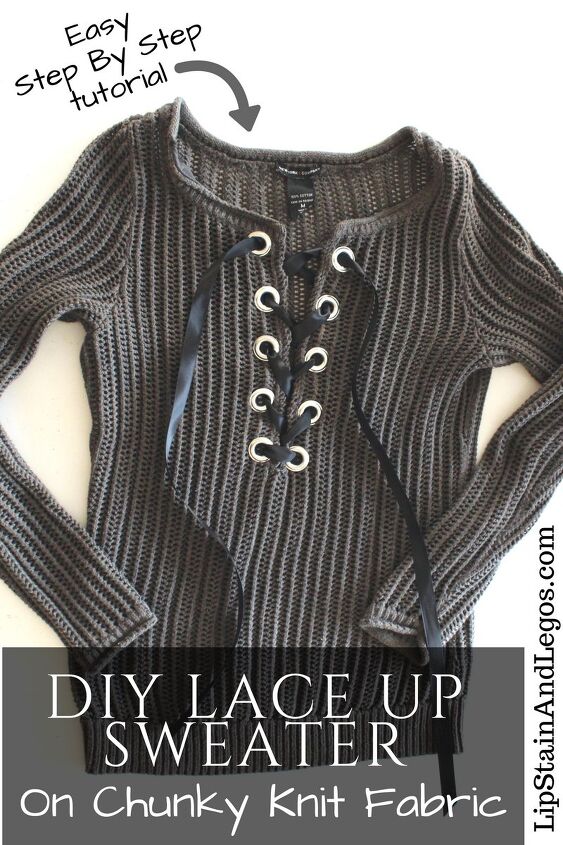
In my opinion, a lace-up sweater is the perfect winter trend. It’s the perfect way to make a sweater have more personality and detail and still keep you warm (unlike the bare-shoulder sweater trend.) So for today’s post, I’ll be showing you how to make a sweater with a lace-up front from a chunky knit sweater you already have.
While there’s lots of Pinterest tutorials on how to refashion a basic cotton sweater, I wanted to create one that walked you through some simple hacks that make it possible to work with more complicated fabrics like chunky knits or loose weave sweaters. This way, no matter what fabric you’re dealing with, you can always create exactly the finished look you want.

Supplies:
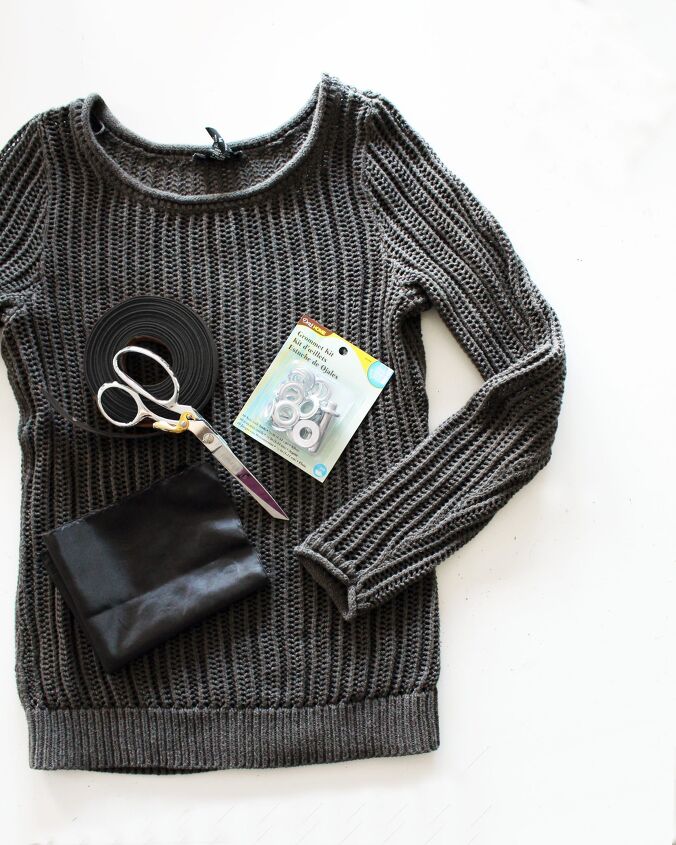
To complete this project, you’ll need a few basic supplies.
- An old knit sweater
- Black Polyester Lining Fabric
How To Make A Sweater A Lace-Up One:
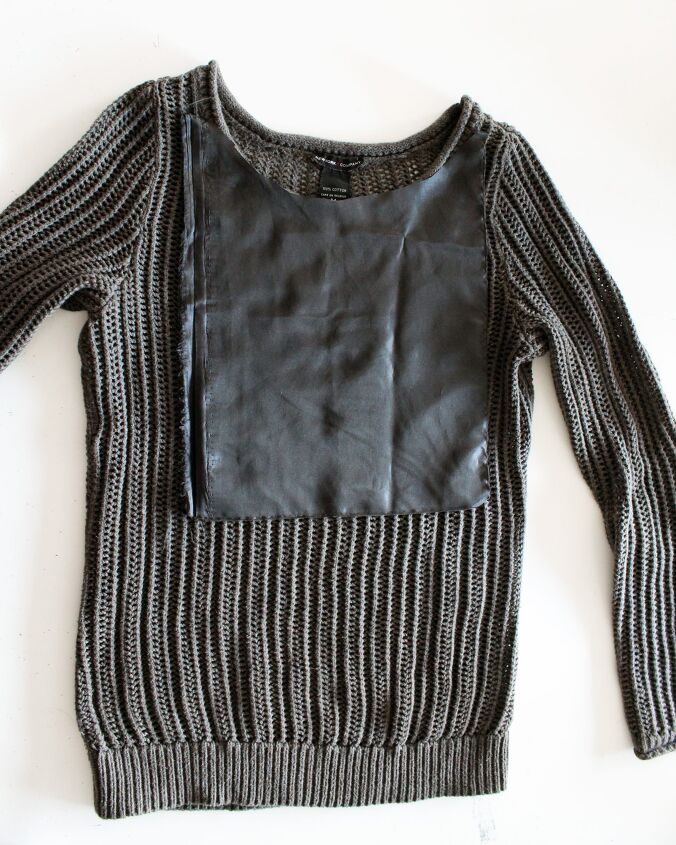
Start out by cutting a small rectangle of fabric large enough to cover the neckline of your sweater. I chose to use a polyester lining fabric because it is inexpensive, will stabilize my knit fabric because it doesn’t stretch, and is really easy to work with.
Lay the rectangular fabric piece over your sweater.
Use scissors to cut along the neckline of your sweater so they match.
Remove the lining and move on to the next step.
Next, you’re going to measure how deep you want the lace-up part of your sweater to go.
Tip: Be sure your lining piece if fabric is 2″ longer than your lace-up section of the sweater, This will help it all lay flat once you are done.
Use Tailor’s Chalk
to mark the line down the front of your sweater. This will be used as a guide to be sure the fabric doesn’t fray while you are working with it.
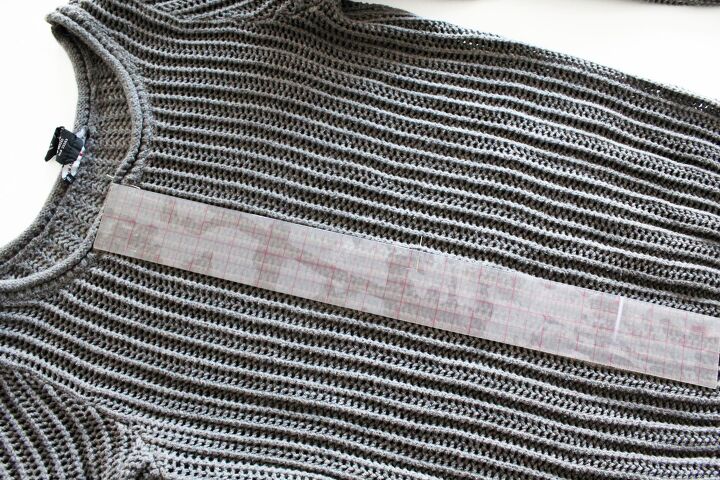
Next you are going to use your sewing machine to sew a line starting from the center of your neckline, down the right side of the line, across the end of your tailors chalk line, and back up the left side of the line to create a long, skinny rectangle. This step makes it easy to cut the center of a chunky knit sweater open without the yarns and threads coming undone.
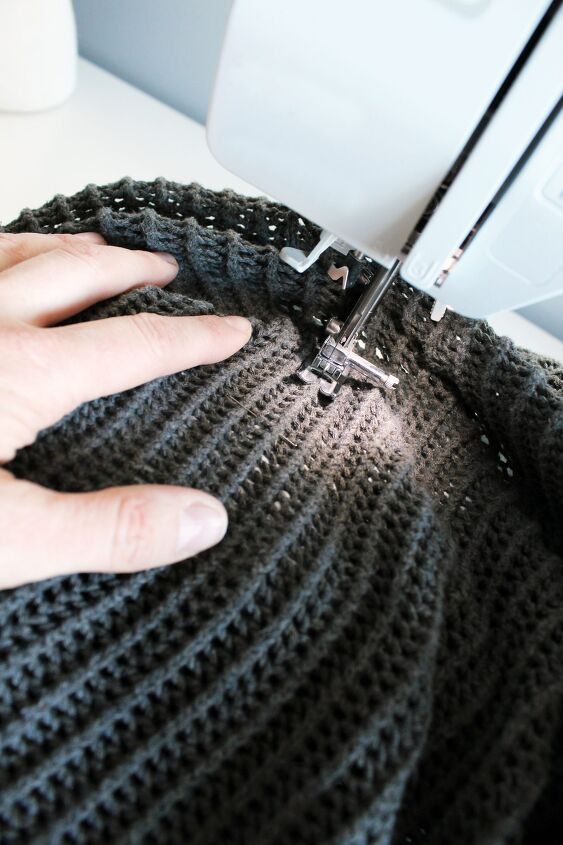
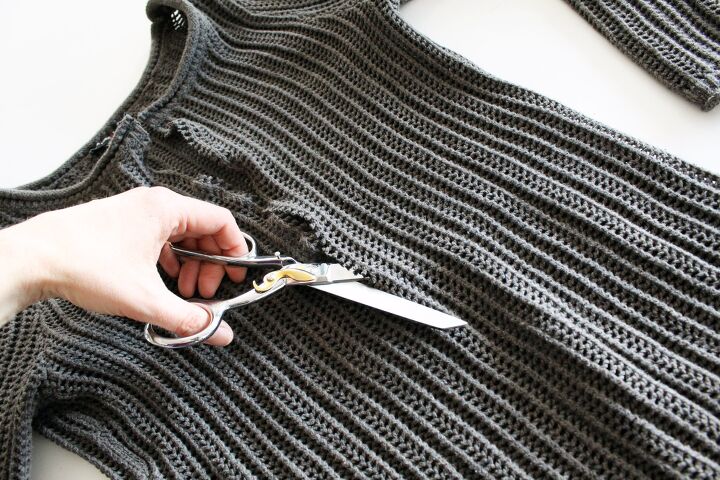
Now, cut along the line you have drawn to open your sweater.
Lay your fabric lining over the front of your sweater again (right sides facing together) and pin into place along the neckline. Cut a line through the rectangular fabric as well to match the cut on your sweater. Again, make sure your lining drops 2″ lower than the cut on the front your sweater.
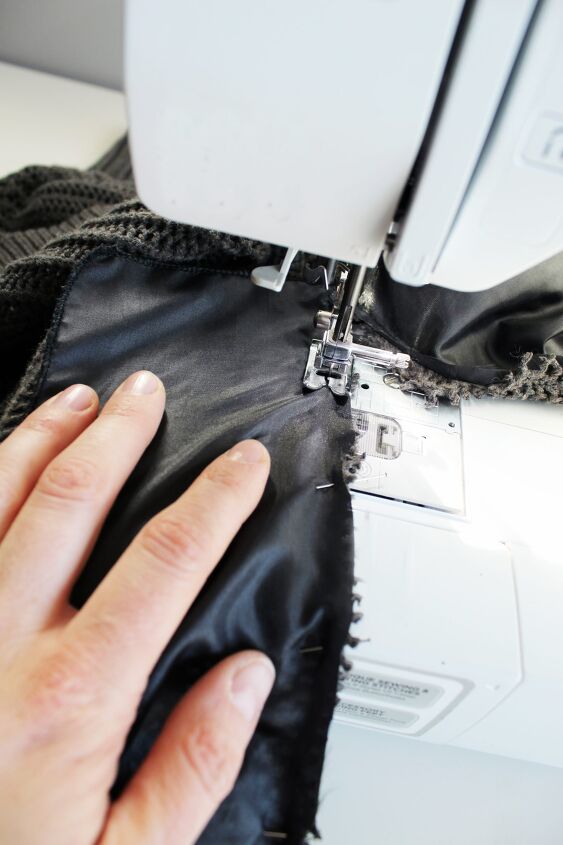
Head back to your sewing machine and sew the lining to your sweater.
Start at a corner of the neckline and continue all the way down the slit, up the other side, and finish on the other side of the neckline.
Flip the lining inside your sweater.
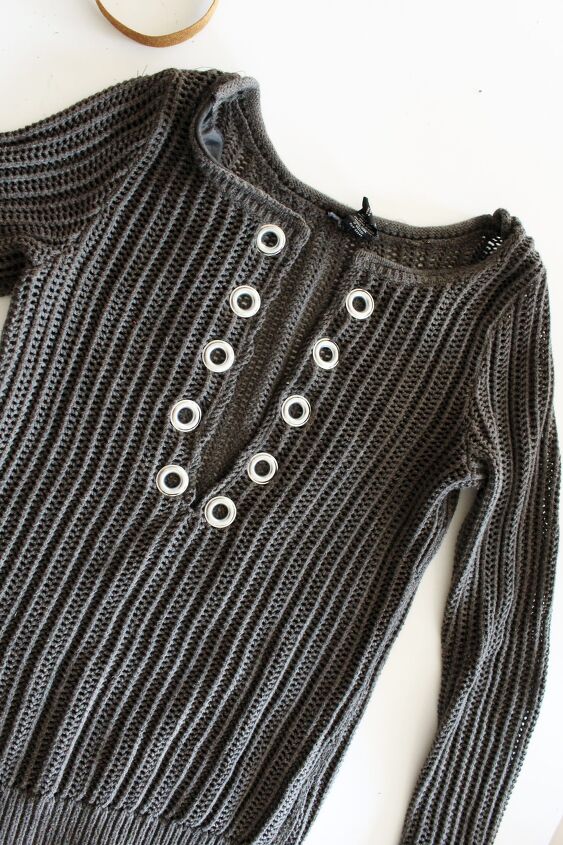
Now, we get to play with grommets!
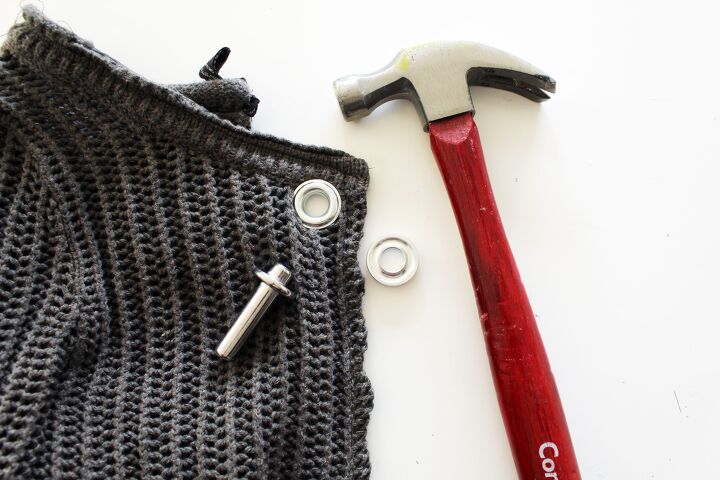
Using a grommet kit is the easiest way to get all the tools you’ll need for this project without wasting your money on things you don’t. This set
is less than $9 and includes the right size grommet setter and enough grommets to complete your project.
Starting from the top of the neckline, I measured 1″ down and placed my first grommet. From there I continued punching grommets every 2″ and setting them with a basic hammer. You can fold your sweater in half and use Dressmaker Pins
to mark where to place grommets on the other side.
Now lace it up with some pretty ribbon and you are all set!
I really hoped you liked this little DIY. Personally, I absolutely love how this project turned out and already wear this sweater all the time. I hope you had fun with it too! As always, if you have any questions, leave a comment below and I’d love to hear from you!
Other Projects You May Like:
Liked This DIY? Please Share It!

The author may collect a small share of sales from the links on this page.


Comments
Join the conversation
Really cute!
Wonder if this would work on the fly away cardigans.