Super Cool Fabric Dyeing Designs

- March 28, 2021
- DIY, Dyeing, Sew & Punch, Up-Cycle
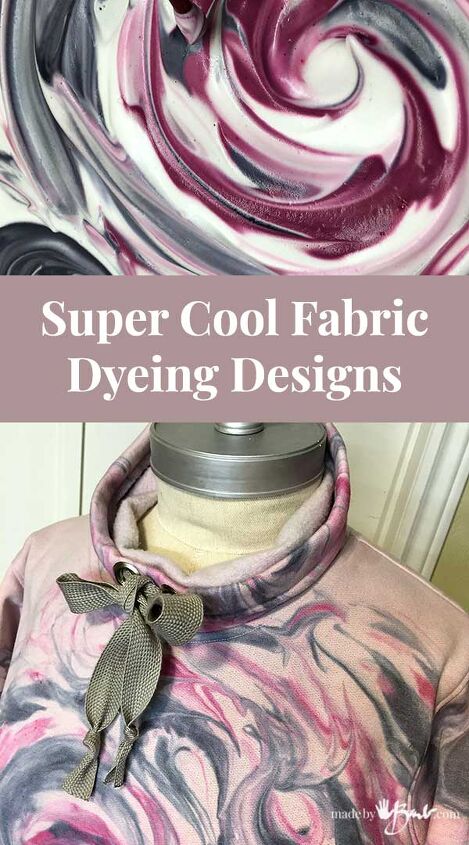
Who said you have to settle for the typical?! Did you know that you can create the most unique designs on fabric, not to mention it’s so much fun. Let me share how to make Super Cool Fabric Dyeing Designs!
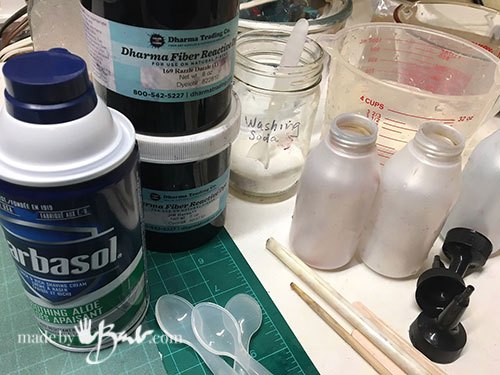
The Supplies:
This is another project using my favourite way to dye natural fabrics; with fibre reactive Dye. Ever since discovering this dye I have pushed it’s limits in all sorts of ways. Shibori, Ice-dyeing, dyeing in the muck, modern Tie-dye, and even colour removal to dye. ‘But this method is by far the most tactile fun. The fabric is prepared for dye (yardage or garments are soaked in a soda ash solution 1 cup to 1 gallon). The thickening ingredient is shaving cream (not gel) as it is pretty stable for a long length of time and washes away nicely.
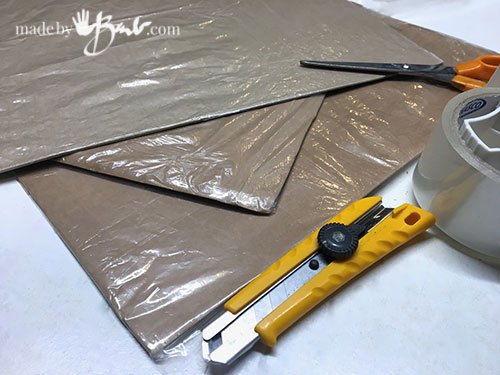
Since I am not dyeing an entire garment I made some stiff boards that can inserted inside the shirts to prevent bleed-through. They are covered with old bags and taped. Do remember that your fabric needs to be natural fibres like cotton, rayon, bamboo, linen. (I have even dyed silk and wool)
As usual the fabric (in this case they are a cotton t-shirt and some onesies) is soaked in the soda ash solution for at least 30 minutes. (One cup soda ash per gallon of water) They are well wrung out. To make working with the wet fabric easier I have made some boards covered with plastic. The boards are placed inside the shirts and pined with some sewing clips
The Secret Ingredient:
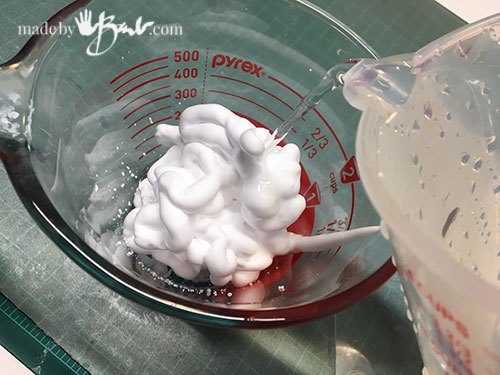
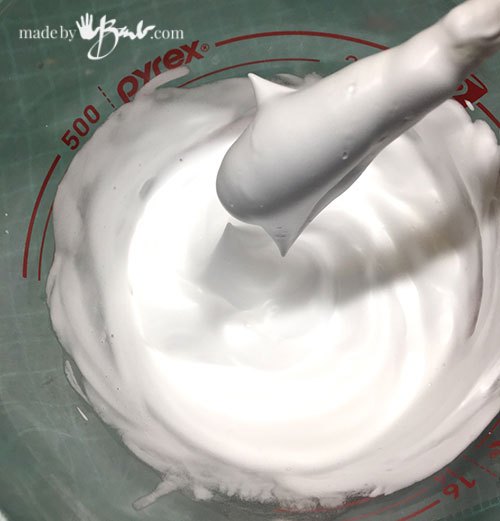
The shaving cream, yes shaving cream, is watered down a bit to make it more fluid and swirlable. The dyes can be mixed in a various ways. You can make larger mixes or more concentrated mixes. Some dye colours like to have a bit of a warm water to dissolve better before adding some of the shaving cream. For more distinct lines you can use a concentrated dye in lesser quantity but higher concentration. It’s all fun and experimental. Tip; the shaving cream will make the colours look somewhat more pastel than they will print though since the shaving cream is just a carrier. The dye does the it’s job.
I planned to only have the swirls in certain places so I prepared the area on a piece of plastic the proper size. It does not run away but may stain so do use some plastic.
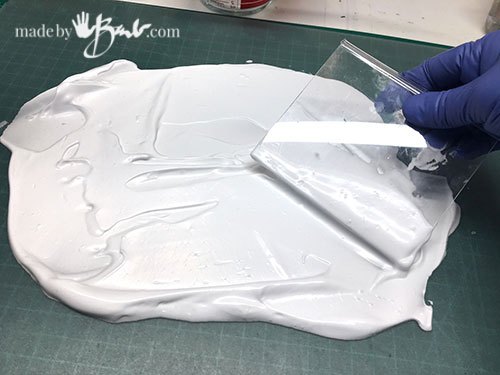
Spread the diluted shaving cream to cover the area pretty flat. Like being a kid Again!
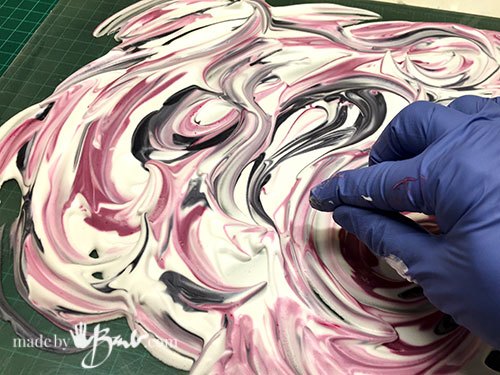
Here comes the fun part. The dyes are mixed as desired strength and thickened with some of the shaving cream. The designs are made using swirling on the shaving cream base. Yes, plain old shaving cream has a good ability to hold it’s shape for quite a long time.
They can be swirled with your gloved hands or with toothpicks, whatever kind of swirls you want. Get ready for how fun it is…
And the Magic Happens:
Usually I leave dye to ‘batch’ for a recommended amount of time (less if warmer) but this time I rinsed pretty well immediately. Oddly the dyes seems to not wash away at all. If you are concerned maybe make a test piece; possibly there is some odd thing happening due to this unique use of the dye.
Since I was not dyeing the entire shirt be very careful not to have any residue of dye on your hands or near that clean shirt; ask me how I know? I did have a few specks that I had to paint a drop of bleach on… solved.
Dyeing first:
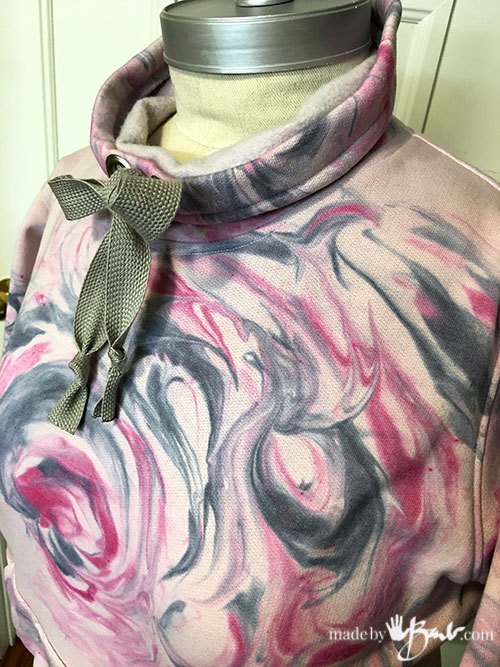
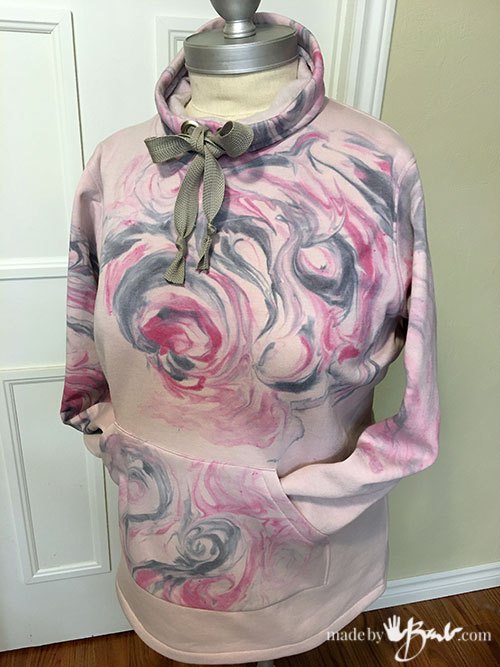
I wanted to make a custom fleece top. From my experiences with eco printing and dyeing large garments at once it becomes quite tedious to manage how to lay it out, so the problem solver brain of mine figured if I cut the pieces of the garment and dyed BEFORE sewing then I could manage a bit easier. Yes! It worked nicely.
I also think if the design is not overall it does look more like art than just a bought fabric print. (colours; Raven Black and Razzle Dazzle)
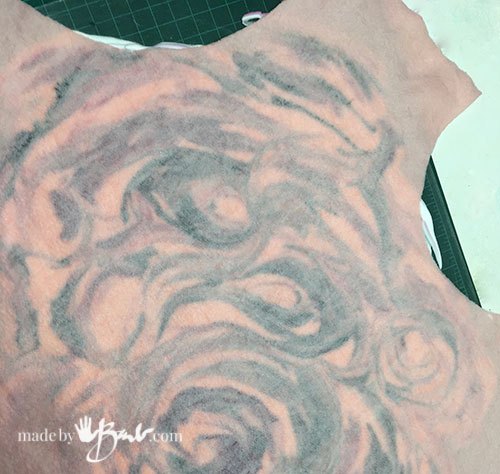
Once you are happy (remember that it will be a mirror image) it’s time to put the fabric on top. Carefully place the fabric on top. Pat gently to make the entire fabric come in contact with the swirled cream. The colours are on the top so they will be what makes your designs.
I cut each piece prior to dyeing and then partially dyed them so that it looked more like fashion design.
If you do not sew you could just isolate sections of the garment for the prints. I like to break the rules… The mistakes are somehow rolled into being part of the plan.
From all the years I have painstakingly painted designs to now where I create unique designs using dye. I love using art within the boundaries of fashion and fibre arts. Think outside the usual ‘box’ and ‘own’ your creativity. I believe the future of fashion design is opening up to lots of unconventional possibilities! Woohoo! You know there’s some more ideas sprouting from this one…
The author may collect a small share of sales from the links on this page.


Comments
Join the conversation
I wouldn't have figured to use shaving cream in a million years! Very creative and very tempting project. Thanks for the inspiration.
Love the blouse, definitely going to try this