How to DIY a Cute Chanel Logo Ruffle Sweatshirt

I saw a women's ruffle sweatshirt that I loved and wanted to make. I'd also wanted to use fabric paints for some time.
Everything came together and I ended up making this ruffled sweatshirt from scratch and custom painting the popular dripping Chanel logo on to it.
Tools and materials:
- French terry fabric
- Ribbing fabric
- Fabric paint
- Old sweatshirt as pattern
- Paper for pattern
- Marker
- Pins
- Ruler
- Measuring tape
- Scissors
- Plastic file protector
- Scalpel
- Hair dryer
- Sewing machine
- Gathering foot (optional)
- Serger (optional)
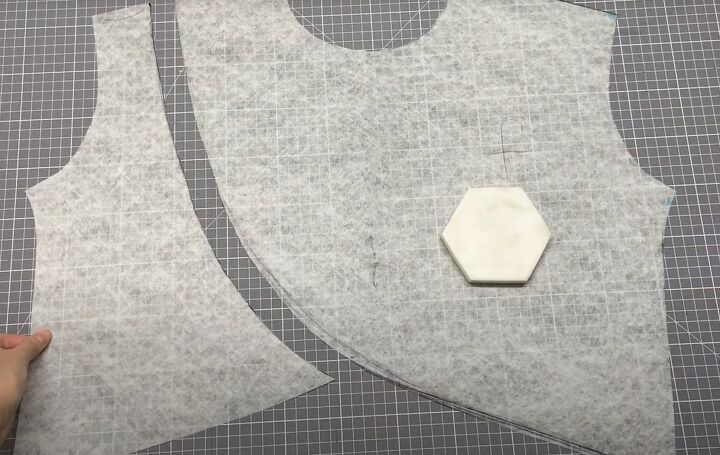
1. Draft pattern
See the video at 0:30 for how I drafted the pattern.
2. Cut fabric
Placing the back and sleeve patterns on the fold and allowing for a half inch (1 cm) seam allowance, cut out two sleeves, one back and one each of the front pieces from the French terry fabric.
3. Make front ruffles
Measure along the lower curve and the longest curved edge of the front pieces. Mark the curves in quarters along their length.
Cut a strip of the ribbing fabric for each curve at double the length and 3.5 inches (9 cm) deep.
Join shorter strips together if necessary. Mark the quarter points along the length of each strip.
Sew a gathering stitch along one long edge of each, either using the gathering foot of your sewing machine or sewing two rows of long, straight stitches and pulling the ends to gather them.
4. Attach ruffles
Gather the ruffles to fit the curved edges. Matching the quarter points, pin the ruffle to the curves with right sides together.
Sew a straight stitch along the seam allowance of both curves and serge or sew a zigzag stitch along the raw edge of the smaller curve.
5. Join front pieces
Matching the shoulder seams, place the smaller front piece over the larger one with right sides together.
Pin and sew the curved edges together and finish the raw edges.
6. Back ruffle
Measure the lower edge of the back. Cut a piece of ribbing fabric double the length and 3.5 inches (9 cm) deep and gather and attach it as before.
7. Join seams
Sew the front and back together, right sides facing, at the shoulder and side seams. Finish the raw edges.
8. Sleeves
Join the sleeve seams and turn the sleeves right side out.
Turn the sweatshirt inside out. Insert the sleeves through the armhole so the sleeve head and armhole are right sides facing, and pin and sew them in place.
9. Neckband and cuffs
Measure around the neck edge on the front and back. Cut a piece of ribbing 70 - 80% of the length of the neck edge plus 0.75 inches (2 cm) in length and 2.25 inches (6 cm) deep.
Measure around your wrist, add 0.75 inches (2 cm) for ease and 0.75 inches (2 cm) seam allowance. Cut two strips of ribbing to that length and 4.75 inches (12 cm) deep.
Fold the ribbed strips in half widthways and stitch the short edges together.
Divide each round into four equal parts.
Fold the neckband in half lengthways with the wrong side inside.
Starting with the seam at the center back of the neck edge, pin the neckband evenly to the right side of the neck.
Pin the cuffs to the sleeves in the same way. Sew the neckband and cuffs in place.
Top stitch around the neck edge just outside the neckband.
10. Make stencil
Draw or trace the elements of your design onto paper. Place the paper inside a plastic file protector and trace the design onto the plastic.
Cut open the file protector and cut out your stencil with a scalpel.
11. Painting
Place a magazine or other protection inside your sweatshirt to keep the front and back apart.
Place your stenciled sheet over the front of the sweatshirt and hold it in place with weights.
Mix your fabric paint with water and apply one color and one section at a time. Lift the stencil carefully between each section and dry the paint with a hair dryer.
Allow the final design to dry naturally for 24 hours. You can speed up the time with an iron or hair dryer, but make sure it's completely dry before wearing.
DIY ruffle sweatshirt
Of course you can use any design you like, but I love my dripping Chanel sweatshirt.
Whatever you choose, your ruffled sweatshirt will be one of a kind and unique to you. Take your time over the painting, it's worth it for the final result.
If you enjoyed this tutorial, please do let me know in the comments below.
For more DIY fashion content, check out my post on How to DIY a Versatile Scarf Top!
How to Make a Chanel-Inspired Bag!
Enjoyed the project?
Suggested materials:
- French terry fabric
- Ribbing fabric
- Fabric paint
- Old sweatshirt as pattern
- Paper for pattern
- Marker
- Pins
- Ruler
- Measuring tape
- Scissors
- Plastic file protector
- Scalpel
- Hair dryer
- Sewing machine
- Gathering foot (optional)
- Serger (optional)
The author may collect a small share of sales from the links on this page.


Comments
Join the conversation