How to Use Tape-In Extensions on Short Hair for Instant Natural Volume

Today, I’m going to be talking about how to use tape-in hair extensions on short hair to fill in gaps, especially in fine hair. Hair extensions are normally used to give length to short hair, but today I will be showing you tape-in hair extension placement for short hair, which gives thin hair a denser, fuller look.
Tools and materials:
- Tape-in hair extensions
- Flat iron
- Scissors
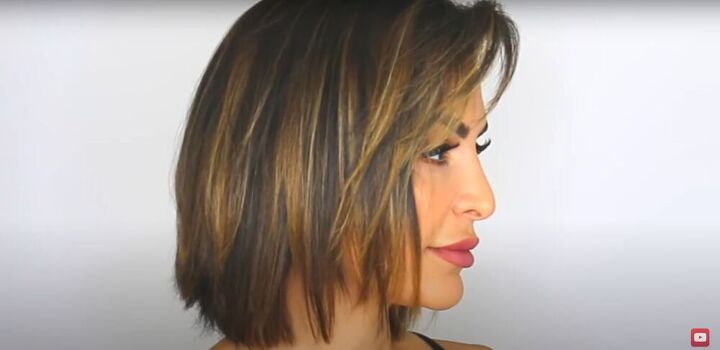
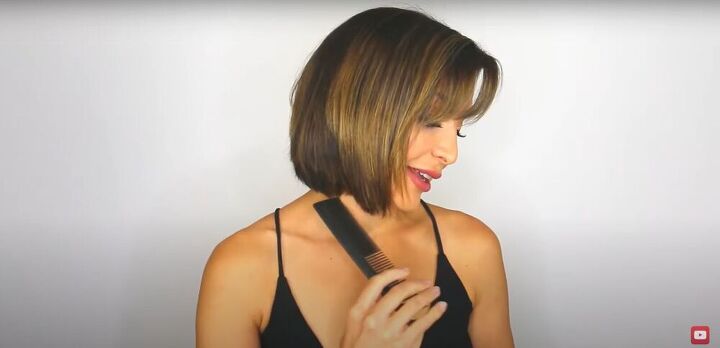
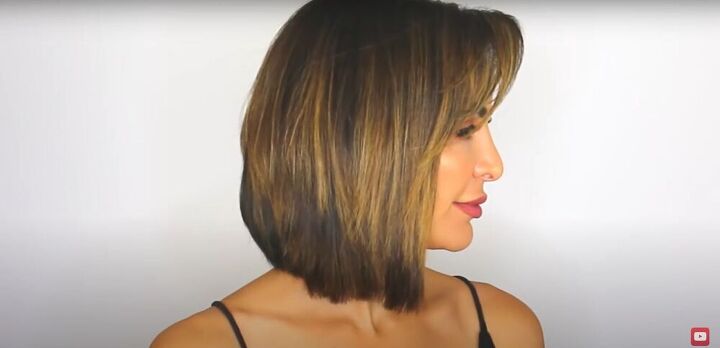
This is my thin hair before I added the tape-in extensions. As you can see, I have a lot of gaps at the bottom of my hair and the hair length is very uneven, especially at the front. This is in part due to my alopecia.
You can find out more about hiding alopecia in my tutorial on how to cover up bald patches from alopecia using makeup.
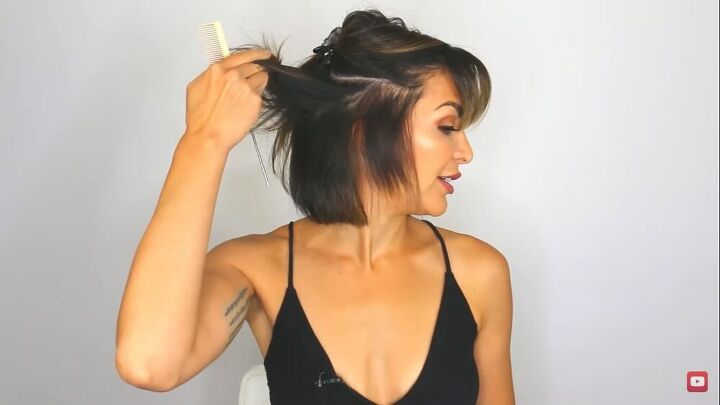
1. Part and section
The very first thing you need to do is make sure your hair is parted the way you normally part it.
Then, identify the areas where there are gaps in the baseline of your hair, so you will know where you want the ends of your extensions to land, and section your hair out about halfway down your head, above that area.
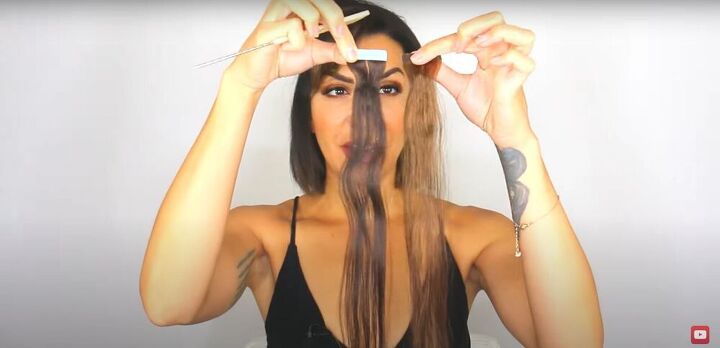
2. Decide on color
If your hair is mostly one color, this step is not necessary. However, if your hair is highlighted or if you have balayage like me, you need to choose colors that match the different shades in your hair, and figure out how to place them so it will all blend together.
Tape-in extensions are attached by sandwiching your natural hair between two layers of extensions. So, I chose a dark brown for the bottom layer and a lighter brown for the top layer.
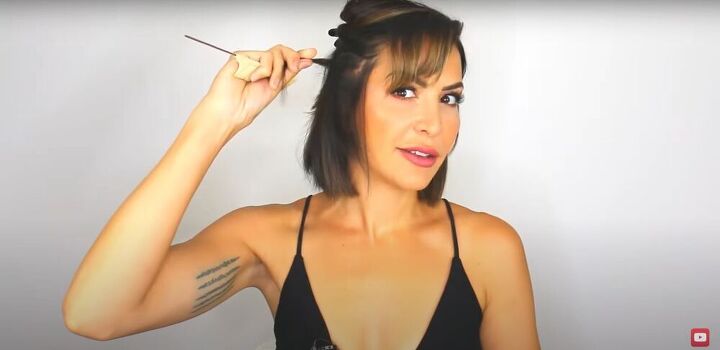
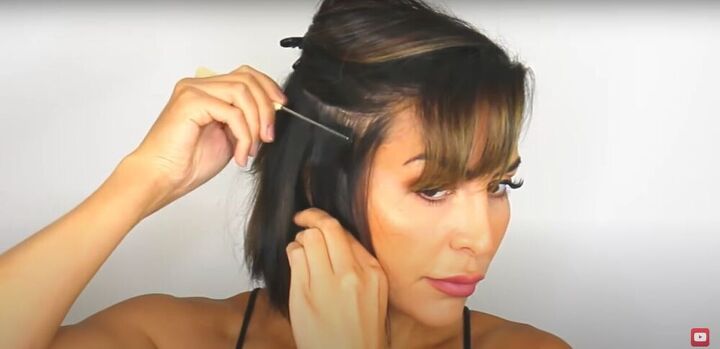
3. Find the best placement
Section out the bit of hair that is going to go in your extension “sandwich.” This section of hair should have roughly the same amount of hair in it as the weft of hair in the extension.
If you use too little hair, the extensions will pull at the hair follicles and cause damage or breakage. If you use too much hair, the extensions will not stay in well. So, you may need to experiment a bit to figure out the exact amount of hair you will need to attach each weft.
Additionally, it’s important to attach the extensions to hair that start at least an inch away from your hairline at the front. If you use a section of hair that is too close to the hairline, the tape will be visible, which is definitely not a look you want.
4. Attach the tape-in extensions
Remove the tape, and attach the first weft to the underside of the section of hair, and press it firmly in place.
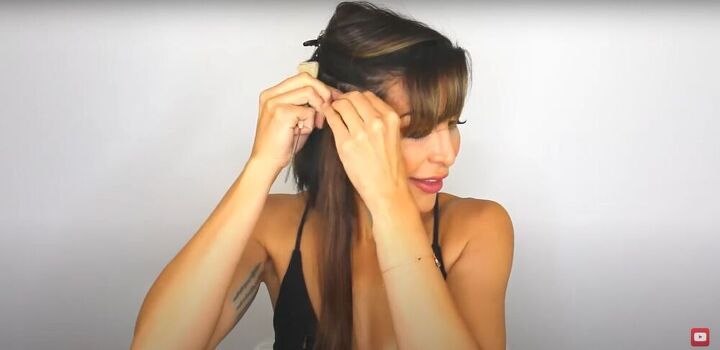
Remove the tape from the second weft, and press it into place on top of the hair you sectioned out, making sure the tape aligns with the tape of the bottom layer. Then press the whole “sandwich” together firmly.

5. Iron
Use a flatiron to straighten the extension, so it blends in with your hair.
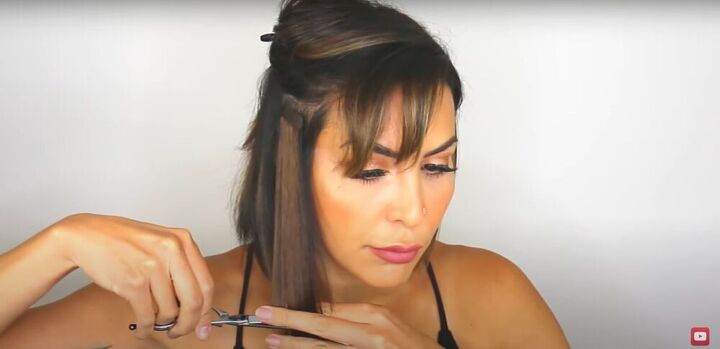
6. Cut
Next, cut the hair to match the length of your natural hair.
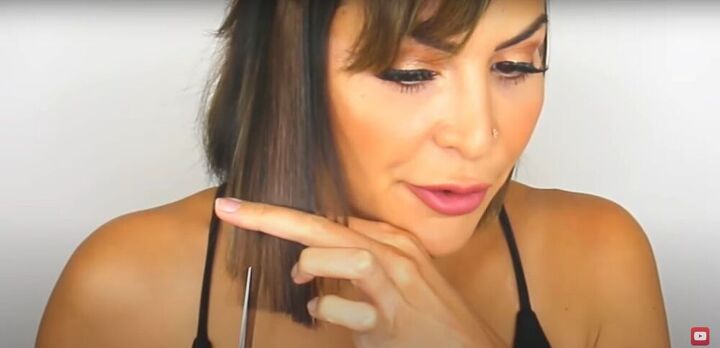
7. Point cut
To make the ends of the extension look natural, cut along the bottom edge of the extensions while holding your scissors vertically. This is called point cutting. This will make the ends of the extensions look significantly more natural. Be careful not to point cut your own hair.
8. Check your progress and repeat as necessary
Release your hair to see how it looks after putting in the first section of extensions. If you feel you need more, as I did, continue identifying the areas that need extensions and placing them using the process explained above, until you are satisfied with how it looks.
Here is the result after placing three wefts. It looks completely natural! The extensions are totally undetectable, and my hair looks full and healthy, with no gaps in the baseline.
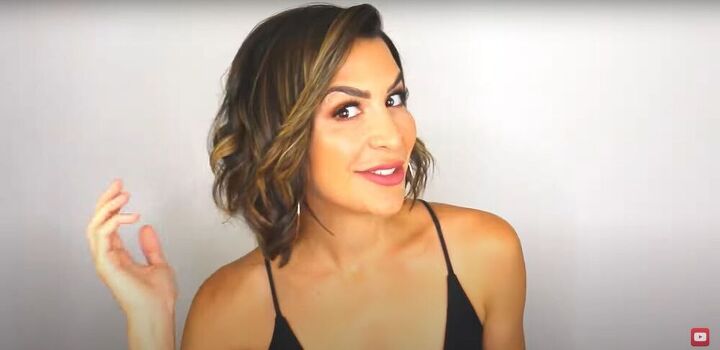
Tape-in extensions on short hair
My short hair is thick and voluminous! Depending on the quality of tape-in extensions you use, these can last from six weeks to a year, if you take care of them properly. By applying the extensions yourself at home, it's so much cheaper than going to a salon, and it's easy to do.
I hope this tutorial on how to use tape-in hair extensions on short hair was helpful. Let me know what you think!
The author may collect a small share of sales from the links on this page.


Comments
Join the conversation
Wish This would work for me unfortunately my hair is totally white. Don’t know if extensions are made in white.
U certainly r a pro at hair extensions, n u r so "Beautiful" too! What a difference!!!!👍️♥️