Summer Staples: Tie-Front Top

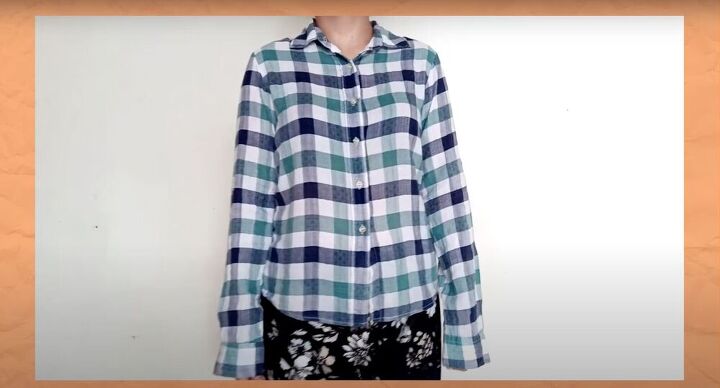
Today’s tutorial will show you guys how to transform a button-up top into a simple tie-front top. I love how this turned out so I hope you guys like this tutorial and stick around!
Tools and materials:
- Scissors
- Seam ripper
- Button-down top
- Tailor’s chalk
- Sewing machine
Cut the fabric
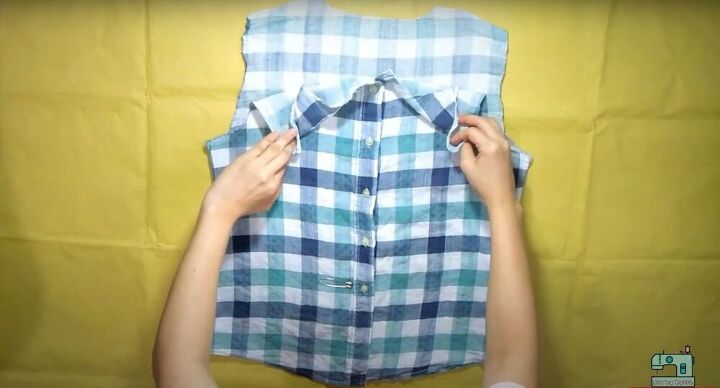
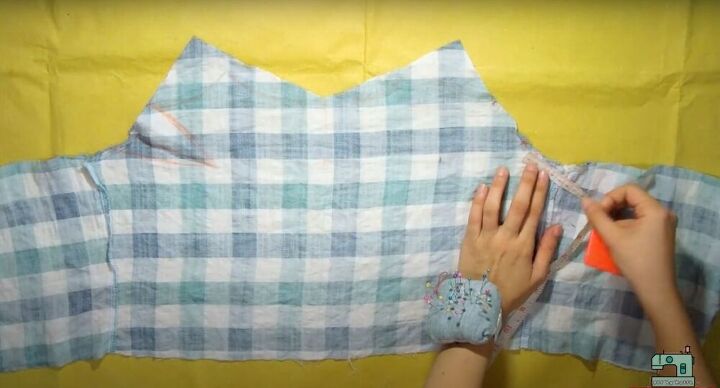
The first step is to mark off the length of your shirt. For this, simply place a safety pin by your desired length. Then grab some scissors and cut off the bottom. Next, use a seam ripper to detach the sleeves and collar and open up the shoulder seams. Fold the shirt in half and clip the edges. Grab a sleeveless top you already own and use it as a guide for shaping your shirt before cutting it out. Now, go ahead and try the shirt on to make sure it would fit before cutting out your new measurements.
Finish the fit
I added some darts by the armholes in order to avoid wrinkling. I did this by folding the fabric into itself in a V shape and then pinning it down. I used a mannequin to keep my darts precise but if you don’t have one, that’s okay! Once the darts are done, finalize all the markings on the top with tailor’s chalk and cut it to fit. (This includes the markings for the darts and neckline). Cut along all the markings and then sew the darts down.
Add the straps
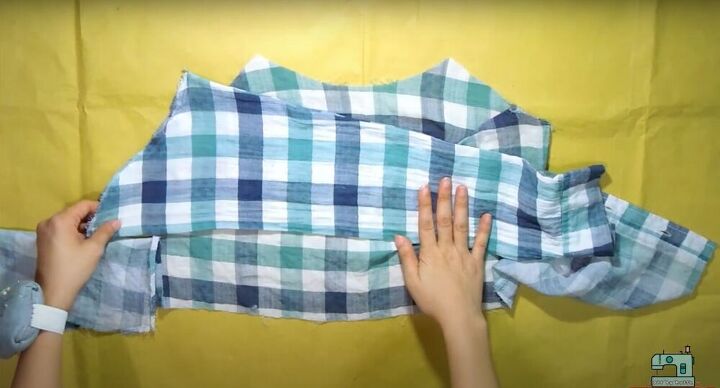
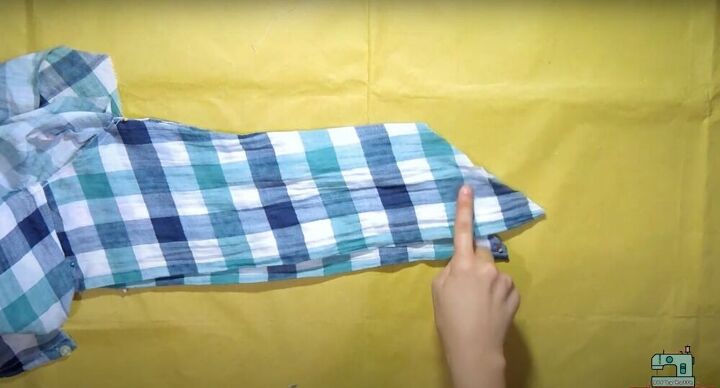
Place the sleeve on the shirt and measure from side seam to side seam. Seam rip the side seam to the size of the sleeve. Pull the sides down and place the sleeve over the back and under the side to sandwich it in between. Pin in place. (Remember, it is one sleeve per side. Both sleeves should be connected to the shirt). Sew the sleeves in place and then cut off all the excess fabric.
Make the front tie
Reclose the side seam, securing it using a straight and zigzag stitch. Next, shape the sides of the sleeves by trimming the edge off diagonally. Then, fold the raw edges inwards, iron them down and then pin and hem the edges using a straight stitch. Repeat this on the other side and then tie the sleeves together to make a bow.

Lower the back - optional
Close the shirt, right sides together, and then mark 5.5 inches from the back on either side. Connect the markings by drawing a diagonal line to create a V shape. Do this with the shirt folded in half so that both lines are even). Next, double fold all the raw edges, pin, and hem.
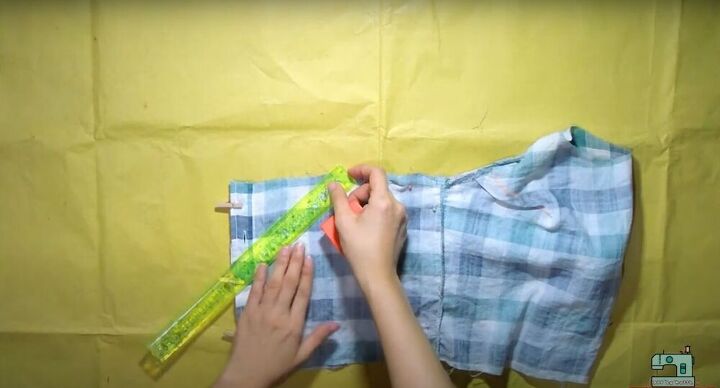
Make the straps
Using the excess fabric, cut out strips for bias tape and straps. Making both of these things is very similar, the only difference being that the bias tape remains unsewn. So, measure and cut out the strips and then fold both edges into the center. Next, fold the fabric in half so that no raw edges are visible. Sew the edge of the straps and sandwich the rest of the raw edges with the unsewn bias tape. Sew in place.
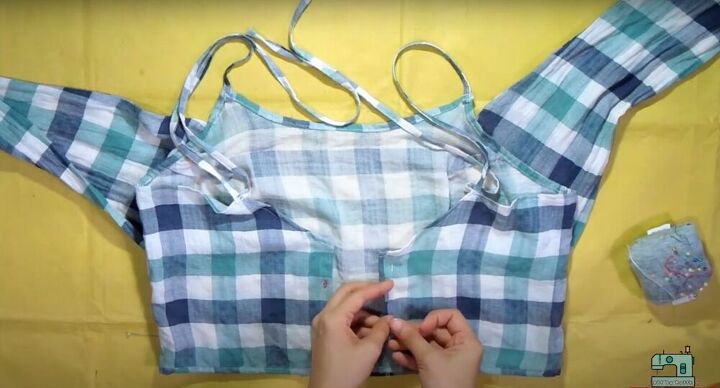
Finish the top
To measure the length of your straps, put the shirt on and measure it over your shoulder. Once you have the correct length, mark it off and proceed to sewing. Next, add ties to the sides (where you sewed the straps in the back) to secure the back. Finally, if like me your shirt was still a little too big, simply fold the buttons inwards, sew it down and then add snap buttons that are better placed for your best fit. (Just remember to make sure you are preserving the V shape of the back).

We are finally done with this tie-front top tutorial. It is easier than expected and a super flattering summer staple! If you attempted to make this too, I’d love to see your creations down below!
The author may collect a small share of sales from the links on this page.


Comments
Join the conversation
Adorable…I love making something unique out of something that would have been donated..it doesn’t look “home made” either with that tie in front..👍🏻