Peasant Top Pattern Hack MMAY18
If you follow me on Instagram you will have noticed I am taking part in Me Made May 2018 – it was, as is often the case, a last minute decision to take part. If you have not heard of Me Made May before you set yourself a personal challenge re wearing handmade clothes for the month of May.
You can find out more here, or listen to this podcast by Love to Sew – I have only just discovered this podcast and LOVE it, I’m gradually working my way through the back episodes on my commutes to work.
My personal challenge is to wear every handmade garment I have – as I only own a few garments it’s not going to be a different outfit per day. As a participant, the idea is to learn through the month, for example what shapes and colours suit you, what the gaps are in our handmade wardrobe and so on. Part way through I already know that I have been avoiding sewing plain knit tops, and trousers (pants).
I have been sewing as I go – last week I made three garments, very good going as I work and have youngish children.
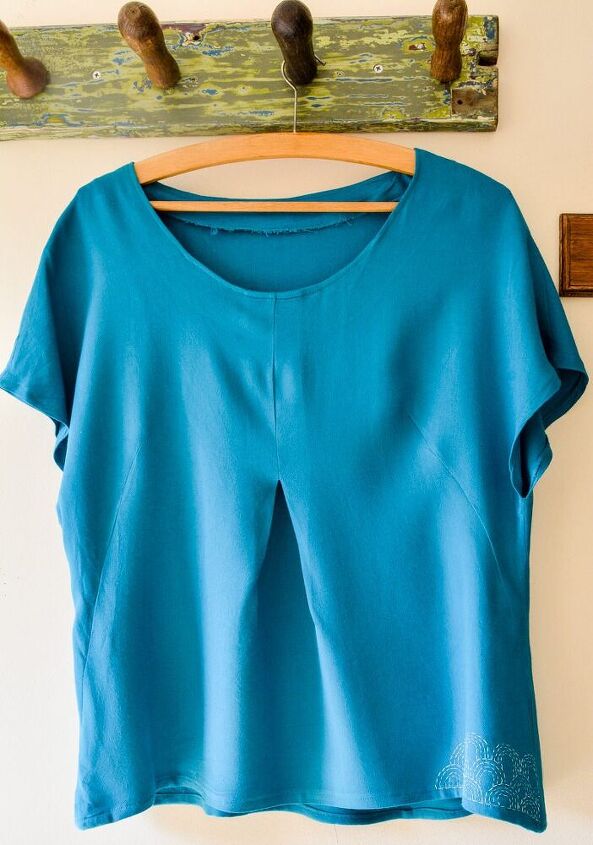
My favourite is the free peasant top from Sew Different. I have adapted the pattern, as I love tops which you can layer – the ability to throw a cardigan on over the top is very important to me. Wide sleeves are, therefore, a bit of a no-no.

Fancy a whistle-stop tour through making the peasant top pattern hack? Here goes:-
Peasant Top Pattern Hack
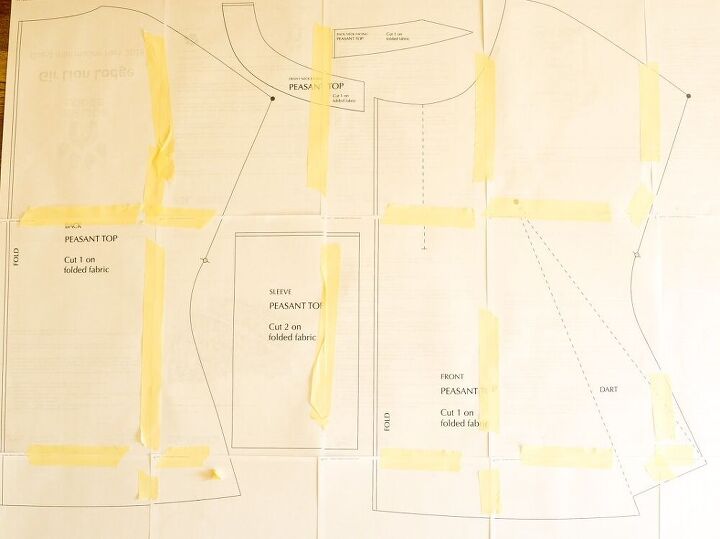
Starting off with printing the pattern – this comes in a size 12 only with no instructions. It is not complicated though 🙂
Layout and then cut fabric as per pattern. Transfer the markings to the fabric, for the centre pleat and side darts.
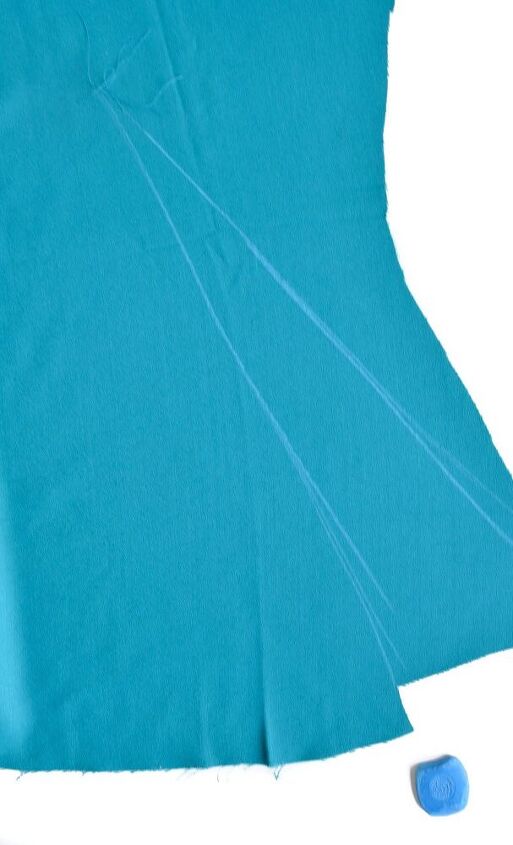
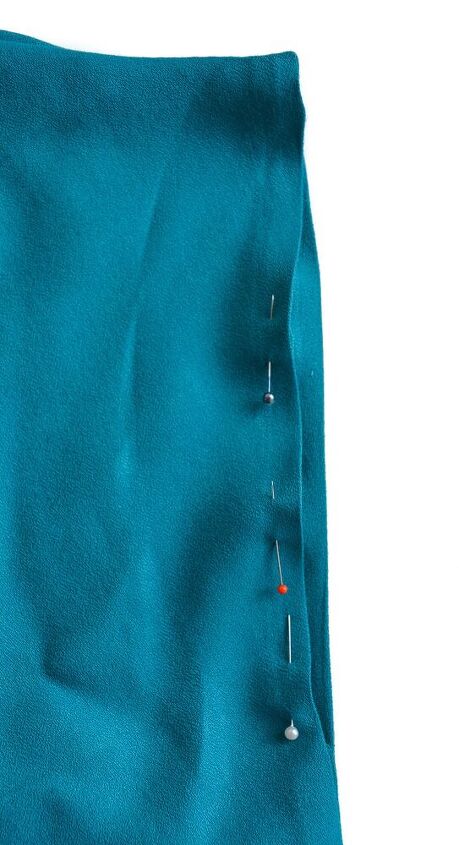
Fold the front in half wrong sides together, stitch along the marked central pleat line. Press the fabric so it lies symmetrically either side of the stitched pleat. Stitch the darts in place. With right sides together stitch the shoulder seams and side seams, finish raw edges to prevent fraying.
Fold over the hem twice and stitch in place.
Press in the armhole seams (as would be if joining the ruffled sleeve pieces). Stitch in place.
Join two pieces of facings right sides together. Finish the wider edge with zigzag stitch. Place the facing right sides together onto the top, ensuring your pressed pleat fabric is flat then stitch along neckline.
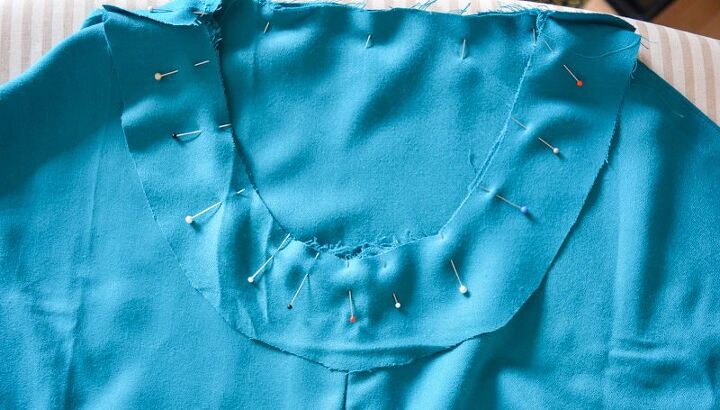
Snip into the seam allowance of the neckline carefully, ensuring you do not cut your stitching. This allows the fabric to lie flat. Fold over the facing and press. Top stitch in place.
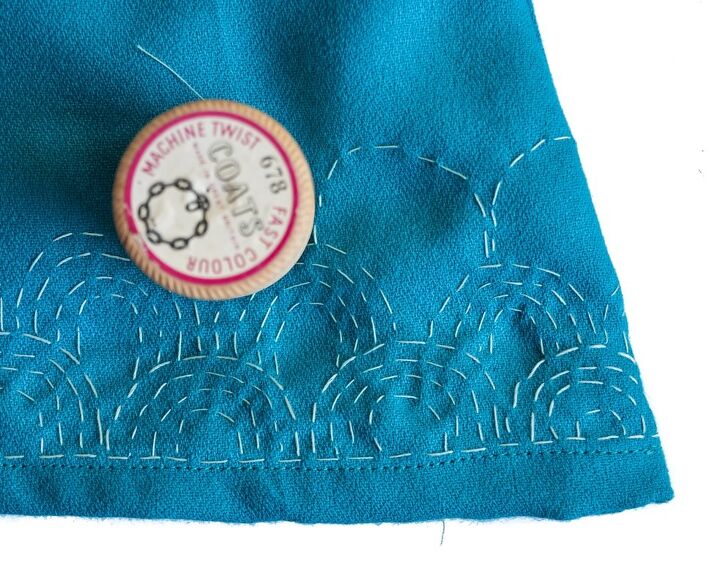
Embellish the top with sashiko stitching – I have created a simple pattern inspired by Sewredy on Instagram. I have used a cotton reel as a template for the half circles.
I love the style of top – I did add an inch as I have a long torso but next time I will add a little more. I have just realised this is my first ever pattern hack… it won’t be the last!
Are you taking part in Me Made May 2018? What have you learnt about your handmade wardrobe?
The author may collect a small share of sales from the links on this page.


Comments
Join the conversation