How to DIY a Cute Tortoise Shell Nail Design

Today, I'm going to be showing you how to create a tortoise manicure.
This is such a classic print that wears beautifully on the nails. It is so incredibly easy to create.
This mani is really trending right now, and I'm so excited to show you guys how to hop on the bandwagon.
Tools and materials:
- Brown nail polishes
- Top coat
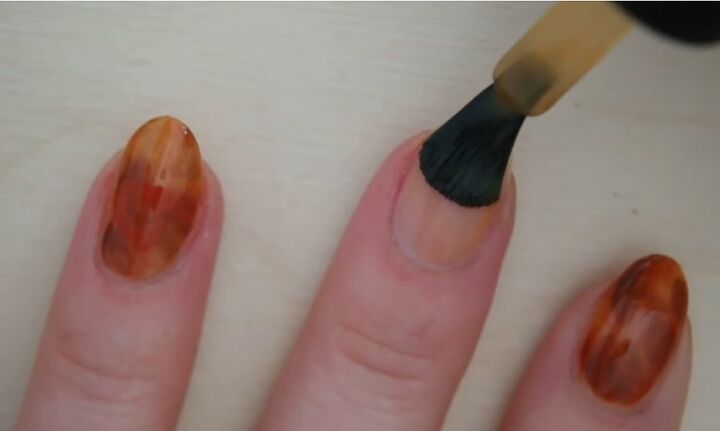
1. Apply base color
The first color we're going to use is a translucent caramel with yellow undertones.
Go for something that is a little translucent, you don’t want an opaque color. Go ahead and paint a nice coat of this onto your nail.
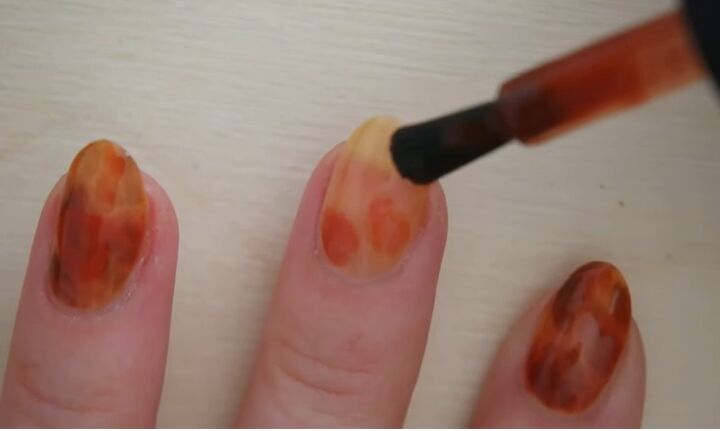
2. Mark on spots
Next, grab a translucent rich brown with red undertones and dab this around the perimeter of the nail, just making a couple of little blobs.
Make sure you work with a very small amount of polish for this.
The best part about this design is you don't have to be perfect, there's really no right or wrong way to do it. You just want to make sure that you're distributing an even amount of this color over that yellow.
We don't want the first coat to be completely dry when we add these spots because we want the polishes to sort of bleed together.
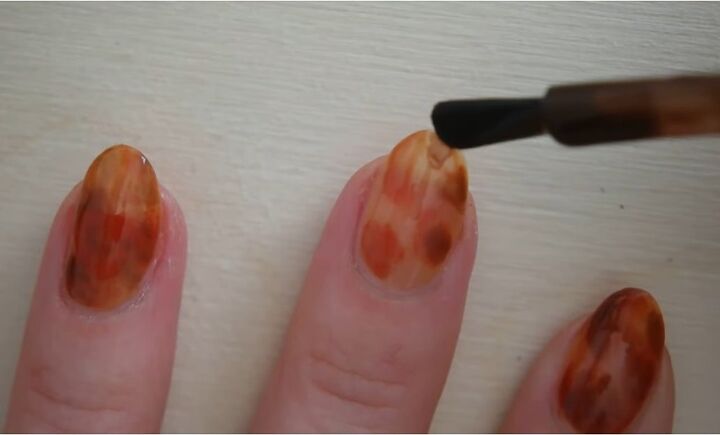
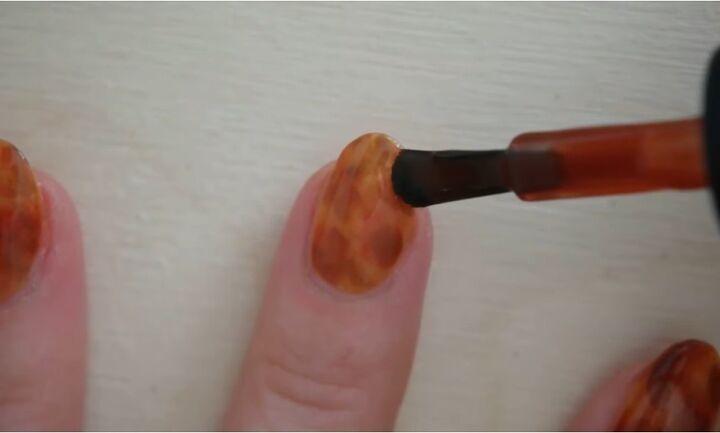
3. Add more spots
The third color we're going to use is a translucent walnut brown. What you’re going to do with this one is very similar to what you did with the previous polish, and that is to just add some brown spots on top of those red spots.
Also, add a little bit throughout the rest of the nail just to create some depth, it will give the look a deep warmth. It's really going to tie the tortoise design together.
Again we want to apply this when the previous polish is still a little wet so that the colors bleed together.
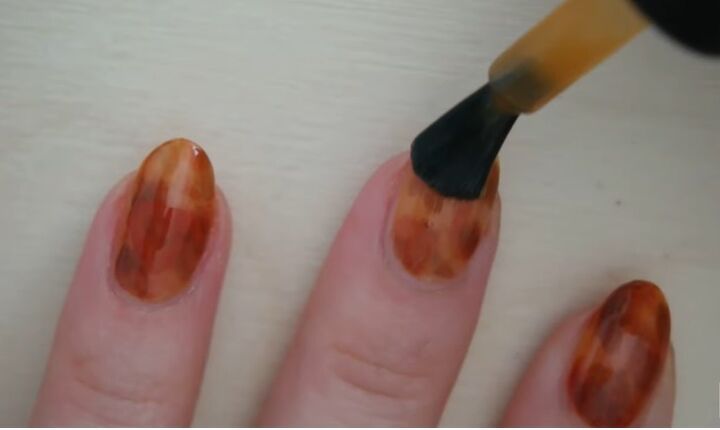
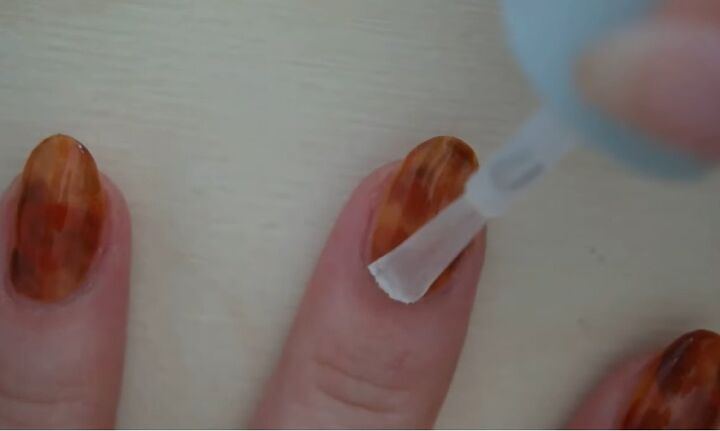
4. Apply another coat
Once you're comfortable with the design and it's pretty much dry, go back in with the lightest shade and paint a coat over the entire nail.
5. Add more spots
While that lighter top coat is still a little damp, go back in with the red polish and add a few more spots on top of the spots you did before.
This is going to help deepen the design, really make it pop, make it super bold, and just tie it all together. You could go back in with the brown as well, but I liked how it looked, so I stopped there.
6. Apply a top coat
Once your nails feel dry to the touch, apply a generous amount of your favorite top coat for that perfect glossy finish, and don't forget to cap the edge.
Repeat the whole process on your other hand and you’re finished!
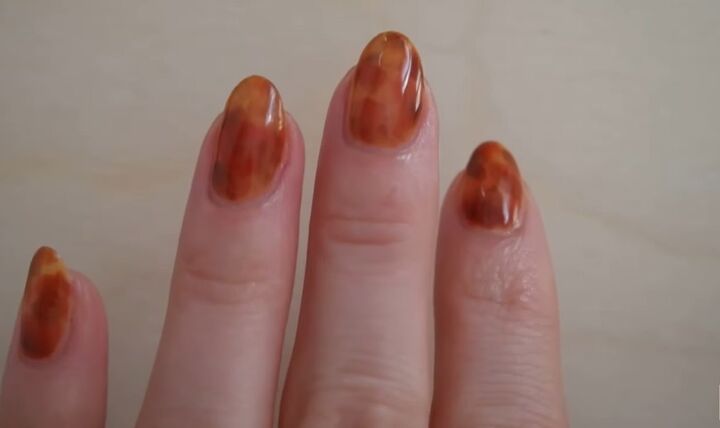
Tortoise shell nail design
And that’s it! Once you're done, you can just stare in awe at this beautiful masterpiece that you just created and try not to be completely shocked by your skills.
I cannot tell you how impressed I am with myself for creating this manicure, it's gorgeous, and I am so in love with it.
Did you enjoy this nail tutorial? If so, let me know in the comments below.
The author may collect a small share of sales from the links on this page.


Comments
Join the conversation