Scrap Buster: Five Simple DIY Hair Accessories

Looking for a great way to use up some of that scrap fabric? These basic DIY hair accessories are the perfect solution. Check out my tutorial for some ideas for easy projects that can be done with just some scrap fabric and a few sewing notions.
Tools and materials:
- Scrap material
- Scissors
- Fabric chalk
- Elastic
- Measuring tape
- Pins
- Safety pin
- Sewing machine
No-Sew Frayed Linen Ribbon
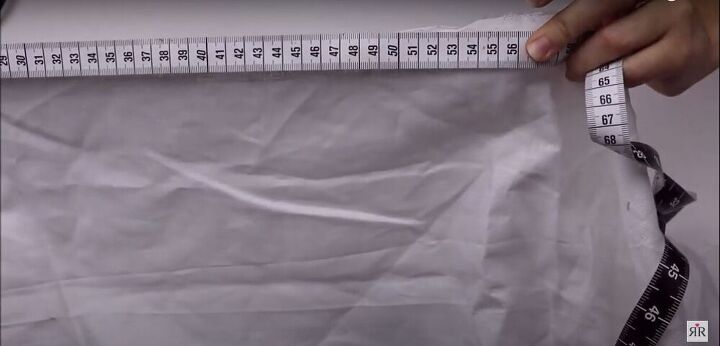
Measure the fabric
Measure and mark a rectangle of fabric 55 centimeters (21.5 inches) long and 6 centimeters (2.5 inches) wide.
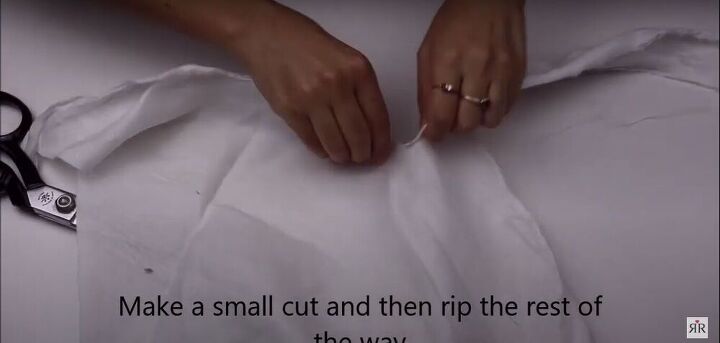
Rip the fabric
Make a small cut, and then rip the fabric the rest of the way.
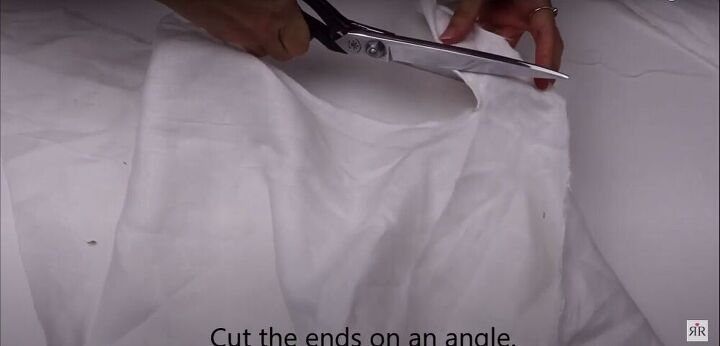
Cut the ends
Cut an angle on both ends of the strip of fabric.
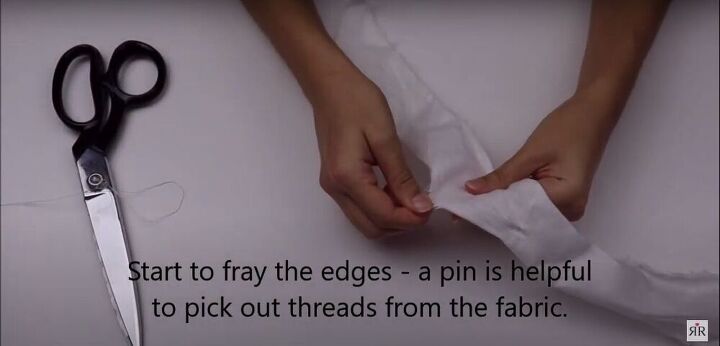
Fray the edges
Use a pin to pull threads from the edges of the fabric to create frayed detailing.
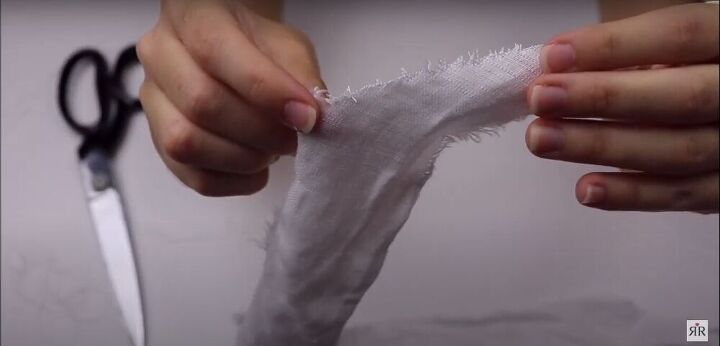
Roughen the edges with your fingers.

Tie it in your hair, and you’re done!
Fabric Tie
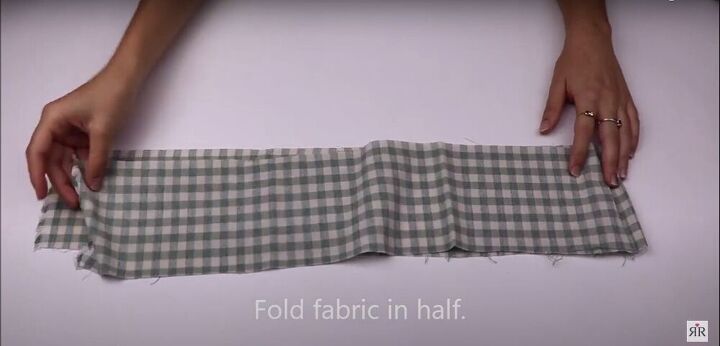
Cut a rectangle and fold it in half
Cut a rectangle of fabric 55 centimeters (21.5 inches) long and 11.5 centimeters (4.5 inches) wide. Fold your rectangle in half.
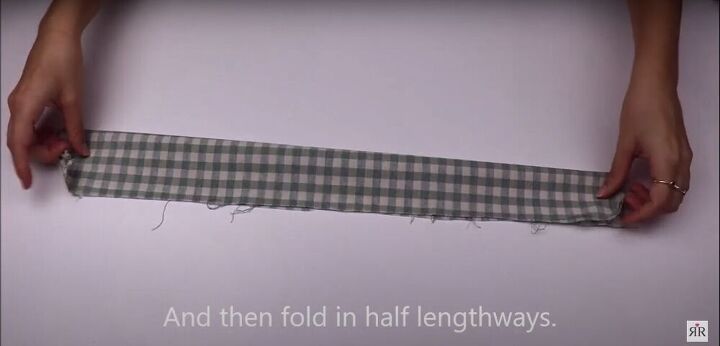
Fold again
Fold your rectangle in half lengthwise.
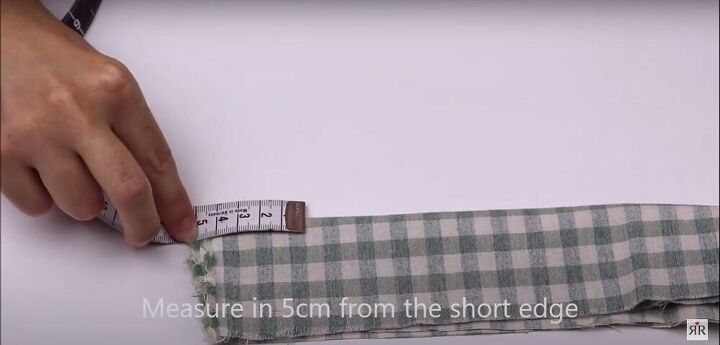
Measure and mark
Measure 5 centimeters (2 inches) from the short edge.

Mark a diagonal line from the 5 centimeter (2 inch) mark to the opposite corner.
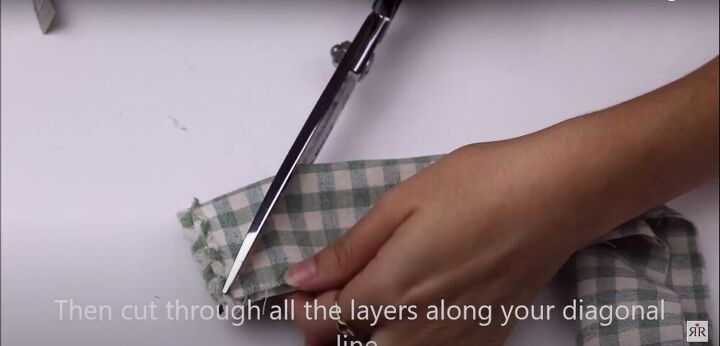
Cut the ends
Cut along the diagonal line.
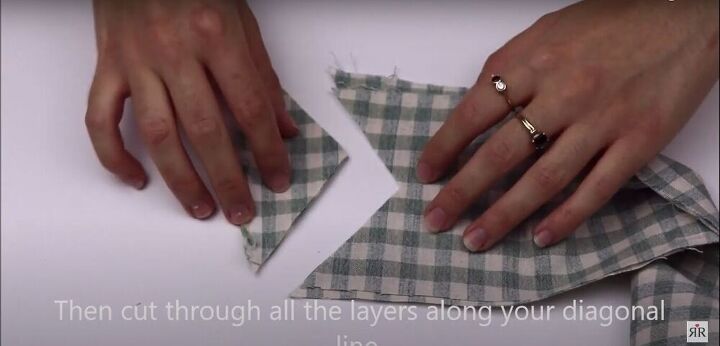
Be sure to cut through all the layers.
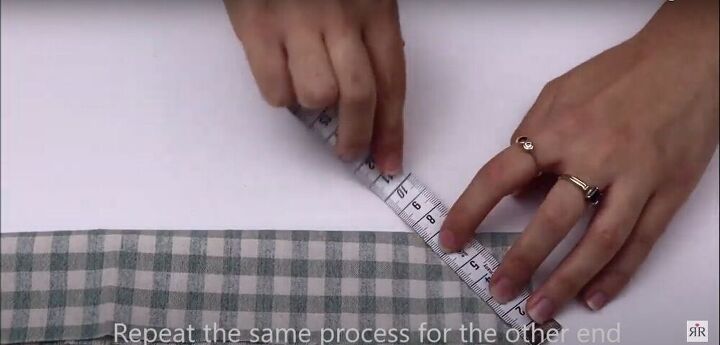
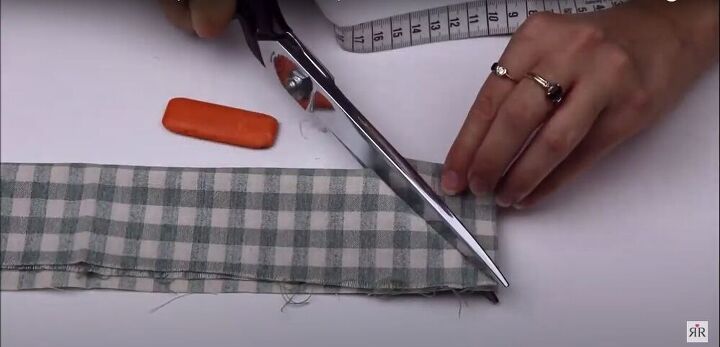
Repeat
Measure, mark, and cut on the other end of the fabric, as well.
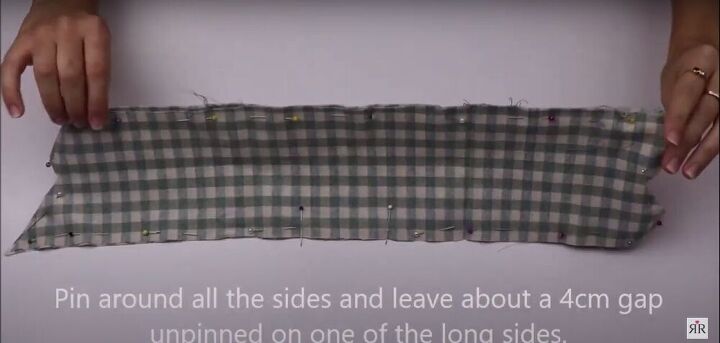
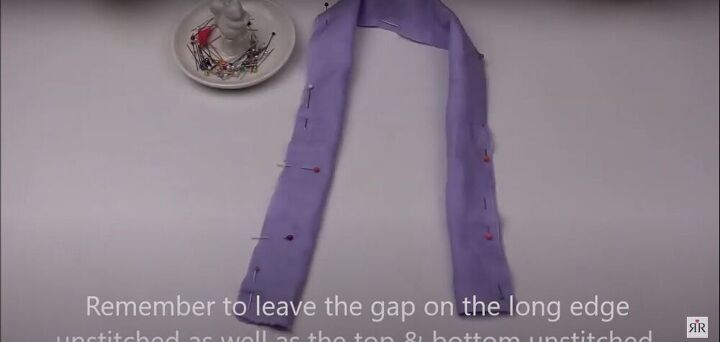
Pin the edges
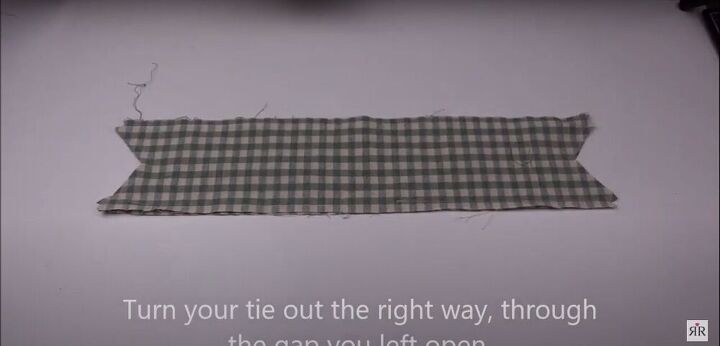
Unfold the fabric so you have two flat pieces laying right sides facing. Pin all the open edges together, leaving about a 4 centimeter (1.5 inch) gap unpinned along one long side.
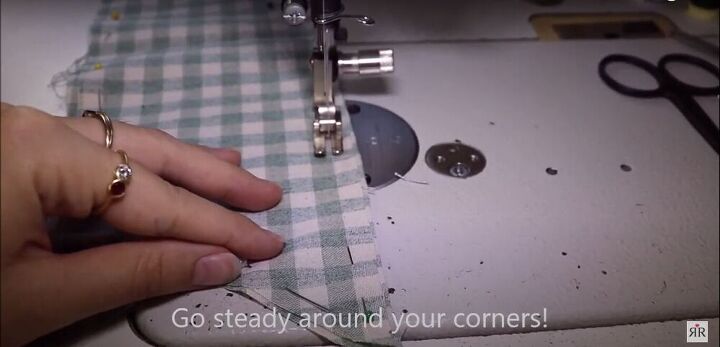
Sew the edges
Sew all the way around, taking care not to stitch across the 4-centimeter gap.
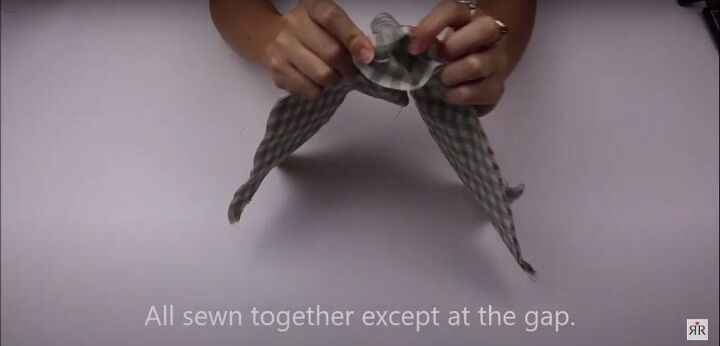
Leave a 4-centimeter (1.5 inch) gap
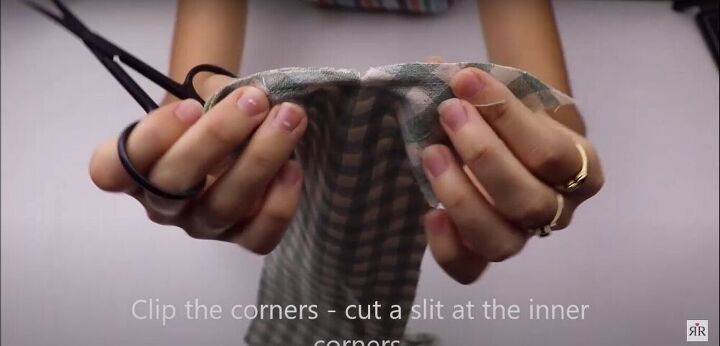
Clip the corners
On either end, make a shallow snip in the inner corners, taking care to stay in the seam allowance, and not to cut through the stitches.
Cut an arrow shape in each outer corner to trim down the seam.
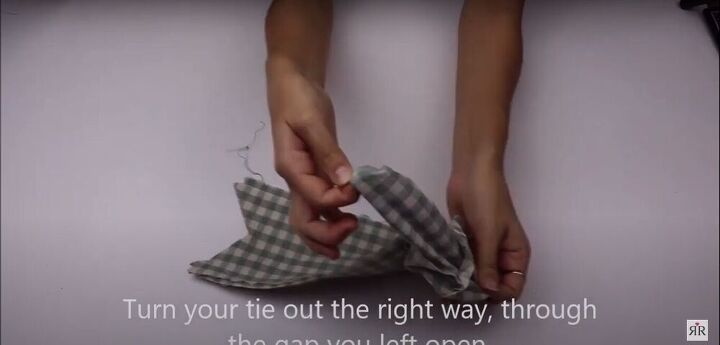
Turn the fabric right side out
Through the gap left in the stitching, pull the fabric through until the right side is facing out and the seams are hidden inside.
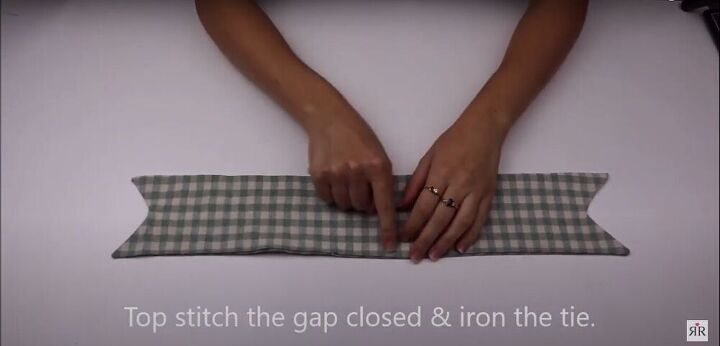
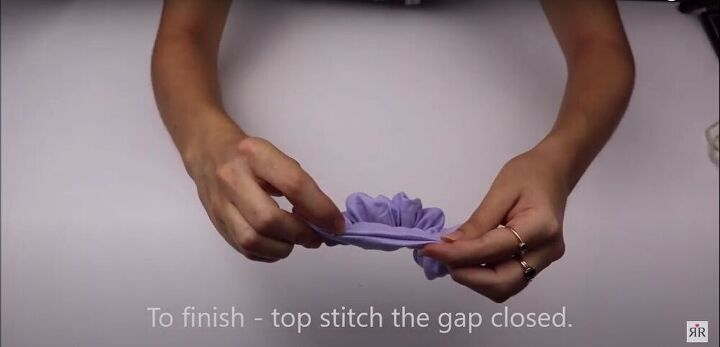
Stitch up the gap
Top-stitch along the gap to close it up, and iron the fabric flat.

Ready to go!
Headscarf
Cut a rectangle
Cut your fabric into a rectangle. For reference, my rectangle was 140 centimeters (55 inches) long and 13.5 centimeters (5.5 inches) wide.
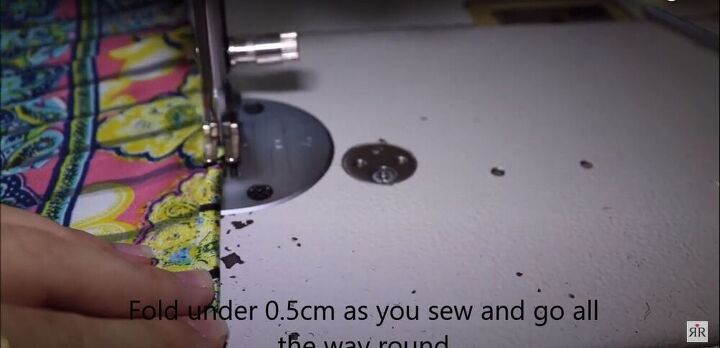
Hem the edges
Sew a rolled hem all the way around by folding half a centimeter (a quarter-inch) down along the edge as you feed the fabric through the sewing machine.
Once you’ve sewn a half-centimeter (1/5 inch) hem all the way around, fold the edges down another half-centimeter (1/5 inch), and hem it again.
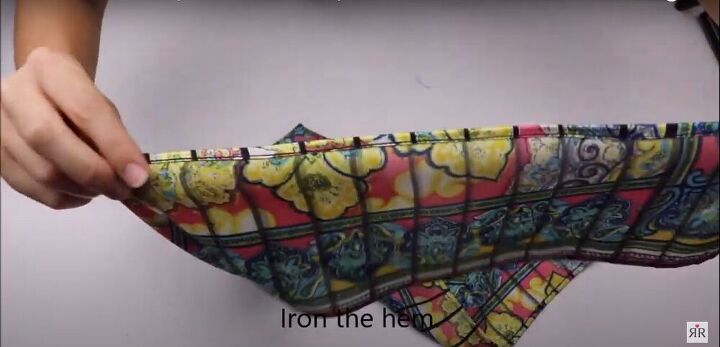
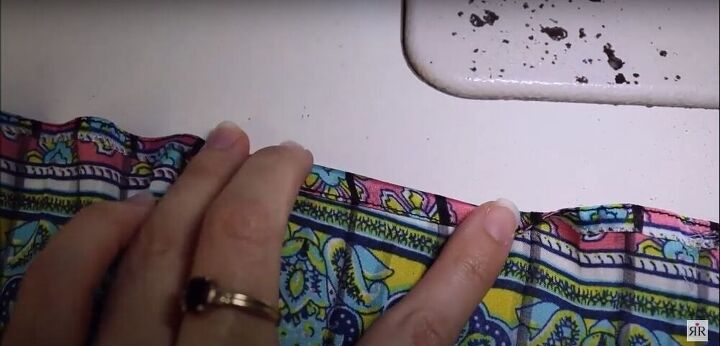
Iron the hem
Press the hems flat.

Voila!
Scrunchie
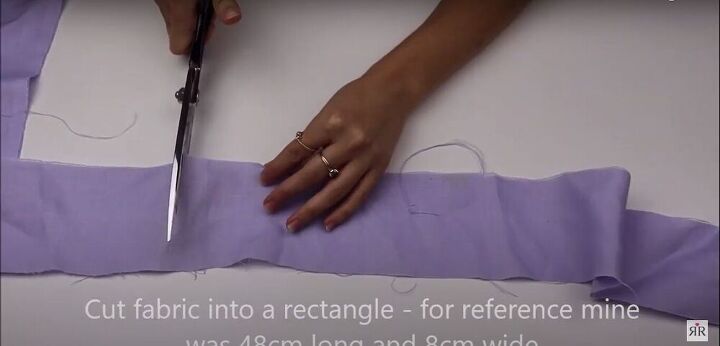
Cut a rectangle
Cut your fabric into a rectangle. For reference, mine was 48 centimeters (19 inches) long and 8 centimeters (3 inches) wide.
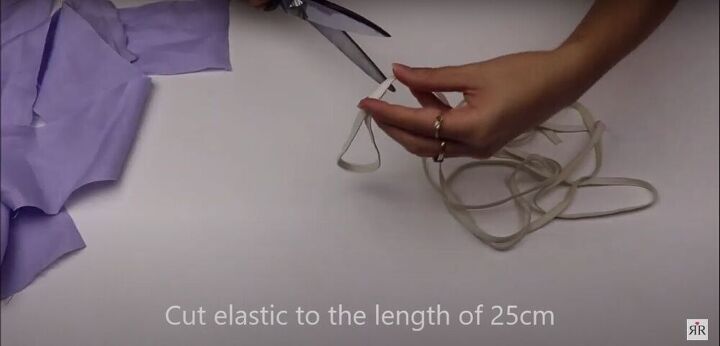
Cut the elastic
Cut a 25 centimeter (10 inch) piece of elastic.
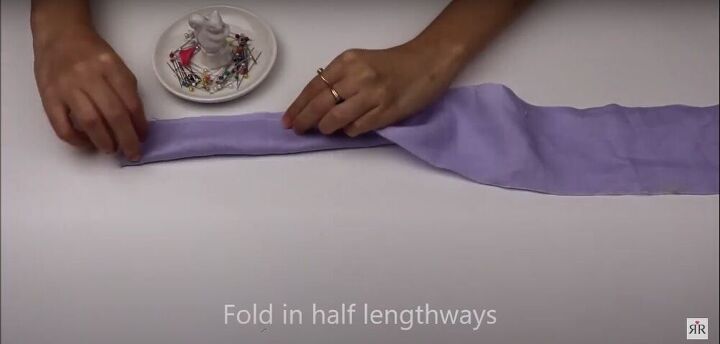
Fold and pin
Fold the fabric in half lengthwise.
Pin down the long edge, leaving a 5 centimeter (2 inch) gap about 2.5 centimeters (1 inch) from the short edge on one side.
Sew down the long edge
Sew down the long edge, taking care not to stitch across the gap. Keep the short edges open.
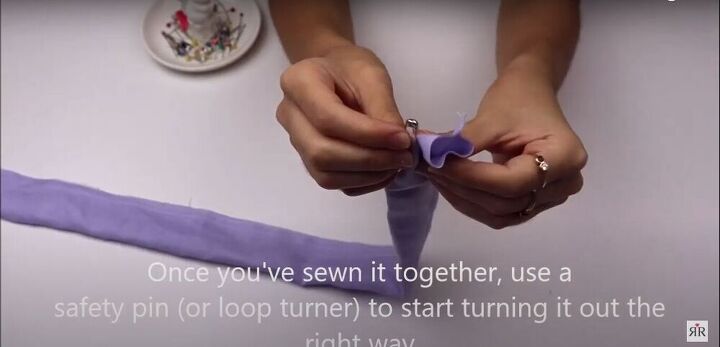
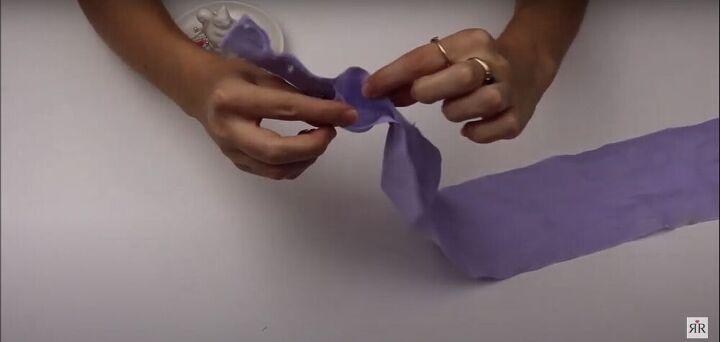
Attach a safety pin
Once the long edge has been sewn down, attach a safety pin to one end of the fabric tube.
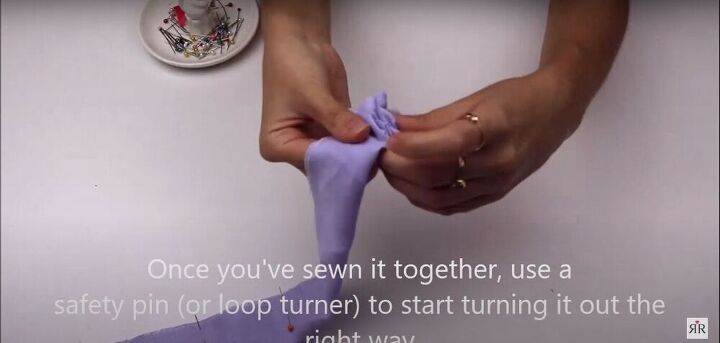
Move the pin through the tube
Insert the pin into the end of the fabric tube, and work the fabric over it, pulling the pin toward the opening on the other side of the tube.
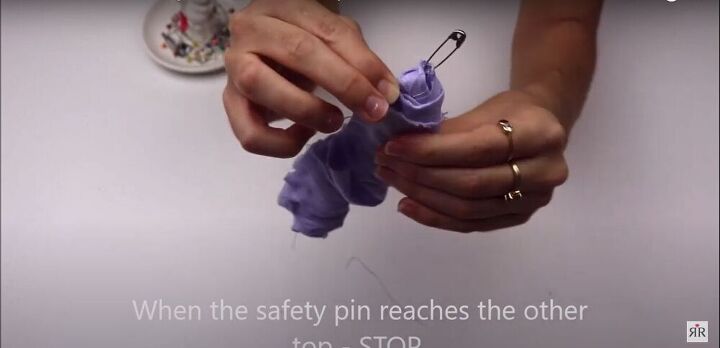
When you can see the safety pin on the other side, stop pulling the pin. Don’t turn the fabric right side out yet.
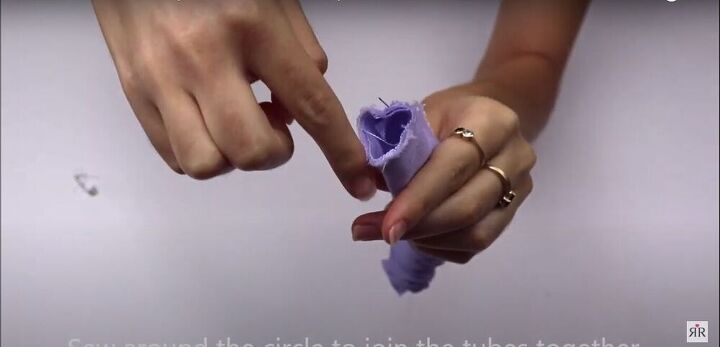
Sew around the opening
Adjust the fabric at the opening of the tube so the raw edges are aligned with each other.
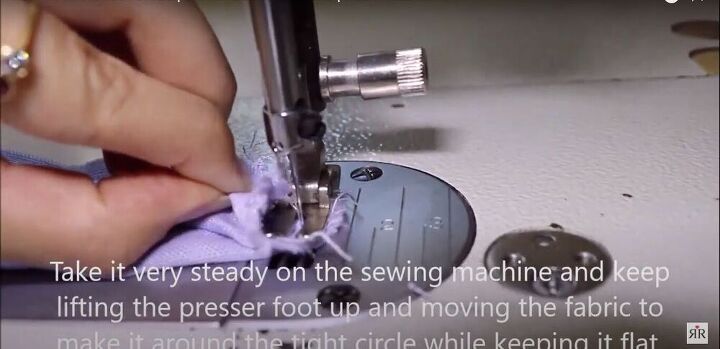
How to sew DIY hair accessories
Sew around the opening very carefully, lifting the presser foot and moving the fabric to make it around the tight circle while keeping it flat.
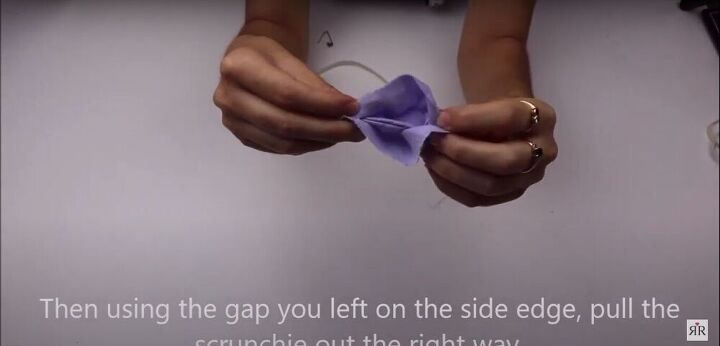
Turn the fabric right side out
Once the ends are sewn together, pull the fabric right side out through the gap left in the stitching on the side.
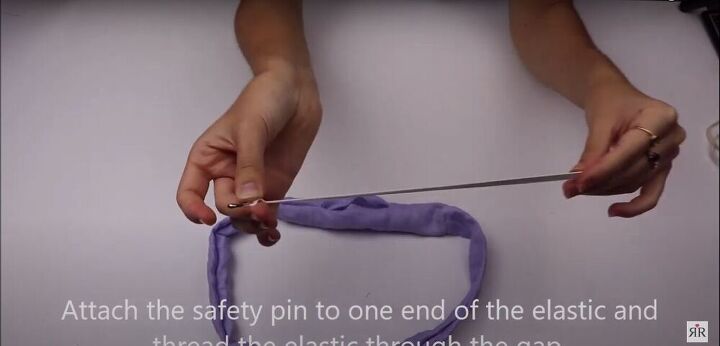
Insert the elastic
Attach a safety pin to one end of the elastic, and insert it into the gap in the stitching. Hold the unpinned end of the elastic in place at the opening in the stitching, and work the fabric over the pin, through the tunnel, until you can pull it through to the other side.
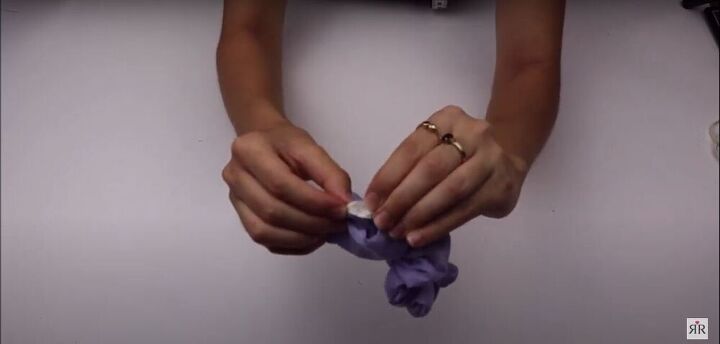
Sew the elastic
Sew the ends of the elastic together.
Close up the gap
Top-stitch across the gap to close it up.

My new favorite!
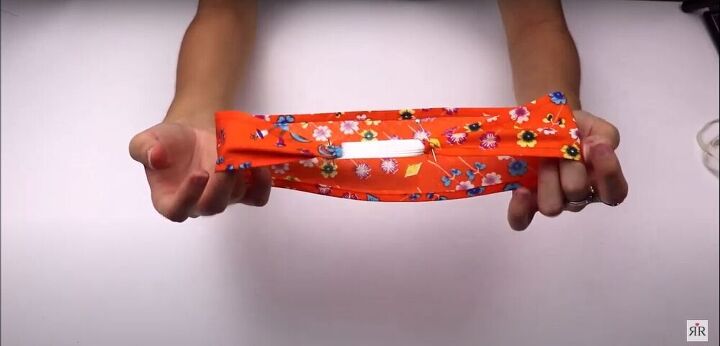
Elastic Headband
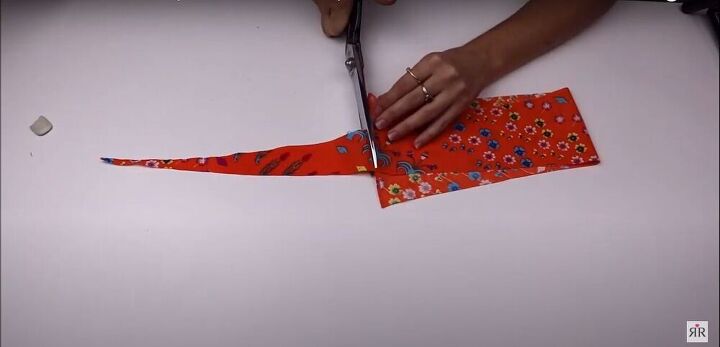
Measure and cut the fabric
Wrap a strip of fabric around your head until it reaches three-quarters of the way around, and then cut the fabric at that point.
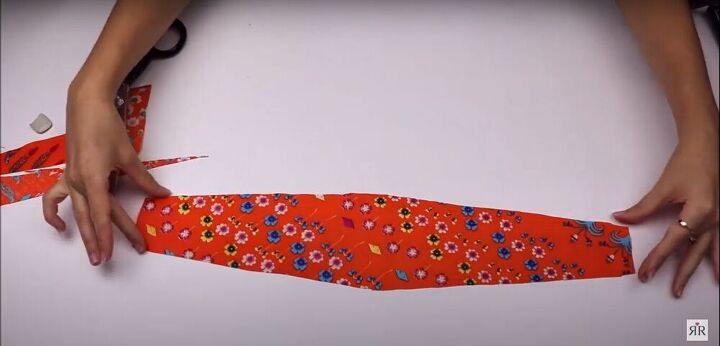
You can cut a regular rectangle, or create a shape that tapers at the end.
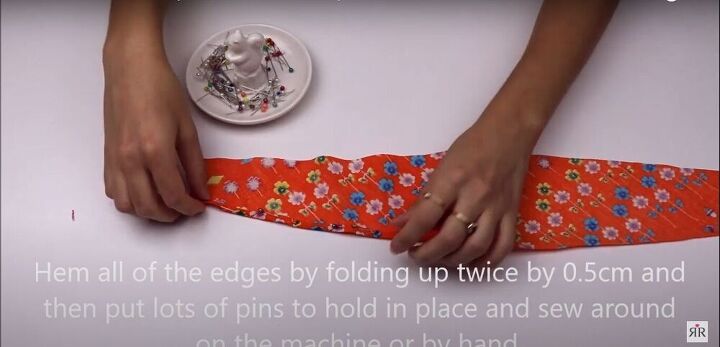
Pin and hem the edges
Fold the edges down half a centimeter (a quarter of an inch) and pin it down.
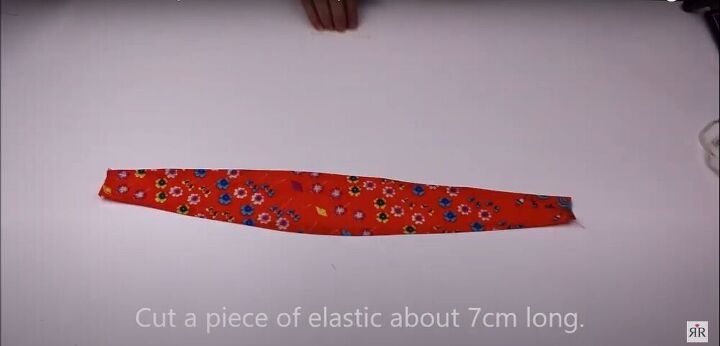
Then sew all the way around the fabric.
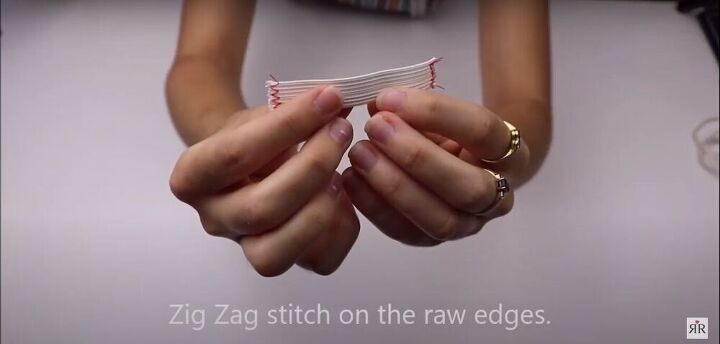
Prepare the elastic
Cut a 7 centimeter (2.5 inch) piece of elastic, and zigzag stitch the raw edges.
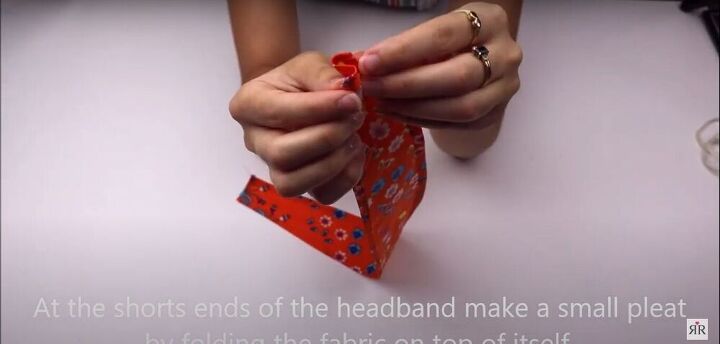
Fold the ends
Make a small pleat on one end.
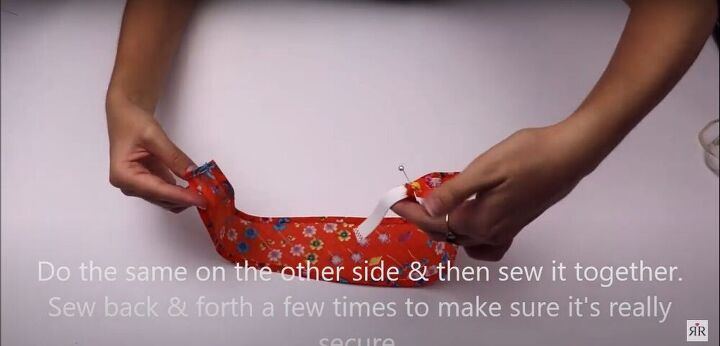
Pin the elastic on
Pin one end of the elastic onto the folded fabric, and then sew it together. Sew back and forth a few times to make sure it’s secure.
Repeat
Repeat the folding, pinning, and sewing on the second side.

Pop it on your head. You’re done!
Let me know which of these hair accessories you like best.
The author may collect a small share of sales from the links on this page.


Comments
Join the conversation
All so cute, my fav is the fun orange headband, Hair happiness!!