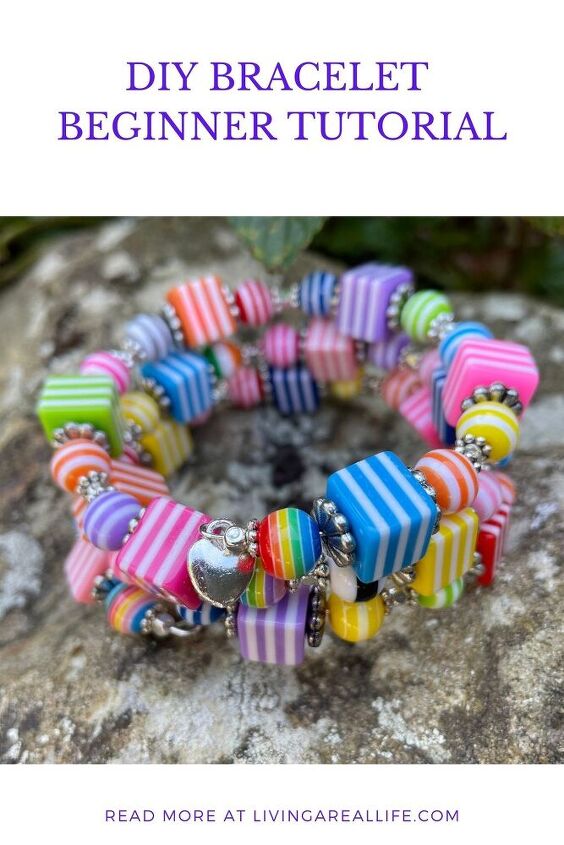
How to Make a Licorice Allsorts Bracelet - Tutorial
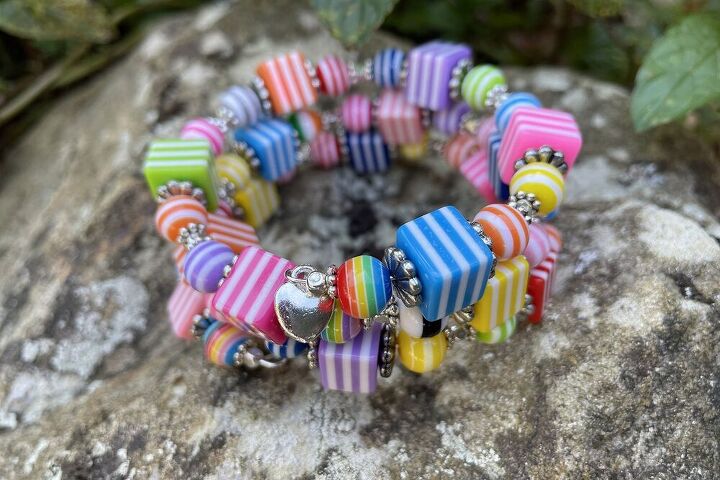
Isn’t this fun! These beads are amazing. They just look like candy to me.
Ever since I first saw these striped cubes, I knew I wanted to make something really fun, so this bracelet was born.
Giveaway
This week Affordable Jewellery Supplies is giving away a kit to make this bracelet. All you need to do is go to the YouTube video and watch to the end. You’ll be given instructions on how you can win this kit. We are happy to ship to anywhere in the World so please enter.
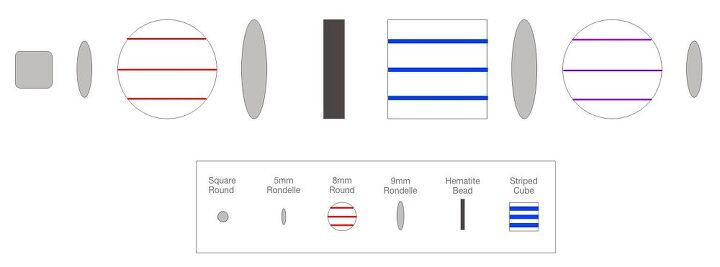
Let’s take a look at what’s included in the kit, and what you’ll need to make this bracelet.
Materials
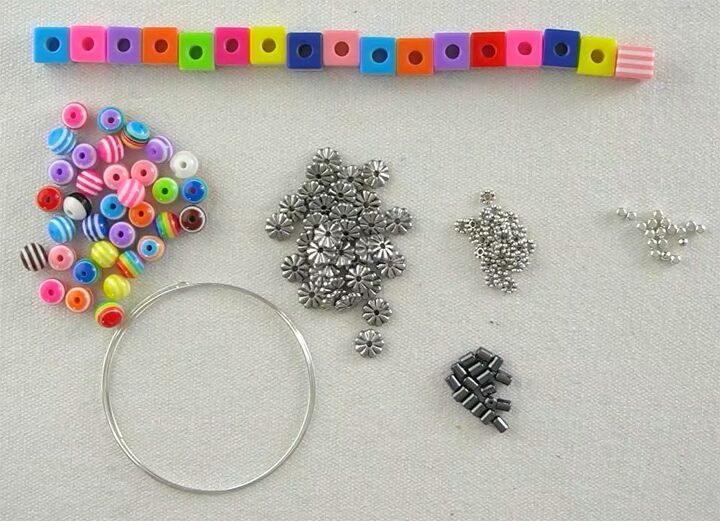
- 10mm Bubblegum Striped Cubes x17 in a variety of colours
- 8mm Light Mix Bubblegum Striped Resin Beads x34
- 9mm Antique Silver Flat Flower Rondelle x 34
- 5x1mm Silver Beaded Rondelle x 34
- 3mm Square Round Silver Beads x18
- 6x4mm Hematite Beads x17
- 5.7mm Memory Wire x4 rounds
- 11x9mm Heart Charm x1 (not pictured above)
Tools
- Round nose pliers
- Chain Nose Pliers
- Memory Wire Cutters
Instructions
Watch the video or read the instructions below.
Remember to watch all the way to the end to enter the competition to win a kit for this project.
Loop and Adding Charm
Cut the memory wire to three rounds plus 3cm.
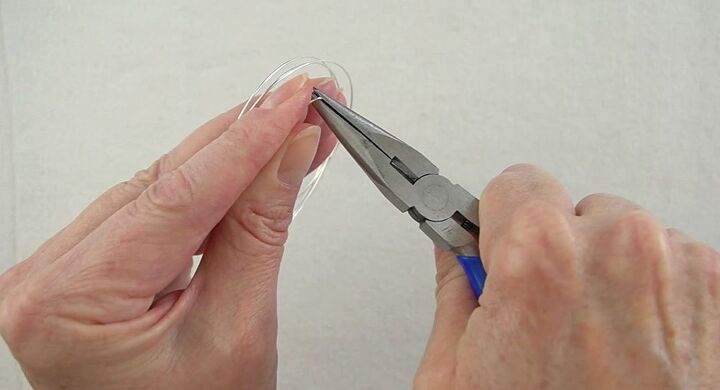
Make a loop facing towards the centre in the end of the wire.
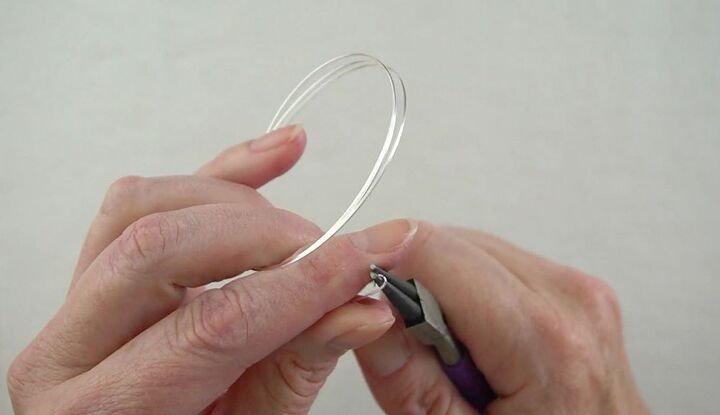
If you don’t know how to make a basic loop please watch this video.
Open the loop and add the charm. Close the loop.
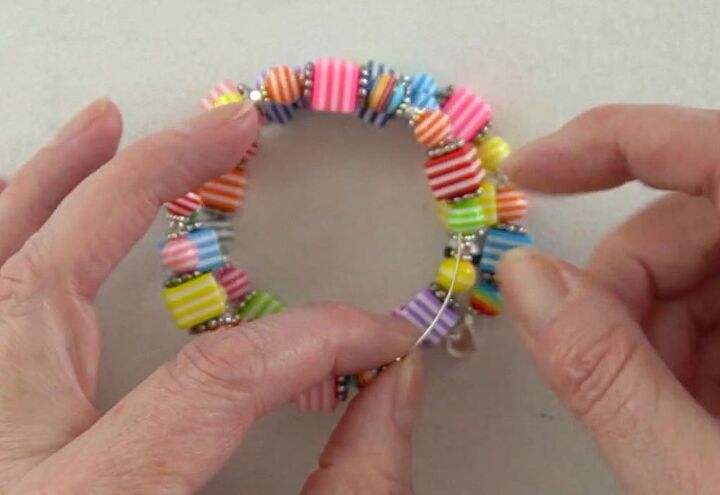
Adding the Beads
Add the beads following the layout diagram below. The colours of the striped beads should be random, however the same colour beads should not be placed next to each other.
Continue adding the beads until you can’t fit another run, finishing with the 5mm Rondelle.
Next add one more Square Round Bead.
Ensure all the beads are pushed right down to the end of the wire and there are no gaps.
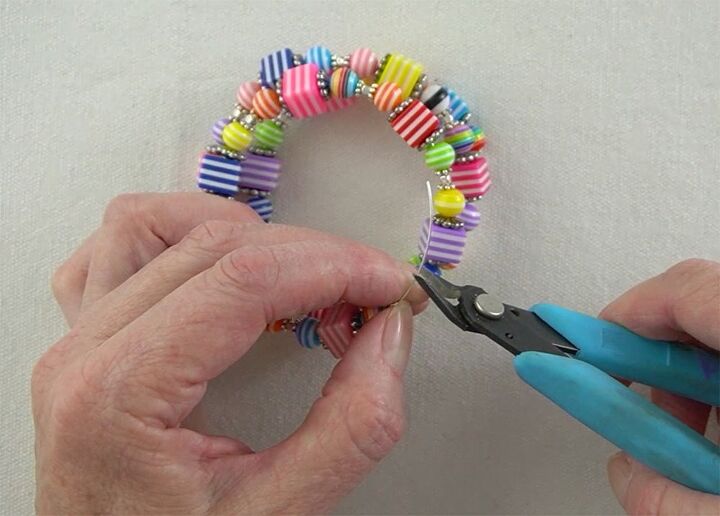
Trimming the Wire
Hold the beads between your finger and thumb to ensure they don’t fall off and cut the wire to about 1cm longer than the beads. Ensure you hold the end of the wire as well to stop it flying away.
Making the Final Loop
Hold the beads on with your thumb and forefinger to stop them sliding off. This can be a little tricky.
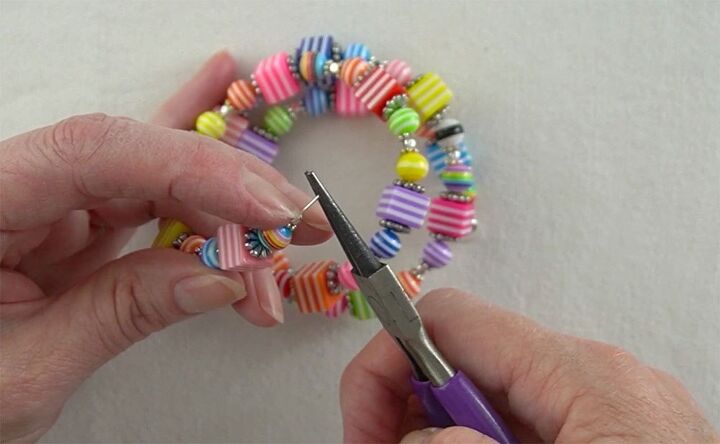
Make a loop in the remaining wire.

That’s all there is to it.
Remember to watch the video right to the end to find out how you can win a kit for this wonderful bracelet.
I hope this post gave you inspiration to make this fun bracelet.
If so…..
PIN FOR INSPIRATION AND SHARE WITH YOUR FRIENDS!!
⇓ PIN THIS ⇓
If you like my blog be sure to click on the RECOMMENDED button and SHARE it with your friends! It’s the best way for my blog to grow. I would love for you to be part of my family so sign up to receive my emails. Every time I post a blog, I will send you an update email.
Also, follow me on Facebook HERE, Instagram HERE and Pinterest HERE.
Come by and say Hey!
The author may collect a small share of sales from the links on this page.


Comments
Join the conversation
I love a colorful bracelet to bring some color to outfits!