DIY a Super Cute Fabric Belt

A belt is definitely one of the most functional accessories! It’s important to remember that functional doesn’t mean it can’t be stylish. Follow my easy tutorial, and get started in making the most amazing and stylish fabric belt to add to any outfit. This belt adds so much to any look and creates a completely new style. If you want to learn all the tips and tricks you’ll need to get this stunning piece, follow my easy, step-by-step guide, and start DIYing this amazing fabric belt.
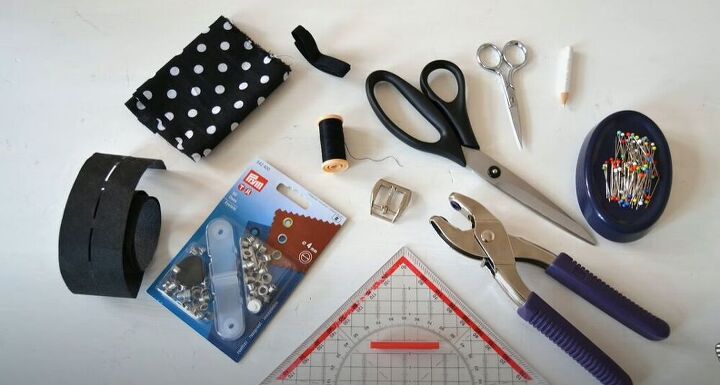
Tools and materials:
- Sewing machine
- Scissors
- Ruler
- Fabric punch
- Fabric
- Fusible fleece
- Belt buckle
- Grommets
- Pins
- Pencil
- Thread
- Binding
To get started on making this stunning fabric belt, I started by making sure my fleece fit perfectly through the belt buckle. I folded the piece in half and then had to trim the edges a little so that it would have the perfect fit.
Once I knew that my fabric would fit inside my belt buckle, I could fuse the fleece. I chose to use this super cute black and white polka dot fabric. The best part about DIYing a belt is that you can get creative with your fabric colors and designs.
I then used my ruler to mark the fabric. This helped me make sure the fabric on all sides of the fleece had an equal width. I used scissors to cut along my marked lines. This step definitely also helped neaten up the edges of my fabric.
Next, I folded the edges inwards, towards the fleece and made sure to press the fabric to keep it sitting flat.
I could then fold the whole piece in half, creating the perfect width for my amazing new belt.
I made sure to pin the folds in place and then I hopped on over to my sewing machine to stitch all around the fabric. Stitching all the way around definitely adds to the aesthetic of the belt and it also helps hold the fabric securely.
I couldn’t believe how gorgeous my new belt was looking and I was so excited to continue working on it. I used binding and measured it around the belt cutting two pieces that would become the straps.
Once I had cut the two pieces of binding to size, I made sure to sew them into two small circles to form the straps.
Next, I turned the straps right side out.
Finally, it was time to get the buckle on. I thread the fabric through the buckle and folded the end down. I slid one strap onto the belt and placed it directly under the fold I had just made.
I then made sure to sew down across the sides of the folded fabric so that the buckle would sit securely on the belt. I also sewed over the strap so that It wouldn’t move around in the fold.
One of the most important elements of a belt is the notches. I used my ruler and pencil to mark exactly where my notches would be.
I then used my fabric puncher to punch notches where I had marked.
To make sure the notches wouldn’t fray and to add a bit of extra style to my new belt I added silver grommets to every notch. I made sure to sew on my second strap for the belt to go through so that the end of the fabric wouldn’t flap.
I love how easy this piece was to make! What fabric would you use for this belt? Let me know in the comments below!
Enjoyed the project?
Suggested materials:
- Sewing machine
- Scissors
- Ruler
- Fabric punch
- Fabric
- Fusible fleece
- Belt buckle
- Grommets
- Pins
- Pencil
- Thread
- Binding
The author may collect a small share of sales from the links on this page.







Comments
Join the conversation