DIY a Super Cute Makeup Bag

I love keeping my makeup neat and organized! I decided to DIY the most adorable makeup bags which can be used to store makeup and are small enough to travel with! I picked out two different, gorgeous fabrics for the inside and outside of the bag and got stuck into the project! If you are ready to learn the ins and outs of making these amazing makeup bags then this tutorial is for you! Follow my easy, step-by-step guide and get started on making your own makeup bag!
Tools and Materials:
- Sewing Machine
- Fabric
- Fusible fleece
- Zipper
- Bias Tape
- Scissors
- Pattern
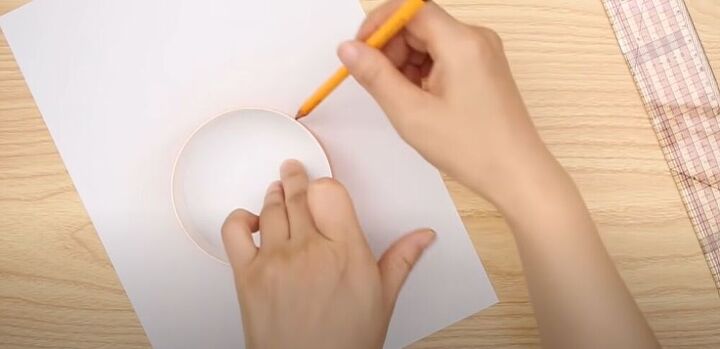
I started by tracing the circumference of a circle onto a piece of paper. It was 30 cm which was the perfect size for this cute makeup bag!
I made sure that I had two pieces of fusible fleece cut to the same size as my circle and four 12 cm by 12 cm squares of fabric. I chose these really cute fabrics for my makeup bags. Get creative with your colors and fabric designs to get the perfect end result!
In this next step, I pressed the fusible fleece onto two of my fabric squares with an iron.
I placed my two other squares underneath the fused pieces making sure their right sides were facing together.
I then marked and drew another circle 1 cm bigger than the fusible fleece circle.
I cut around the circle and was so excited to get started on putting this bag together!
It was time to start pinning. I made two pairs of circles by placing two pieces of fabric together. This time the right sides of the fabric were facing outwards.
With my pins in place, I sewed all the way around my perfect circles, leaving 0.7 cm from the edge.
Once my pieces were sewed together, I folded the circles in half and trimmed the corner pieces at the fold. I then folded it the other way and trimmed again creating four small gaps around the edge of the circle.
In this next step, I took a small piece of fabric 6 cm by 5 cm and folded it in half. I then opened it up and folded the two sides towards the center fold mark I had just made. Once they were on the line, I folded the piece in half again.
I then fed this small piece of fabric through the ring chain and sewed it onto the edge of my circle as an adorable added feature of the makeup bag.
I cut some rectangular pieces of the two fabrics and was ready to continue on this awesome project!
Using the rectangular pieces I had cut from my pattern, I pressed fusible fleece onto 3 of the pieces. The biggest piece I cut to 25 cm, by 4 cm, the second piece was 25 cm by 2 cm and the third piece was 5 cm by 7 cm.
Now it was time to work on the zipper. I chose to use this cute yellow zipper because I love the contrast it creates with my fabric! I started by taking all the rectangular pieces and folding them in half. I then cut the corners at the folded edge.
I marked the center of my zipper and pinned it to the medium rectangular piece without the fleece.
Next, I placed the other piece above the zipper, right side facing down, and pinned it on. I sewed one cm from the edge of the pinned side.
I then clipped my two pieces of fabric together and sewed a stitch along the edge of the zipper. I repeated the same on the other side of the zipper with the larger two rectangular pieces.
Next, I pinned my two small pieces onto the end of the zipper, making sure they were right sides facing inwards. I hopped on over to my sewing machine and stitched them on.
I turned the pieces right side facing out and sewed another stitch across the edge closest to the zipper.
I folded in the edge of the bottom rectangle and pressed it using my iron.
I folded my piece over with the wrong side facing out and sewed the two ends together about one cm from the edge.
Next, I folded the flap of fabric at the edge and pinned it down. I turned the almost finished makeup bag right side out and sewed the flap in place. I love seeing this amazing bag finally coming together!
I pinned the raw edges of the top and bottom of my makeup bag and sewed around, leaving a 0.7 cm gap from the end. I then folded the piece and snipped off the corners as I had done earlier.
In this next step, I added bias tape to the bag. I chose this really cute tape that complemented my other fabrics. I pinned the tape to the top and bottom of the piece with the right side facing inward. I sewed the bias tape on 0.7 cm from the edge.
I made small incisions in the top and bottom of the bag and was ready to attach them to the bag.
I took my bottom piece and carefully lined up the small gaps I had made from trimming the corners earlier. I pinned the bottom in place and sewed it on at 1 cm from the edge. I repeated this on my top piece and couldn’t believe I was almost finished with this super cute makeup bag.
I lifted the bias tape and double folded it over the raw edges inside the bag and then sewed it in place. I love how the tape gives a gorgeous, neat finish to the makeup bag! I made sure to turn the bag right side out once my bias tape was on.
These makeup bags are so adorable! What would you keep inside? Let me know in the comments below!
Enjoyed the project?
Suggested materials:
- Sewing machine
- Fabric
- Fusible fleece
- Zipper
- Bias tape
- Scissors
- Pattern (http://sewingtimes.co.kr/221732014094)
The author may collect a small share of sales from the links on this page.






Comments
Join the conversation
My eyes glazed over by about step #43 about how complicated this would be to try to replicate. I’m sure that’s because I don’t sew but sure wish I did. For those of you who sew, I bet this is a fun and fulfilling thing to make for yourself and friends. I just can’t imagine how hard it is!
Not alot they are to little..Maybe a lip balm or lippy and tissue in a day out handbag..