How to Make This Rustic & Vintage-Inspired DIY Beaded Headband

In this tutorial, I’m going to show you how to make a DIY beaded headband with wooden beads. This vintage-style beaded headband design is really easy to make and you can play around to create a truly unique pattern. Keep reading to learn how to make beaded headbands.
Tools and materials:
- Basic headband
- Paper ribbon
- Wooden beads (7 large, 20 medium, 20 small)
- Ruler
- Scissors
- Glue gun
- Brown linen
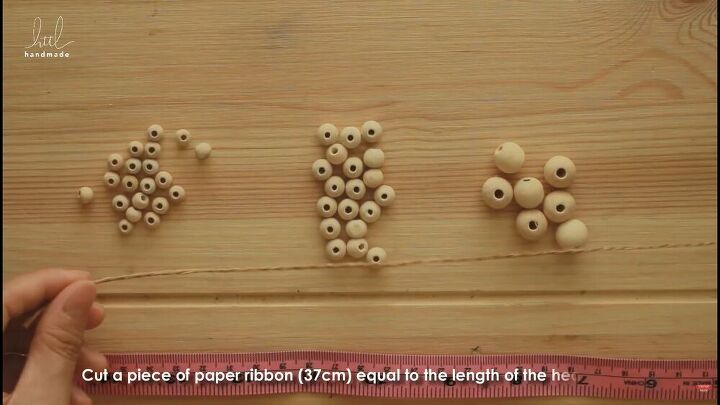
1. Cut the paper ribbon
Cut a piece of paper ribbon that is equal to the length of your basic headband. Mine was 37cm (14.5 inches).
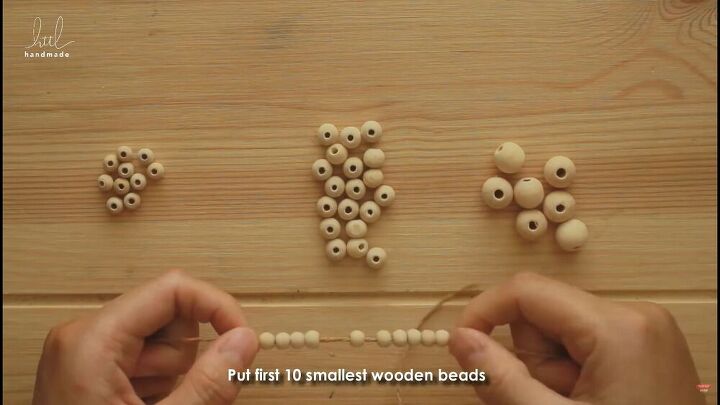
2. Add the beads
Now, starting from the smallest beads, thread the first 10 wooden beads onto your paper ribbon.
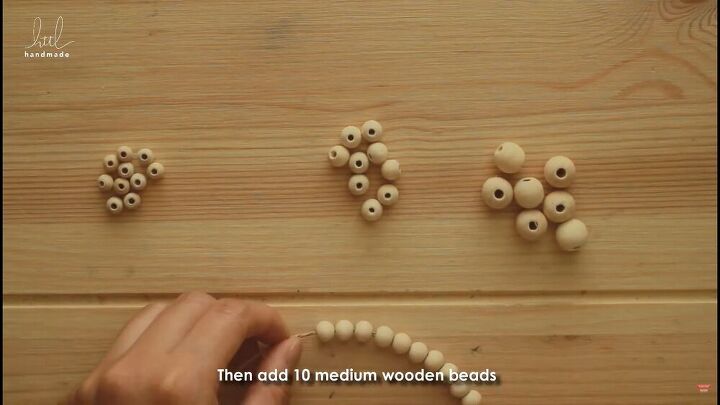
Then, add 10 of the medium wooden beads.
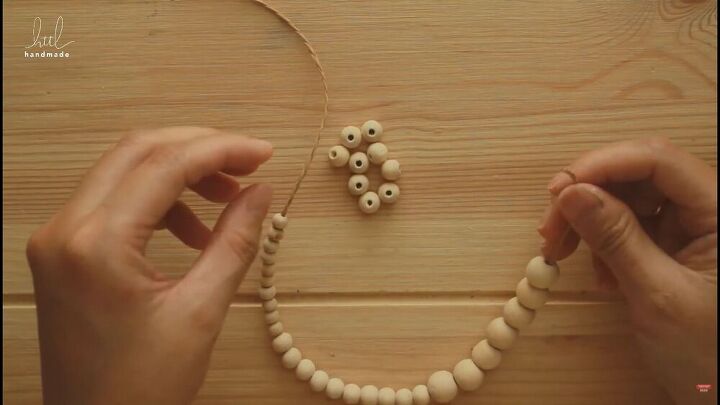
Next, add all 7 of the largest wooden beads.
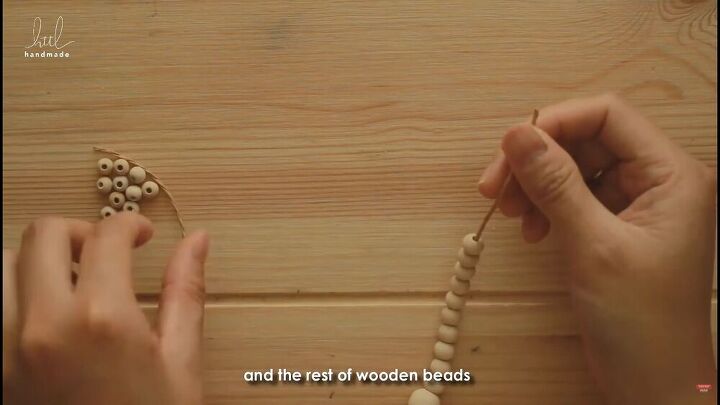
Lastly, add the rest of the wooden beads, working from the medium beads, to the smallest.
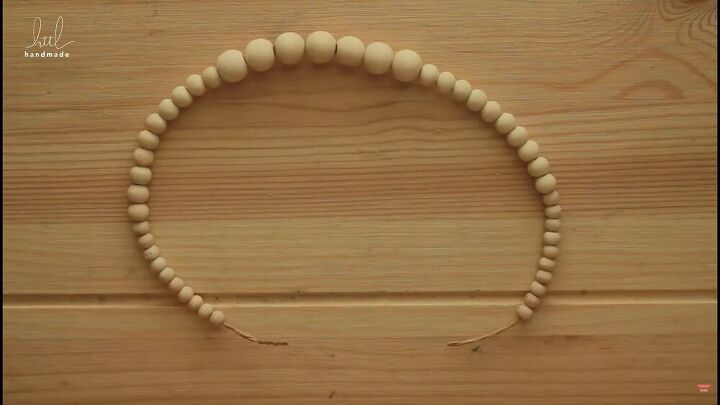
This is what it should look like.
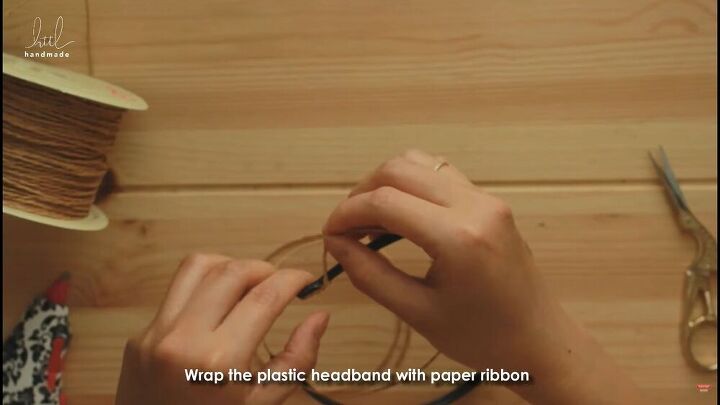
3. Wrap the headband with paper ribbon
Now, add a drop of glue to the end of the plastic headband with a hot glue gun. Then, take your paper ribbon, and wrap the paper ribbon around the headband.

Work in increments, so add glue, then wrap the ribbon, then add some more glue. If you add glue to the whole headband, it will dry out by reaching the other end. Continue this process until you reach the other end.
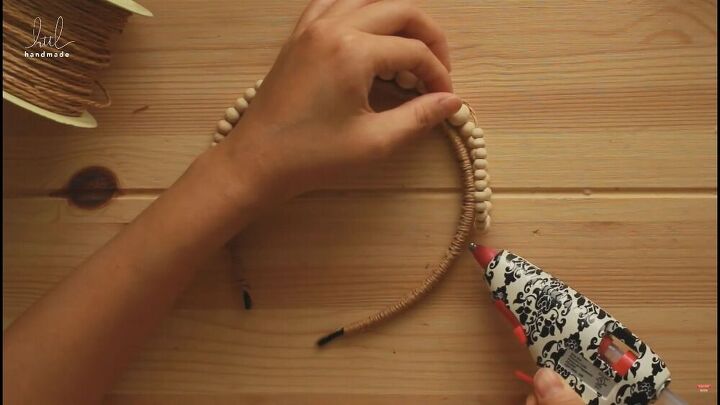
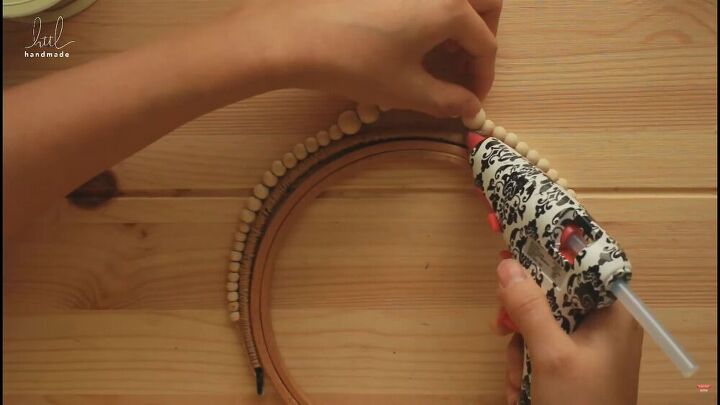
4. Glue the beads to the headband
Using hot glue, stick the string of wooden beads onto the headband. First, attach it to the bottom right corner, and then move onto the left side.
Tip: Don't add the beads from the very end of the headband, as remember this may annoy you as this section is placed behind your ears. So, start a few inches up.

5. Adjust the position
Put your headband on any circular object. Here I'm using an embroidery loop. This will help you adjust the position of the top wooden beads. I wanted the larger beads to lift off the headband, as shown.
Now carefully, add more glue to the top of the beaded headband and stick the medium-sized beads down.
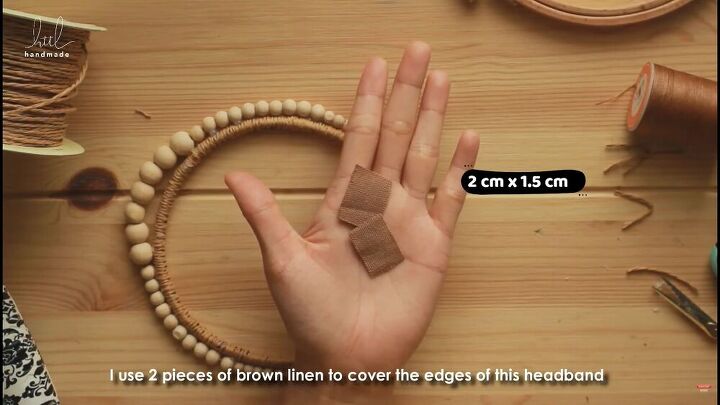
6. Cover the headband ends
Take two pieces of brown linen, cut them into 2cm x 1.5cm (0.75 inches x 0.6 inches) squares, and cover the edges of the headband for a cleaner look.
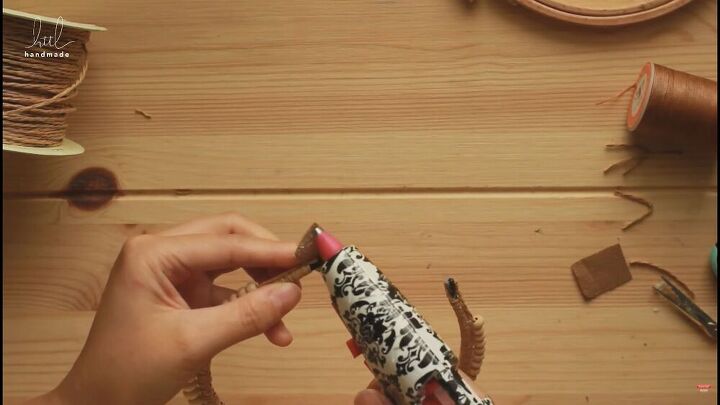
Wrap each square around the visible plastic portion of the headband and use a glue gun to stick it down.
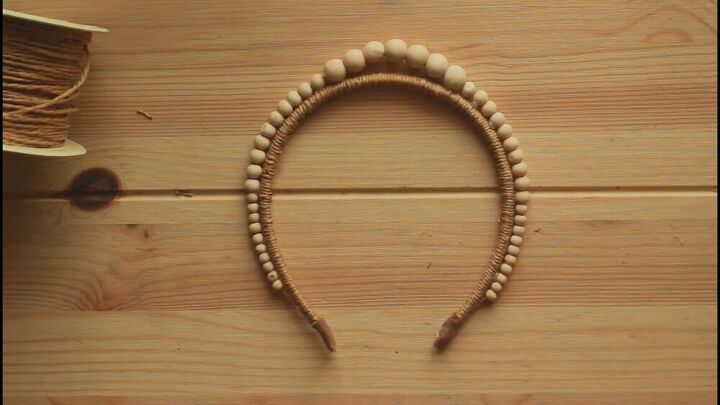
DIY beaded headband tutorial
Here's the final result of the DIY beaded headband! I love this rustic, vintage design. I think this accessory would complement lots of different outfits.
Let me know what you think about this tutorial on how to make beaded headbands in the comments.
The author may collect a small share of sales from the links on this page.


Comments
Join the conversation
Hi HTTL, This headband is very pretty and reminds me of Thai traditional clothing looks. Thank you so much for sharing your creation. :)
This looks fabulous! Thanks for the great tip!