How to DIY a Super Cute Bow Scrunchie From an Old T-shirt

I love reusing materials and upcycling them, especially natural materials.
My brother was going to throw out his old t-shirt so I grabbed it. There were lots of marks on it but enough clean areas for me to make a bow scrunchie.
I'd never made one before so I was winging it a bit but I think my hair bow scrunchie came out really well.
Tools and materials:
- Old t-shirt
- Scissors
- Ruler
- Marking pen
- 1/4 inch wide elastic
- 2 safety pins
- Iron
- Sewing machine or fusible tape
1. Cut out the pieces
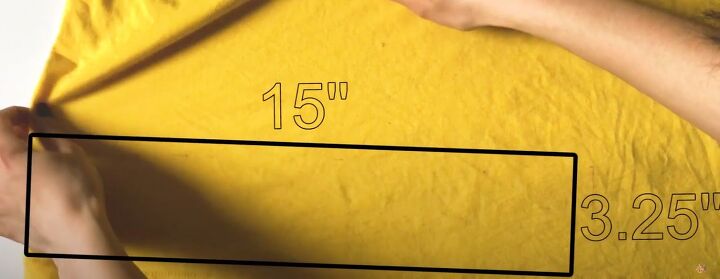
Cut a rectangle 15 inches by 3.25 inches from the body of the t-shirt for the scrunchie.
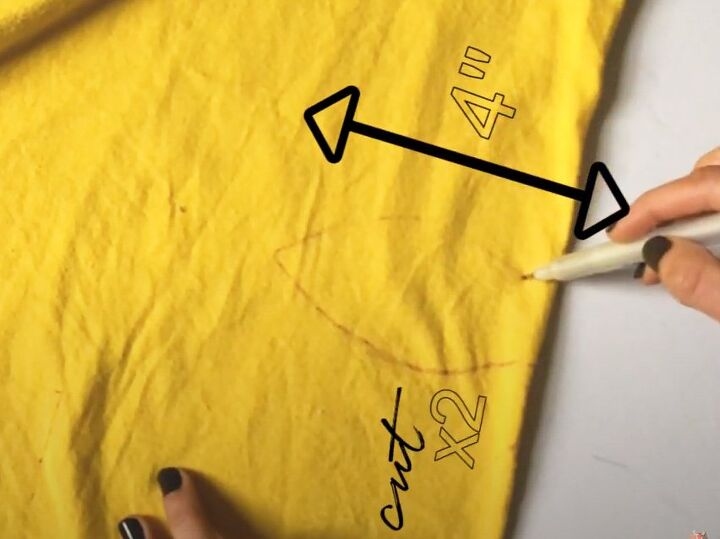
For the bow, draw a leaf shape about 4 inches long on the fold of one seam and cut it out. Use it as a template to cut a second one.
2. Sew bow
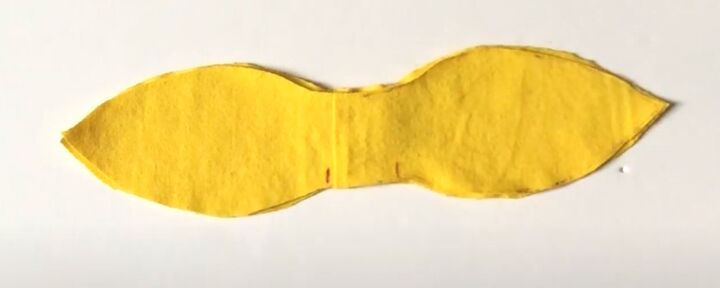
Place the bow pieces on top of each other with the right sides together. Mark a small section in the middle of one edge for the opening.
Sew the two pieces together, 0.25 inches from the edge, and leave the marked area unstitched.
I made a mistake here and put the wrong sides together before I sewed it so the seams show on the right side.
If you don't have a sewing machine, use fusible tape between the two layers and press with a hot iron or a flat iron to join them together.
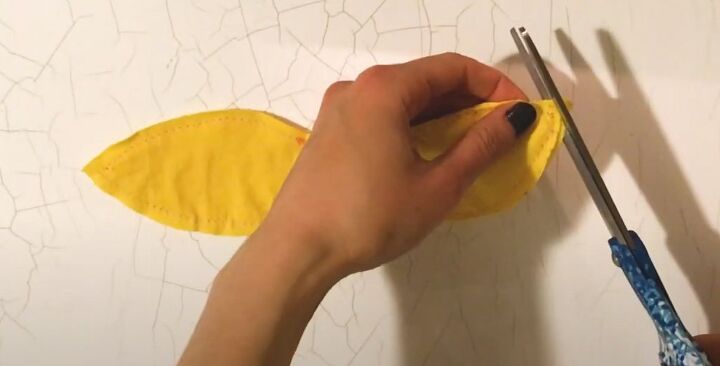
Snip off the leaf tips to give a sharper edge. Turn the bow inside out through the opening and press it. Hand sew the opening closed.
3. Make scrunchie
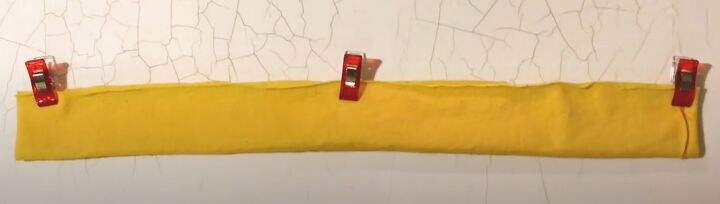
Turn in one short end of the scrunchie 0.25 inches and sew it in place.
Fold the scrunchie in half lengthways with right sides together. Sew one short edge and along the long edge, 0.25 inches from the edge.
Turn the scrunchie right side out and press it.

4. Insert elastic
Cut a 6 inch piece of elastic and attach a safety pin to each end.
Insert one pin into the scrunchie and start feeding the elastic through, pleating the material as you go.
The second pin stays outside so you don't lose the end of the elastic. Sew or knot the two ends of elastic together.

Tuck the raw edge of the scrunchie into the other end and sew the opening closed.
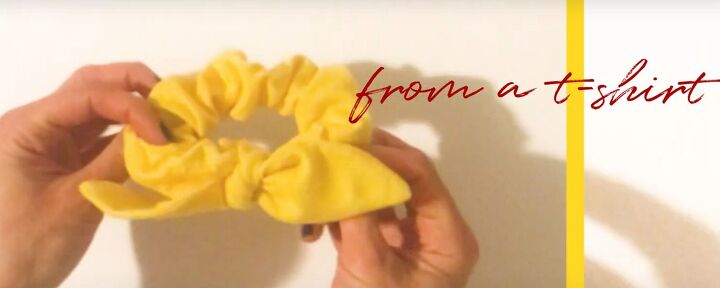
5. Attach bow
Put one end of the bow through the center of the scrunchie and knot the bow over the scrunchie.
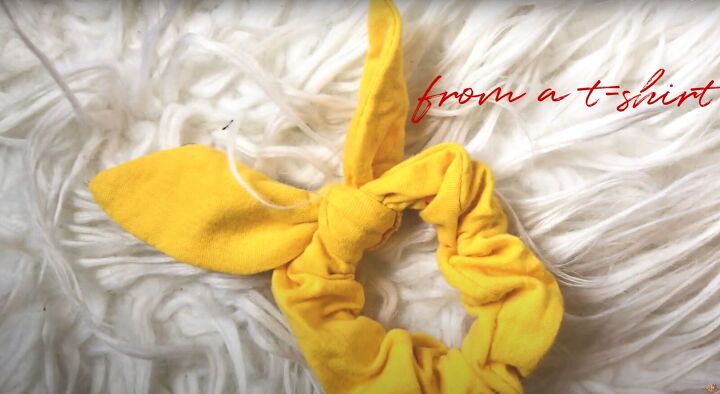
DIY bow scrunchie
And that's all there is to it! A super quick and easy scrunchie with a bow that looks really cute. I love that it's in bright yellow but of course you can use any scraps of fabric in whatever colors you have.
I hope you enjoyed this and if you did, please leave me a comment below. I love to hear from you.
The author may collect a small share of sales from the links on this page.


Comments
Join the conversation
Loved your idea! You gave me something to make for my 3 little nieces and a way to recycle some of my material leftovers🙂
you are awesome! Thanks for this project.