How to Easily Make DIY Braided & Top Knot Turban Headbands

If you’re having a bad hair day, take the focus off your hair with these two styles. Follow along to make a DIY braided hairband and a DIY top knot turban headband. They are both easy to make and look gorgeous!
Tools and materials:
- Velvet fabric
- Plastic hairbands
- Scissors
- Ruler
- Glue
- Sewing pins
- Sewing needle and thread
- Binder clips
- Ribbon
- Tape
DIY braided headband
1. Cut & fold the fabric
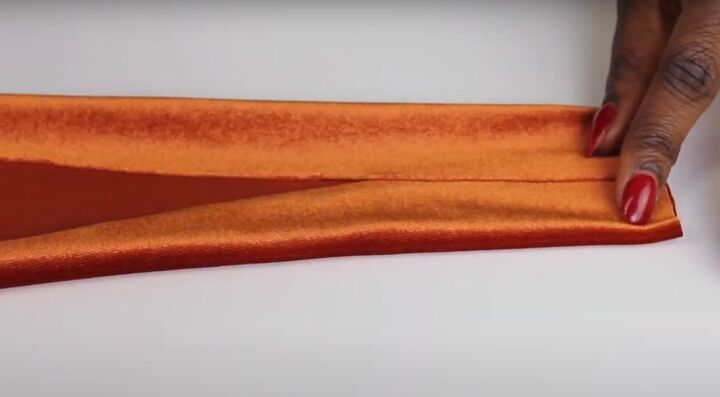
Cut a rectangle from your velvet fabric that is 60 x 13 centimeters (23.6 x 5.1 inches). Fold both long edges of the rectangle into the center and then fold it again.
Pin both ends and the middle of your folded rectangle, so it won’t unfold.
Make two more velvet strips exactly the same as the first one.
2. Sew the strips together
Stack the three strips on top of each other at one end. Pin and sew that end to hold the three strips in place. You can hand sew or use a sewing machine for this.
3. Braid the fabric
Lay your strips on a flat surface and tape the sewn end down to the surface to hold it in place.
Braid the three strips together carefully, making sure that no rough edges are peaking through and that the braid is even all the way to the end.
When you get to the end of the braid, stack the ends, and sew just like you did at the first end.
4. Cover your hairband
Cut a rectangle of velvet almost twice as wide and a bit longer than your plastic hairband.
Apply glue to the outside of your hairband.
Place one edge of your hairband near one end of your rectangle along the center line, and roll the head band along the fabric, gluing the fabric to the hairband.
Stretch and smooth the fabric on the hairband.
5. Snip & wrap
Snip the fabric on the sides from the edge of the fabric to the hairband every couple of inches.
Working in sections, wrap the sides of the fabric around the hairband and glue it in place.
Glue a piece of ribbon down the inside middle of the hairband to cover the edges of the fabric.
6. Attach the braid to the covered hairband
Apply glue down the center line of the outside of your covered hairband.
Hand sew both ends of the braid tightly and use your thread to tightly wrap the ends of the braid around the headband.
7. Add ribbon to the ends
Glue a small piece of ribbon around the ends of the hairband and use a binder clip to hold it in place until the glue dries.
This is how your finished braided hairband will look!
DIY top knot turban headband
1. Cut & fold the fabric
Follow step 2 above to cover a plastic headband.
Cut out a 22-inch square of fabric. Fold two opposite corners of the square into the middle, overlapping them a bit.
Fold both long straight sides into the middle, overlapping them slightly.
2. Tie a knot
Tie a loose knot in the center of the turban.
3. Add a headband
Slip a covered headband into the bottom of the knot.
4. Sew
Lay the fabric along the top of the headband and fold in and sew down the ends so there are no raw edges.
Sew with invisible stitches, passing your needle down through the same spot you just came up and moving the thread along on the inside of the fold.
5. Secure the ends
Secure the end of the turban to the headband with glue.
DIY headband tutorial
This beautiful turban headband will take care of any bad hair day you have!
Please leave me a comment to let me know if you tried the DIY braided hairband or the DIY top knot turban headband, or both, and how they turned out for you.
Enjoyed the project?
Suggested materials:
- Velvet fabric
- Plastic hairbands
- Scissors
- Ruler
- Glue
- Sewing pins
- Sewing needle and thread
- Binder clips
- Ribbon
- Tape
The author may collect a small share of sales from the links on this page.


Comments
Join the conversation
Great job! Your manner of instruction is very good and effective. Kudos!