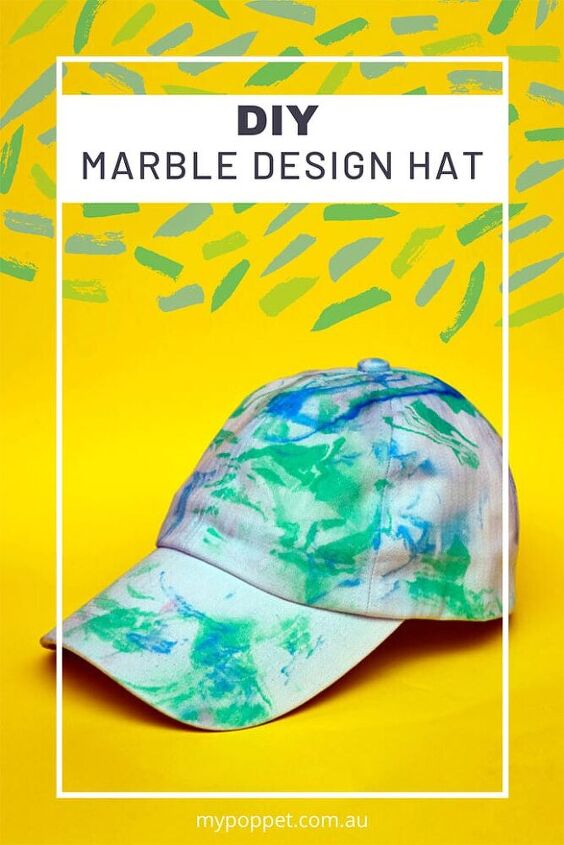
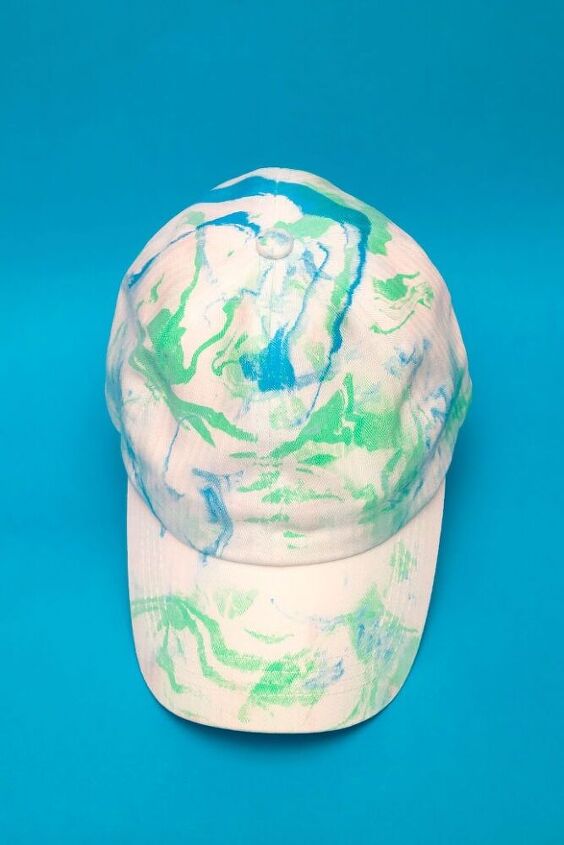
DIY Marble Design Hat – How to Marble Print 3D Surfaces
This post contains affiliate links
Marble prints and patterns have been a hot fashion trend for a little while now.
You’ll see marble patterns on home wares, clothing and accessories popping up everywhere.
Traditionally ink marbling is a technique used on paper or silk. As far back as the 10th century, Japanese artisans swirled drops of floating ink on the surface of water, and layered paper over the top to transfer the design permanently.
But marble painting isn’t just limited to flat surfaces. You can use the same water marble technique to add a marble effect to 3D surfaces as well.
This tutorial is an easy to follow step-by-step guide to show you a simple method for marbling a three-dimensional blank canvas.

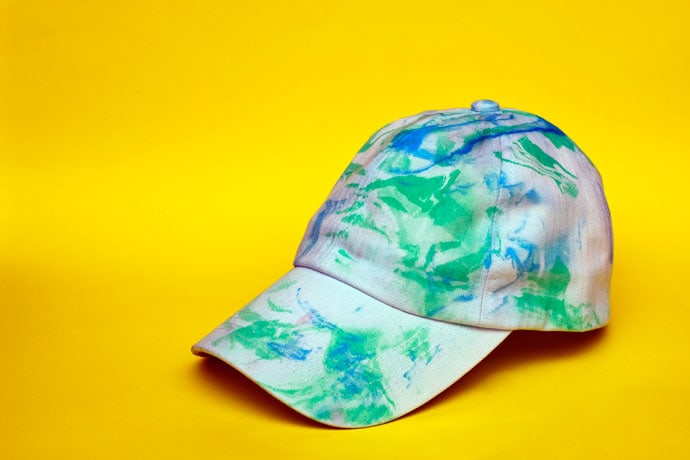
Today we are brightening up a plain white baseball cap with a swirly marbled print.
Don’t stop at just a hat! Use this process on to any light coloured canvas material that marbling ink will adhere to.
Why not try marbling a pair of white canvas shoes?
It’s a super fun craft project that doesn’t require any special skills, and is a great way to update boring accessories. Kids and teens will love customizing their own trendy marble print accessories.
Here are some other ideas for updating your accessories:
You will need:
- White canvas cap
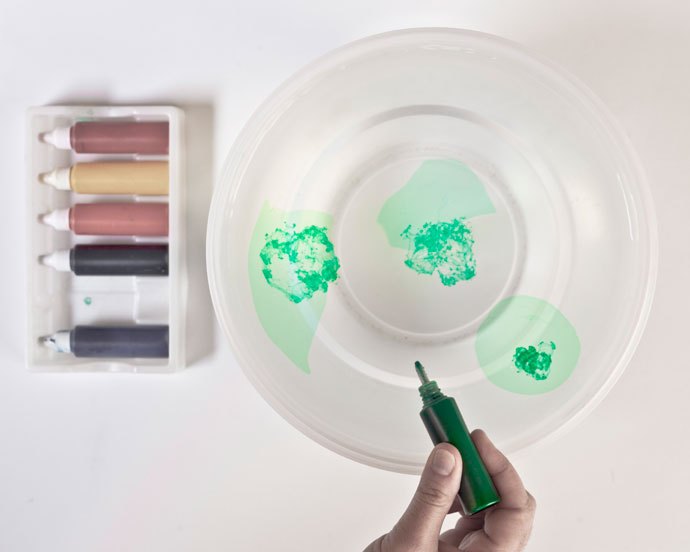
- Marbling inks
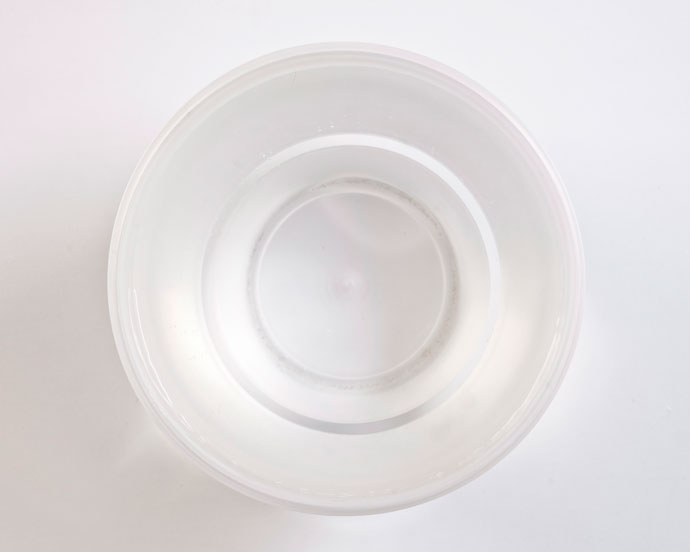
- Large bowl
- Water
- Hair Dryer (optional)
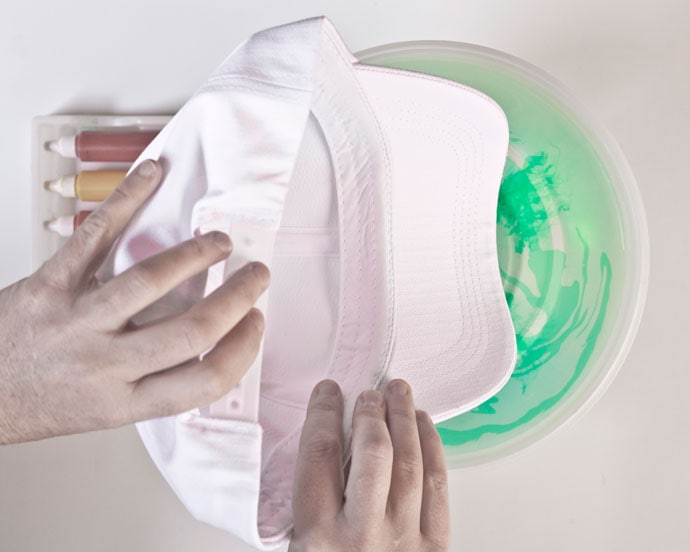
1. Fill the bowl ¾ with water.
2. Give the water a little swirl then drip a few droplets of ink into the water. Watch the ink swirl in the currents of the agitated water.
3. Submerge the cap into the bowl of water. Make sure the exterior side of the cap is going into the water first. The whole cap will get wet. Don’t worry if some ink appears on the underside.
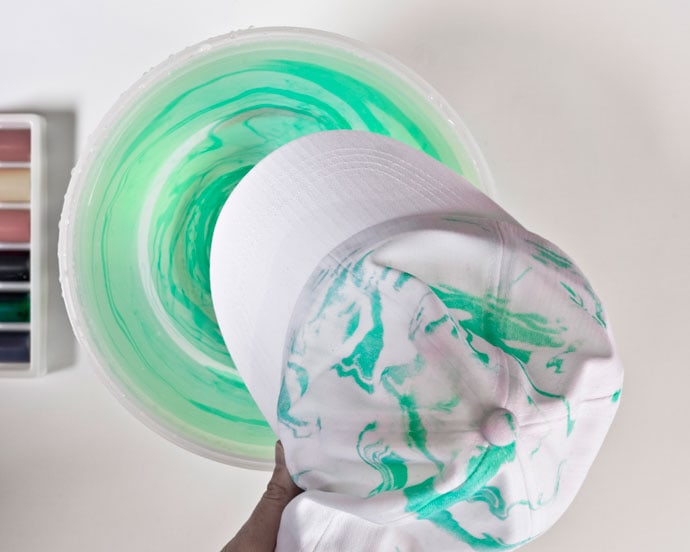
4. Allow the cap time to dry. This may take anywhere between a few hours (hot weather) to 24 hours (cold weather). You can potentially speed up the drying process by using a hairdryer on the cap.
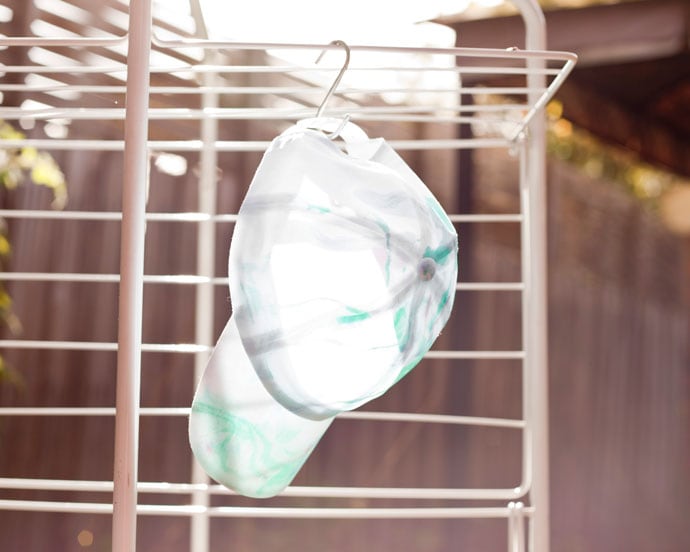
5. You can add marbling layers by repeating Steps 1 to 4. Make sure the cap is dry before adding layers. The ink will not adhere if the cap surface is already wet.
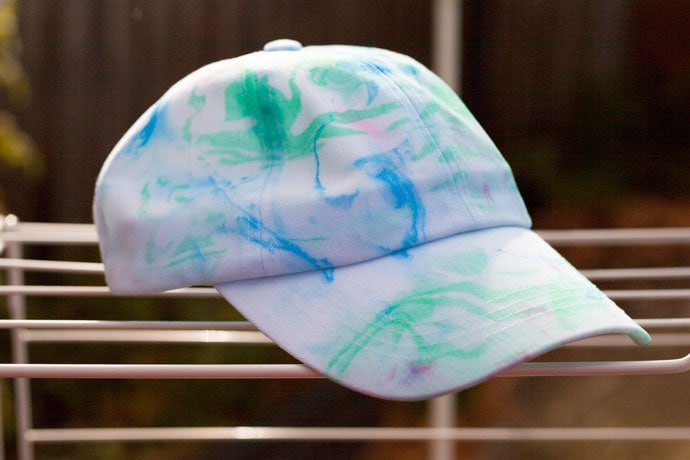
6. Dry the hat out one final time, and it’s ready to wear.


The author may collect a small share of sales from the links on this page.


Comments
Join the conversation
Will this wash out and does it need some type of sealer?