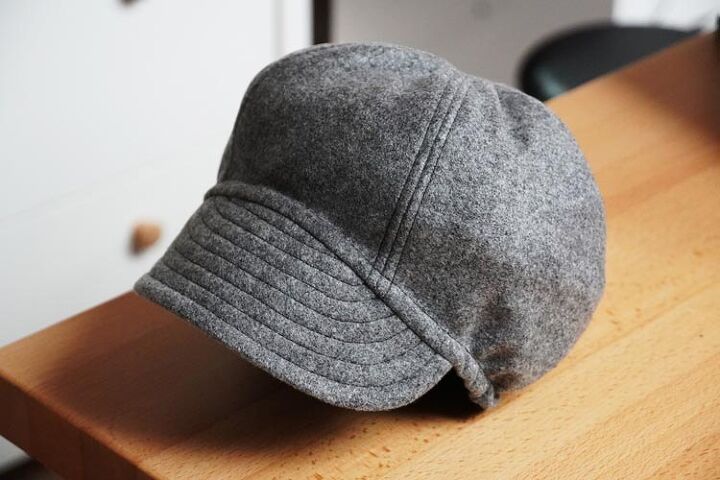
How to Sew the Newsboy Hat GO OUT

Today I added a new pattern to my online store. It's a pattern for a newsboy hat (also called an apple cap, or Gatsby cap), which I prepared in two styles. I couldn't decide which style was better during the testing phase, so I’m offering you both versions (in one pattern) and you can decide for yourself… The pattern for the newsboy hat GO OUT comes in 9 sizes for head circumferences between 46 and 62 centimeters.
Sewing pattern
There are two versions of this pattern:
- smooth top
- shaped top
You will receive pattern files for both of these versions so you can choose which one to sew.
Recommended material
This pattern works best with thicker woven fabrics - softshell, corduroy, or denim, for example. I used a coat fabric with a little bit of elastane for the lighter hat. This makes it very comfortable to wear. However, fabric with elastic fibers is not required.
✂My tip: If you want to make the sewing process easier, use fabrics that don’t fray. If you choose a fabric that frays, don’t forget to clean seam allowances of all finished seams - this is not repeated in the rest of my sewing tutorial for this hat.
You will need about 40 cm of 140 cm wide fabric for any size of this hat. I sewed both of my pieces from leftovers from other projects and you can do it that way too - this pattern is great for processing various scraps. :)
You will also need
You will also need a medium to strong one-sided fusible interfacing. For example:
- Ronofix, which is a few millimeters high, but flattens after ironing. It’s moderately strong and at the same time retains a certain degree of softness.
- Heavier canvas interfacing works very well.
- Novopast, which is not very strong, but the part reinforced by it retains its softness and pliability.
- Ronar fix, which is strong, therefore great for strong reinforcement of flatter peak (visor).
The degree of reinforcement and the subsequent stiffness of a part is directly proportional to the strength of its interfacing - the heavier the interfacing, the stiffer the part.
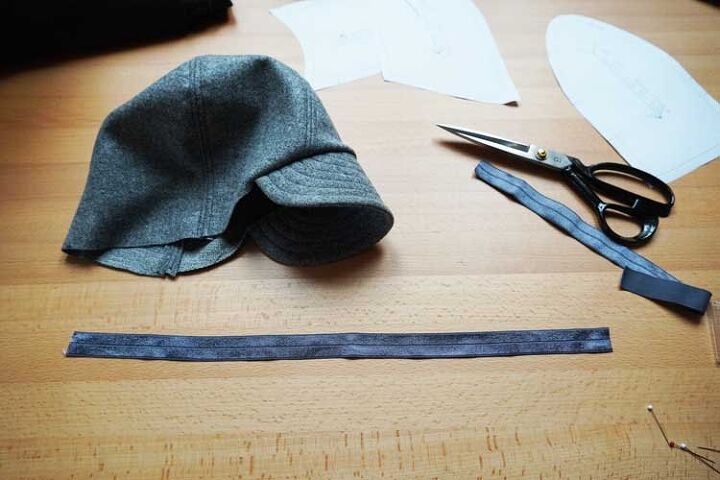
You will also need a (halved) hemming elastic band. Find the appropriate length by wrapping it around your head - it should be tight, but not uncomfortably tight. Keep in mind that it will become a bit looser after you sew it to the hat. Each piece is different, so unfortunately I can't tell you exactly how much looser it will be. I use relatively soft bands - I used a 45 cm long band and my head circumference is 54 cm. The hem of the cap goes over the forehead, under the ears, and to the nape of the neck, which is a bit shorter distance than the “classic” head circumference. Therefore, the difference between the length of the elastic band and the circumference of the head may seem too large.
My hats are sewn with a straight stitch on a regular household sewing machine. You won't need an overlock machine or any special stitch.
How to choose the right size
The pattern comes in 9 sizes
Choose the appropriate size according to the head circumference. Measure it with a tailor’s tape placed approximately 2.5 cm above the eyebrows and the ears. This way you should be able to measure the widest part of your head.
Sewing instructions
Pattern layout
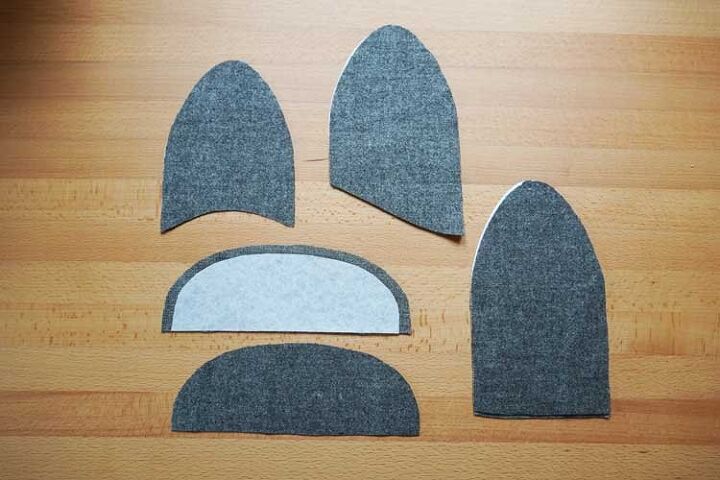
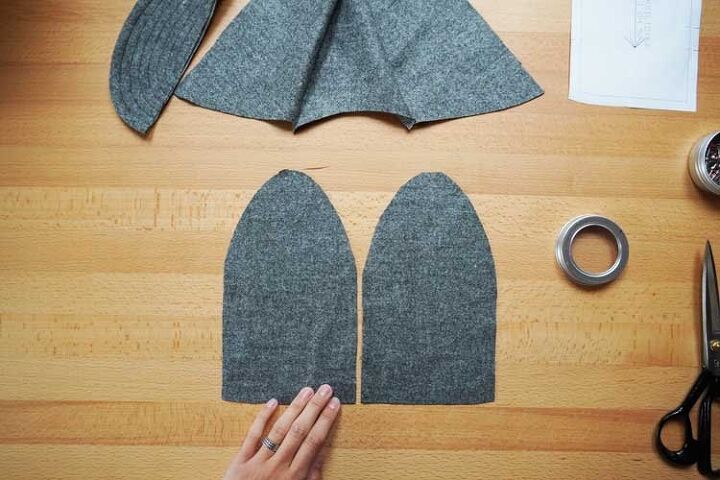
1. Position & prepare the pieces
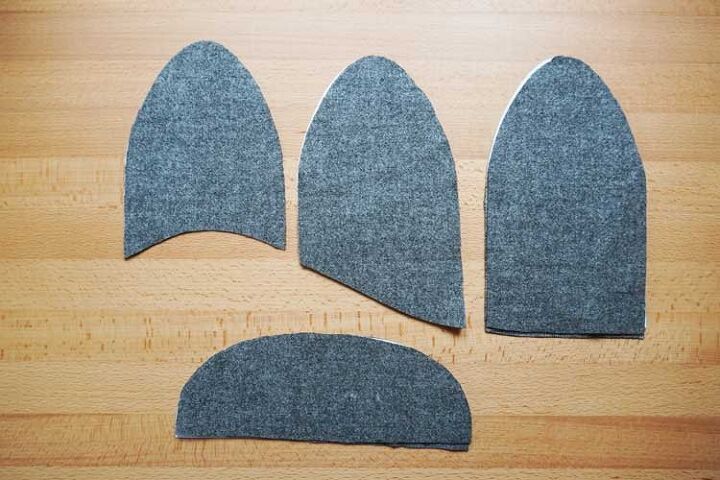
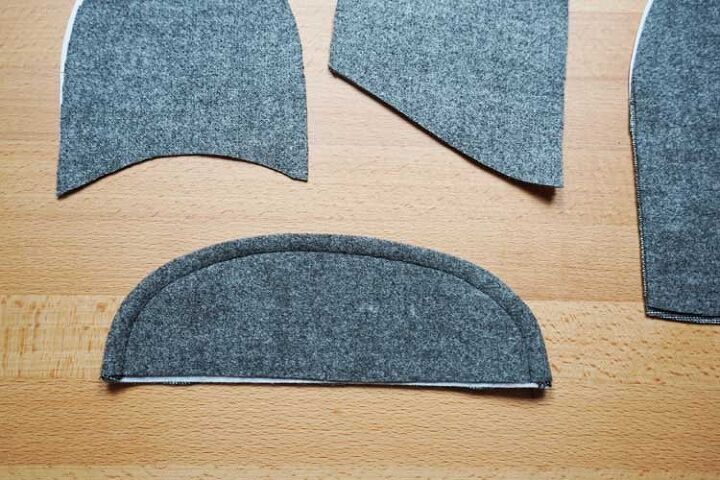
There are a total of 7 pattern pieces:
- Piece No.1 - Peak/visor (same for both styles of the hat)
- Pieces No.2 & No.3 - Front pieces (No.2 for the shaped version, No.3 for smooth version)
- Pieces No.4 & No.5 - Side pieces (No.4 - shaped version, No.5 - smooth version)
- Pieces No.6 & No.7 - Back pieces (No.6. - shaped version, No.7 - smooth version)
Prepare:
For shaped version:
- 2x piece No.1 - Peak
- 1x piece No.2 - Front piece
- 2x piece No.4 - Side piece
- 2x piece No.6 - Back piece
For smooth version:
- 2x piece No.1 - Peak
- 1x piece No.3 - Front piece
- 2x piece No.5 - Side piece
- 2x piece No.7 - Back piece
All seam allowances are 1 cm wide.
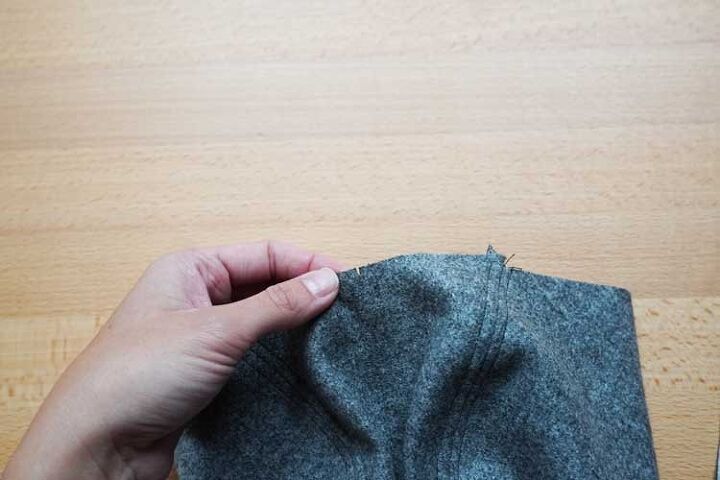
Transfer all marks from the paper pattern to fabric pieces - I recommend using small notches (cuts). These marks will help you to put all the parts together correctly.
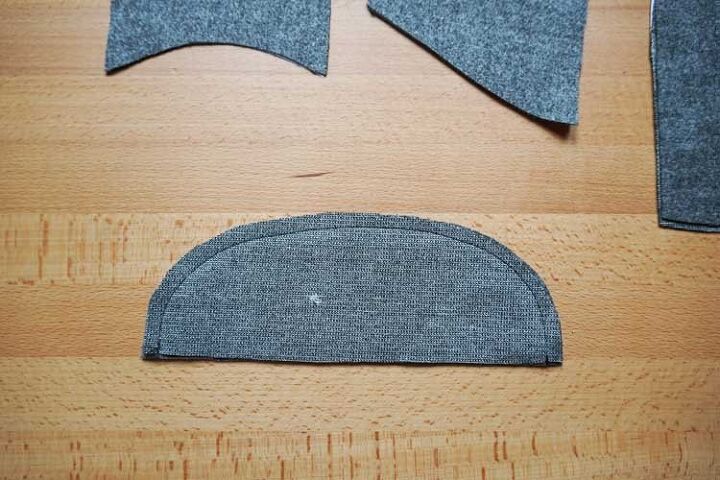
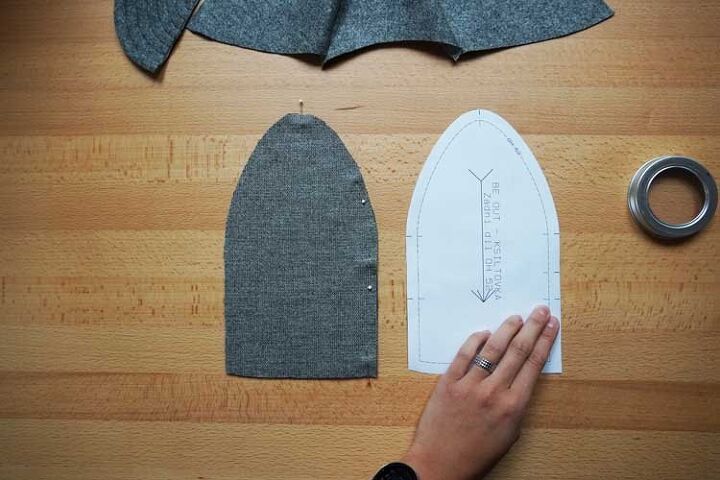
Peak
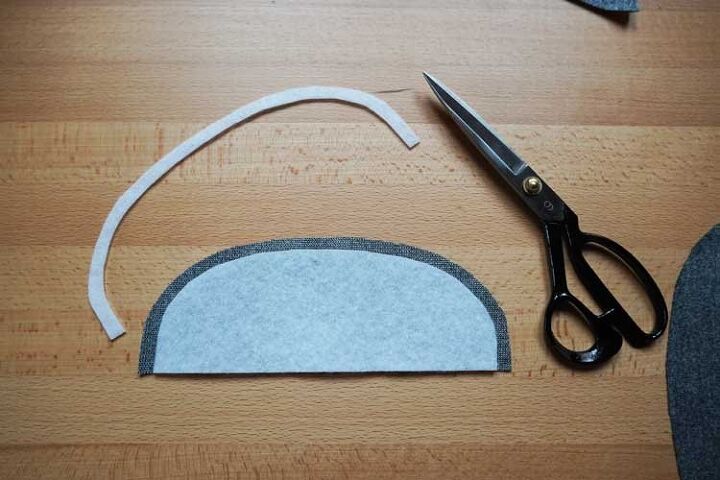
2. Interfacing
Reinforce one of the peak pieces. If you only have weaker interfacing, you can reinforce both parts of the peak. If, on the other hand, you have very strong interfacing, it is necessary to cut off the part that would cover the seam allowance along the arch so that there is not too much material in there. You can apply the modified reinforcement to the reverse side of one of the peak pieces.
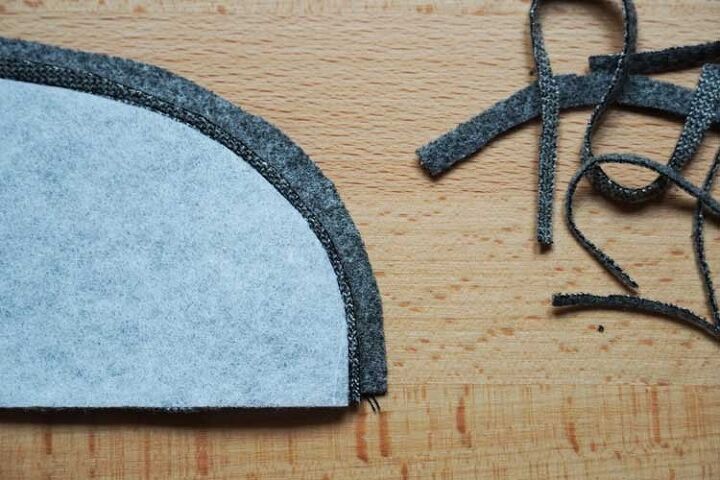
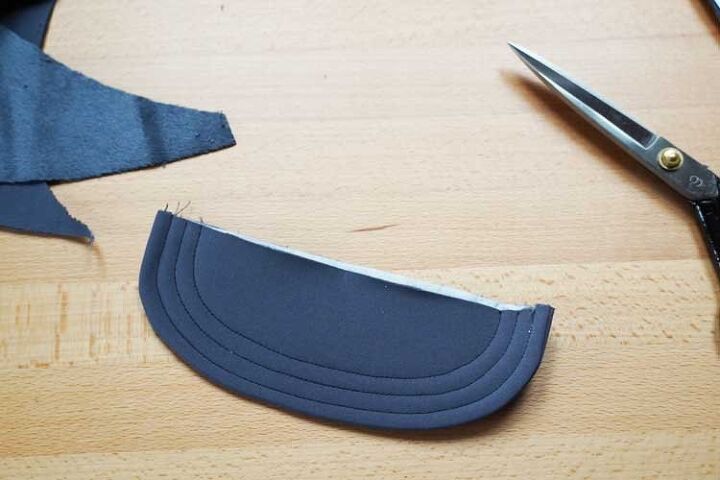
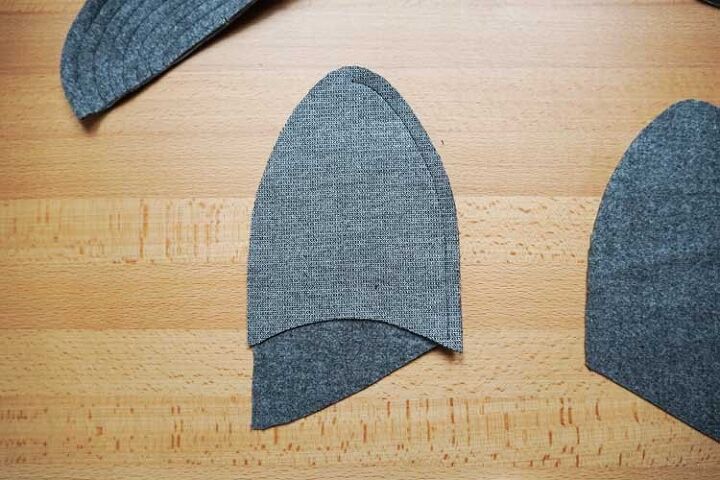
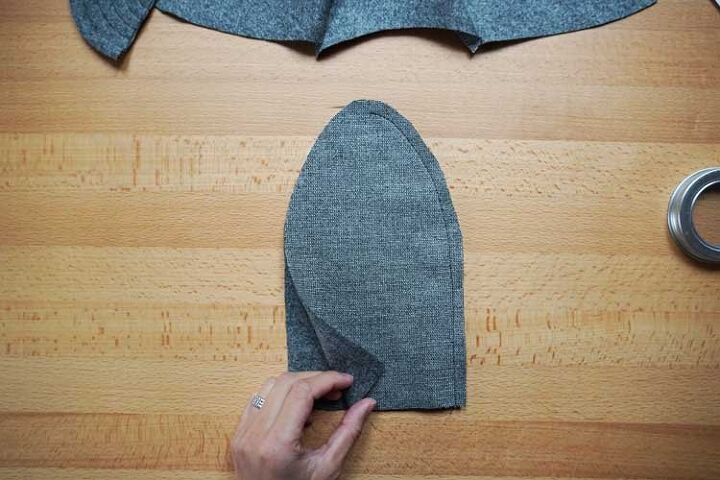
3. Sew the peak
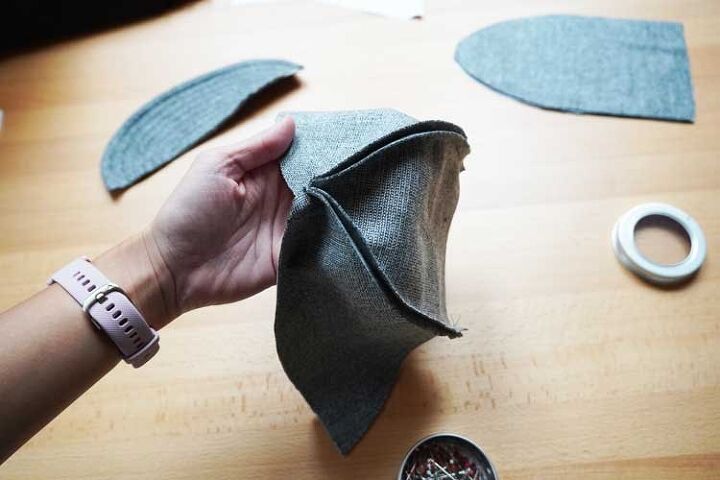
Put the peak pieces together (face side to face side). Sew along the outer edge of the peak (1 cm from the edge).
To be able to turn the peak face side out (and to keep the edge sharp & undeformed), it’s necessary to grade the seam allowances. Trim the seam allowance of one peak piece to make it only about 2 mm wide. If you can't get a sharp edge after that, you can carefully cut problematic areas of the other seam allowance. But you have to do it carefully so that the seam does not fall apart.
Turn the peak face side out and iron it thoroughly.
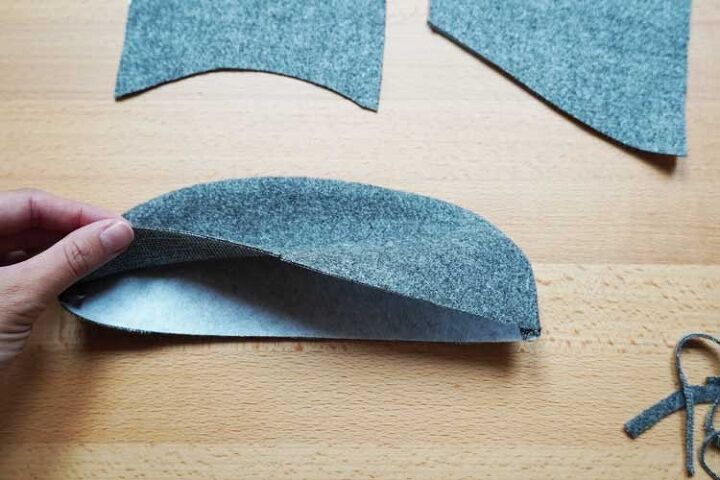
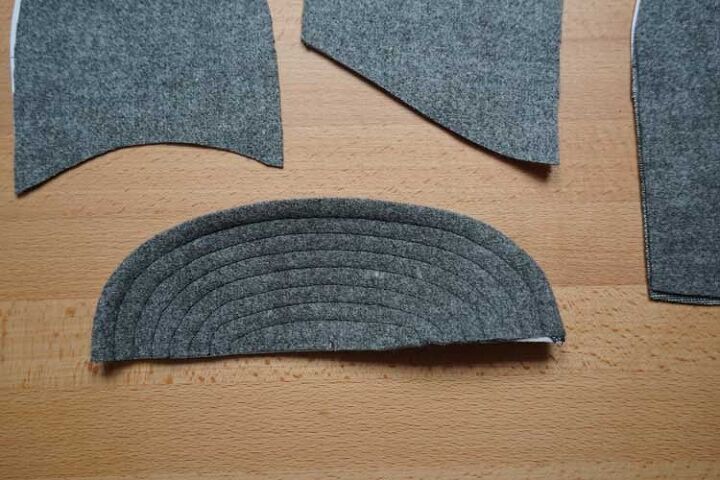
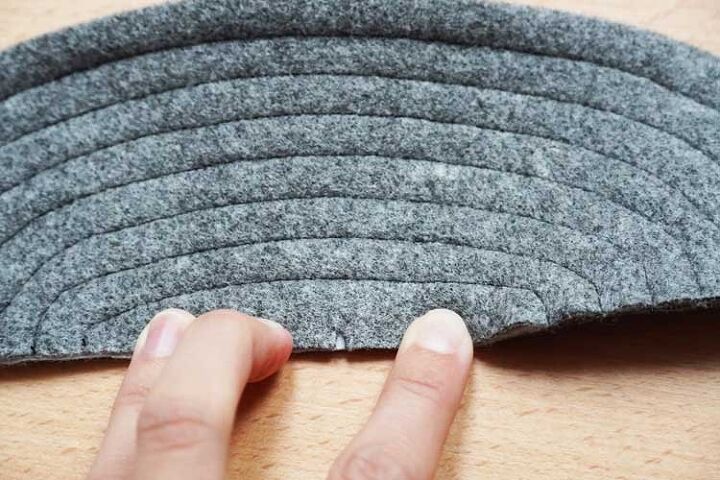
4. Topstitch the peak for stabilization and an interesting look
To stabilize the shape of the peak, sew (topsitch) a series of arcs with about 1 centimeter wide gaps in between the seams.
You can topstitch the whole peak or just a part of it… Be creative. :)
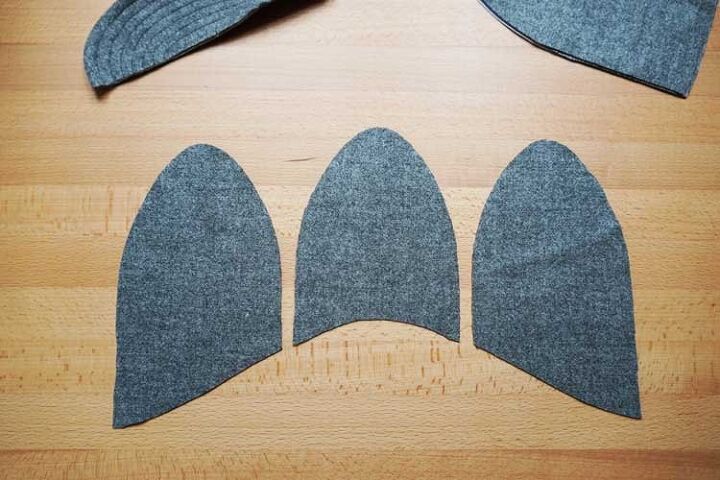
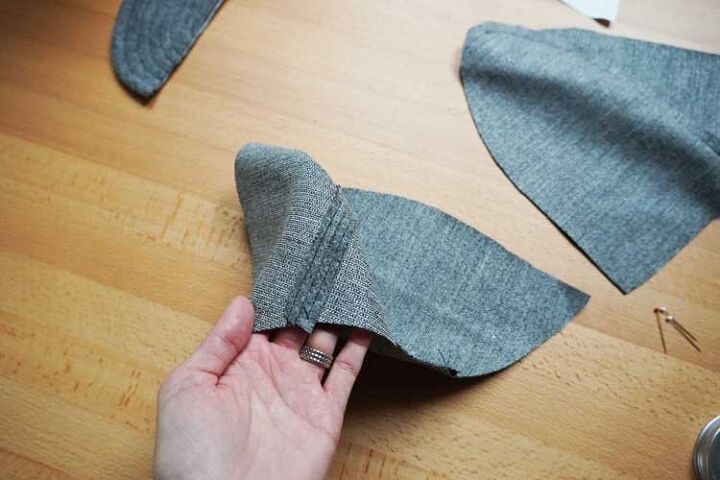
Front part of the hat
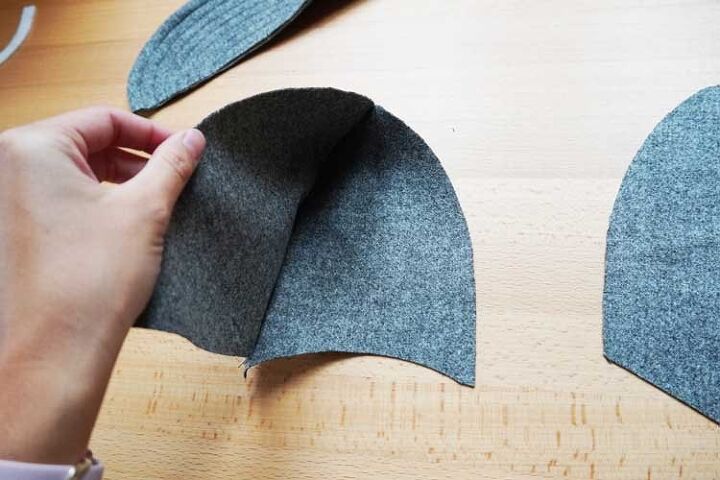
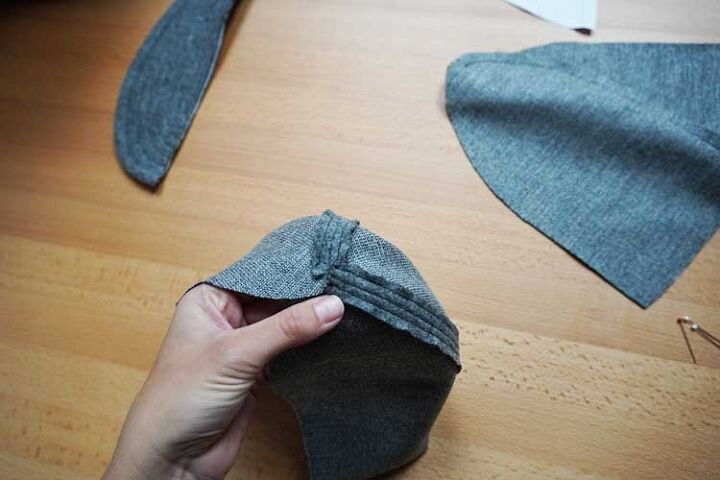
5. Front seams
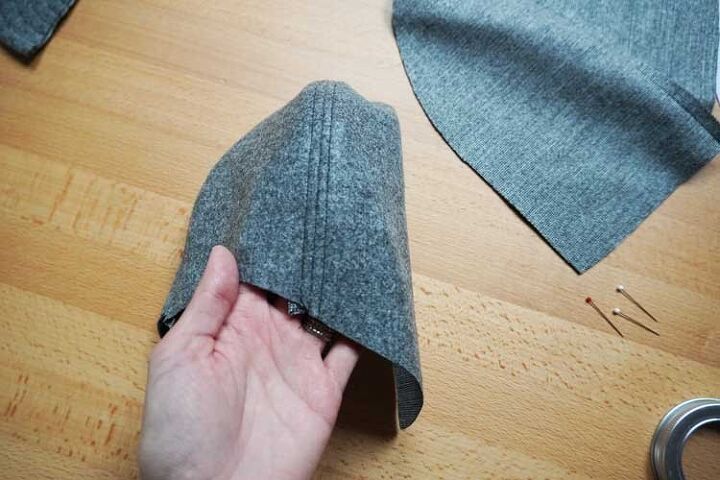
Let’s connect the front piece with side pieces. Take the front piece and two side pieces. The picture below shows the shape of the bottom hem of the forehead area. Thanks to this curve, you can immediately tell which of the side pieces belongs to which side of the hat. The marks on the edges will also help you with the correct alignment.
Put the front piece on top of the first side piece (face side to face side) and pin the connecting seam.
It’s important to sew only up to the top of the hat and not further. In the case of the smooth version, the top is clearly visible (it’s sharp), but in the case of the shaped version, parts are rounded at the top, so it is important to follow the marks.
Sew the connecting seam - start at the top and continue towards the bottom hem of the hat.
Pin the other side piece in the same way.
Sew the second side piece to the front piece - sew up to the previous seam (top of the hat).
(Click to zoom in.)
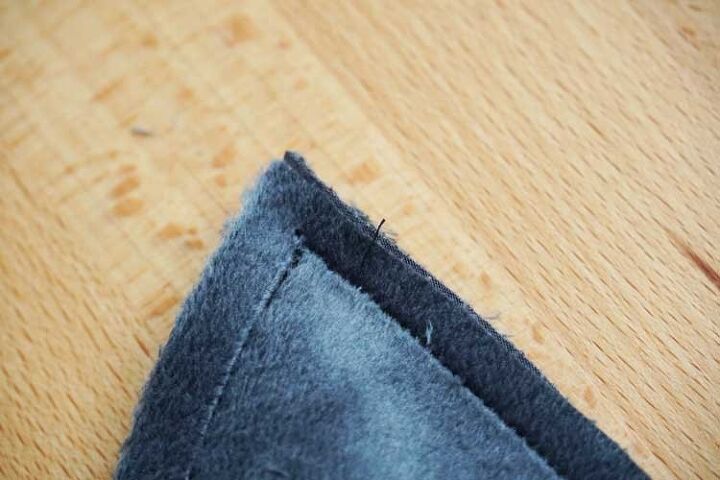
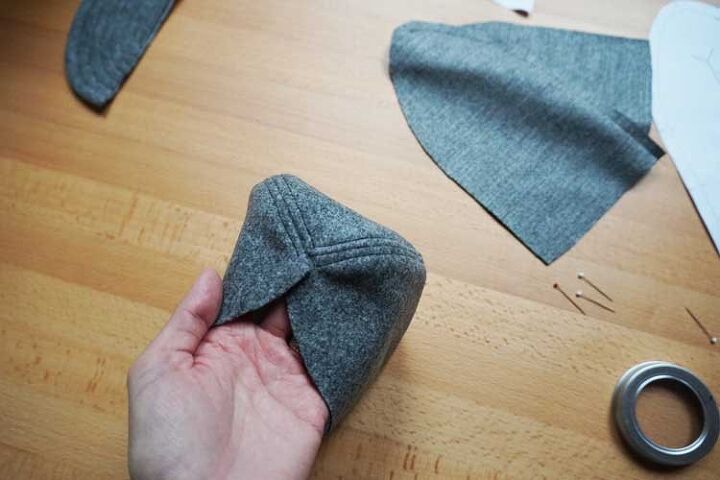
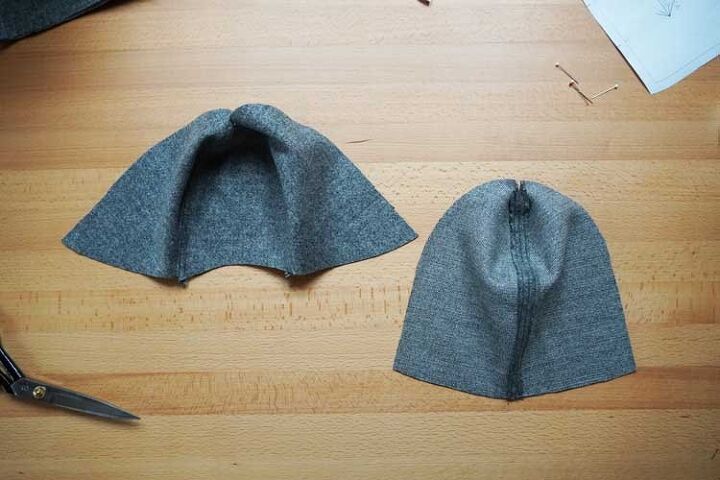
6. Front seams - Topstitching
Cut off the top of the seam allowance of the front piece about 2 mm above the seams. This will make it easier to press the seam allowances open.
Topstitch both front seams. Sew through the seam allowances (from the face side), about 0.5 - 0.75 cm from the original seams. This stabilizes and flattens the seams.
The top of the hat should look like this:
Back pieces
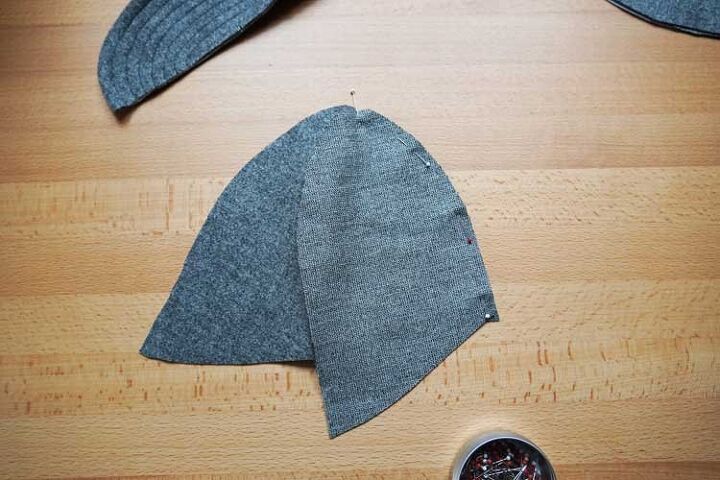
7. Rear center seam
Prepare the two back pieces. Here you need to pay really good attention to which piece belongs to which side.
The rear center seam is marked with three marks. Rear side seams (which connect the back pieces with the side pieces) have only two marks. After all, you can verify this just by aligning the marks on the back and side pieces.
Lay the back pieces on top of each other (face side to face side) and pin the sides with three marks - the rear center seam.
Sew the rear center seam and don’t go over the top of the hat (follow the marks).
8. Rear center seam - Topstitching
Press the seam allowances open and topstitch both sides of the rear center seam.
Rear side seams
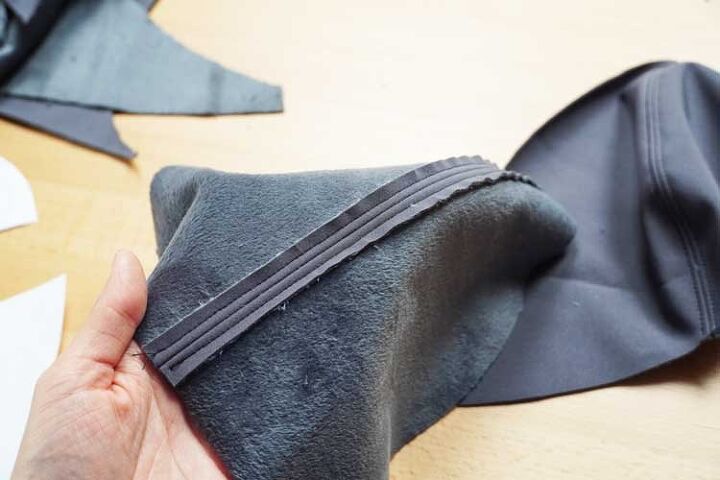
9. Sew the rear side seams
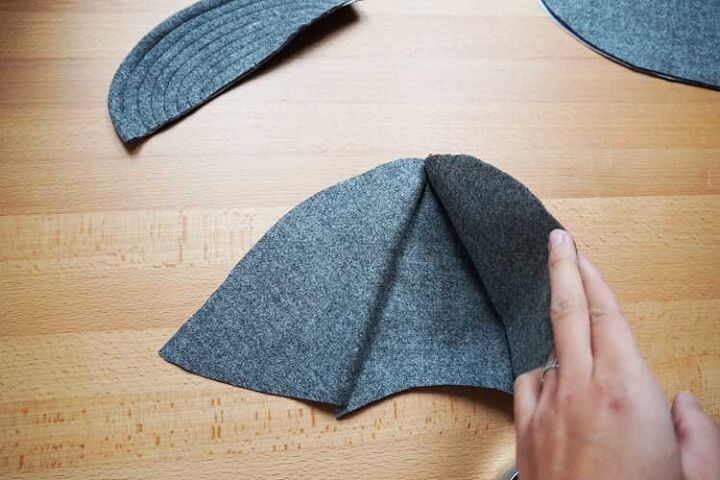
Now you can connect the front and back part of the hat.
Lay the back part over the front part (face side to face side). All seams must converge at the top of the hat. The seam allowances should be ironed and topstitched, so the pieces should be relatively easy to align.
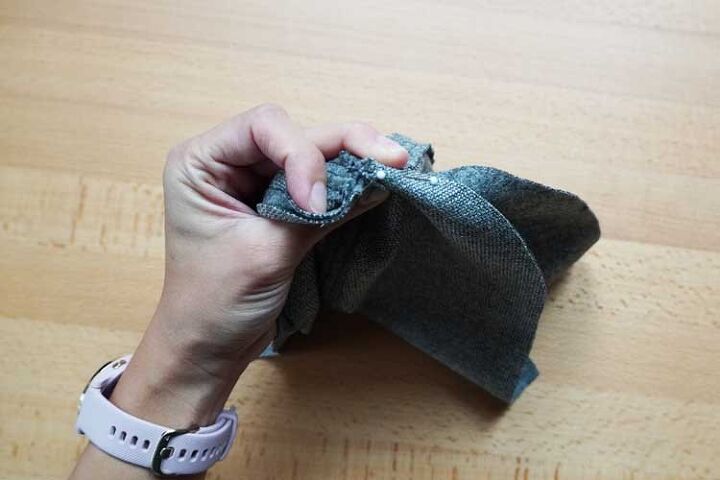
Pin both seams.
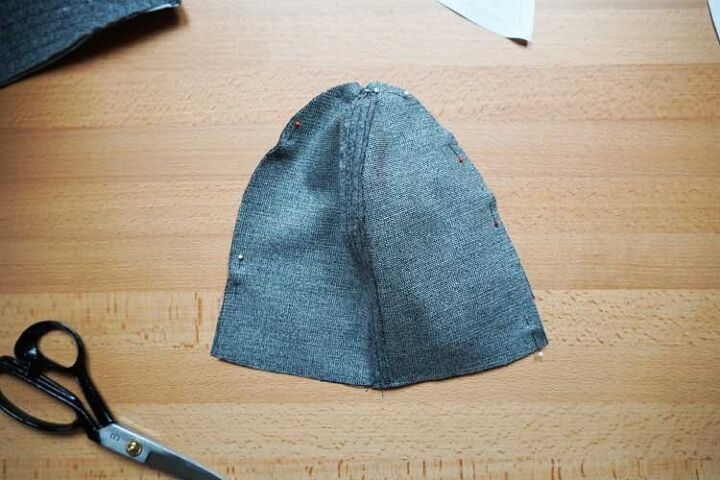
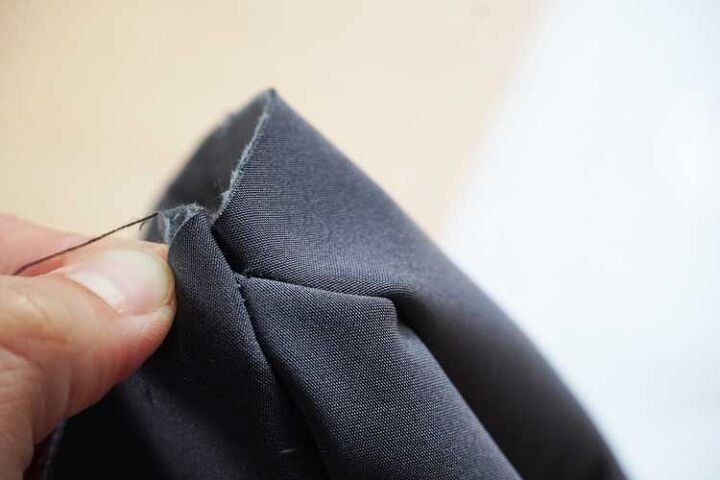
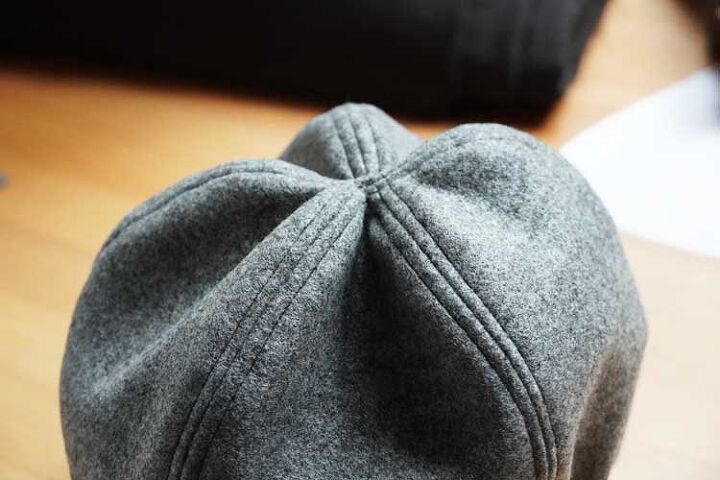
10. Check the top of the hat
Sew the rear side seams. After sewing (and before topstitching), turn the hat face side out and check that the seam goes directly through the top. If there is a small hole in the top, it means that you sewed too close to the edge. If there is a “weird” pleat at the top of the hat, it means that you sewed too far from the edge (through some other part of the hat). I sewed too close to the edge on my first try (right seam) and I had to fix this (left seam).
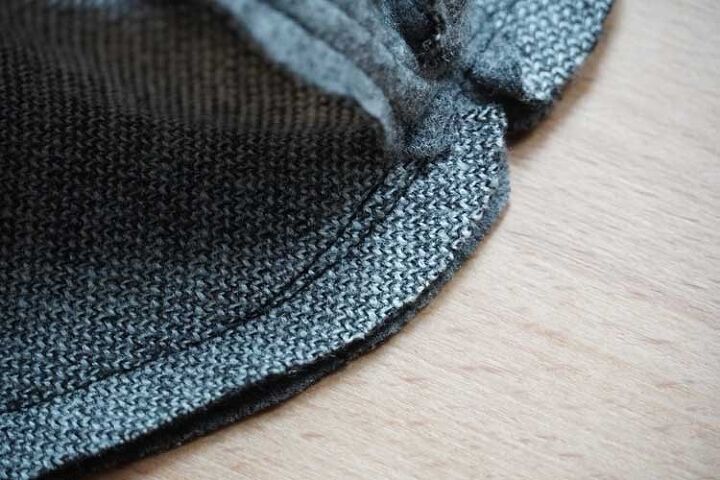
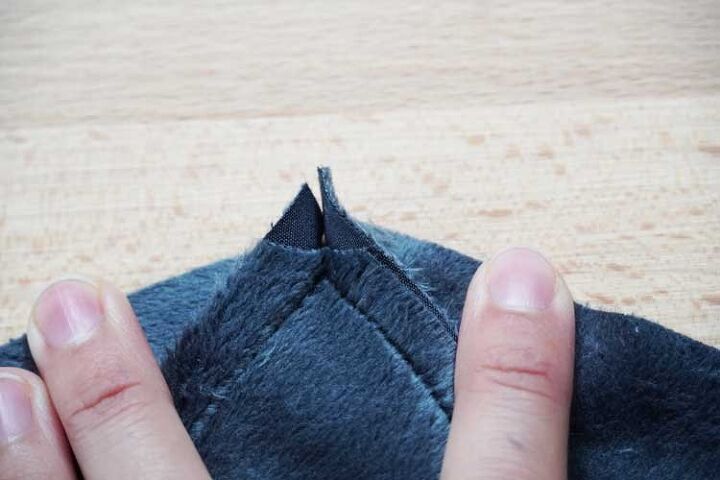
Check once more that all seams converge at one point…
If everything seems fine, you can rip the wrong seam. After that, you should be able to topstitch the last set of seam allowances.
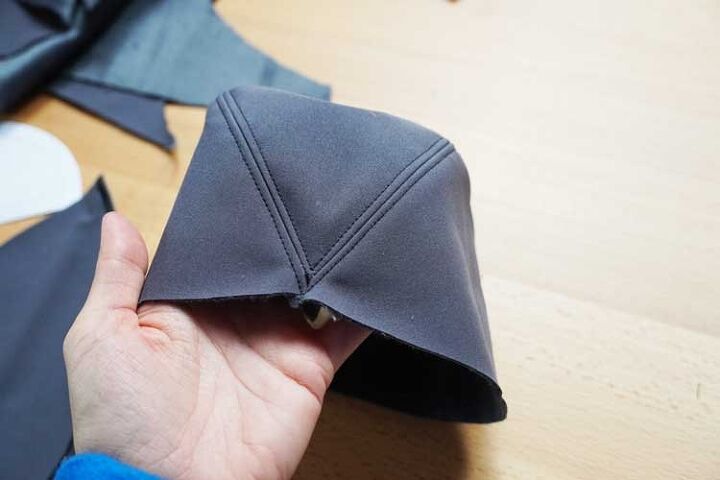
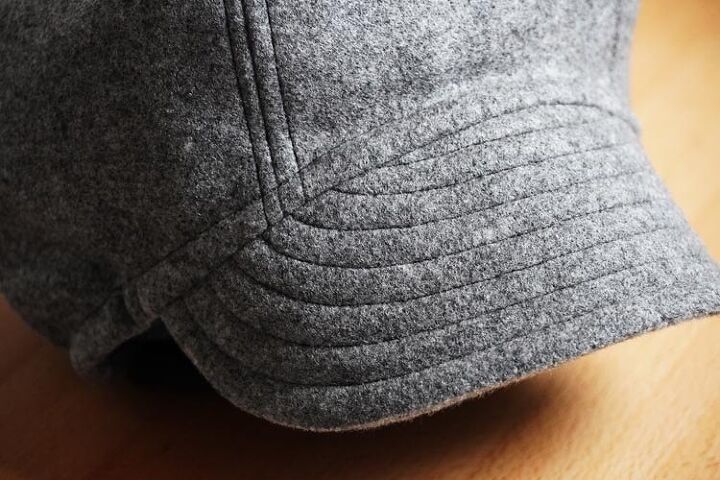
11. Rear side seams - Topstitching
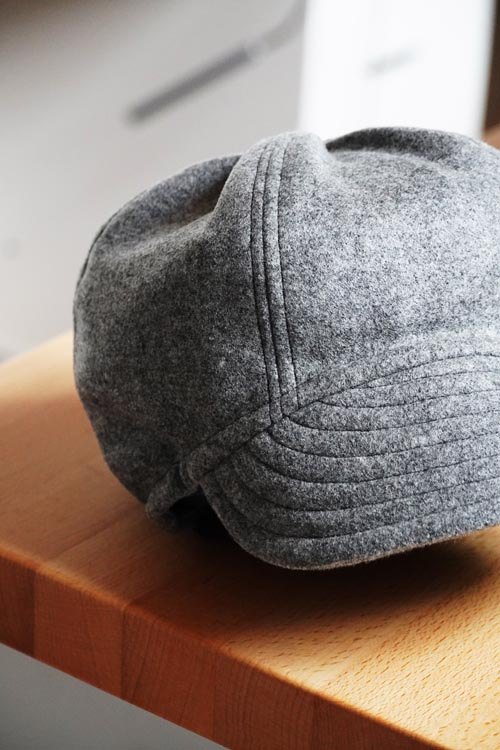
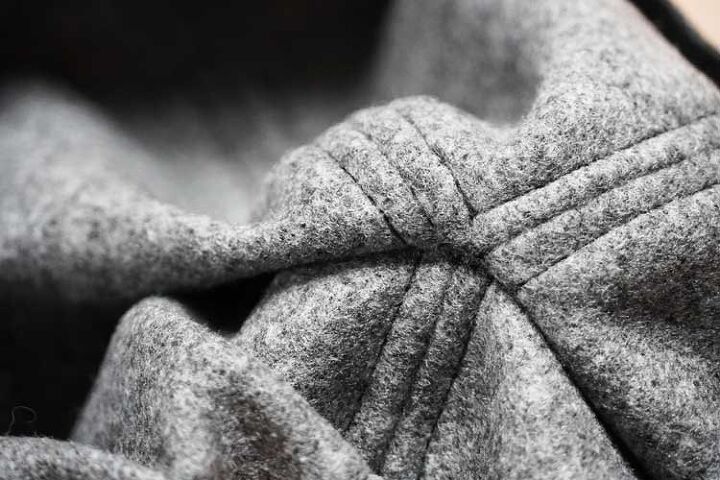
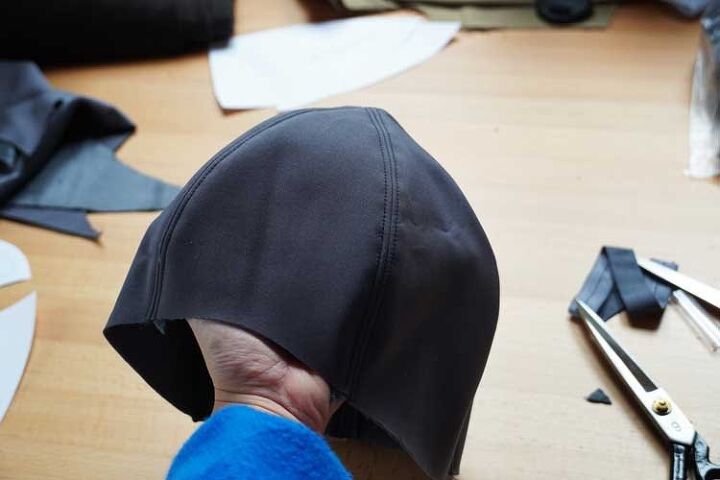
Topstitch both sides of both rear side seams. This is what the smooth version should look like:
And this is the top of the more shaped version:
Almost there...
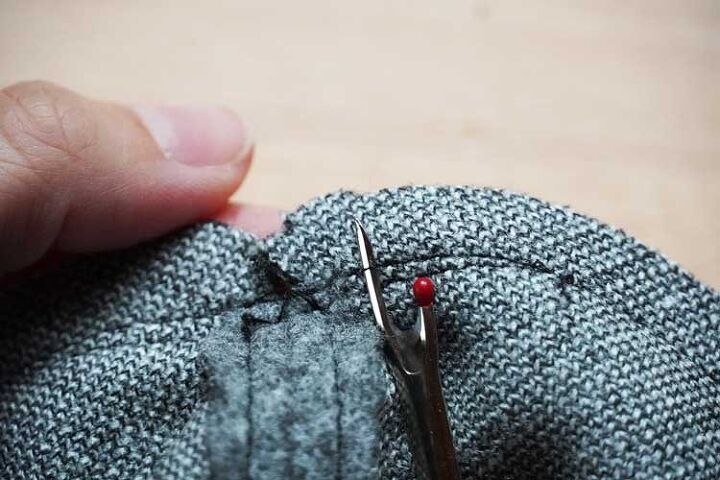
12. Connect the peak
Prepare the head part and the peak of the hat.
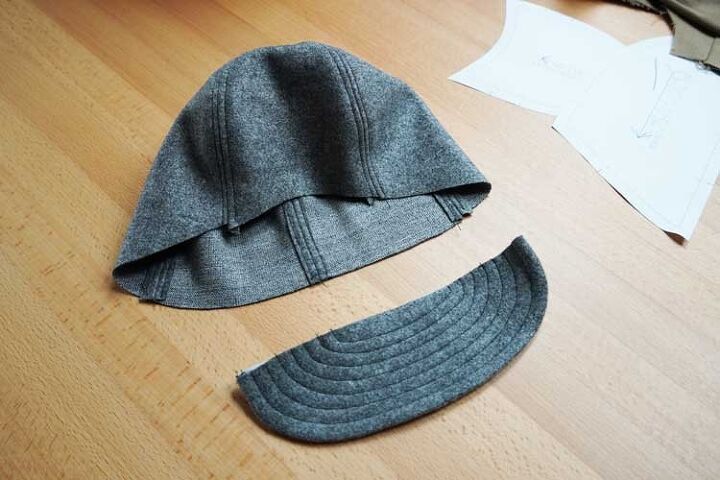
Consider the reinforced part of the peak the bottom part. If you had to reinforce both parts of the peak, it doesn't matter.
Find the center of the front piece of the hat (there should be a mark).
The center should also be marked on the peak.
Lay the peak on the hat - upper part of the peak to the reverse side of the hat - and align marks on both pieces.
The side pieces are also marked at the bottom - these marks indicate where the edges of the peak should be.
Place the edges of the peak on these marks.
Attach the peak to the hat - sew about 0.5 cm from the edge.
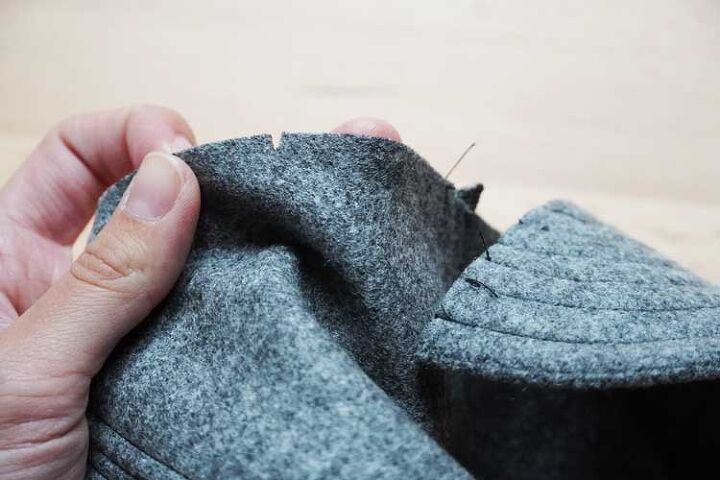
Elastic bottom hem
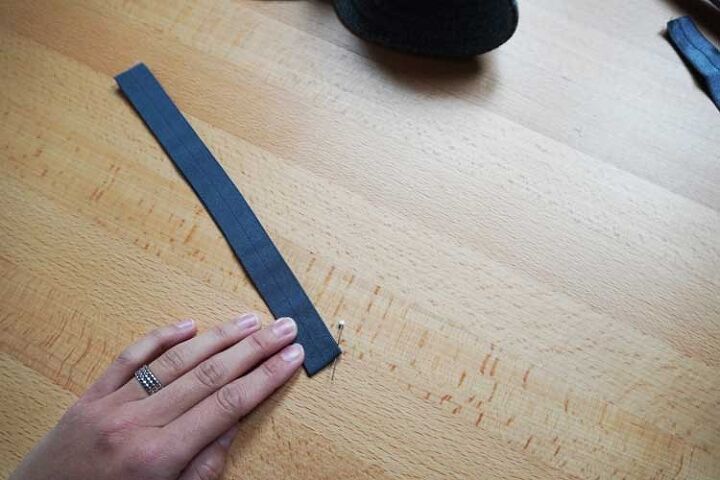
13. Measure out the required amount of elastic band and prepare it for sewing
Measure the required length of the elastic band directly on your head (see the “Recommended material” section of this article). The elastic band should not be uncomfortably tight, but still tight.
Fold the band in half and mark the half-point with a pin.
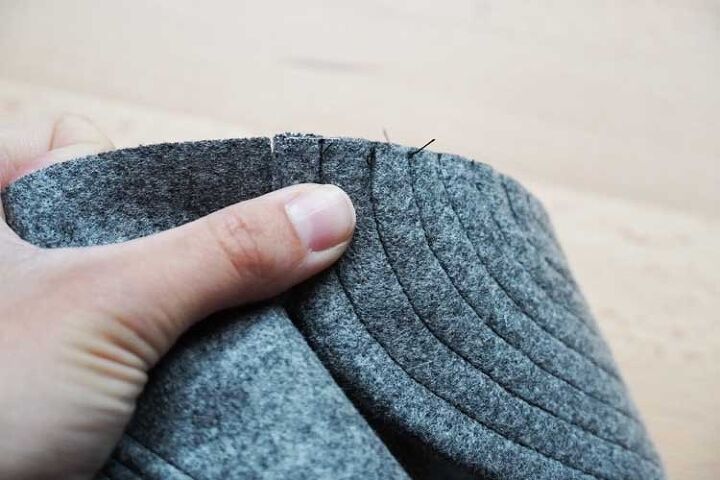
14. Sew the hem
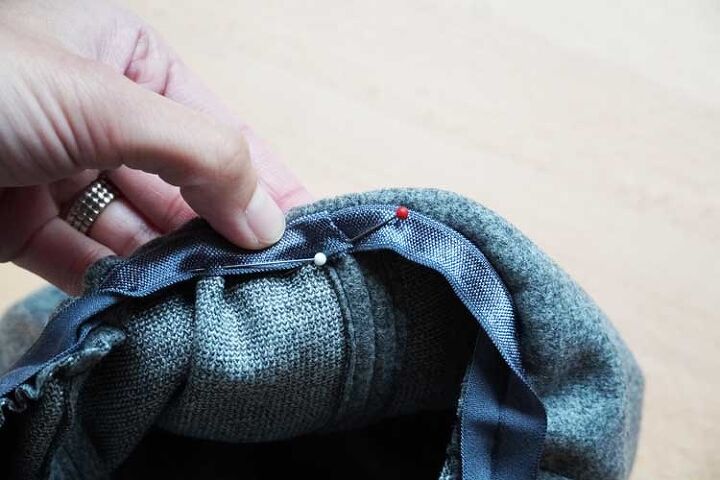
Pin the half-point of the band to the middle of the peak edge (face side of the band to the bottom of the peak).
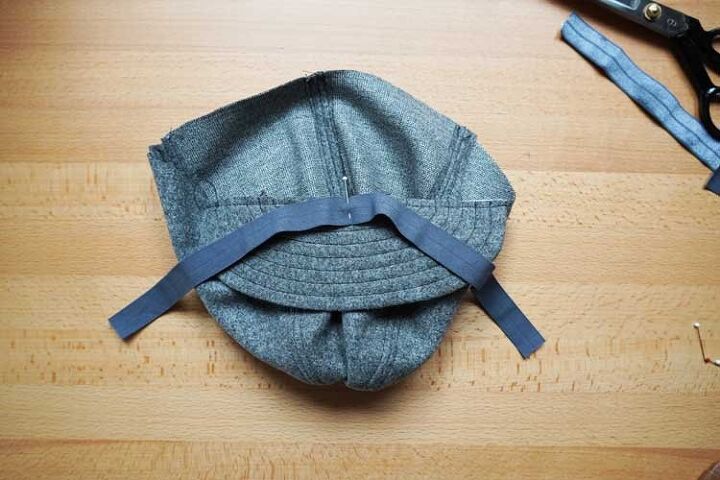
Also, pin the band to the edges of the peak - the band should be slightly stretched (see the picture below).
Then pin both ends of the band to the rear center seam of the hat. The ends of the band should overlap (about 1 cm).
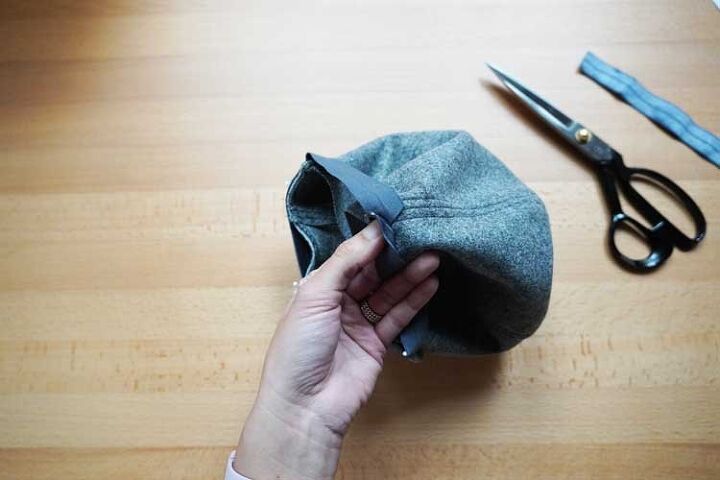
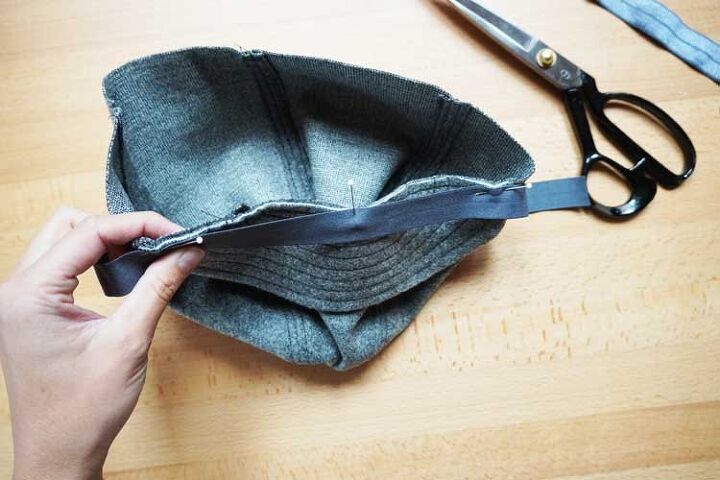
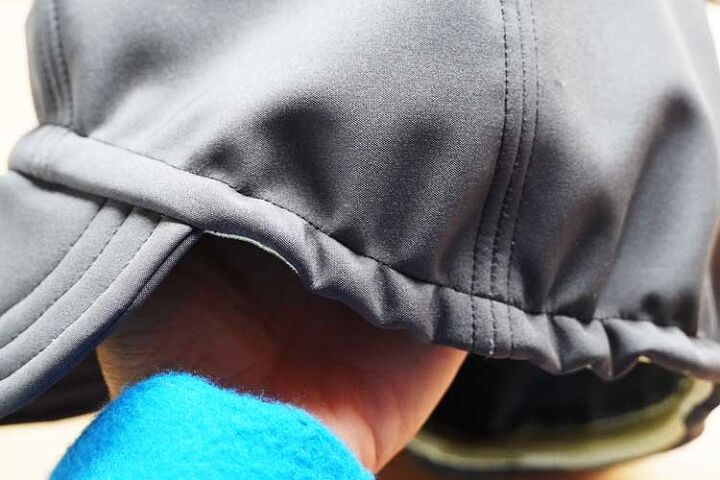
Sew the band to the entire circumference of the hat - sew about 0.5 - 0.75 cm from the edge. When sewing, it is necessary to stretch the band quite a lot so that it fits around the entire circumference of the hat. It should be stretched the most in the sides and back of the hat (the part below the peak should be somewhat looser).
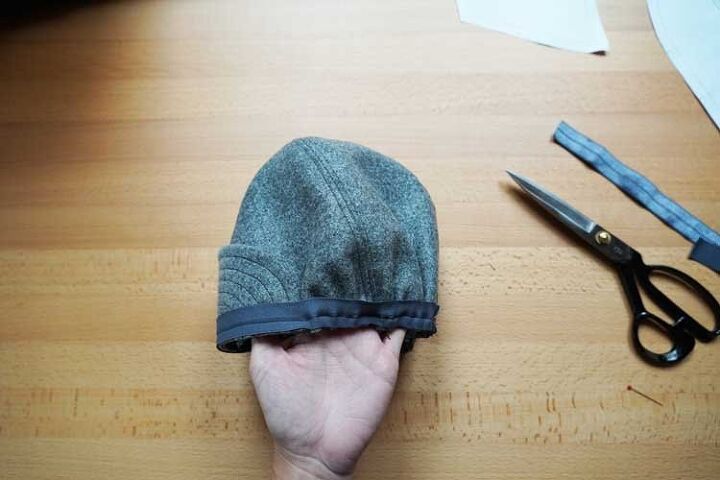

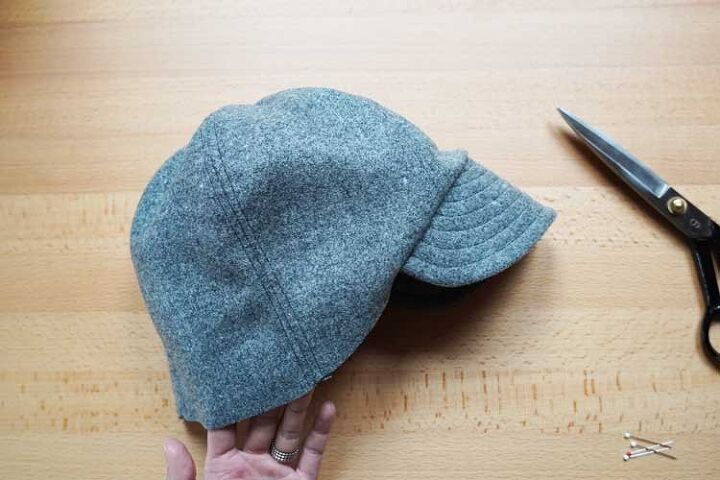
Then flip the upper part of the band to the inside of the hat. Pin the band in several places.
Now sew on the face side of the band (inside of the hat) with a straight stitch. You should pull on the hem a little when sewing so that it remains slightly elastic.
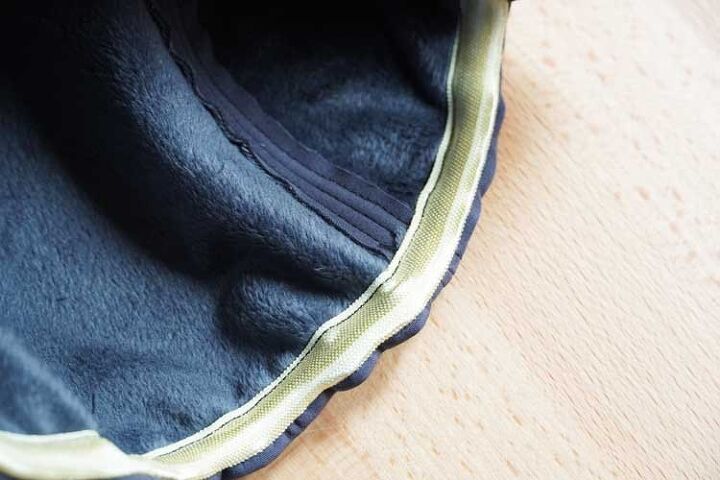
This is what the hat should look like after that - the hem is tighter around the sides & back of the hat and looser around peak (thanks to which the peak is not deformed):
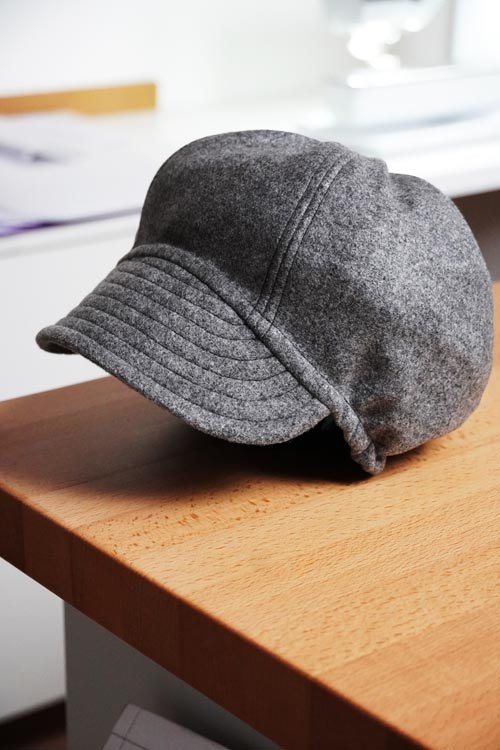
And it is done! That wasn’t that hard at all, was it?


Sewing pattern
You can get the pattern for this hat (9 sizes, two styles) here:
Don't forget to share your joy with others!
Did you like today's instructions and pattern? If so, share it with your friends and tell me about it in the comments section below. I look forward to your feedback! ♥
Did you know that there are FREE PATTERNS available on my blog?
The author may collect a small share of sales from the links on this page.


Comments
Join the conversation
You are super talented and that hat is adorable! Thank you so much for sharing your talent with us. I am definitely going to try making that hat.