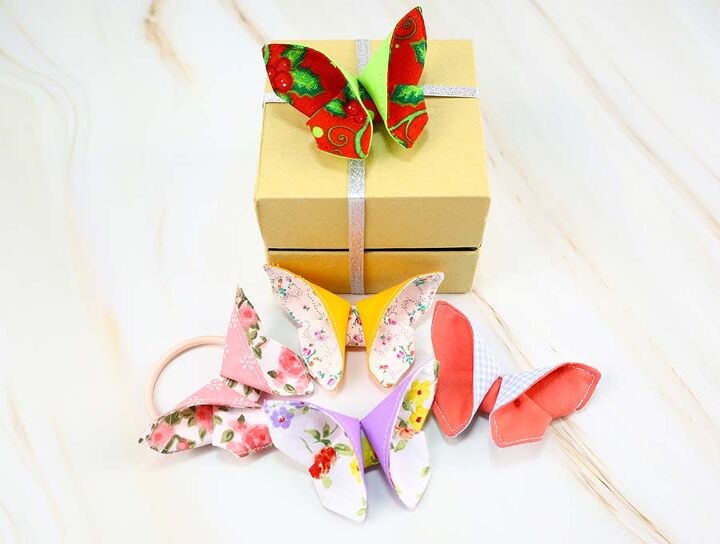
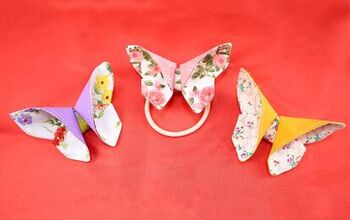
How to Make Fabric Butterflies in Minutes
It’s great to have small decorative pieces you can attach to all kinds of things. These butterflies are adorable and cheerful enough to liven up whatever you place them on. You can attach the DIY fabric butterfly to a hair elastic or a hairband for a quick and stylish look, you can attach it to a purse or to a backpack. You can even use them to spruce up your home - room walls, porches, and backyards, everything can be improved aesthetically with a few of these little guys.
the DIY fabric butterfly
They’re super simple to make in ten minutes or so, so be sure to give them a go in your next sewing session. This tutorial will show you how to make two types of butterflies, fabric, and lace.

This tutorial will show you how to make two types of butterflies, fabric, and lace.
Prepare the fabric
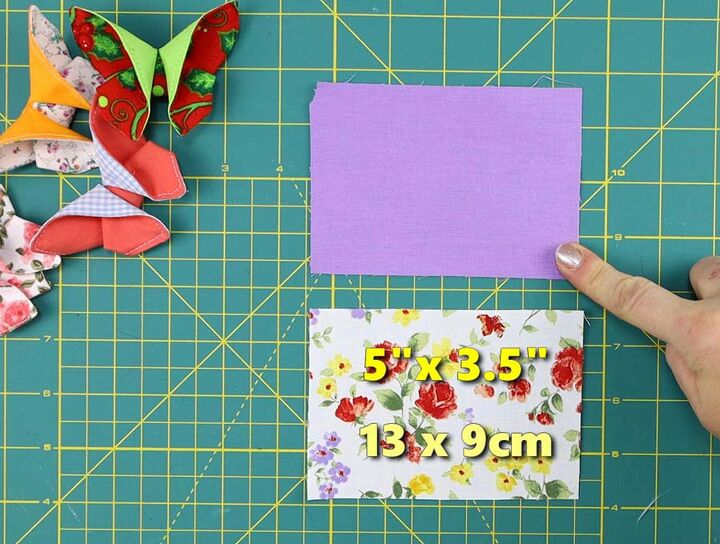
Cut two rectangles of contrasting colors measuring 5 x 3.5 inches in size.
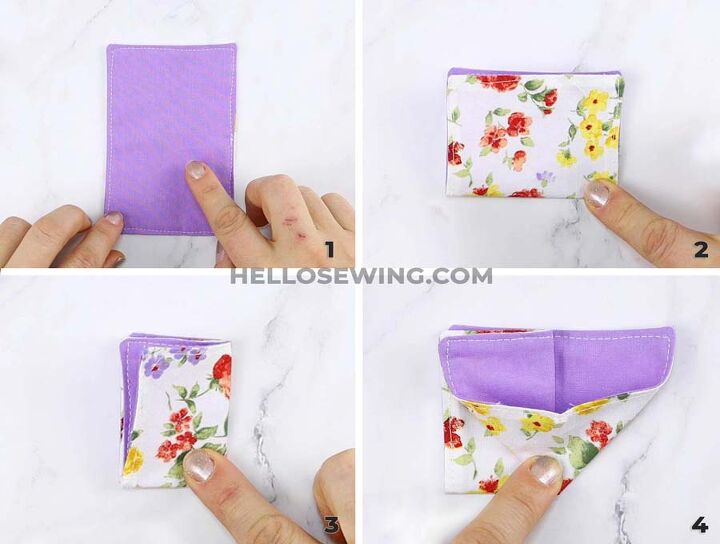
Place the rectangles onto each other with their wrong sides facing out and align the edges. Stitch around the rectangle, leaving a small gap unstitched.
Turn the butterfly inside-out through the gap and press it flat. Topstitch around the entire rectangle.
Create the butterfly
Fold the rectangle’s bottom half up so the short edges meet and the right side is facing out. Fold it in half again but this time from the side. Unfold just once.
Place your finger on the left half of the rectangle. Push the right half of the bottom edge into itself and align it with the central crease on the inside of the fold. Press the fabric with your hand. Check and see if the diagonal edges are aligned. Repeat with the other half of the bottom edge.
You should have a downward pointing triangle with two protruding rectangles at the top if you did everything right.
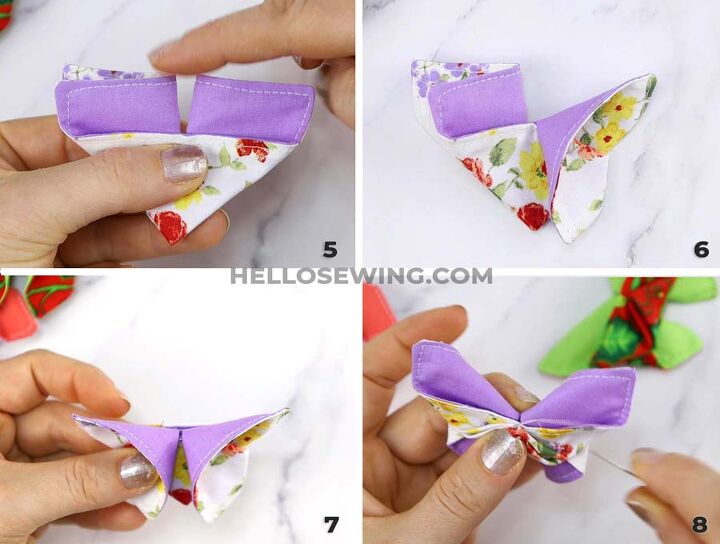
Push the fold of the left protruding rectangle leftward so it aligns with the top edge of the triangle. The wrong side of the fabric will form a triangle that points to the central crease. Pull its bottom-right edge down so it aligns with the central crease and press with your finger. Then slightly offset it to the left and stitch it in place by hand.
Repeat on the right side and you will have formed the wings. Make sure they’re symmetrical.
Fold the point of the triangle that’s behind the winds up to the edge on the back and press it.
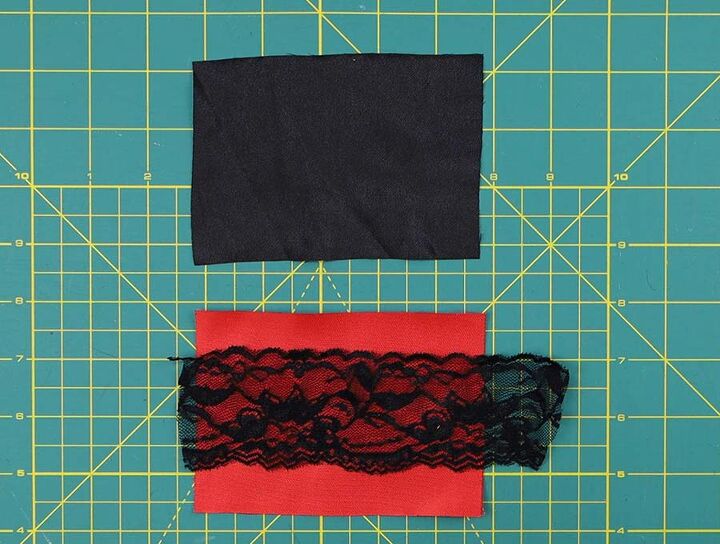
The lace butterfly
The process is almost identical to the first one, with one exception.
Before you place two fabric rectangles onto each other, set a strip of lace across the middle of the bottom piece and stitch it. The rest is the same.
You can attach a hairpin, a hairband, or a plain elastic to the back of the butterflies so you can easily attach them to whatever you wish to decorate.
We hope you loved this tutorial and that you found it useful. Feel free to make plenty of them and try out various color and fabric combinations so you can find the one you like the most.
Did you like the tutorial? If so, subscribe to Hellosewing's youtube channel or to my insider newsletter for more free patterns, tips and ideas
The author may collect a small share of sales from the links on this page.


Comments
Join the conversation
Super cute!