How to DIY Last-minute Halloween T-shirts

Hello, friends! In this tutorial, I’m designing and painting DIY Halloween t-shirts. These custom-painted t-shirts are a dark aesthetic since I didn’t want to paint obvious Halloween things, like pumpkins, ghosts, or bats so they can be wearable in any season. Let’s get started.
Tools and materials:
- Black t-shirt
- White t-shirt
- Fabric paints
- Textile dye
- Paint brushes
- Pencil and paper
- Fabric marker
- Bar of soap
- Vinegar
Spooky season t-shirt 1: Dark crows
The design of this spooky t-shirt will have darkness at the bottom of it, and then something will come out of the darkness at the top.
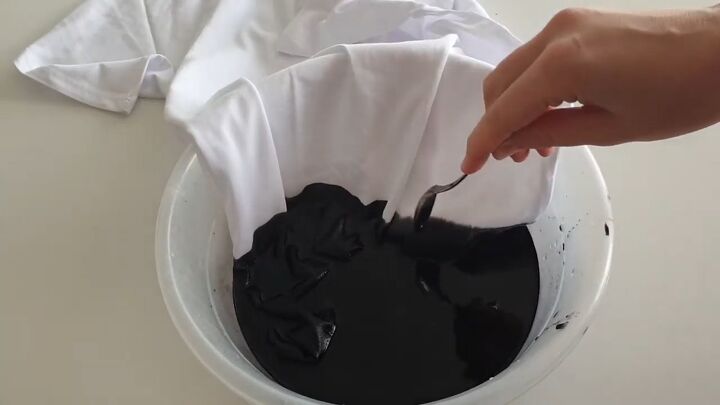
1. Dip a white shirt in black dye
To create darkness at the bottom, dip your t-shirt in a bowl of black textile dye.
I’ve been using this technique to dye clothes a lot recently because it’s a very useful technique. Using a brush and fabric paints takes a lot of time so this method is very useful, even if you don’t have much control over the outcome.
Make sure to follow the instructions written on the dye since all textile dyes are different.
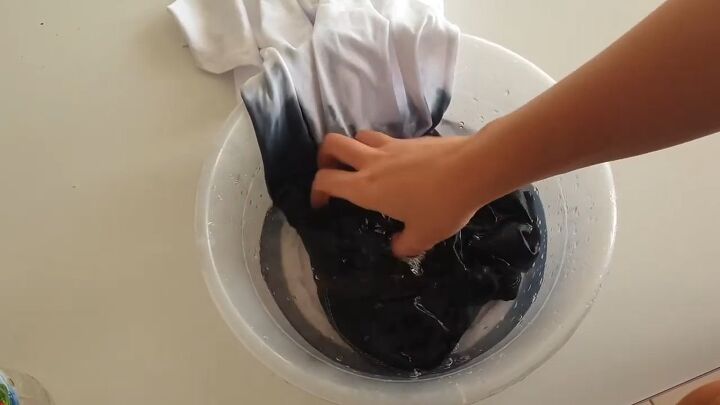
2. Dip your dyed shirt in vinegar
Dip your shirt into vinegar to help set it.
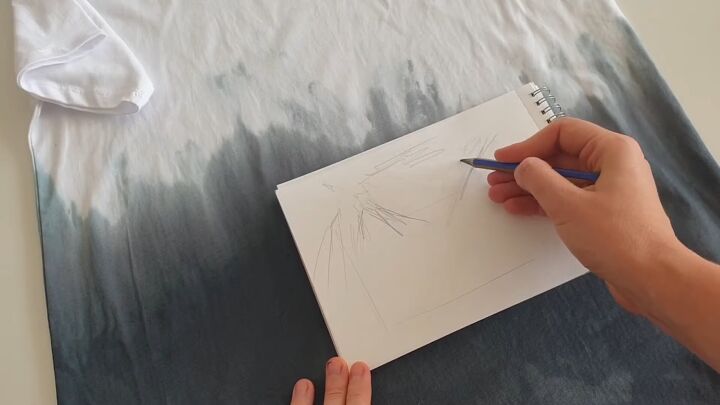
3. Sketch your design
Create a very quick sketch of your design.
For this shirt, we’re going to paint crows flying out of the darkness so sketch the crows and the direction of their flight. You don’t want to paint very realistic crows so they should be half abstract.
4. Sketch your design on the t-shirt
Now that you’ve solidified your design, you can sketch it on the t-shirt with a pencil to mark the position of the crows.
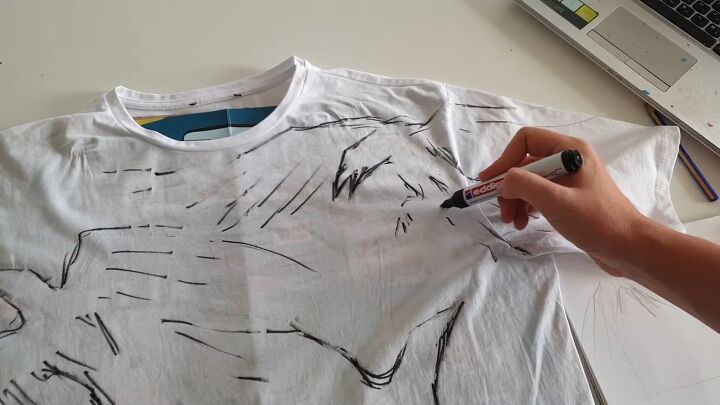
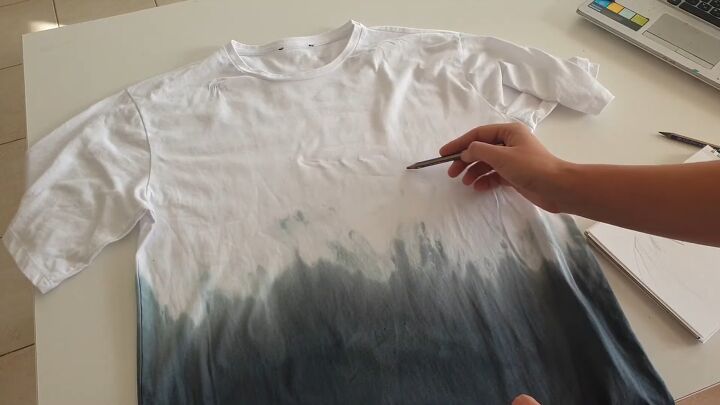
5. Outline your design with a fabric marker
Use a fabric marker to outline your design so it’ll be easier for you to start painting.
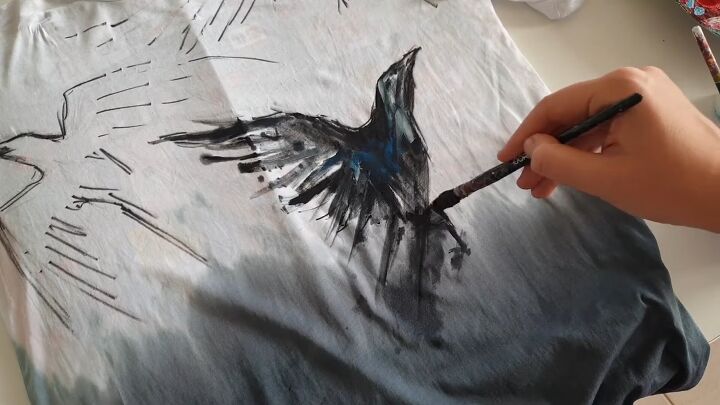
6. Start painting the crows
Let’s paint. I’m mainly using black fabric paint, but also a little bit of white, blue, and purple as well.
We want to use a big flat brush and a big round brush since we want to make the crows a bit abstract and make bold strokes and paint splatters, so they have a lot of dark energy.
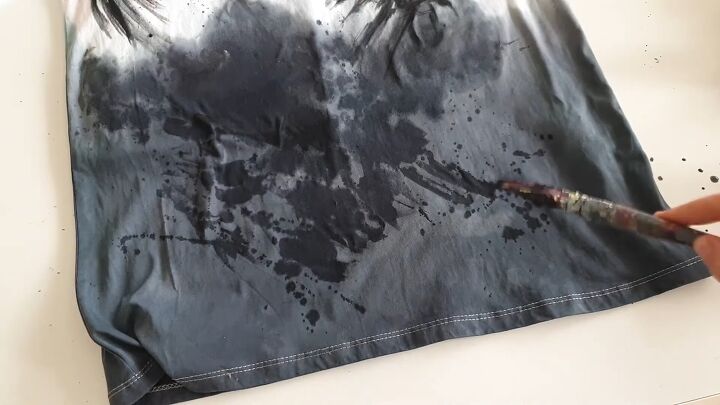
7. Darken the gradient (if necessary)
I noticed I made the gradient with the textile dye a bit too light in comparison to the crows, so I mixed fabric paints and water and applied a second layer.
I also wanted the gradient to be a bit messier, so I made random strokes and paint splatters.
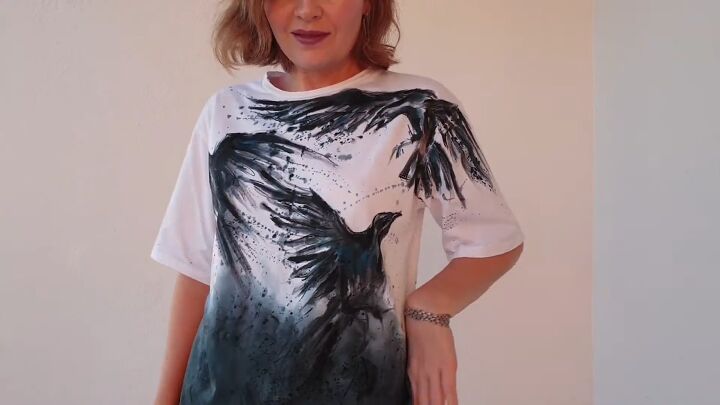
Here’s the finished t-shirt! I love how it turned out.
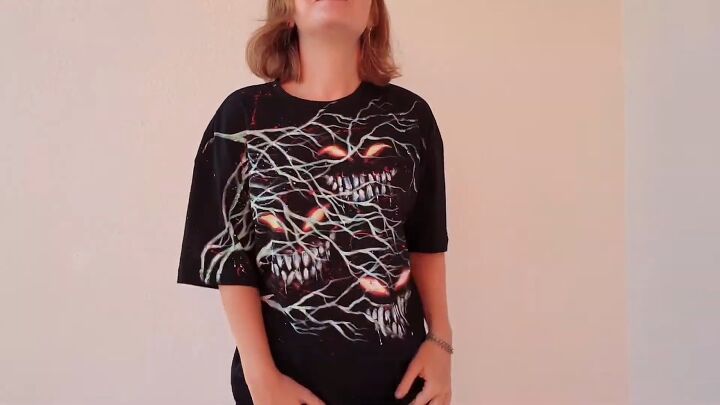
Spooky season t-shirt 2: Monsters in the forest
For this t-shirt, I wanted to increase the level of creepiness but still make it wearable in any season.
The idea is for the shirt to have a creepy forest with monsters hiding behind branches. These monsters will look like a mix of Venom, the cat from Alice in Wonderland, and a pumpkin in the dark.
1. Sketch your design
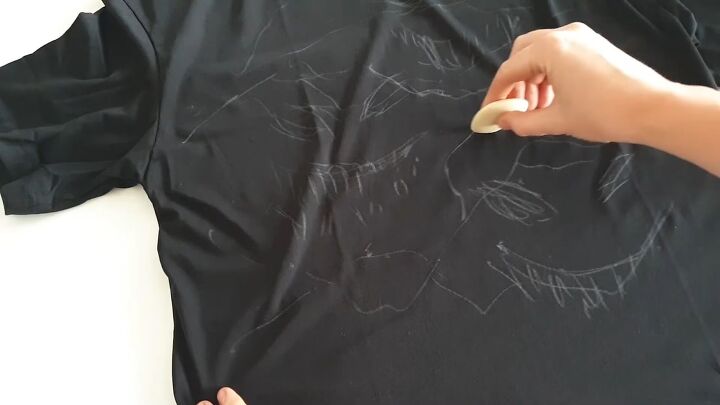
Start by sketching your design. This time I decided to sketch out the design with a bar of soap.
The tree branches will start from the sleeve and cover up most of the t-shirt, and all of the monsters will differ from each other. Some will have smiles, some will have eyes, etc.
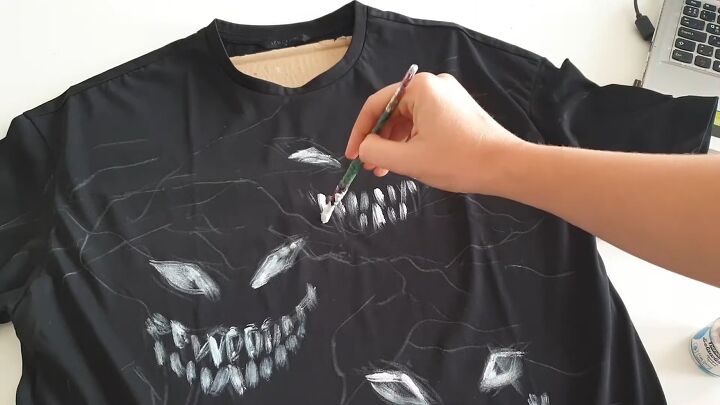
2. Outline the monsters
Start by outlining the monsters with fabric paint. You’ll be creating an undercoat for them at the same time.

3. Paint the branches
Paint the branches so that they overlap the monsters.
Don’t use pure white color, but instead mix the white with a bit of blue and green. This is because if you go to a forest at night with a lantern, the trees will have that blue and green color.
4. Paint the monsters
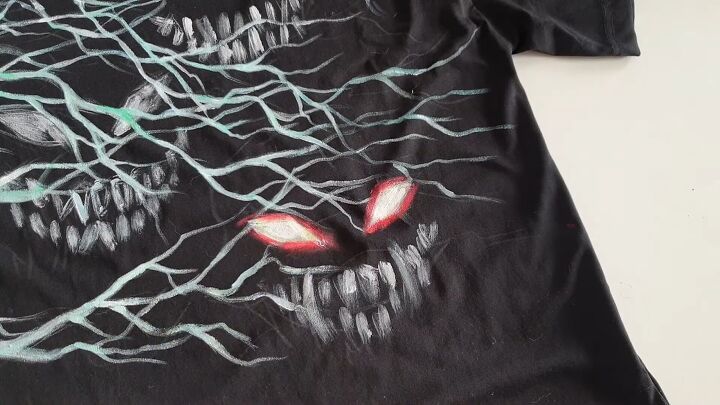
Now, let’s paint the monsters. We want their eyes to shine, so use red and yellow colors to paint the eyes.

5. Paint the teeth
Use white paint to make the teeth lighter.
To make the monster a bit more creepy, paint some saliva.
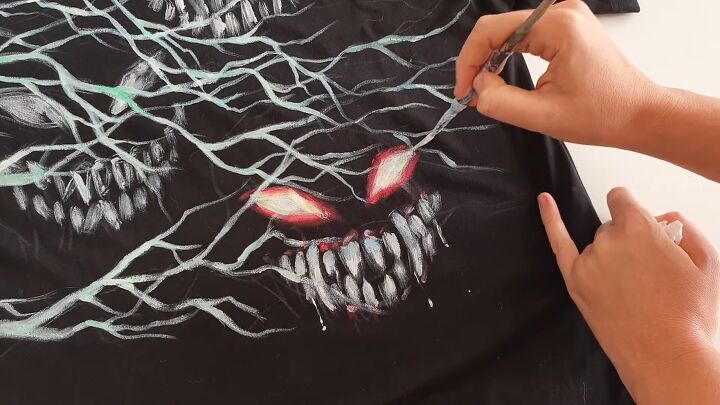
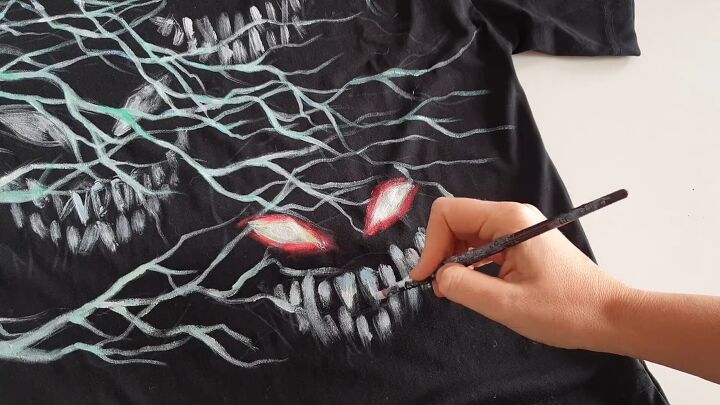
6. Cover the monsters
Paint more branches over the finished monster’s face.
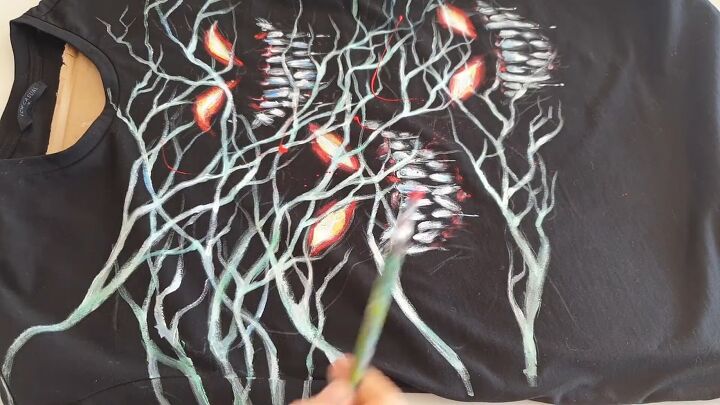
7. Splatter paint
Finish the shirt with red paint splatters.
DIY Halloween t-shirts
Here’s the finished spooky t-shirt!
What do you think about these Halloween t-shirt ideas? They’re dark and spooky for the season, but still wearable in others! Let me know what you think about these designs down below.
The author may collect a small share of sales from the links on this page.


Comments
Join the conversation