DIY Shirt Extender
Today I’m showing you how to make a DIY shirt extender.
Do you remember that time when it seemed like every single t-shirt out there was too dang short? I swear that time when low rise jeans were a thing AND short tops wasn’t my favorite!
I thought I had gotten rid of all of those tops, but once in a while, one pops up in the laundry and I start thinking about how to dress without embarrassing my kids.
Thankfully shirt extenders are there to help keep your booty covered when you bend over. That you can add a little extra texture in the way of lace, chiffon or any other kind of fabric you’d like is bonus awesome.
If you love layered looks, a lace shirt extender might be just the thing for you.
In this tutorial, I’ll show you how to convert a basic camisole into a DIY shirt extender.
So find yourself a camisole in a drawer and get going on making a shirt extender.

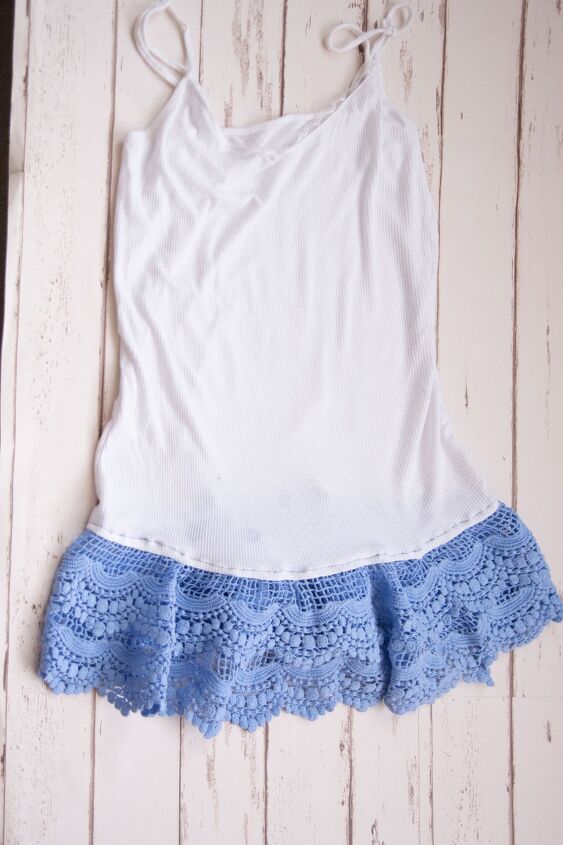
Table of Contents
Supplies for DIY shirt extender
- knit camisole that fits you
- 1-2 yards wide lace trim (see sources below)
- 1 yard chiffon fabric
- measuring tape
- pins
- ruler
- chalk
- mesh fabric (optional)
What is a shirt extender?
A shirt extender does just what it sounds like it will do. It is an extra layer that goes under your favorite shirt to add a little length.
Shirt extenders can be like skirts or attached to a fitted layer like a camisole. You can make a DIY shirt extender from lace, chiffon, shirting or other lightweight, decorative fabrics.
It’s also not totally necessary to have a shirt extender sewn to a secondary layer. An extender can be as simple as a short elastic waist skirt.
This page contains affiliate links. If you purchase a product through one of them, I will receive a commission (at no additional cost to you). I only ever promote products that I use and love and I think you will love too. Thanks for supporting this blog!
elizabethmadethis.com is a participant in the Amazon Services LLC Associates Program, an affiliate advertising program designed to provide a means for sites to earn advertising fees by advertising and linking to Amazon.com.’ As an Amazon Associate, I earn from qualifying purchases. If you purchase a product through one of them, I will receive a commission (at no additional cost to you). I only ever promote products that I use and love and I think you will love too. Thanks for supporting this blog!
Where to buy lace for an extender top
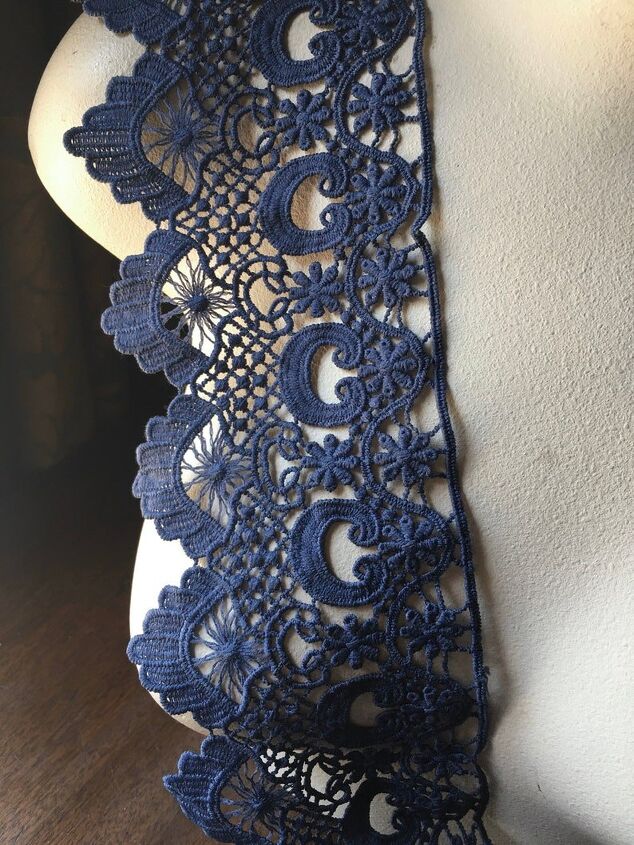
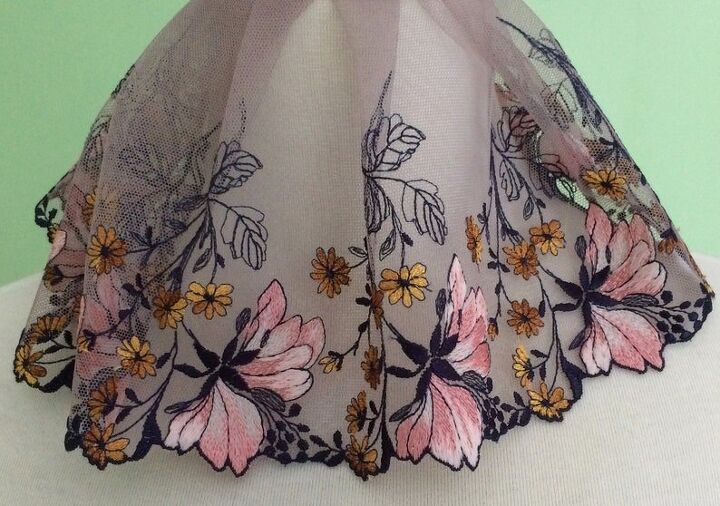
It’s not always easy to find good quality lace. For an extender top, heavier weight laces with cotton that are wider width are really lovely. You’re trying to get extra length, right?
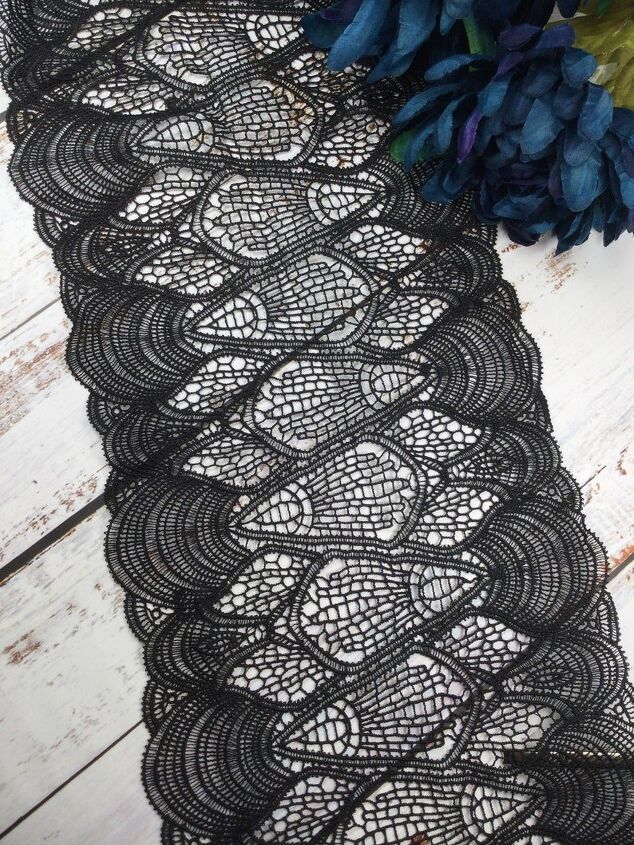
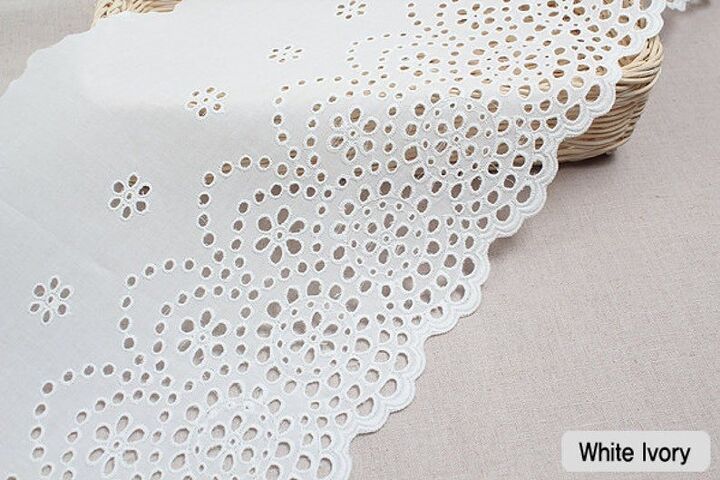
Look for venise lace, guipure lace, broderie anglaise or even embroidered netting. For this project, do not get stretch lace trim.
If you’re lucky, you can thrift this kind of thing. Be on the lookout for nice quality lace. You’d be surprised how many ratty thrift store tops can be trimmed out with actually really fabulous lace. My own lace I’m using here came from a decidedly unhip old cardigan I thrifted. Get my thrifting tips for sewing supplies here.
But you can’t always rely on the whims of the thrift store. With that in mind, here’s a few places to find wider width lace.
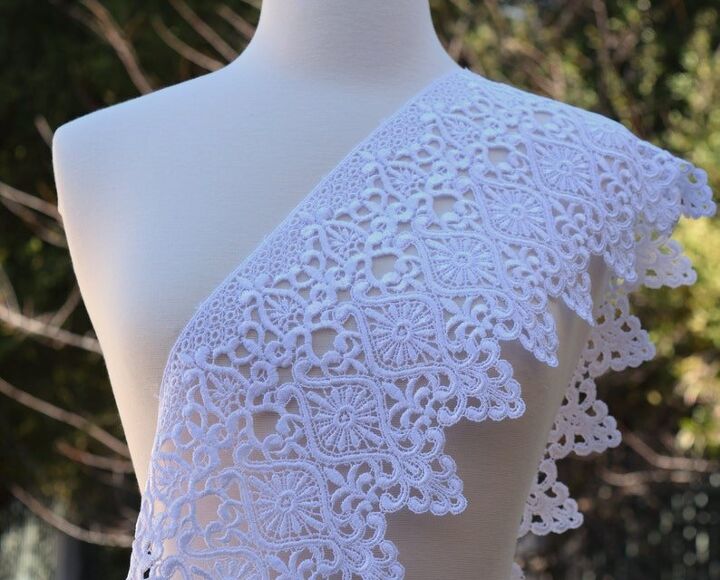
- One Stop Stitched white 7″ Venise Lace
- Mary Not Martha blue venise lace
- Fabric Connection 7″ multicolor embroidered lace trim on netting
- Lovely Lace Shoppe black wide Guipure lace trim
- Lace King white cotton eyelet lace trim
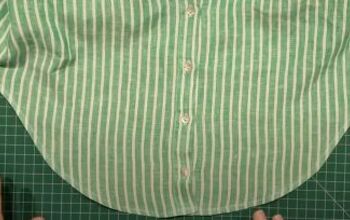
How to make a DIY shirt extender with lace
Get your camisole ready
Put on your camisole. Over the top, put on the top that you want to be your top layer.
Decide if you want to have the camisole peek out the bottom of your top or if you only want the extender fabric or lace to show.
If your cami is shorter than your top, you can skip this step.
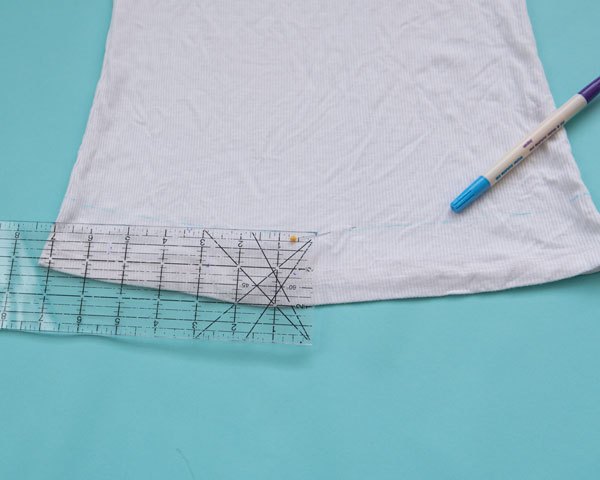
If however your camisole is longer than your top, make a mark with a pin about 2” above where your top’s hem ends. This will keep that pesky cami fabric from peeking out of the bottom.
From here, use a ruler to make a straight line across at the level of your pin. Cut off any extra fabric.

Measure the lace
Put the camisole back on, then wrap the lace around your hips right at the bottom of the cami.
Make sure that the circumference of the lace around your hips feels comfortable.
If it doesn’t, you’ll need a little more lace. Lay the camisole flat on a table and measure along the bottom edge. Multiply this number by 2. That’s the total circumference of the bottom edge.
From here, multiply the circumference of the bottom edge of the camisole by 1.5.
This is how much lace you’ll need.
For an example, if your camisole measured 30” along the bottom edge, you’ll need 45” of lace (30×1.5).
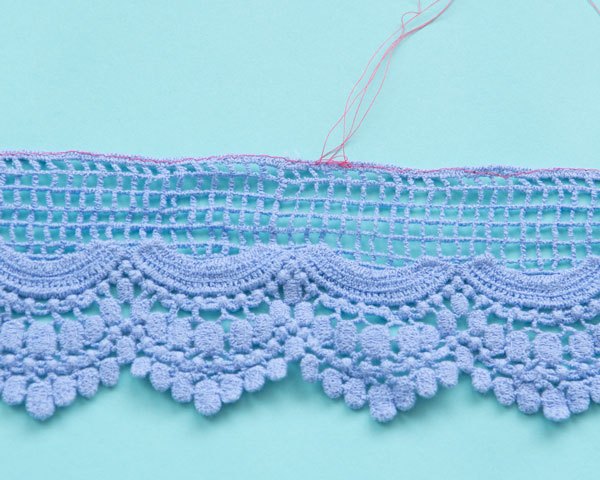
Cut the lace
From here, cut a length of lace equal to the number you calculated in the last step.
Sewing the lace
Set your machine to a zigzag stitch with a 2.0mm width and 2.0mm length.
Next start, bring the short edges of your lace together and sew with a 3/8” seam.
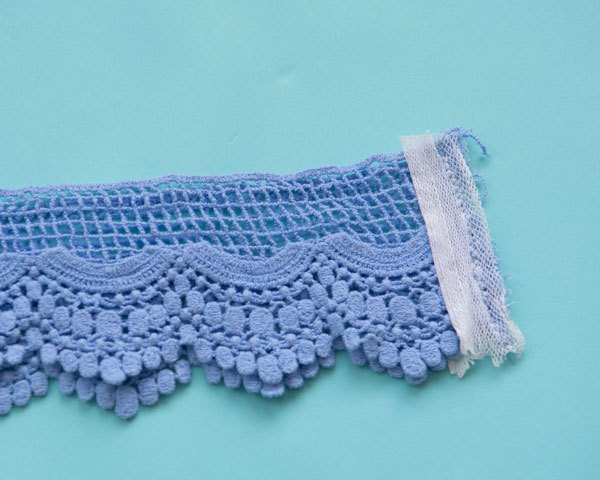

If your lace has a very open structure, it may be difficult to sew a seam here. If that’s the case, cut 2 strips of nylon mesh 1” wide.
From here, sew the seam. The mesh will give the thread something to hold onto while you’re stitching, allowing you to make a nice looking, strong seam.
Trim away the extra mesh 1/8” away from the stitching line on one side of the seam.
Press the seam to one side, wrapping the mesh around the seam. From the right side, sew 1/8” away from the wrapped edge of the mesh. You will have a circle of lace now.
Gather the lace
Fold the lace in half along the seam. Mark the opposite side of the seam with a pin. After that bring the seam and the pin marking together. Mark the other ends with pins. Now your lace should be divided into 4. Do the same thing for the bottom of the camisole.
Next, set your machine for the longest straight stitch.
Stitch along the top edge of the lace with 1 or 2 rows of stitching, near the edge.
The edge of my lace was too narrow for 2 rows, but that not might be the case for your lace.Leave your thread tails long at the beginning and end of stitching.
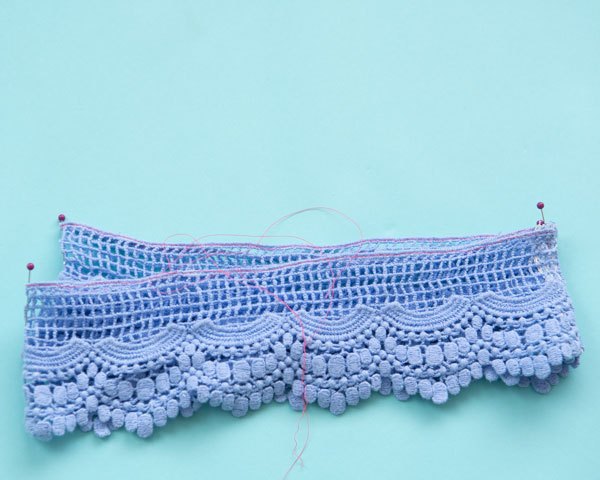

Find your bobbin threads. Cut the bobbin threads at the quarter marks one at a time. Then, pull on the bobbin threads from either side to gather up the top edge of the lace. Repeat with the other quarter marks.
Why quarter the gathering threads?
I know you’re asking me right now, why would I bother doing this step multiple times vs. just gathering around the whole circle once?
Glad you asked that question.
Here’s the thing: gathers are really difficult to distribute evenly. When you divide fabric that needs to be gathered into smaller sections, you have a better chance of getting more even gathers. Also, with smaller sections to gather, you’re less likely to break a bobbin thread which will negate all your work in the first place.
Is it time consuming? Yes, definitely. When you make it through this step, you’ll have gotten through the worst of it. Take your time here, and be careful, and you’ll have no trouble.
If you want to try this step a slightly different way, Learn How to Gather Fabric 5 Fail-Proof Ways.
Time to sew the lace to the camisole
Pin the gathered edge of the lace to the bottom of the camisole, right sides together. Match the quarter marks of the lace to the quarter marks of the cami as you do this.
Adjust the gathers on the lace to fit between the quarter marks. Do your best to distribute the gathers evenly.


Set your machine for a zigzag stitch with a 0.5mm width and 2.5mm length.
Set up your fabric so you’re sewing on the camisole side. Sew the lace to the camisole with a 3/8” seam.
Remove your basting stitches, then press the seam towards the camisole.
Stitch close to the seam all the way around.
Lace too short? Do this
If you want to make your lace extend even further, sew on another row of lace. Repeat all the above steps, just cut enough lace equal to 2x the measurement of the waist. Gather the second row of lace so that it fits into the bottom of the first row, then zigzag stitch all the way around to connect the two layers together.
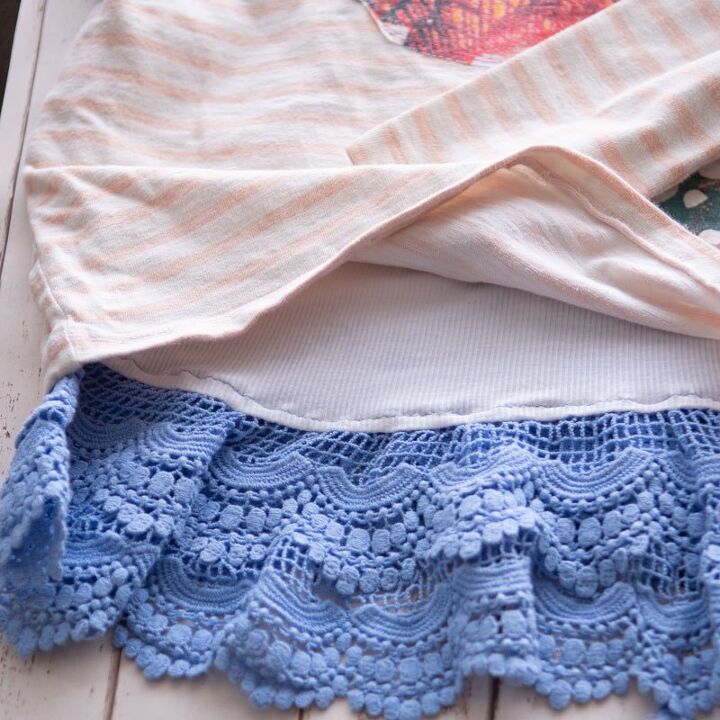
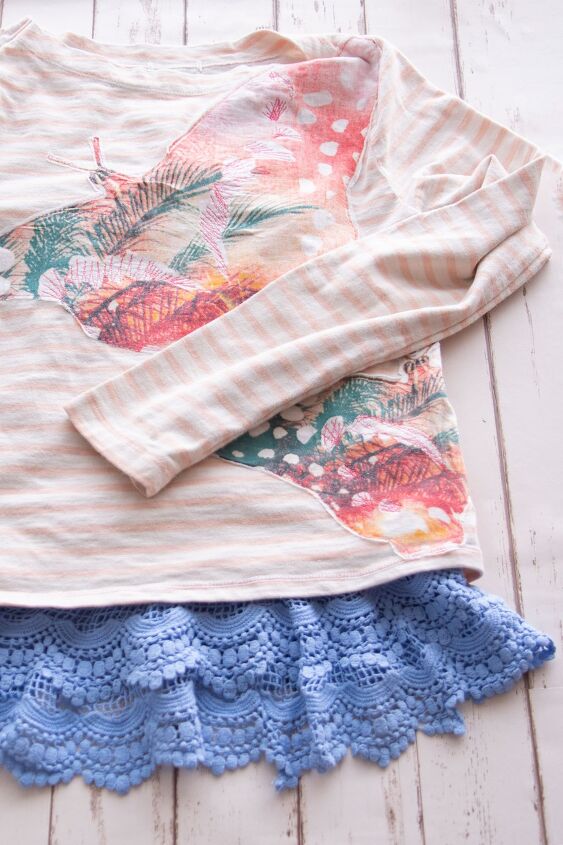
So that is how you can make an extender top. Pop it on under your favorite long sleeve tee or sweater for a fresh new look that won’t leave you pulling down on the hem to cover your waistband constantly.
I hope you give this quick and easy project a try. Once you do, you’ll have a versatile layer you can throw under sweaters and other tops to mix up your wardrobe.
Like this refashioning project?

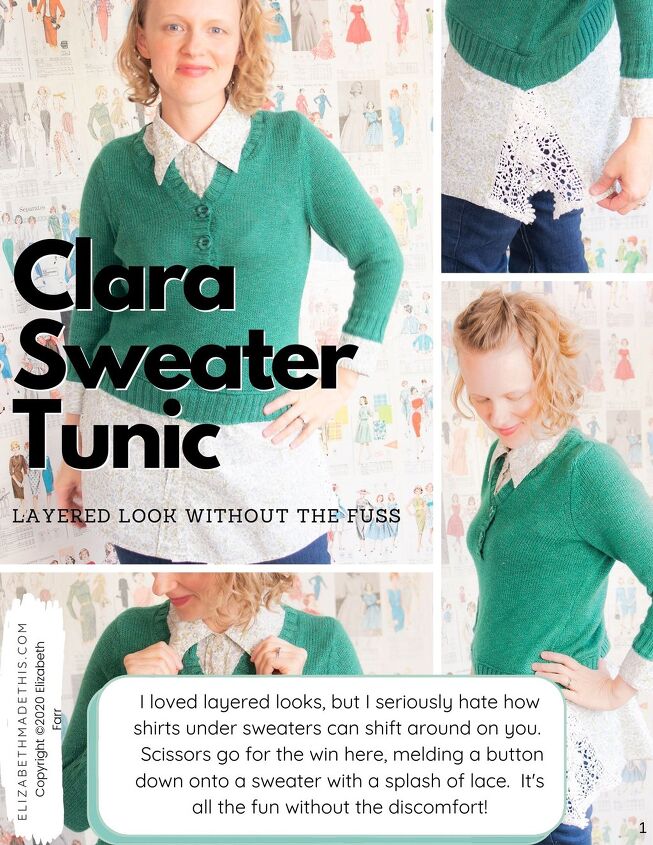

Why not check out Easy Refashions for Every Season? This Eguide will walk you through how to take everyday forgotten clothes and turn them into garments that you’ll love to wear. Of all the projects inside the guide, one of my favorites is the Clara Sweater which shows you a different way of turning a forgotten sweater into a tunic. You’ll take a button down shirt and some lace to create a different kind of extender top with a gorgeous lace vented side seam. You could totally use the Clara Sweater tutorial to make another version of a DIY extender top! Learn more about Easy Refashions for Every Season when you click on the image below.
Elizabeth Farr is the writer behind the Elizabeth Made This blog where she shares helpful sewing tips, step by step sewing tutorials and videos to help you explore your creativity through sewing. She has written sewing Eguides and patterns, been a featured teacher at Rebecca Page’s Sewing Summit and Jennifer Maker’s Holiday Maker Fest and her work has appeared in Seamwork and Altered Couture magazines. She also created a line of refashioned garments for SEWN Denver. When her sewing machine isn’t humming, she’s playing and teaching violin, and hanging around a good strategic board game with her husband and 4 kids.
The author may collect a small share of sales from the links on this page.


Comments
Join the conversation