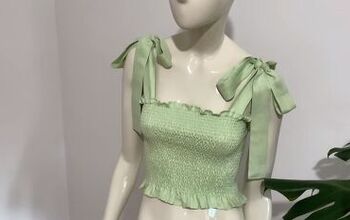
DIY Shirred Top

Upstyle Recommends!
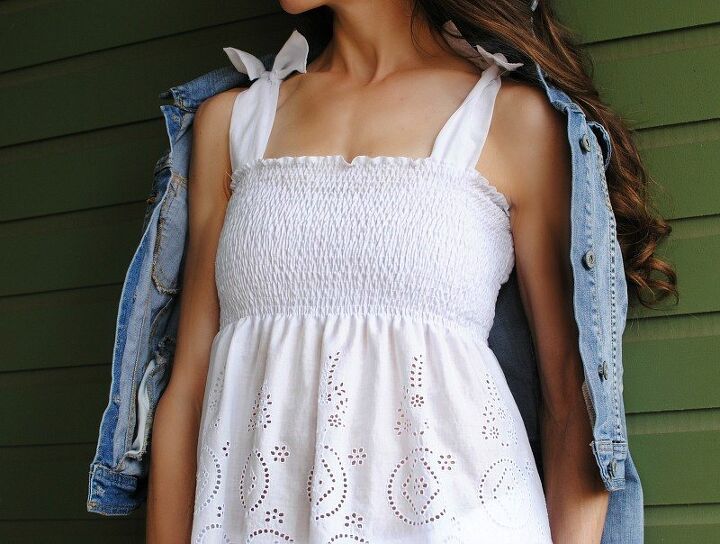

As the weather begins to warm I'm always inspired to start sewing my Spring/Summer projects. For my first look, I wanted to make a top that could easily be paired with a jacket but also transition as a stand alone piece for summer. To create the gathered detail I used a technique called shirring. Shirring is two or more rows of gathers used to decorate parts of garments. You can do this on a bodice, neckline, and waistline. It's a simple technique and all you need is Dritz Elastic Thread.
Get the details below on how to make your own Shirred Top.
Supplies:
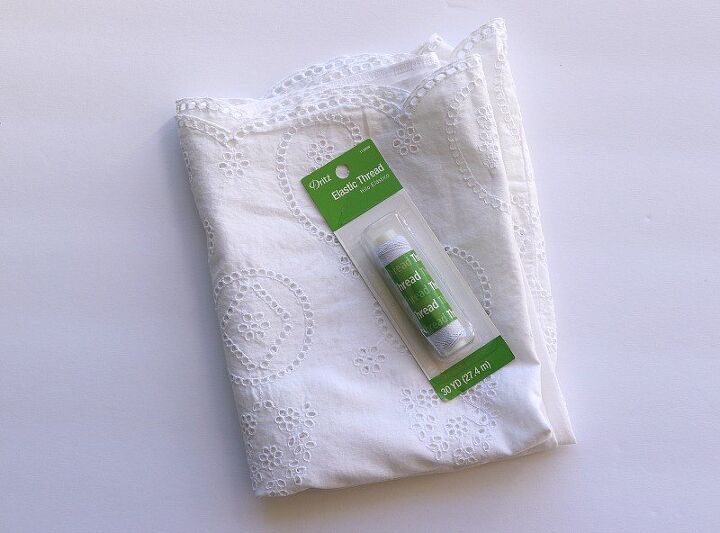
- Dritz Elastic Thread
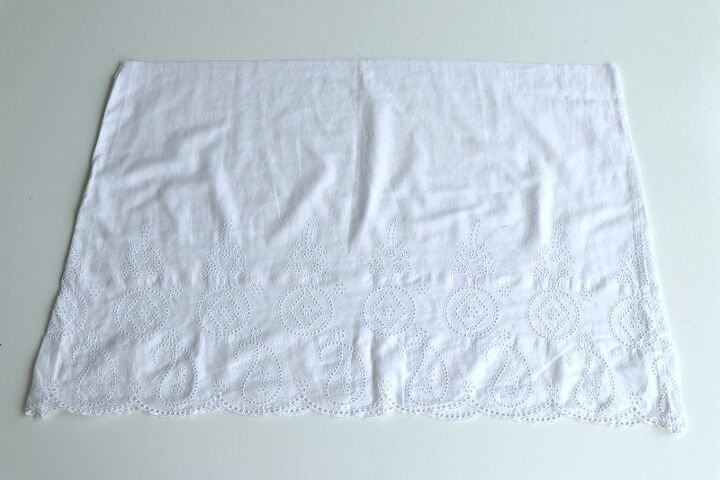
- 1 yard light weight fabric: The lighter the fabric the more effective the shirring will be. Try light cottons, chiffon, knits, gauze, etc. I'm using a light cotton material previously from an old skirt.
- Brother Sewing Machine
- General sewing notions
Machine Set up:
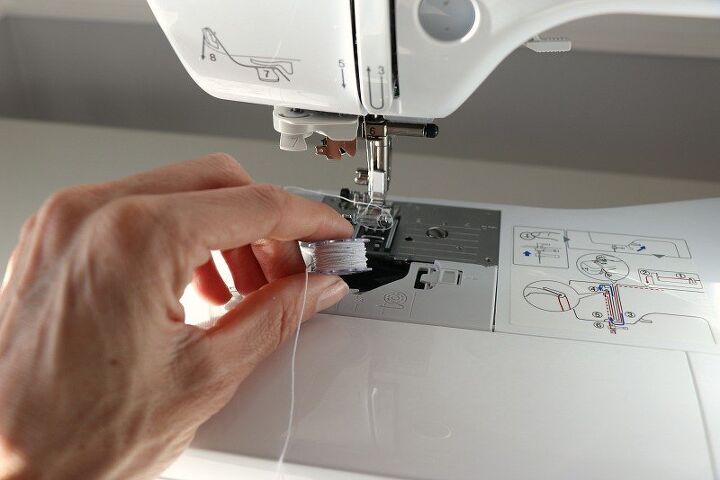
You will only use the elastic thread in the bobbin. Wind the bobbin with the elastic by hand but I did it on my machine and it worked fine. I suggest winding a couple bobbins as you will go through them pretty fast. You will thread the needle with all-purpose thread. Thread the bobbin as you would normal thread.
Leave a tail of 2-3" every time you start and finish a row. You will need this to knot the strings once finished.
I used a stitch length of 4 which worked well with my material. You will want to test out the settings on similar fabric to get the settings right on your machine. The longer the stitch length the the more effective the shirring.
Cutting:
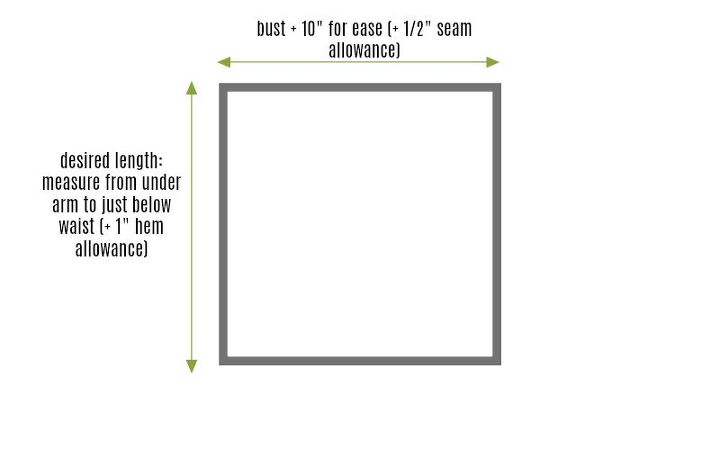
Start with a tube of fabric (the side seams should be sewn at this point right sides together). You will want the top to be at least 10" wider than the size of your bust (or final measurement) as it will shrink a lot depending on how many rows you do.
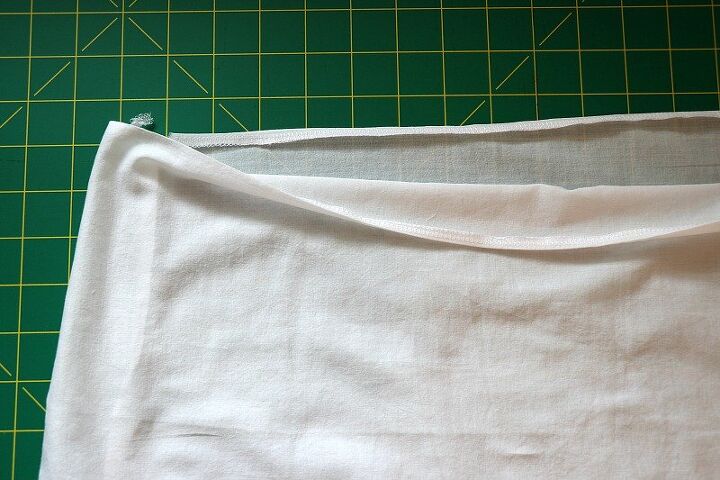
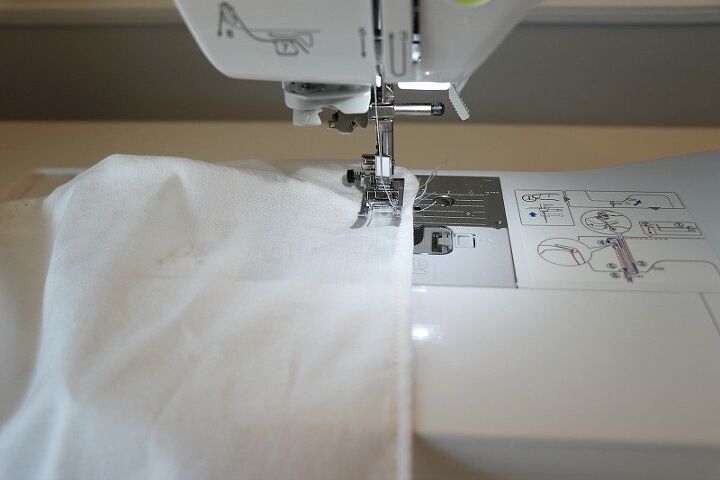
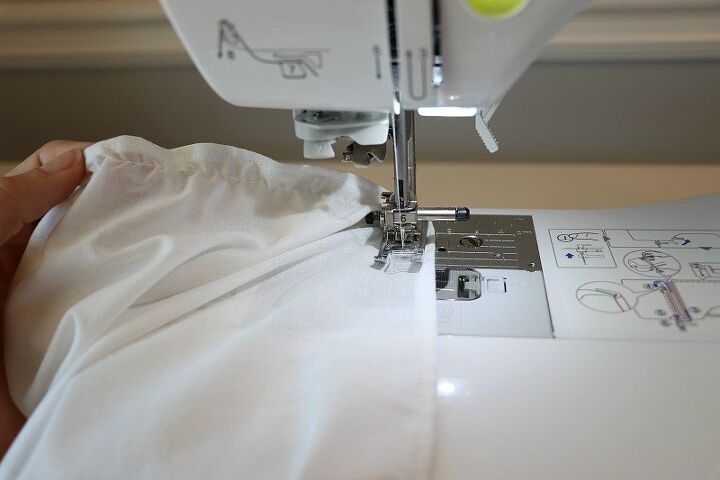
Finish the top and bottom edges with a narrow hem.
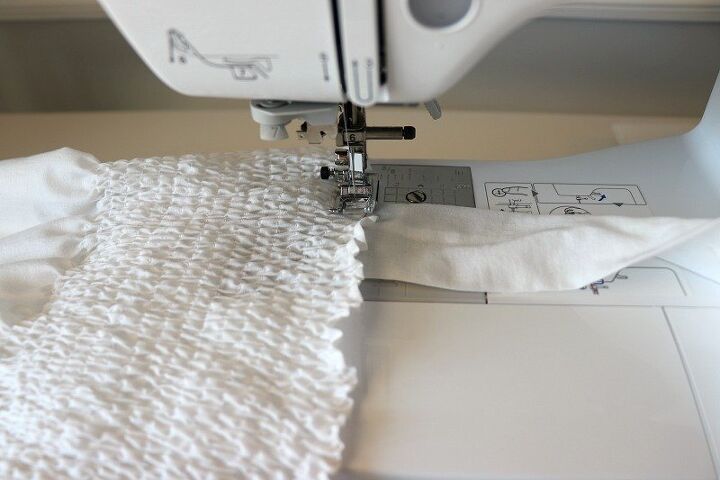
Shirring:
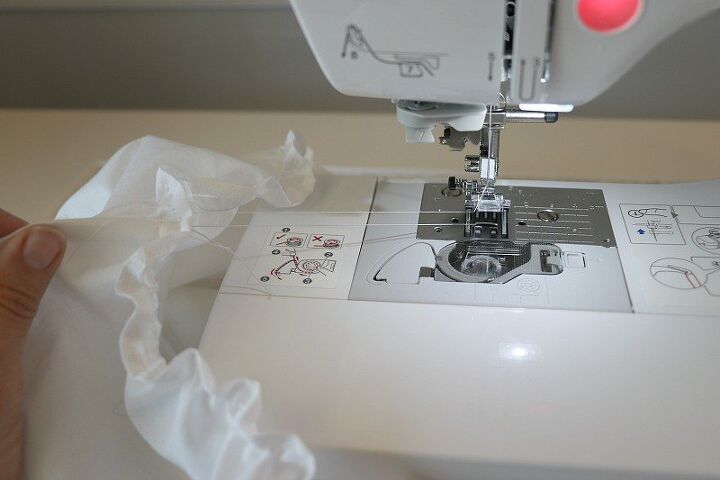
Start at the side seam right below the top hem stitches. You will topstitch so the elastic thread is on the wrong side of the fabric. You don't back stitch but again just make sure to leave a tail to knot at the end.
Start sewing until you get all the way around to the starting point. You will notice it already start to pucker.
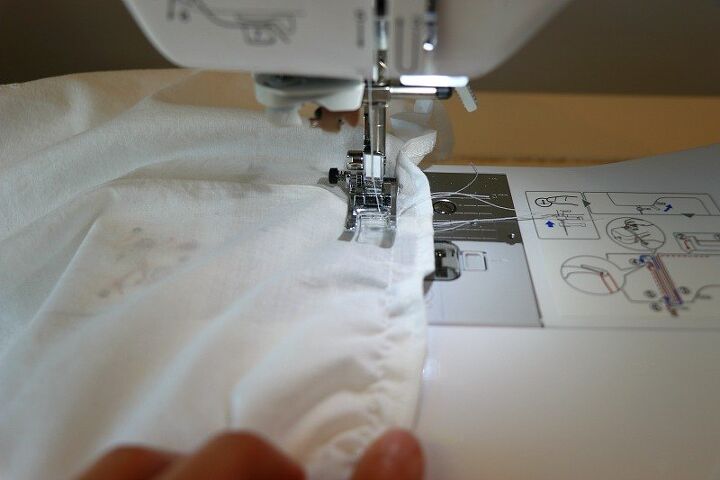
Move along to the next row. I didn't mark my rows which you typically do with shirring. I just lined the presser foot up to the edge of the previous stitch line and that worked great. It was a perfect space between (about 1/4").
Tip: If you run out of bobbin thread midway through a row, just knot that elastic thread off on the wrong side of the fabric. Re-thread your bobbin and continue sewing from that spot.
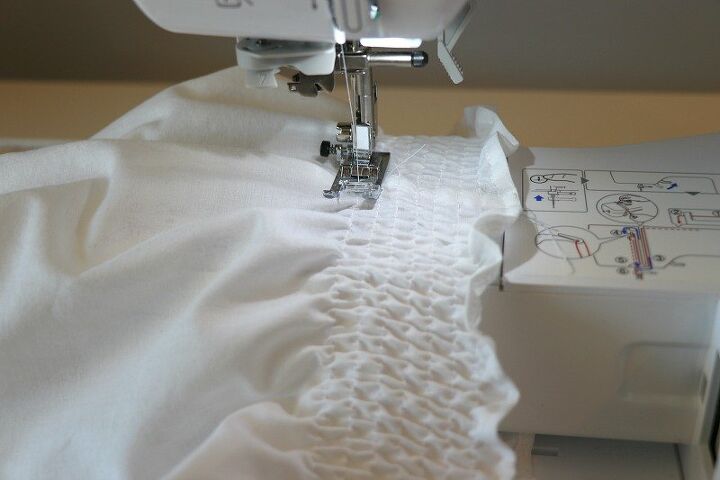
Continue with the sewing. You will notice as you create more rows you will A) go through bobbins like crazy (hence why you should do a few before beginning). B) the more rows you sew the more effective the shirring is. C) sometimes folds will occur so I pull the fabric (when necessary) as I sew so I'm not creating unwanted pleats in the fabric.
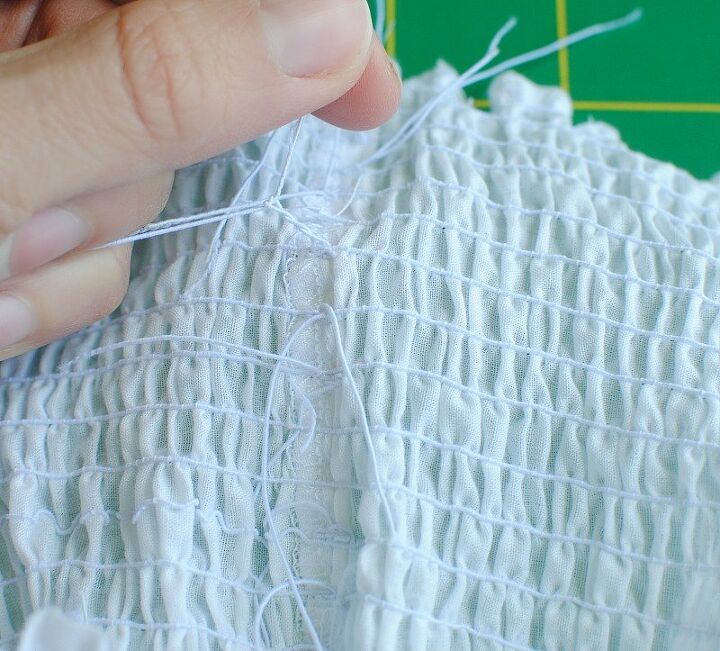
I did enough shirring to cover my bust area. Then knot the elastic threads together on the wrong side and trim down so you don't have long thread.

Create sashes for the straps (like I did here) or use any type of trim/ribbon. Try the tube on and position the straps to where you want them before sewing. Evenly place them front and back and pin into place.
Top stitch the straps into place just along the hem stitches with an all-purpose thread and a standard stitch length (backstitch start/finish).
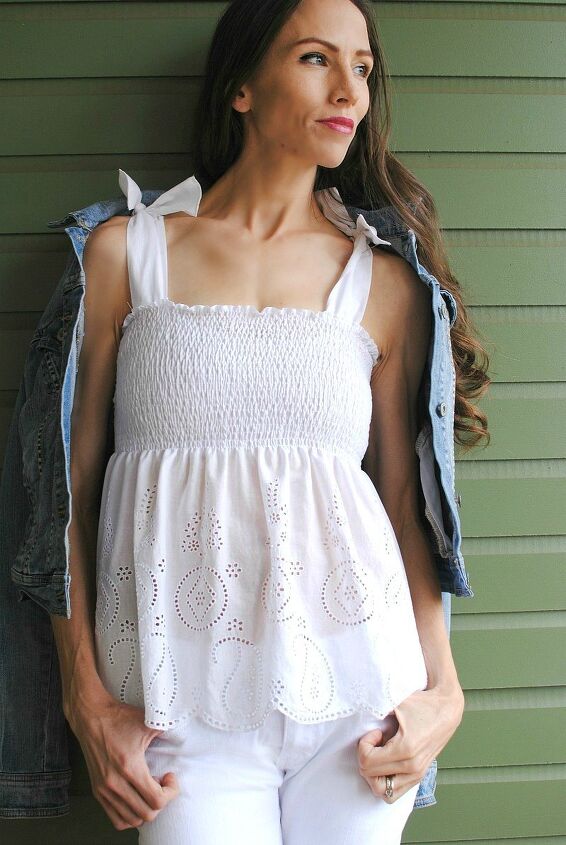
Shirring is cute technique and can be used for many projects. Try this along a waistline, neckline, and even for a fitted bottom edge. So many options.
*In collaboration with Dritz.
I received compensation from Dritz®, and some of the materials featured here or used in this project were provided free of charge by Dritz®. All opinions are my own.
The author may collect a small share of sales from the links on this page.


Comments
Join the conversation
I love this post. Me and a friend were just talking about this the other day. They use to sell pieces of fabric with this same thing already done at the top of the fabric. Haven't seen it in a few years. Thanx you so much for the DIY.