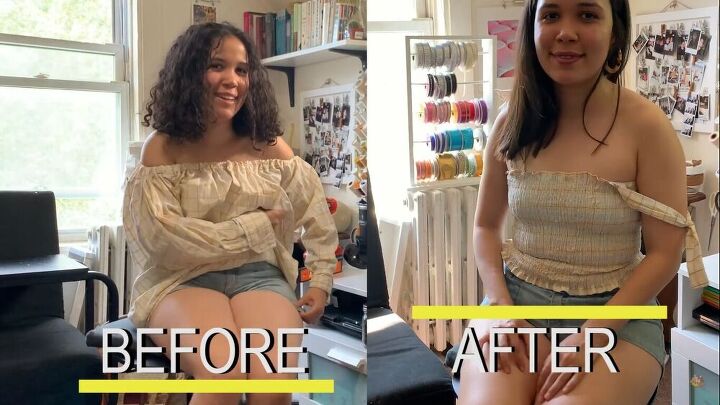
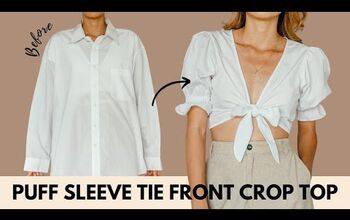
How to Make a Shirred Tube Top From an Old Men's Shirt

Today I’m going to be showing you how to make a shirred tube top out of a men’s button-down shirt. The shirt I’m using is one that I already transformed into an off-the-shoulder dress, and it wasn’t getting worn, so I decided to transform it yet again into something super cute and summery.
This is a very simple project that’s perfect for beginners, so just follow along, and I’ll take you step by step through sewing a DIY shirred tube top.
Tools and materials:
- Men’s button-down shirt
- Scissors
- Safety pin
- Pins
- Measuring tape
- Elastic thread
- Sewing machine
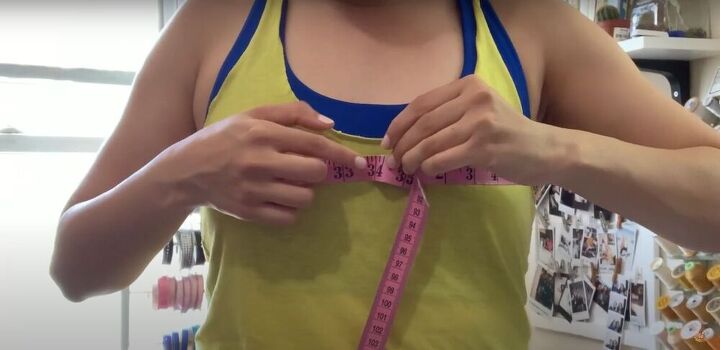
1. Take measurements
To begin, I took my bust measurement and added 12 inches. I also measured how long I wanted my top to be by measuring from the top of my chest to where I wanted the hem of the shirt to land (which was 11 inches for me), and added 1 inch for seam allowance.
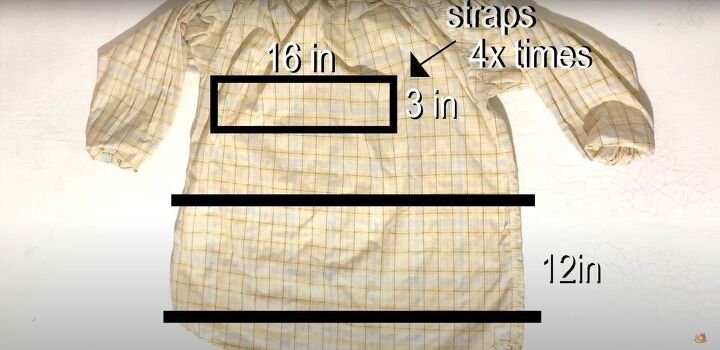
2. Cut the fabric
Next, I cut a rectangle using the measurements I just took. I also cut four rectangles for the straps, each one 16 inches long and 3 inches wide.
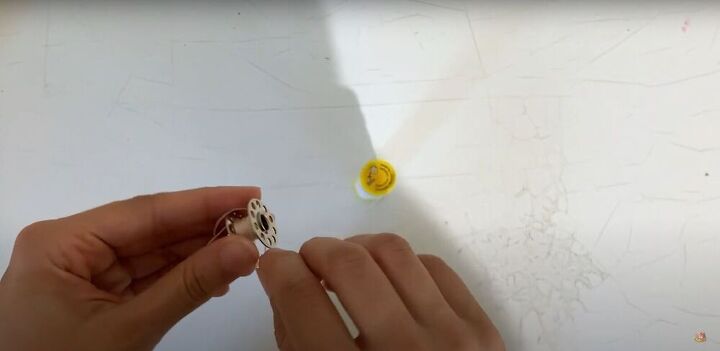
3. Wind the bobbin
At this point, I prepared the bobbin with the elastic thread, which needs to be wound by hand. You need the elastic thread to make the shirring. But I didn’t put it into the sewing machine just yet.
4. Iron and hem
Before starting the shirring, I hemmed the top and bottom edges of the rectangle that will become the bodice. I double folded ¼-inch and then another ¼-inch of fabric on either edge. I ironed it in place before sewing it down with a straight stitch.
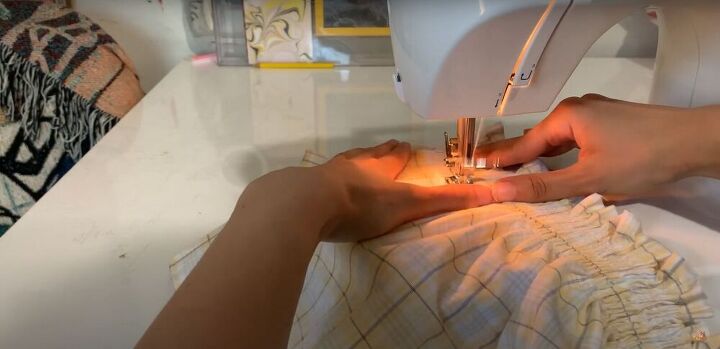
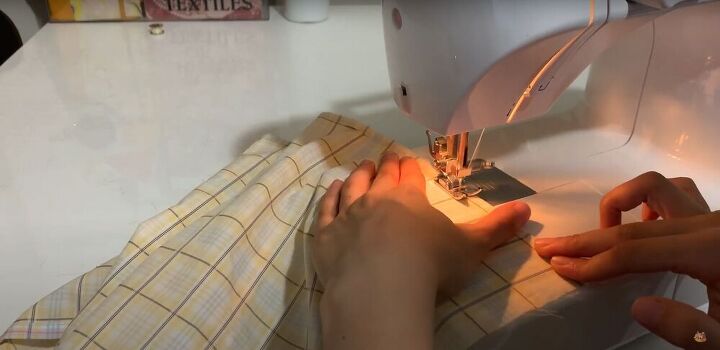
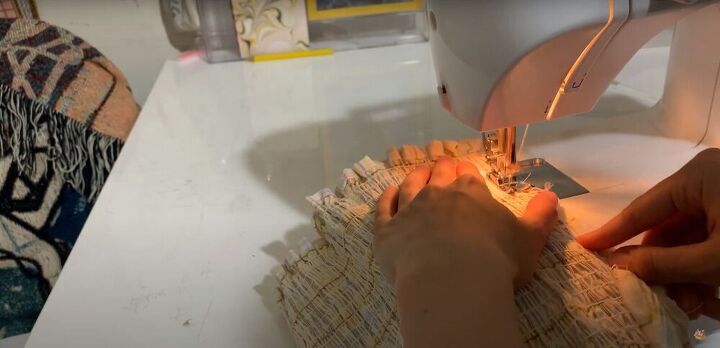
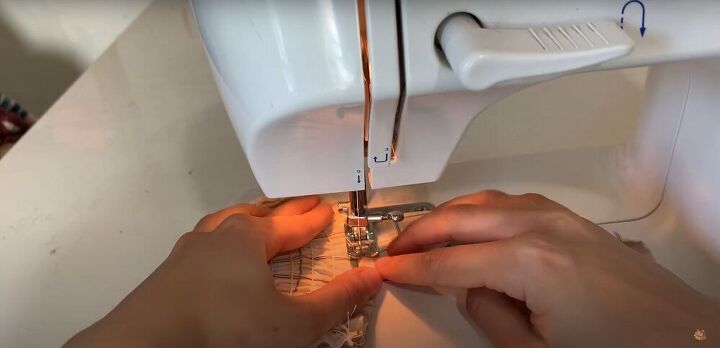
5. How to sew a shirred top
Next, I switched out the bobbin with cotton thread for the bobbin with the elastic thread. Before starting to sew directly on the shirt, I used a piece of scrap fabric to figure out the tension and thread length that will work best, and I recommend you do this, as well.
Once the sewing machine settings were properly adjusted, I began sewing rows of stitches across the width of the fabric, spacing each row about ½ an inch apart. As I sewed, the fabric began to gather, so I made sure to stretch the fabric as I sewed each row.
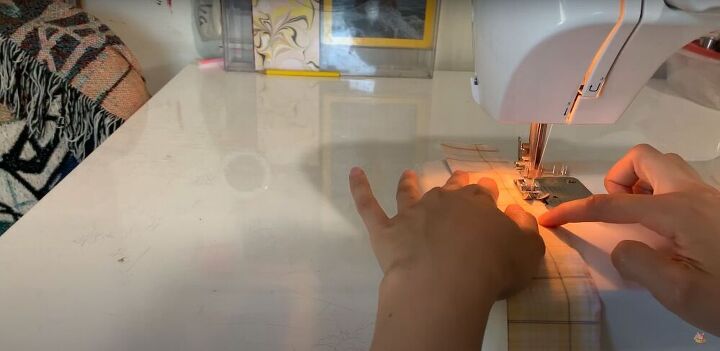
6. Sew the edges
Once all the shirring was complete, I switched the bobbin back to cotton thread. With the wrong side of the fabric facing outward, I aligned the side edges of the rectangle and sewed them together with a straight stitch.
7. Fold and sew the straps
Next, I folded the fabric for the straps in half lengthwise, right sides facing, and sewed down the long edges.
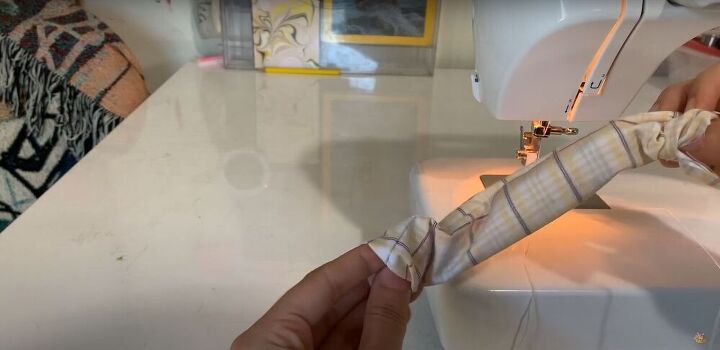
8. Turn the fabric
Then I turned each strap right side out. I did it with my fingers, but you can also attach a safety pin to one end and use that to pull the fabric through, which makes it a little easier.
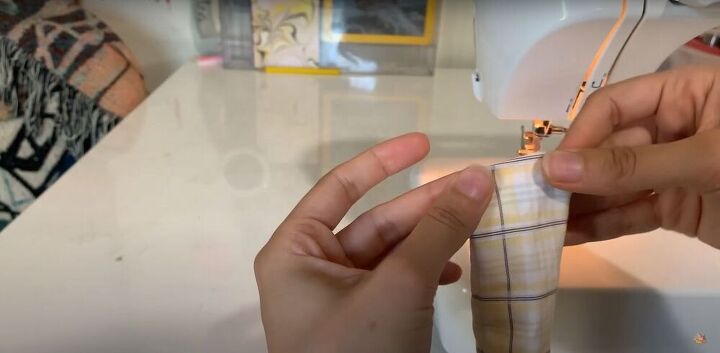
9. Fold and sew the strap edges
Then, I folded in the raw edges on both ends of the straps and topstitched them closed.
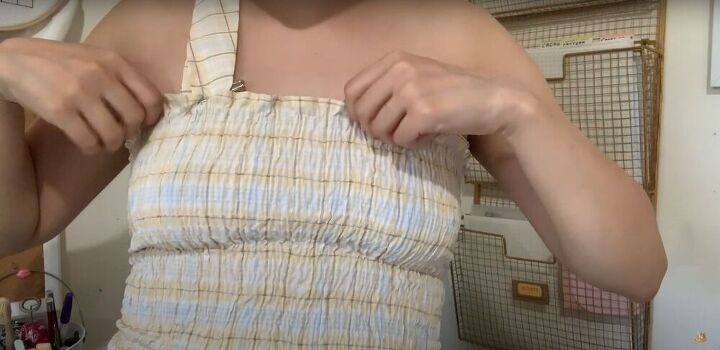
10. Place the straps
To figure out where to sew the straps, I tried on my top so I could see where the best placement would be for the straps, and used a safety pin to hold each strap in place.
11. Sew
Then I took off the top, turned it inside out, and sewed each strap in place on the wrong side of the fabric.

How to make a shirred tube top tutorial
Once the straps were sewn down, my DIY shirred tube top was ready! I love this top. It’s so adorable, and it was so simple to make. It can also be worn as a proper tube top by simply tucking the straps inside.
I hope you found my tutorial on how to make a shirred tube top helpful. What do you think of this transformation? Will you be trying it out for yourself? Let me know!
The author may collect a small share of sales from the links on this page.


Comments
Join the conversation