How To Sew A Button: The Louisa Midi Sewing Tutorial

This month's sewing tutorial is a fun one: We are learning how to sew a button! I feel like there is this misconception that buttons (& buttonholes) are difficult to sew.. But I feel like they are actually one of the EASIEST details to learn how to sew when it comes to making (or repairing!) your own clothes.
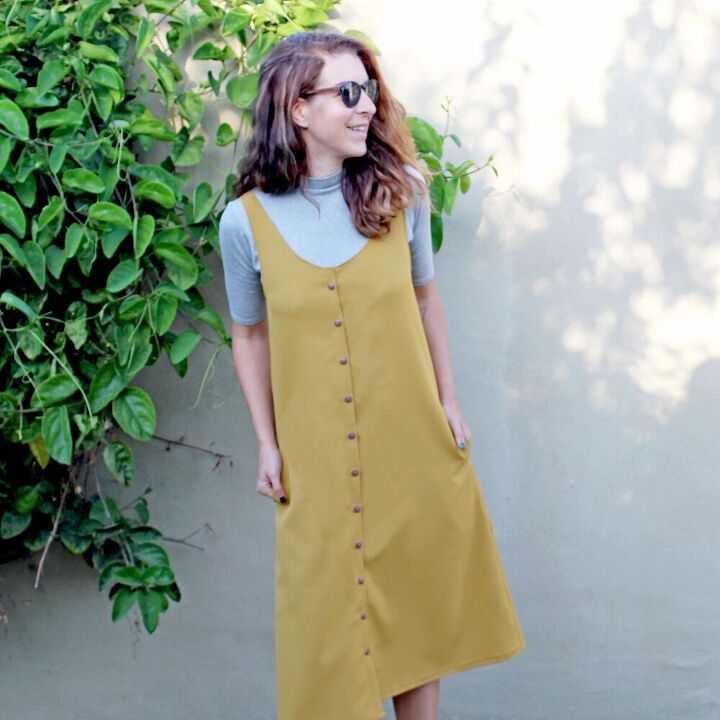
TBH, I have been on a bit of a button kick lately.. This month's sewing project, the Louisa Midi, essentially has buttons from head to toe. (Seriously love this dress, it's one of my favorite sewing projects yet!)
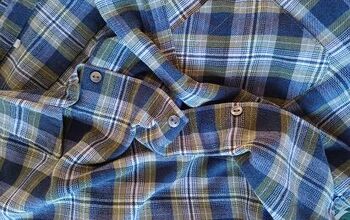
There were also quite a few buttons on last month's sewing project, the Mauve Shirt Dress. Oh! And I've also been sewing up Hawaiian shirts for the husband like no other. BTW: If you have a man (or woman!) that loves Hawaiian shirts (a-la Mac from It's Always Sunny) then don't forget to check out the recent post we did on how to match patterned fabric when sewing. It actually ties in to sewing with buttons quite well.
But as I said in last week's post:
Give me all the buttons
Previous to this Summer, I was avoiding buttons at all costs. I'm really an easy breezy slip on dress kind of girl, and buttons just seemed like too much work. But all of that has changed.
It IS possible to still wear easy, hassle free clothing WITH buttons. As I proved with this month's sewing project, the Louisa. (Seriously, have you checked out that post? It's a beauty!)
ANYWAYS. Buttons.
This post is going to walk you through how to sew both a button & buttonhole. (Because you can't have one without the other!)
And while I created this tutorial while sewing up a dress, the same steps can be applied to ANY project you may be working on.. A button down shirt, a skirt, a coat. Seriously, it does. not. matter.
So! Ready to get started?
(This month's step-by-step sewing tutorial certainly has to be our easiest one yet. Download your free, printable guide on all there is to know about how to sew a button today!)
How to sew a button: The different types of buttons
But first. There are two main types of buttons out there:
- Sew-through buttons: These buttons have 2 or 4 holes in the center of the button for attaching the button to the garment. (The 2 hole sew-through button is the one we will be covering with this sewing tutorial!)
- Shank buttons: These buttons can have metal, fabric, plastic, or thread extensions UNDERNEATH the face of the button for attaching the button to the garment.
I have found that sew-through buttons are ideal for lighter weight garments. Think: Button down shirts, dresses (like the Louisa), skirts, etc.
And that shank buttons work better for heavier garments, like coats.
I have seen giant 4 hole thick as buttons on coats, and tiny delicate gold shank buttons on a blouse. It really just depends on the design and the weight of the fabric.
When picking out what button to use, just keep the weight of the fabric in mind. If working with a heavier fabric, then obvi get a thicker, sturdier button that will be able to take the weight.
And if working with a lightweight, sheer fabric, then make sure to get similarly delicate buttons. Don't try to force a button on a design if the two won't work well together. There will always be other projects to use a button you love on.. Just be patient.
And now, let's get sewing! (This month's step-by-step sewing tutorial certainly has to be our easiest one yet. Download your free, printable guide on all there is to know about how to sew a button today!)
How to sew a button sewing tutorial: Step 1
Ok! When sewing with buttons, I always recommend starting out with a guideline on where the buttons & buttonholes will be going.
It's important to know where both the buttons & buttonholes will be stitched.. Because it is incredibly difficult to rip out buttonholes if the placement is wrong.
And since it does take some time to hand sew buttons, it can be a bit frustrating to rip them out if they end up in the wrong place. But it's so easy to just erase pencil marks on a sewing pattern if the measurements are off!
So. Mark all button & buttonhole placements on the sewing pattern before getting started with any sewing. Again, this doesn't have to be perfect--It's just a guideline to follow when sewing.
FOR EXAMPLE: When creating the buttonhole placement for the Louisa, I marked the top of the first buttonhole 1" down from the neckline. And then separated each completed buttonhole by 2", which I felt was a sufficient distance.
How to sew a button sewing tutorial: Step 2
I always sew all of my buttonholes first, and then move on to sewing the buttons.
Why? Because it is WAY easier to rip out buttons rather than buttonholes in case of a mistake. It's almost impossible to rip out a buttonhole cleanly, without leaving a mark.
So. We are starting with buttonholes! Always start with the top buttonhole. In this case, that would be the top of the placket, near the neckline.
Following the markings on the sewing pattern, mark with a horizontal pin the distance from the neckline to the top of the first buttonhole. (Make sure to account for seam allowances!)
How to sew a button sewing tutorial: Step 3
Cool! So now we need to figure out the length of the buttonhole. ALWAYS sew a sample buttonhole on a piece of spare muslin.
As I mentioned above, it is incredibly difficult to rip out buttonholes.. And buttonhole sewing machine feet can be a bit tricky sometimes.
Place the button you will be using for the project in the buttonhole foot, and sew up a sample!
Measure the finished buttonhole--We will be using it for the next step.
How to sew a button sewing tutorial: Step 4
Using the measurement from step 3, pin that distance from the step 2 pin. Again, we are moving DOWN the garment.
At this point, you should have the length of the first buttonhole pinned out on the garment.
FOR EXAMPLE: The length of the buttonhole for the Louisa was 7/8". So the distance between the pin from step 2 & the pin from step 4 is 7/8".
How to sew a button sewing tutorial: Step 5
So at this point we have the length of the buttonhole pinned out. Now we need to mark the width.
Using the sample buttonhole from step 3, measure out the width of the buttonhole.
FOR EXAMPLE: The width of the buttonhole for the Louisa was 1/4".
How to sew a button sewing tutorial: Step 6
Using the measurement from step 5, determine the exact CENTER of the buttonhole on the garment and mark it with a vertical pin.
This measurement and placement will vary, depending on the project. Not only will the width of the buttonhole determine the placement, but the width of the placket (or wherever the buttons are going) will also affect the overall placement.
In the case of the Louisa, I wanted the buttonhole to be centered on the 1" wide placket. So I went inward, 1/8" at a time, until I reached the center of the placket. Then I pinned that as the center for my buttonhole.
NOTE: Always mark the width of the buttonhole to ensure the placement looks accurate. Could you eyeball it? Probably. But I wouldn't recommend it.
How to sew a button sewing tutorial: Step 7
Now it's time to actually sew the buttonhole!
With the buttonhole foot attached to the sewing machine, match the sewing needle to the bottom horizontal buttonhole pin, as well as the center vertical pin.
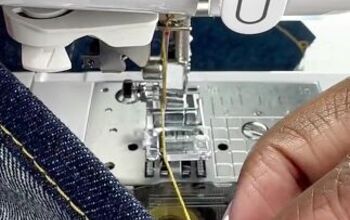
Ensure the button is in the button foot and that you have switched your machine to the correct buttonhole stitch. Remove all of the pins and then sew the buttonhole!
NOTE: Make sure to keep the foot straight when sewing so that the buttonhole doesn't turn out crooked.
How to sew a button sewing tutorial: Step 8
And with that, we have a finished buttonhole!
Now it's time to essentially repeat the steps of marking the top, bottom, & center of the buttonhole for all remaining buttonholes.
How to sew a button sewing tutorial: Step 9
With all of the buttonholes sewn, it's time to open them up.
Grab your seam ripper and gently insert the sharp point in to the bottom of the buttonhole. Rip the buttonhole open, making sure to go slowly and GENTLY.
If you rip too quickly or roughly, then you could rip the garment. And that's pretty much unfixable. So don't do it.
Following the measurements on the sewing pattern, measure the distance from the bottom of the last buttonhole to the top of the next one, and then repeat the process until all buttonholes are finished.
After opening the buttonhole, trim any excess threads. Repeat the process until all buttonholes are opened up!
How to sew a button sewing tutorial: Step 10
And now, FINALLY, it's time to start sewing buttons.
Place the completed buttonhole placket (or whatever it is you may be working with) over the top of the bare button placket. Make sure the seams are lined up with how they will be worn.
Push the sewing needle & thread through the CENTER of the buttonhole, to mark the center of the button.
While some people prefer to just measure their buttons out following the sewing pattern placement, I prefer to do it this way. Measurements can be off on sewing patterns, and things can change after buttonholes are finished.
But this way, we know 100% where the buttons will be placed.
Remember: (Except for opening buttonholes, obvi.)
How to sew a button sewing tutorial: Step 11
Ok! So now that the center of the button is marked on the button placket, it's time to start hand stitching.
Back stitch a few times in the button center, to ensure the button will stay in place and not unravel after one wear. (Not sure how to sew a back stitch? No worries my friend, we've got you covered. Check out part one of our hand stitching tutorial series!)
Once the thread has been securely backstitched, it's time to finish off the button.
How to sew a button sewing tutorial: Step 12
Thread the needle & thread through one of the holes on the button. Push the needle & thread through the other hole of the button, grabbing a few threads of fabric to securely attach it.
Repeat the process, going back and forth between the two holes until the button is secure.
Once the button is securely attached, finish it off by back stitching a few times underneath the button, where the stitching can't be seen.
Repeat the process with each button.
So! Not too bad, right? I feel like sewing both buttons & buttonholes is pretty easy, it just takes some time & patience.
Could you eyeball like half of the above steps, and finish a project?
Because there is nothing worse than crooked buttonholes. Or garments that gape open because the buttonhole placement wasn't accurate. Just go slowly, and it will be worth it!
And I actually think sewing buttons is pretty fun, once you get the hang of it.. But I said so to my younger sister the other day as she was photographing this tutorial and she just smiled & nodded at me politely, HA. So maybe it's just me?
Let me know of any button & buttonhole questions below!
Enjoyed the project?
The author may collect a small share of sales from the links on this page.


Comments
Join the conversation