How to Sew a Zipper: A Detailed Beginner's Tutorial to the Perfect Zip

Even if you are new to sewing, knowing how to sew a zipper opens up the world to you. This technique can be used to sew a zipper into anything like a cushion, bags, and virtually any type of garment.
The instructions are very detailed but they will teach you how to install a zipper successfully! Let’s get started!
If you'd like to know about sewing a concealed zip, see my other tutorial on How to Install an Invisible Zipper.
Tools and materials:
- Zipper
- Sewing machine with zipper foot
- Scissors
- Marking chalk
- Iron
1. Line it up
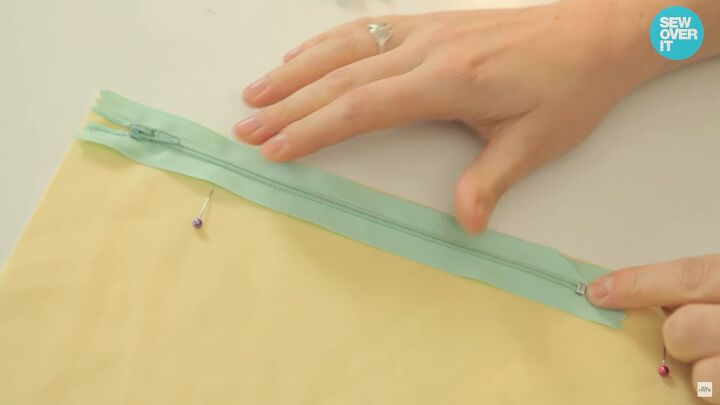
I’m going to teach you how to insert a zipper into a closed seam. Make sure the top of the zip is lined up in the right way according to the seam allowance you are using. Here, the pattern I am using has a seam allowance of ½ an inch.
At the bottom where the little metal bit is, I put a little snip just in front through both the fabric and the zip tape to create a notch.
2. Sewing up the seam
Place the zip aside. Stitch the seam closed ready for the zip. Start with a long stitch all the way down to the notch. These stitches will be opened up when the zipper is fully installed.
When you get to the little snip, change to a normal stitch length and begin backstitching all the way to the end. Then, do a regular stitch length and reverse at the end to close up the seam.
3. Sew the zip in
Make sure the seam is pressed so it is nice and flat. Place the zip face down onto the back of the seam. The little snip needs to line up where the stitch length changes.
Place pins horizontally on the back side of the zipper. Make sure the zipper sits central along the seam. If there is any fabric poking out from the seam allowance, it should be the same on both sides.
Flip the fabric over. Pin the zip in on the outside on one side with the pins parallel to the seam and going upwards.
Pin the other side down with the pins going downwards. This helps with the direction of the sewing and helps you whip the pins out easily as you move along.
The pin that was at the bottom snip or notch is on the underside. We need to know where to sew down to, stop, sew horizontally, and then sew up the other side. Move that pin to the other side and place it in a horizontal position at the bottom of the zipper at the notch.
Once you have all these pins in position, remove the horizontally placed pins from the inside of the fabric.
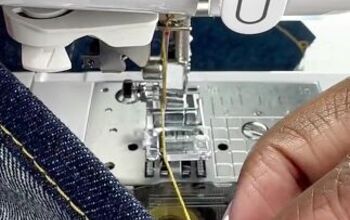
With the zipper on the inside, put the zip foot in the machine. Start from the top left-hand side.
Open the right side presser foot to get as close as you can to the left edge of the zipper.
The widest part of the zipper is the chunky slider, which determines the width of the sewing. If you start sewing too narrow at the beginning, you’ll have to sew outward and get a bulky bit in the zipper and it won’t have a nice straight line.
I recommend tucking it under when you’re level with the chunky slide and then at that point, just gently slide that bit back. Try not to remove it so you keep the position. There isn’t a guide, so you can always draw a line on where to sew.
I think it’s best to just sew as straight as you can, visualizing the straight part of the seam and the flat edge of the zipper, keeping it as straight as possible. The fabric can stretch but the zipper tape can’t.
If you get a little ripple, just allow it to come through. Don’t stitch a pleat in - just allow the ripple to come down.
Once you’ve worked your way down the left side and gotten to the horizontal part to mark where the stitch length changes, take out the pin. You can still see where the pin was. Stop there.
Put the needle in by turning the handwheel towards you. Lift up the presser foot and pivot the fabric around and then lower the presser foot down.
Stitch over and across the zipper, sewing horizontally. You might need to give a little pull from behind to let it smoothly move across. Stop in the same place on the other side. Pull the pin out. Lift the presser foot.
Start stitching up the other side. When you reach the top, reverse in the normal way to close up the seam.
4. Seam rip
Take a stitch and pick it up with the seam ripper. Insert it into the seam to make sure you’re just catching a stitch and not the fabric.
Unpick the stitches and like magic - the zip appears!
How to sew a zipper tutorial
There you have a neatly inserted regular zipper where both edges are perfectly meeting in the middle! Please let me know in the comments if this tutorial on how to sew a zipper helped you!
Enjoyed the project?
Suggested materials:
- Zipper
- Sewing machine with zipper foot
- Scissors
- Marking chalk
- Iron
The author may collect a small share of sales from the links on this page.


Comments
Join the conversation